With this feature, you can bring fully configured products into your store without building them from scratch. Whether you are pulling from InkyBay's own product library or from another Shopify store already using InkyBay, all the customization setups and design configurations will carry over automatically.
What is Import Custom Products? Import Custom Products lets you reuse already configured products instead of setting everything up from the beginning. You can import from InkyBay's ready-made collection or mirror a product setup from another store you own. Either way, the process is quick, and the full setup comes with it.
Why does this matter? Setting up a product from scratch takes time and effort. This feature eliminates that by letting you reuse existing configurations. It is especially useful when you manage multiple stores or want to quickly add proven products to a new store.
💡 Important: Both stores must have the InkyBay app installed and active. The product you are importing must also have been set up through InkyBay on the source store. |
You can import custom products from-
Import products directly from InkyBay
Import products from another Shopify store that is already using InkyBay
Option 1: Import Products from InkyBay
Follow these steps to import a product from InkyBay's product library into your store.
Step 1: Access your store products. Go to your admin dashboard. Hover over the Products, then click on Import Custom Products. All available collections will be displayed.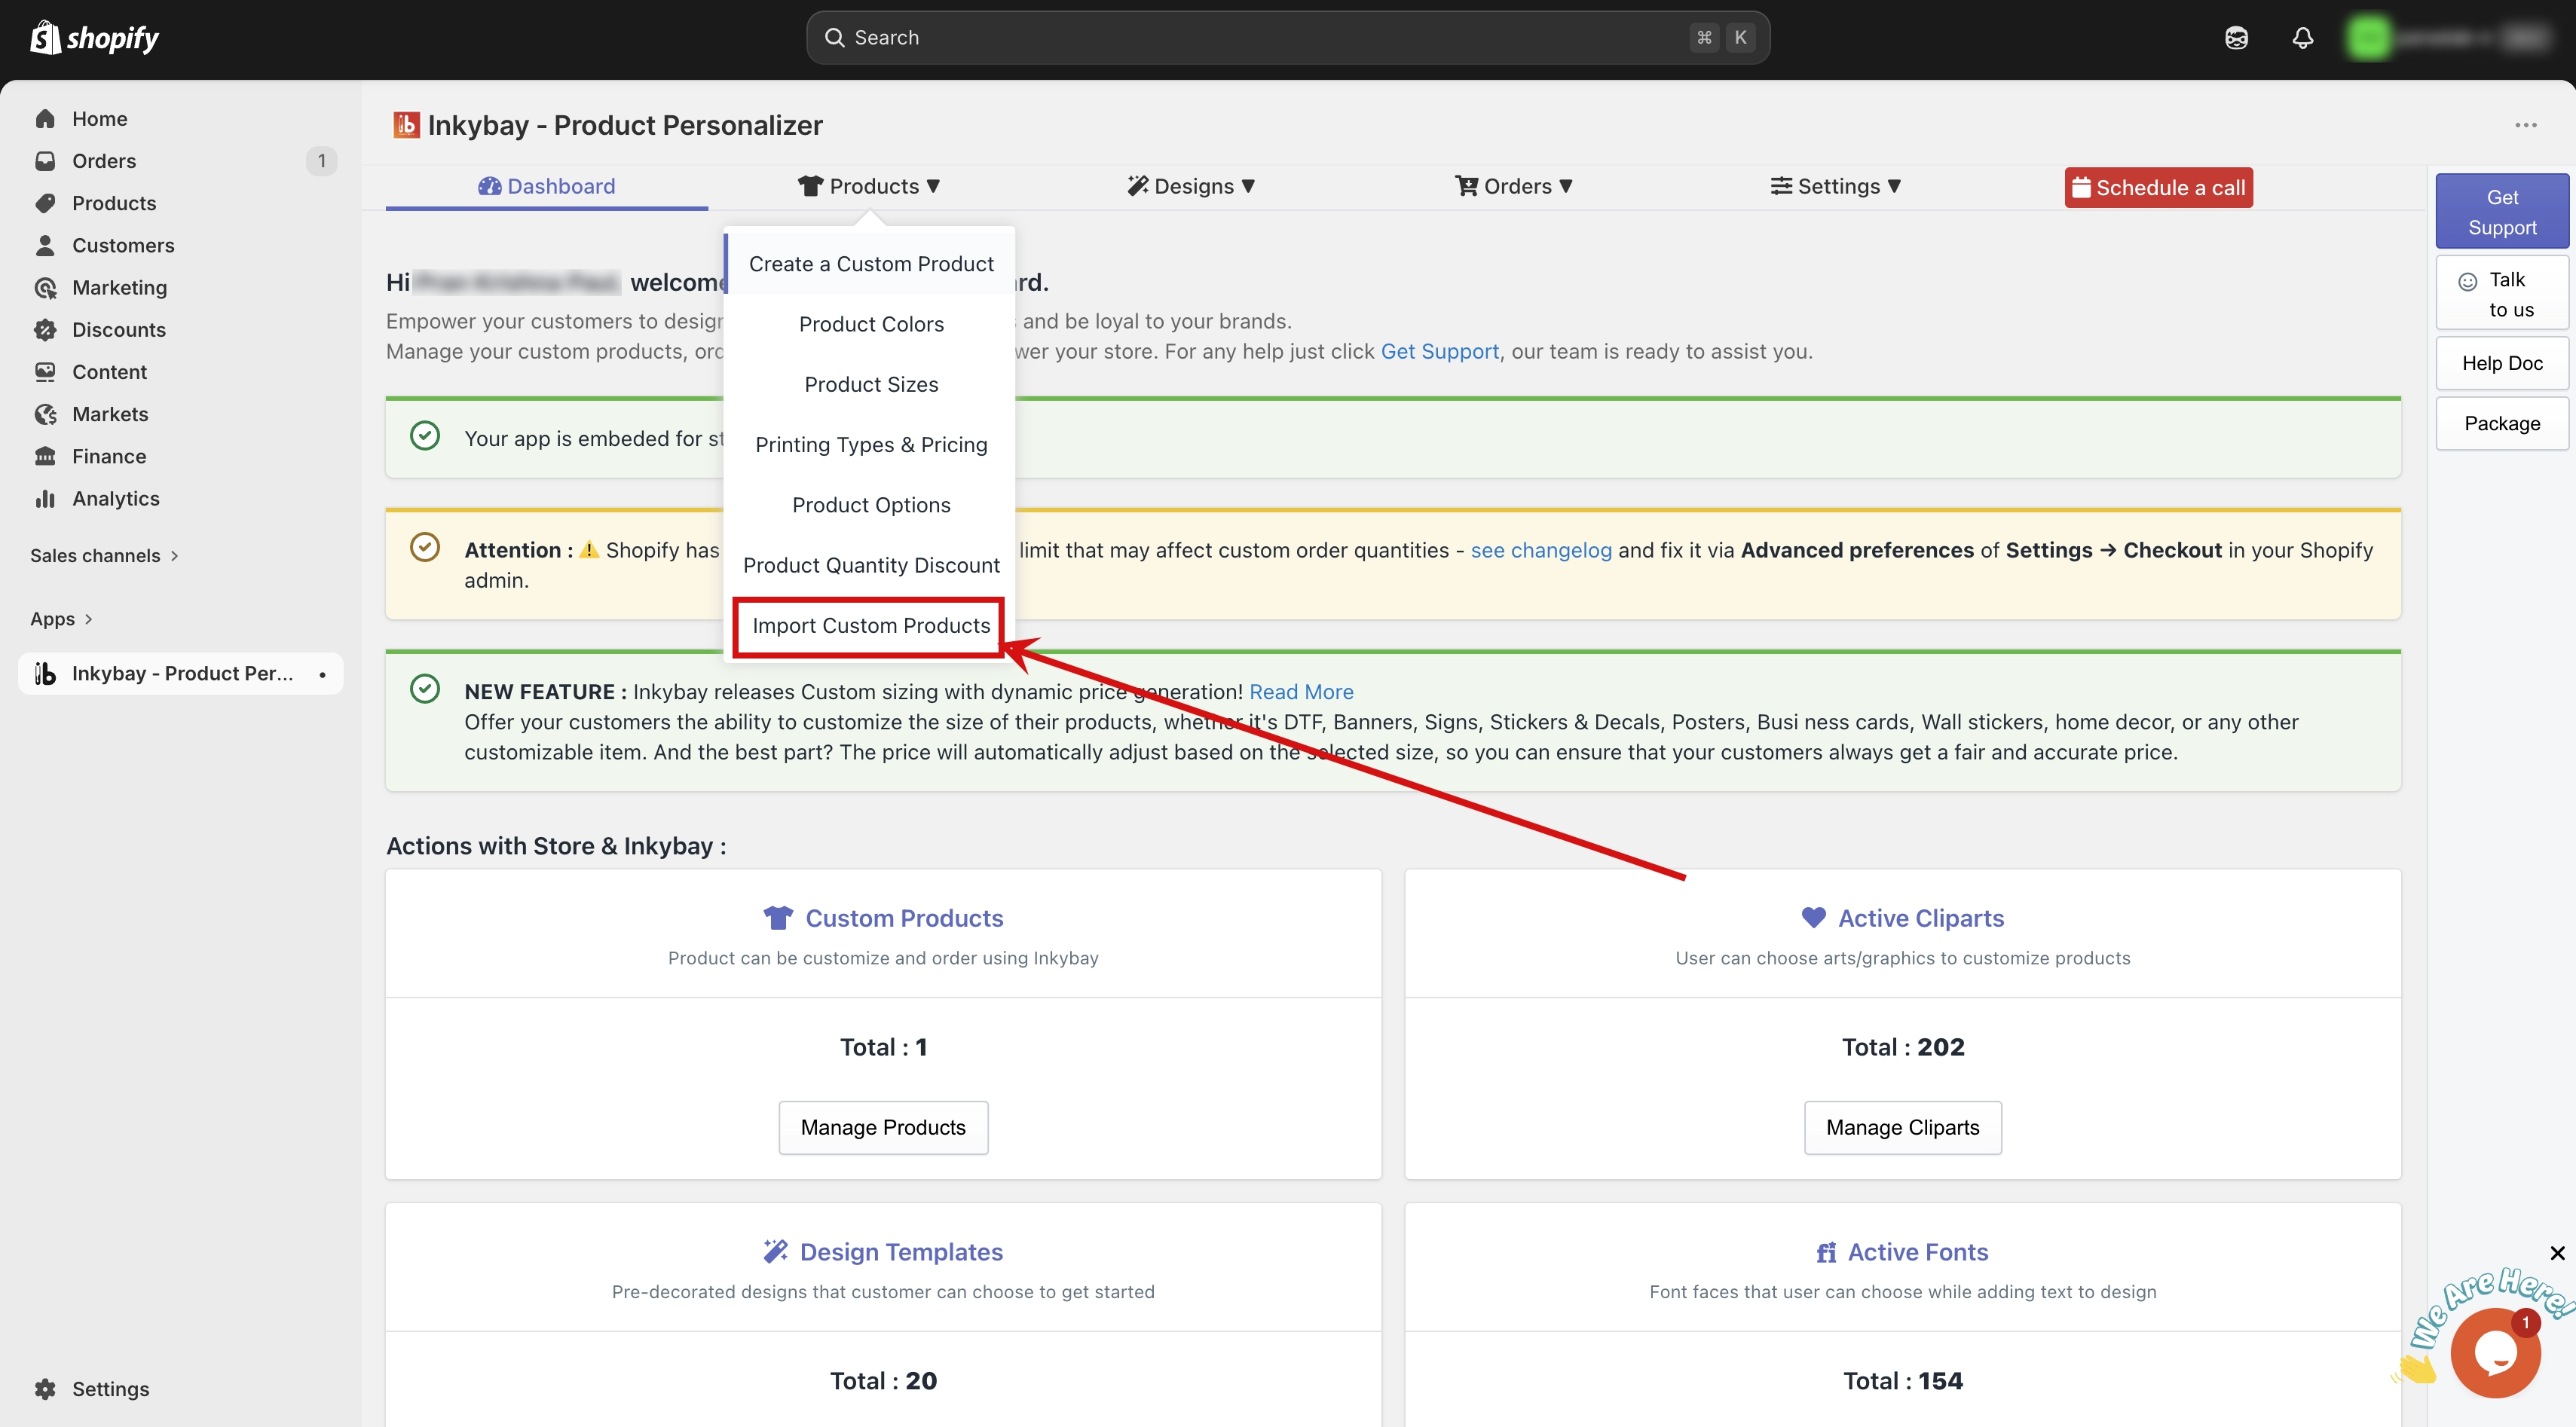
Step 2: Choose a collection. Select the collection you want to browse. The product categories within that collection will appear.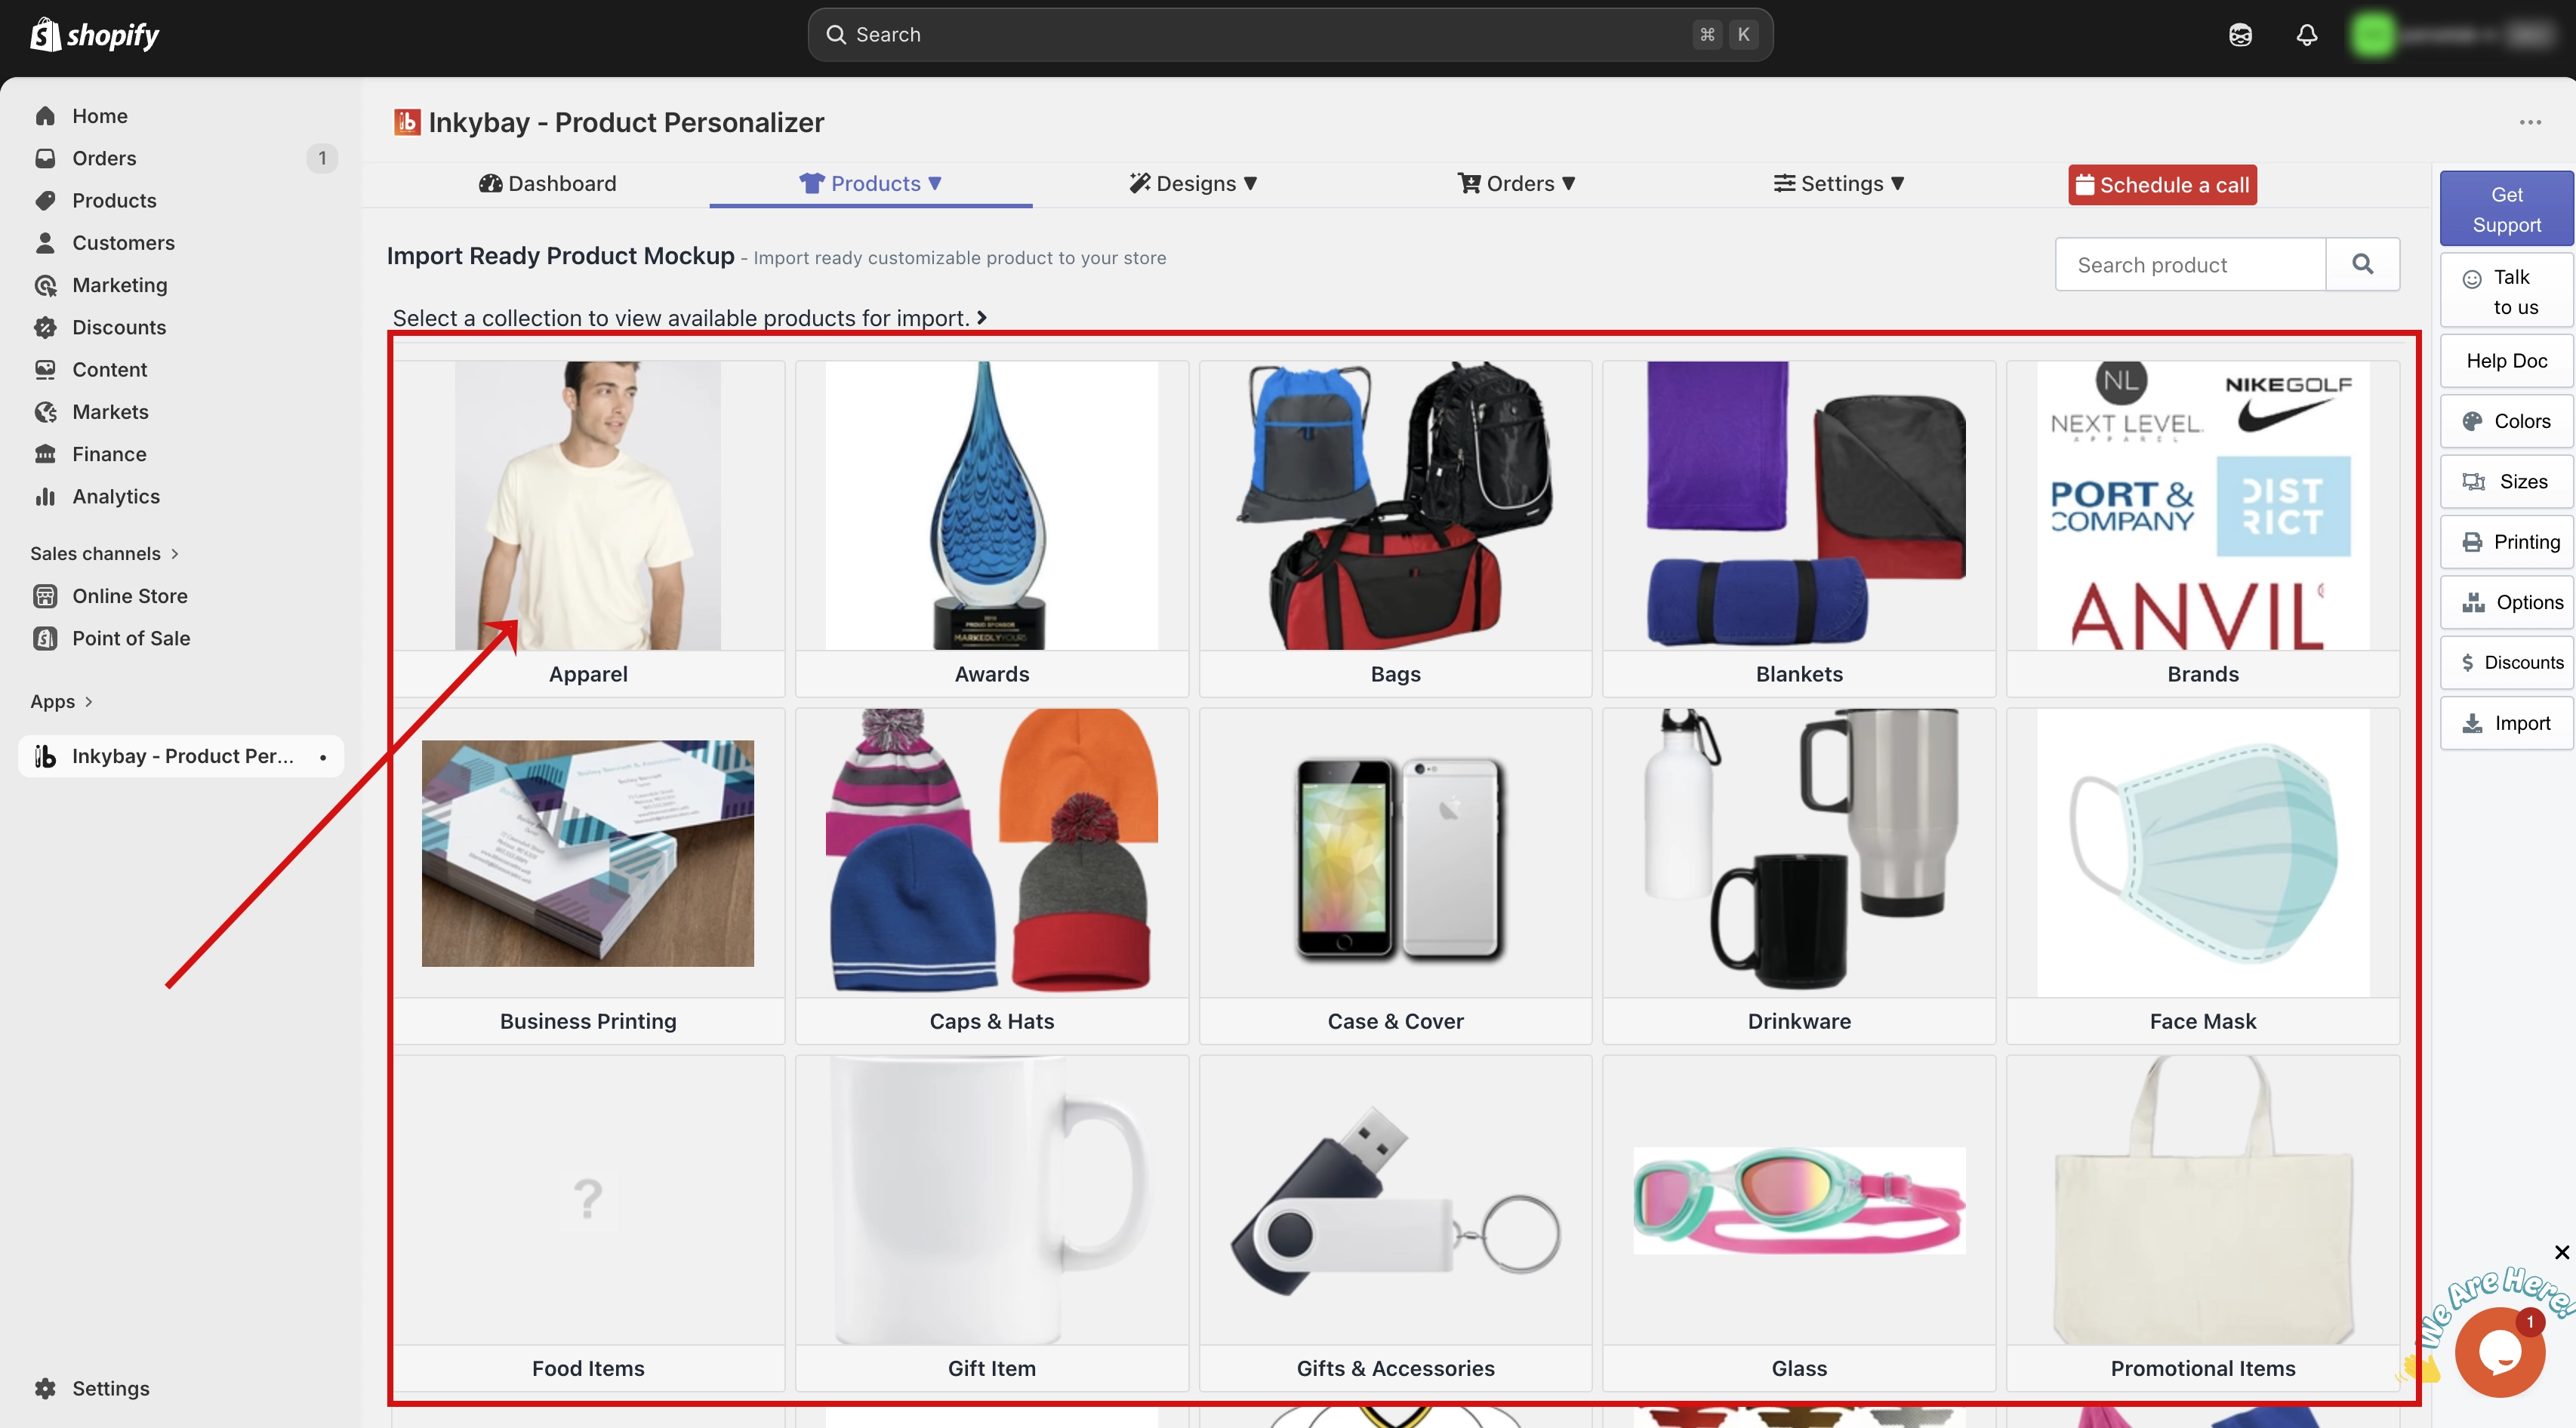
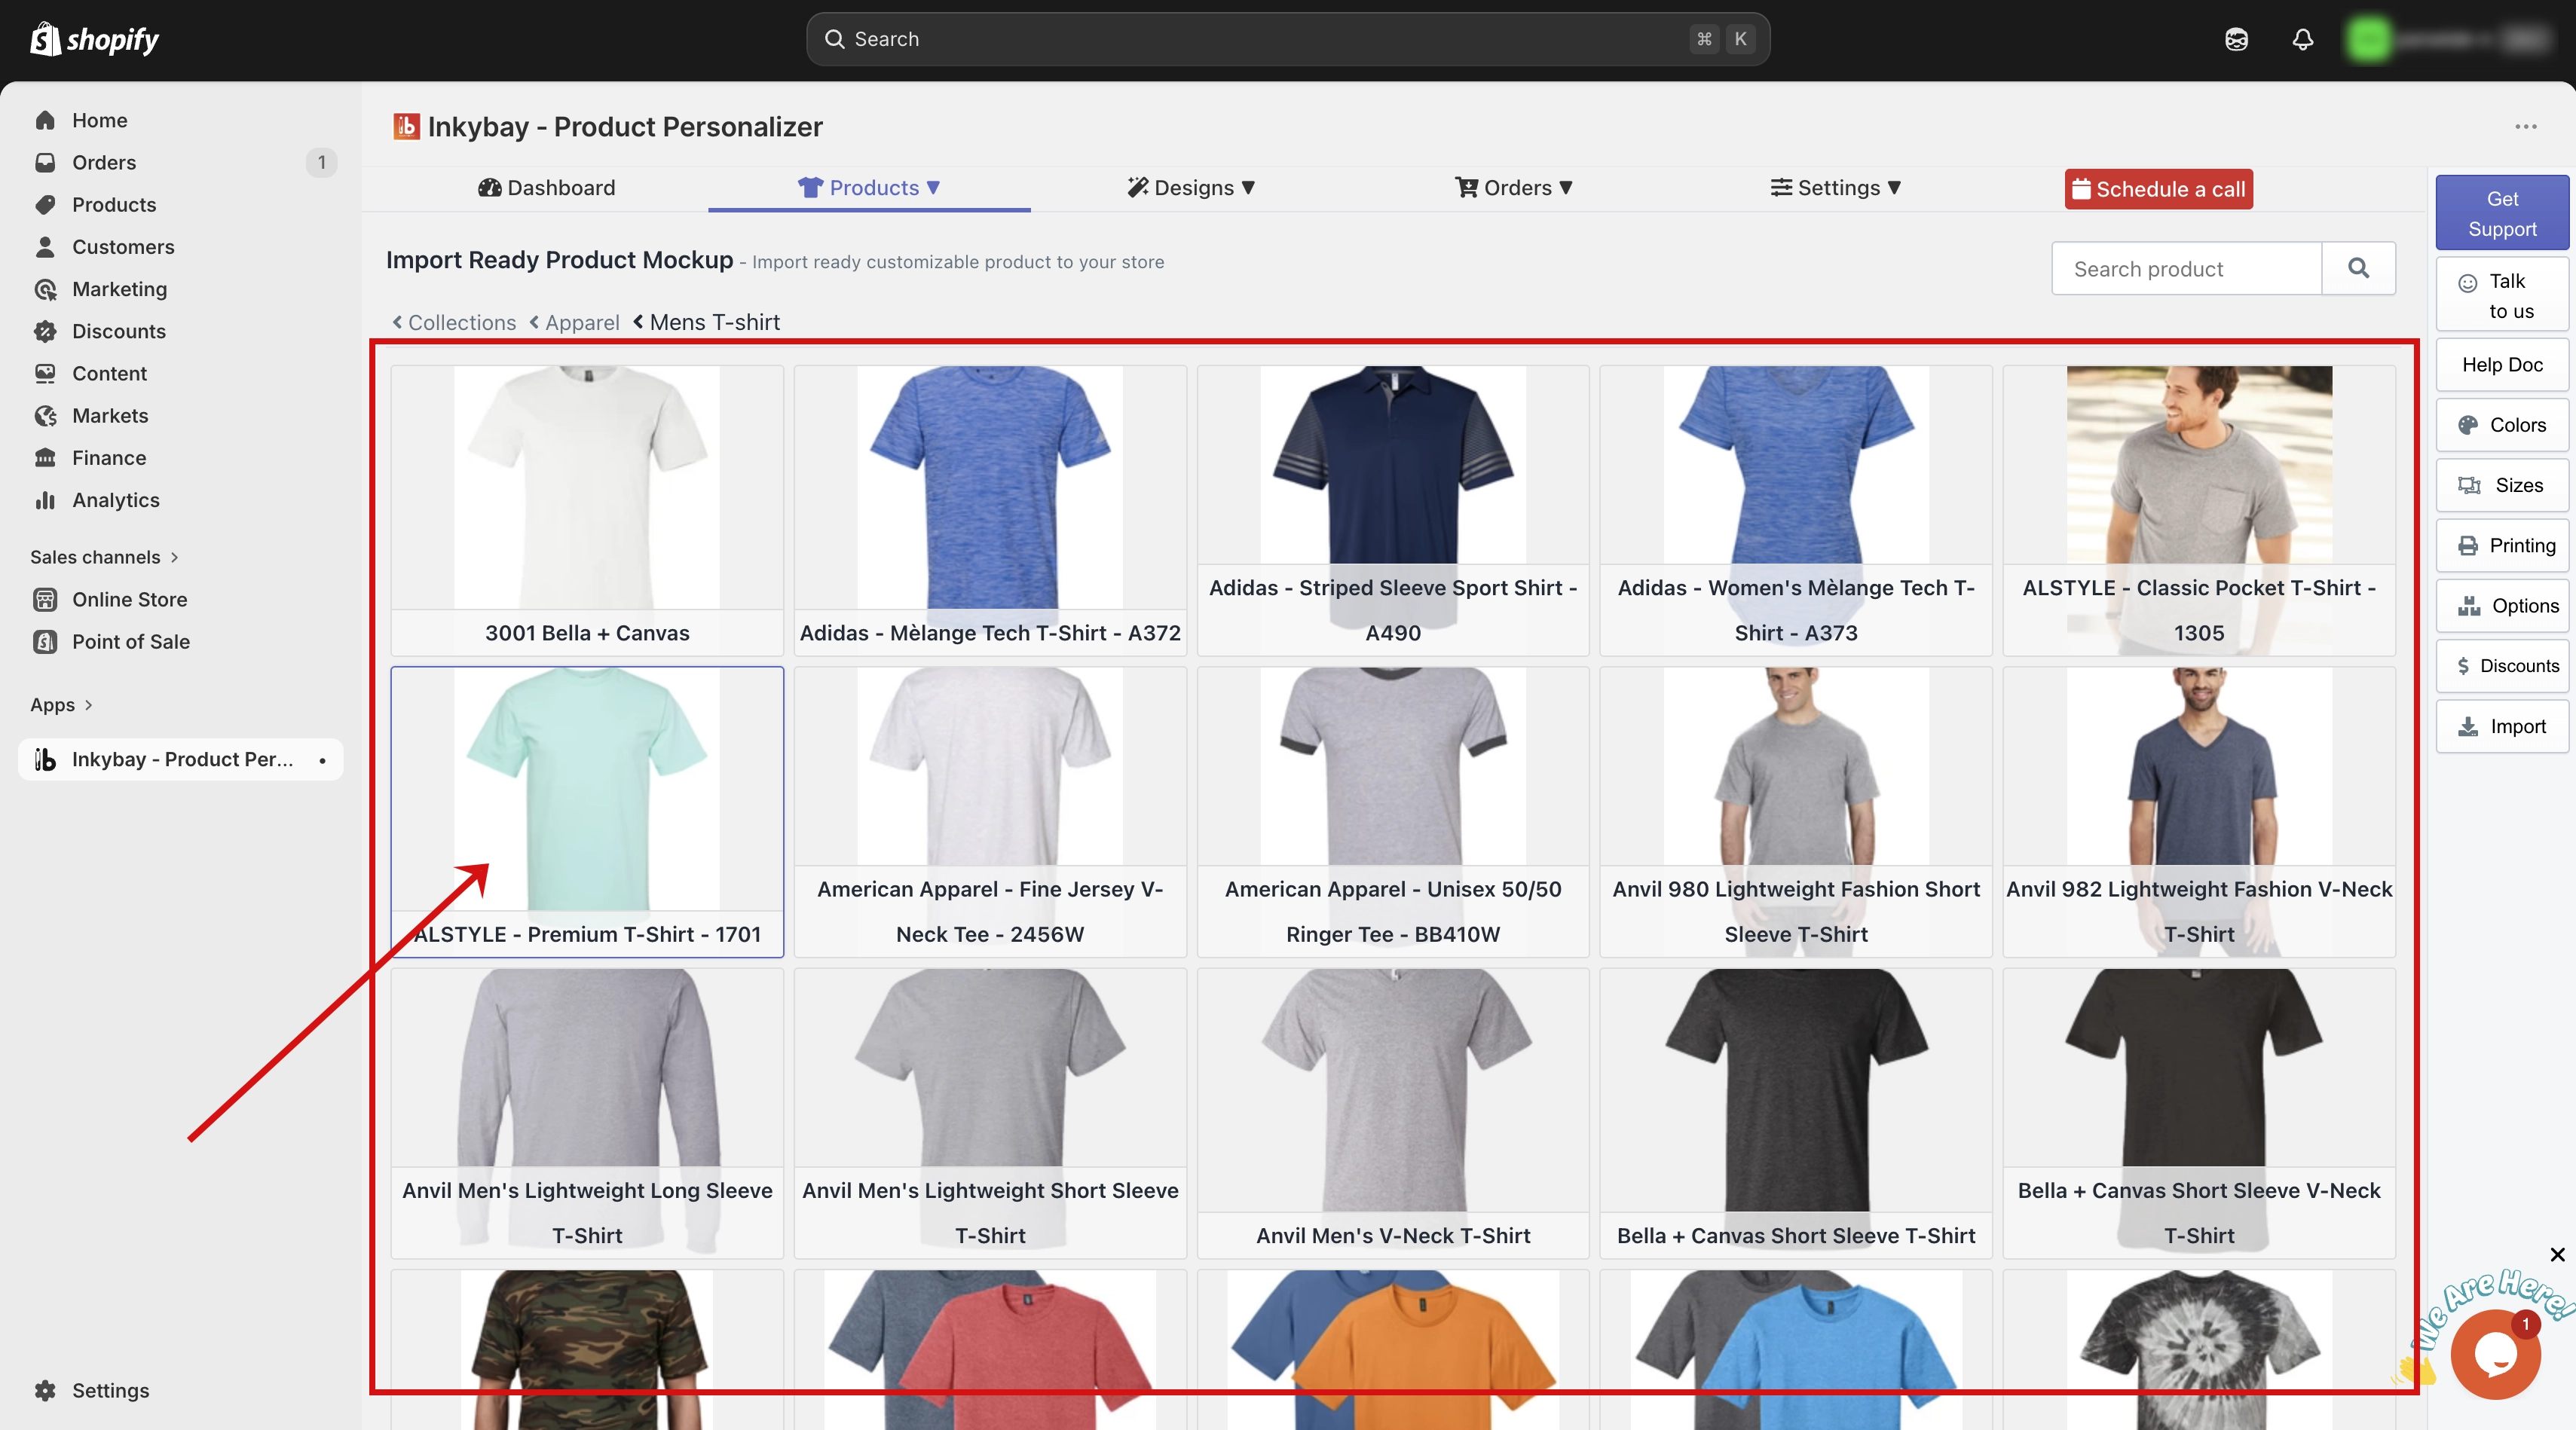
Step 3: Choose a category. Select a category. All the products available under it will be listed. If this store has not described the category of the product, then you will see the product list directly. Which is step 4. 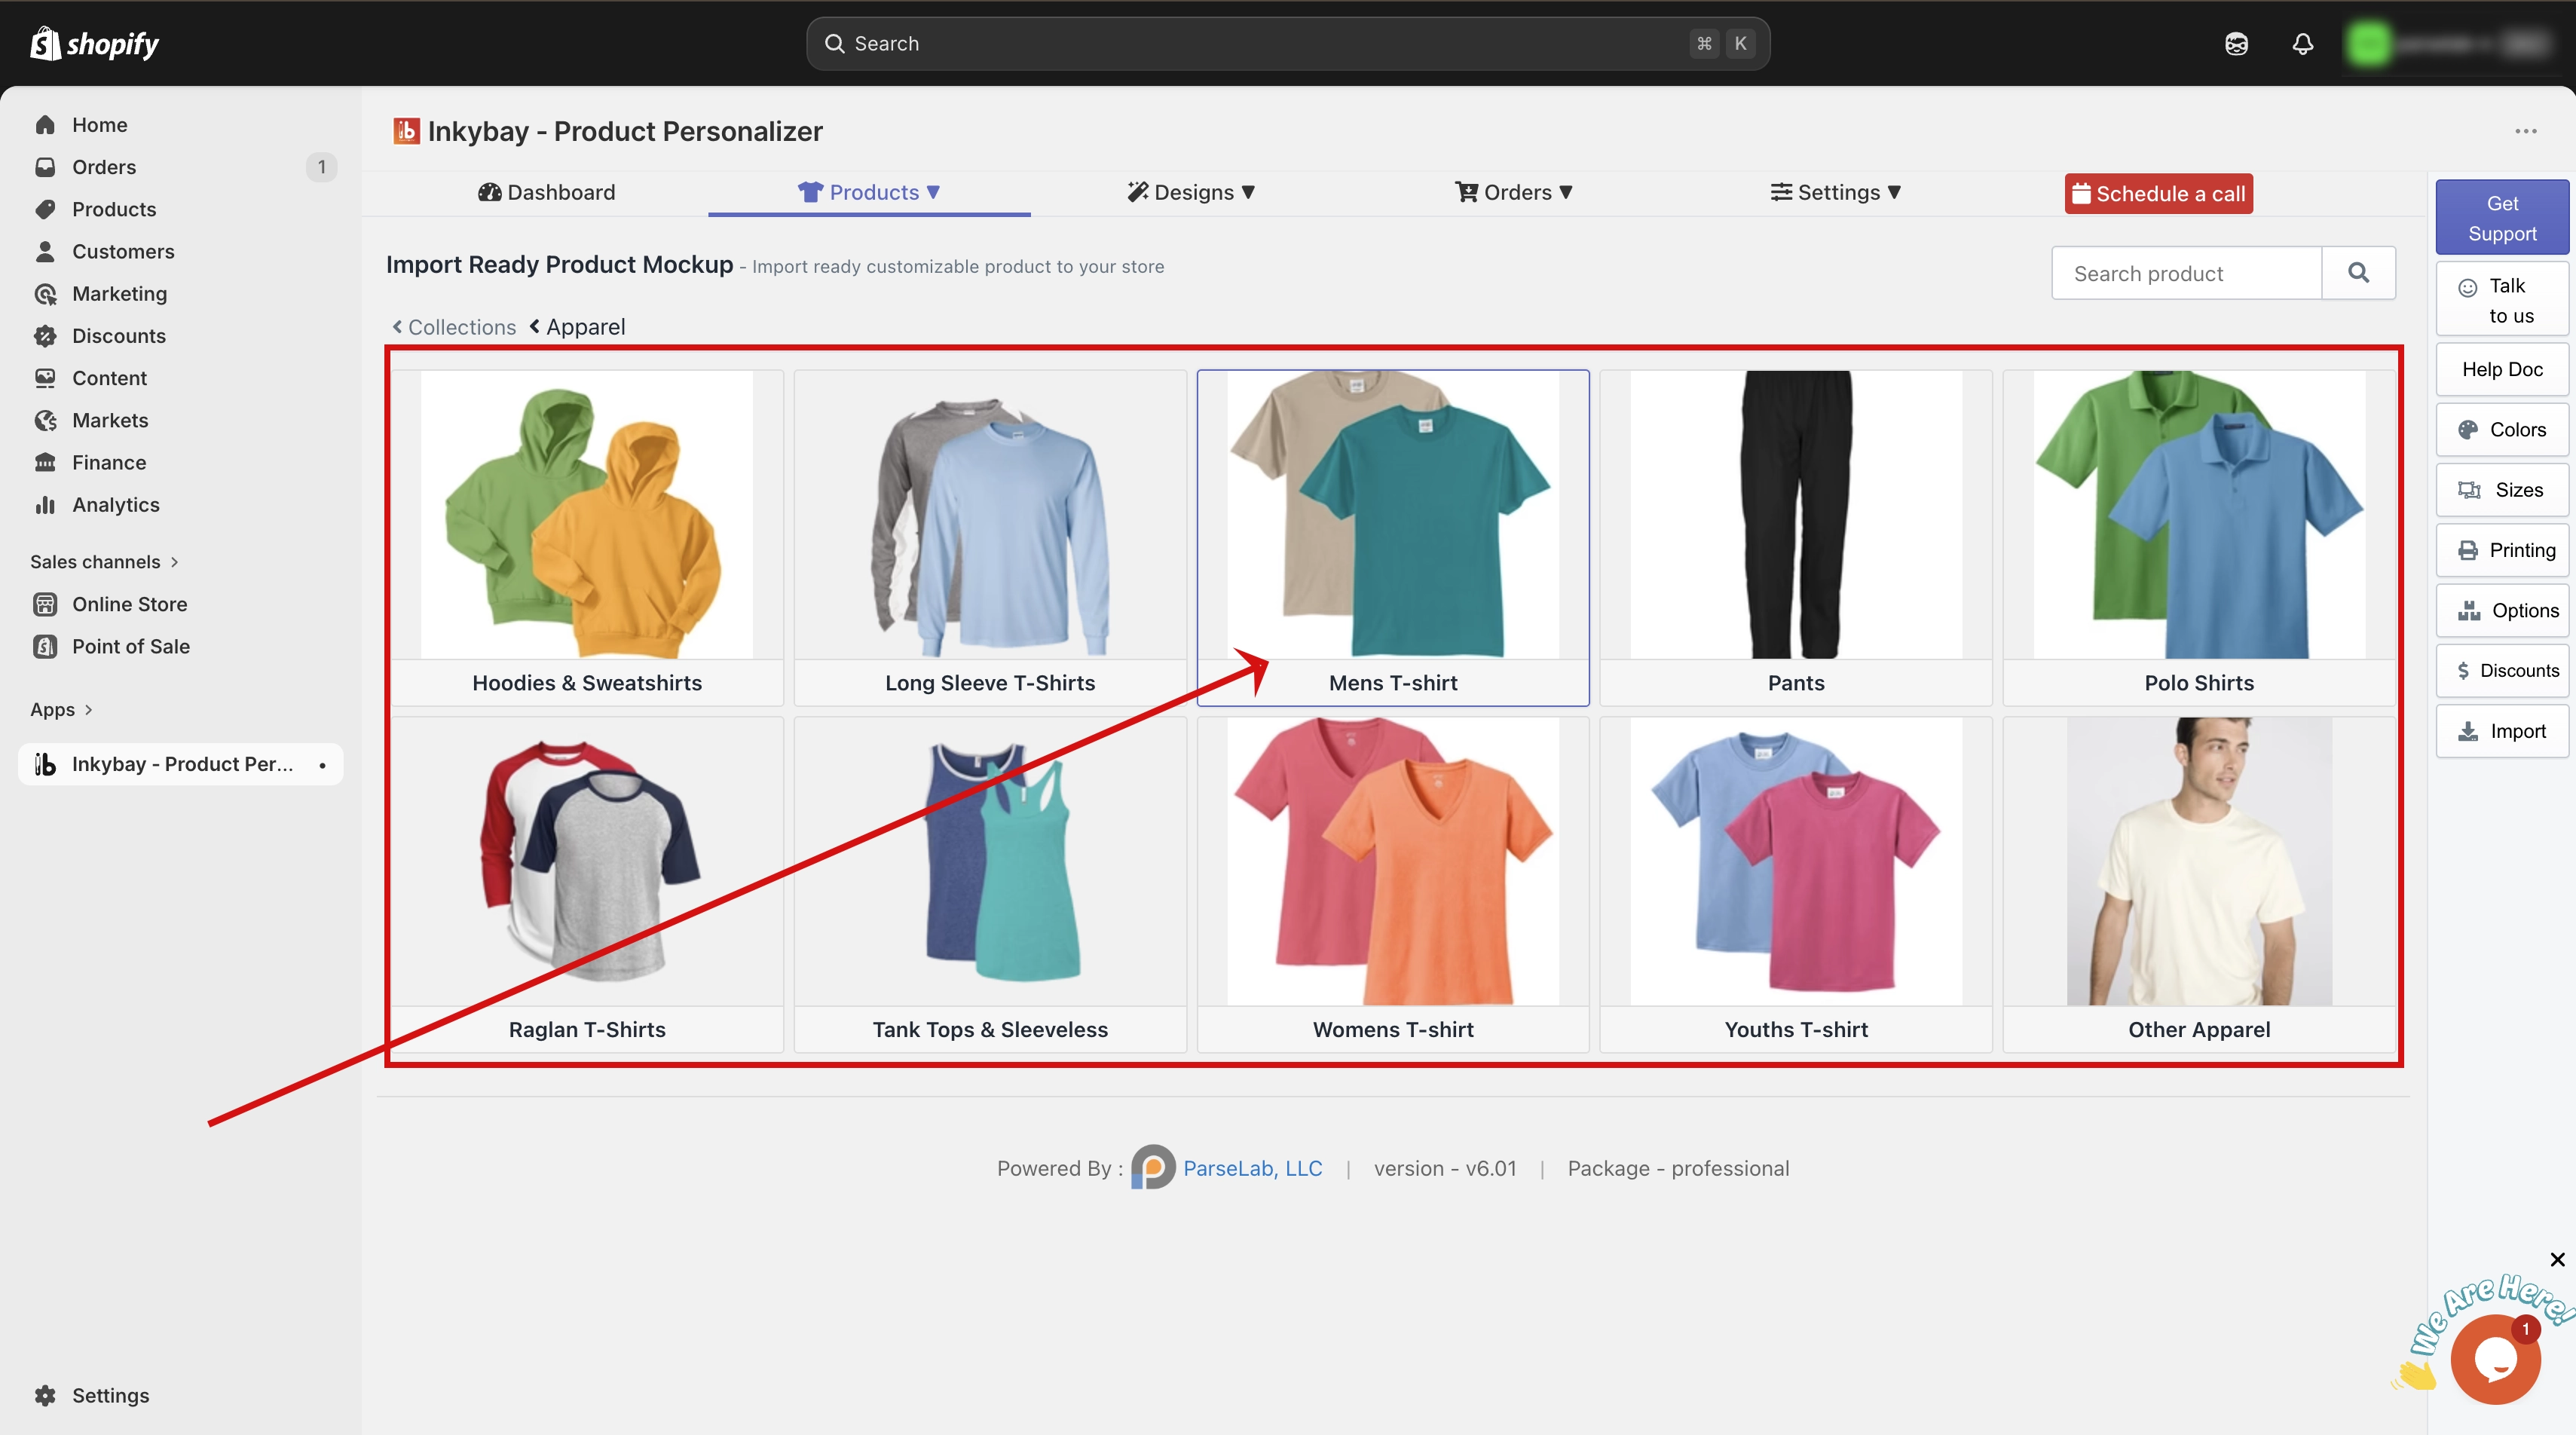
Step 4: Select a product. Click on the product you want to import.
 Then, from your store's collection list, select the collection where you want this product to be placed, and
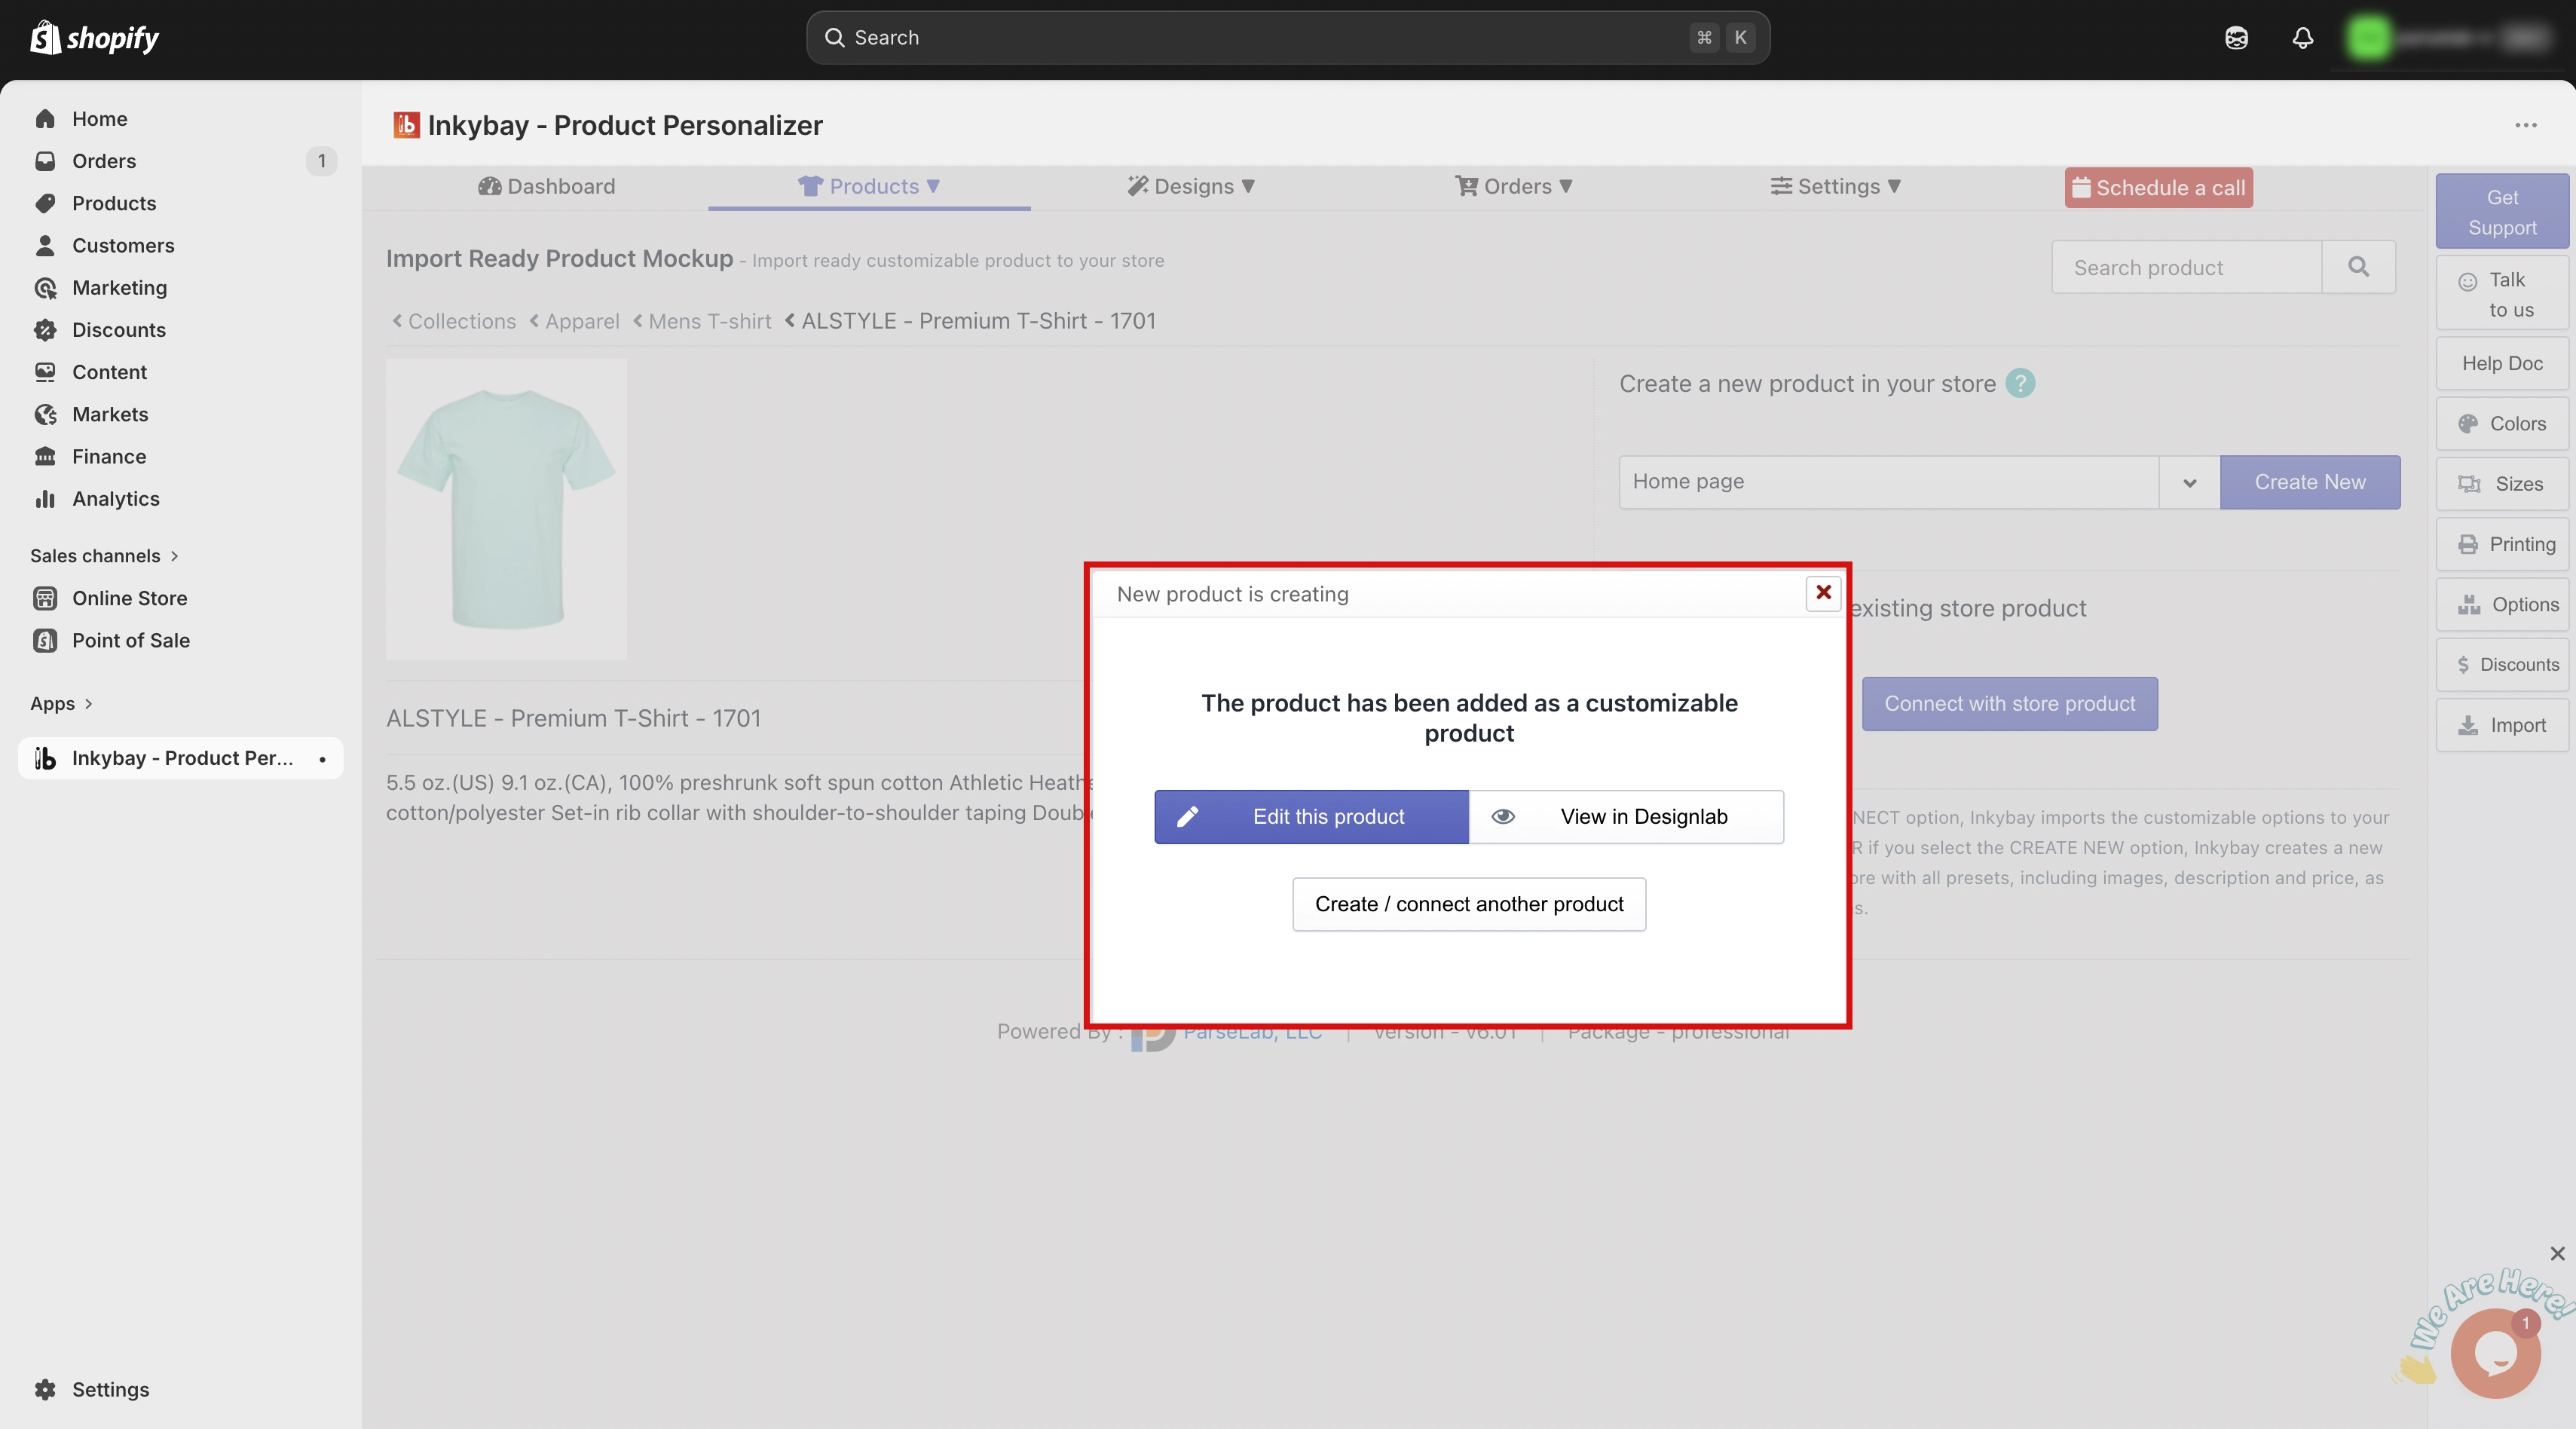
Step 5: Create the product. Click the Create New button. The product will be imported into your store.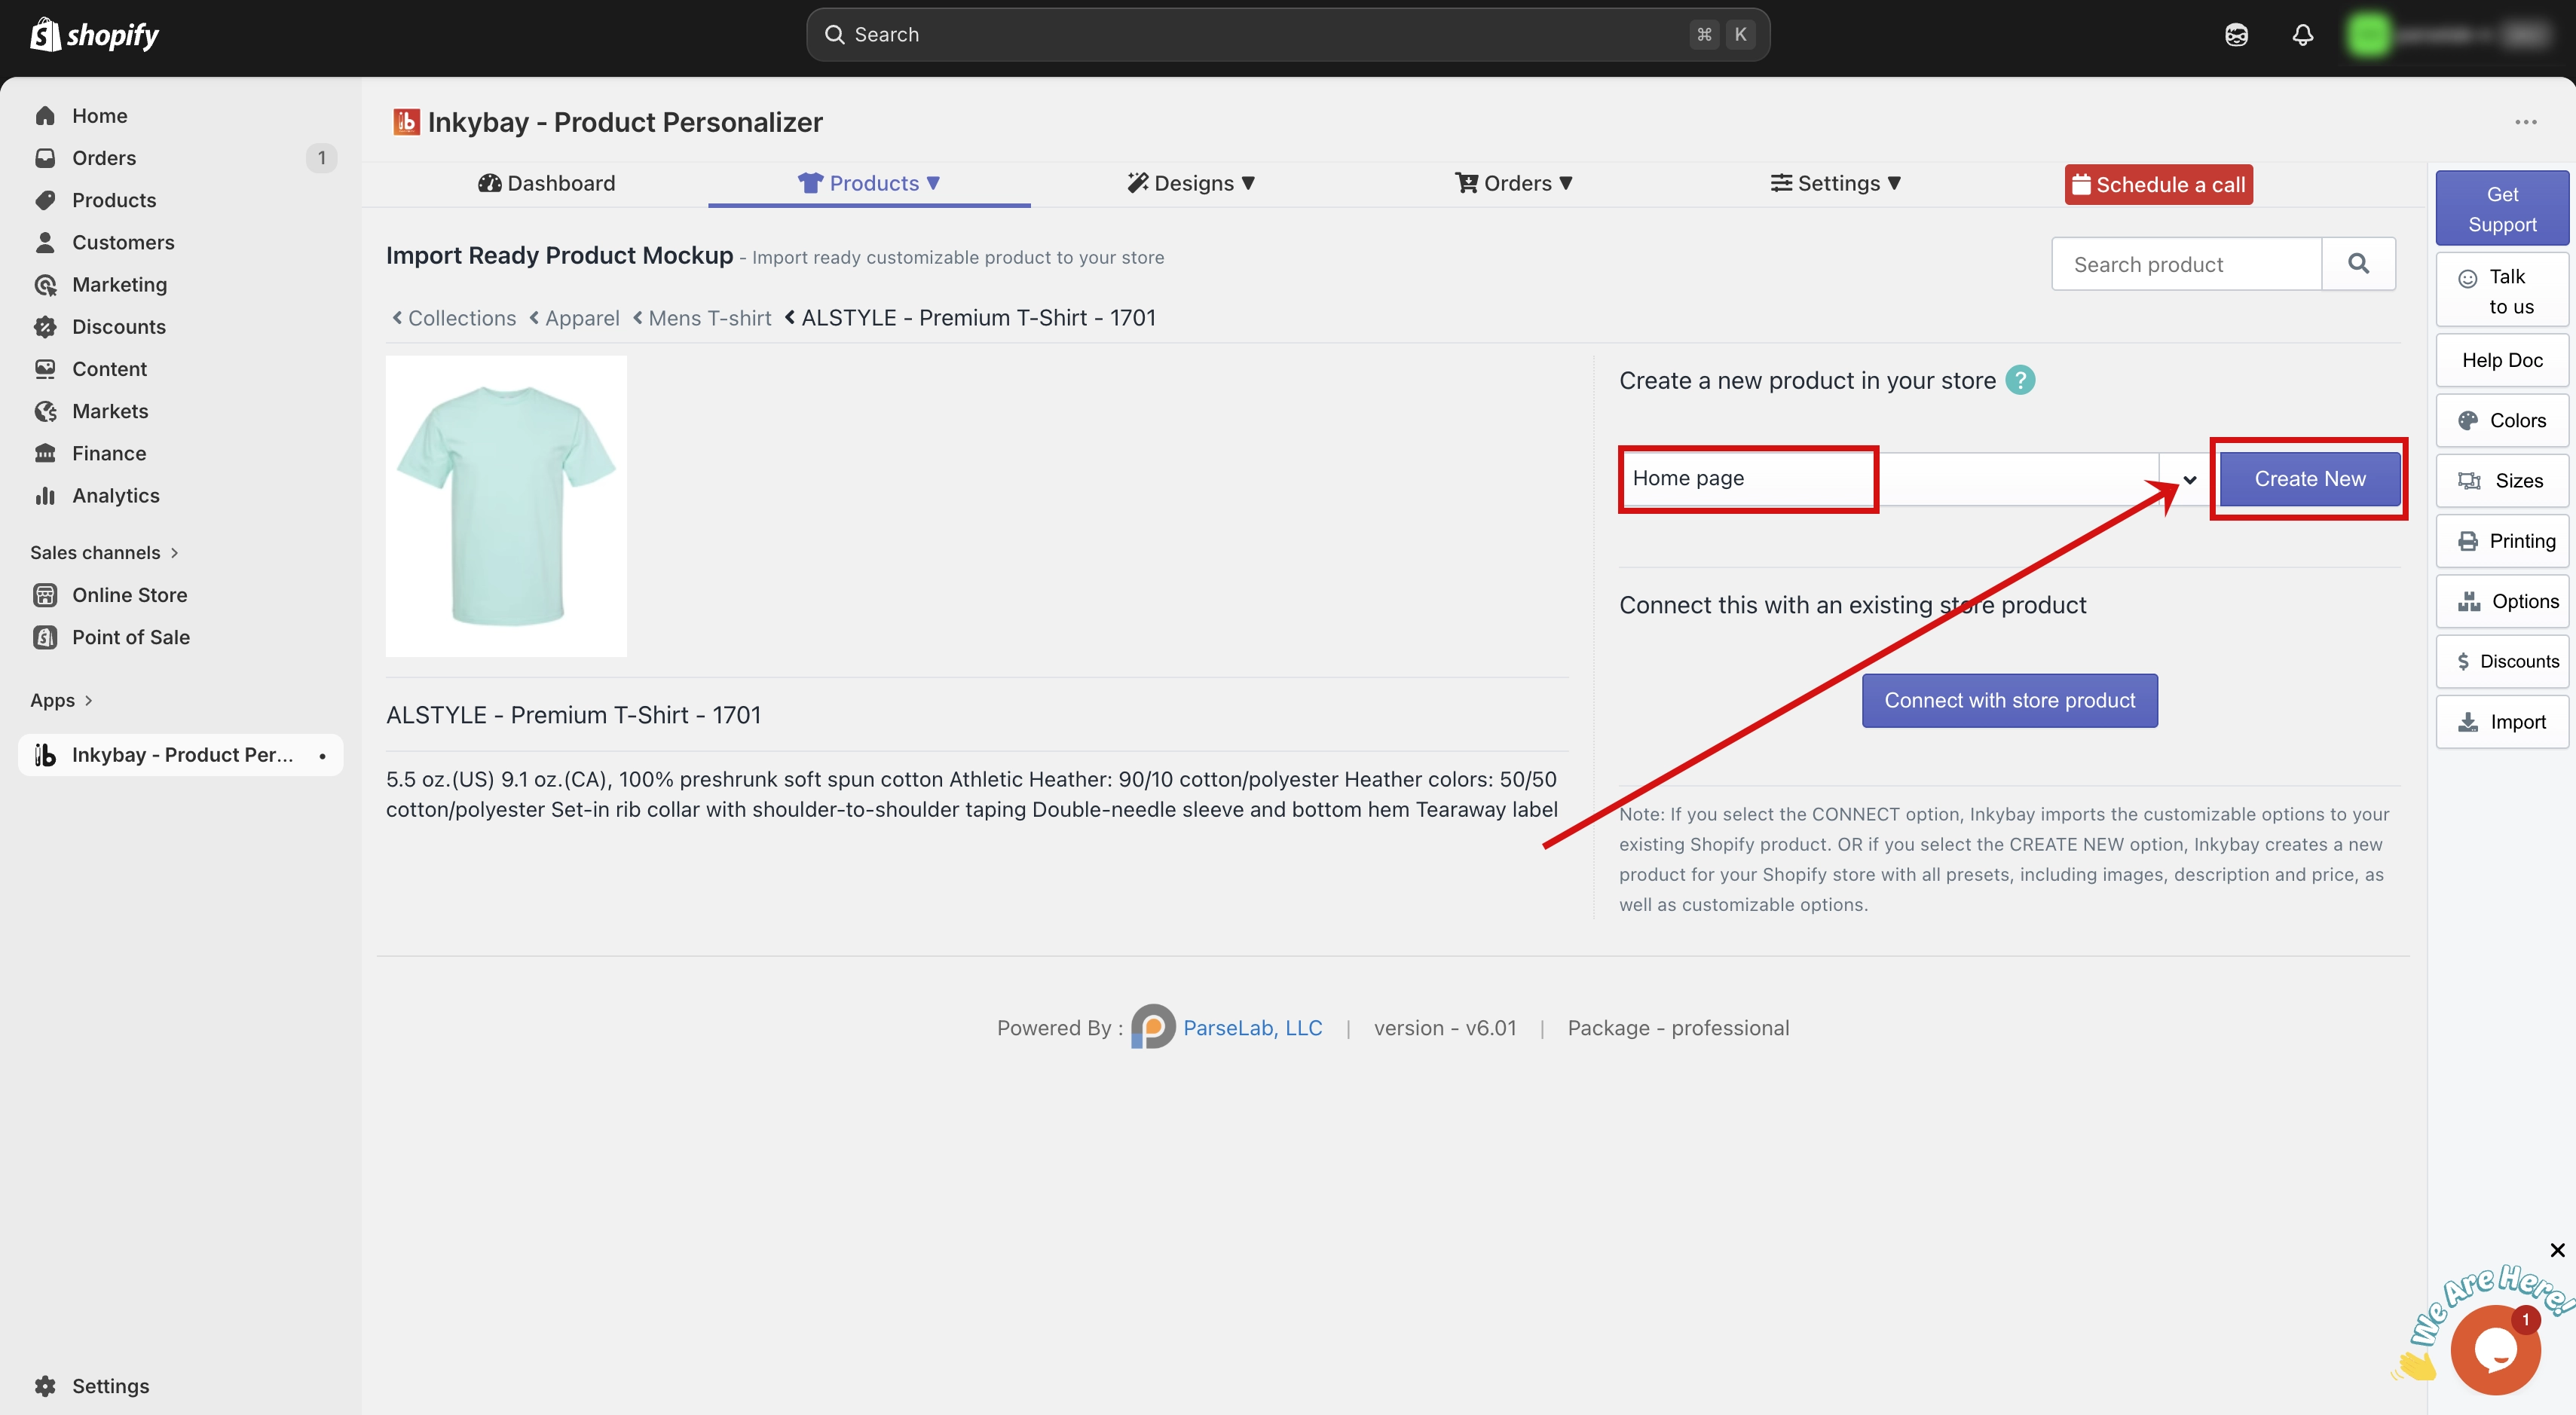
🎯 Note: Once the product is imported, you will see three options: |
(a) Edit This Product — Click this to adjust or update the product setup.
(b) View in Design Lab — Click this to preview how the product looks in the design lab.
(c) Create and Connect Another Product — Click this to go back and import additional products by following Steps 1 to 5 again.
Option 2: Import from Another Shopify Store Using InkyBay
If you have another Shopify store that uses InkyBay, you can import products from it. Before doing this, you need to grant import permission from the source store first.
Part A: Give permission from the source store
Step 1: Go to the source store's admin dashboard. Open the admin dashboard of the store you want to import products from.
Step 2: Open Other Settings. Hover over the Settings option, then click on Other Settings.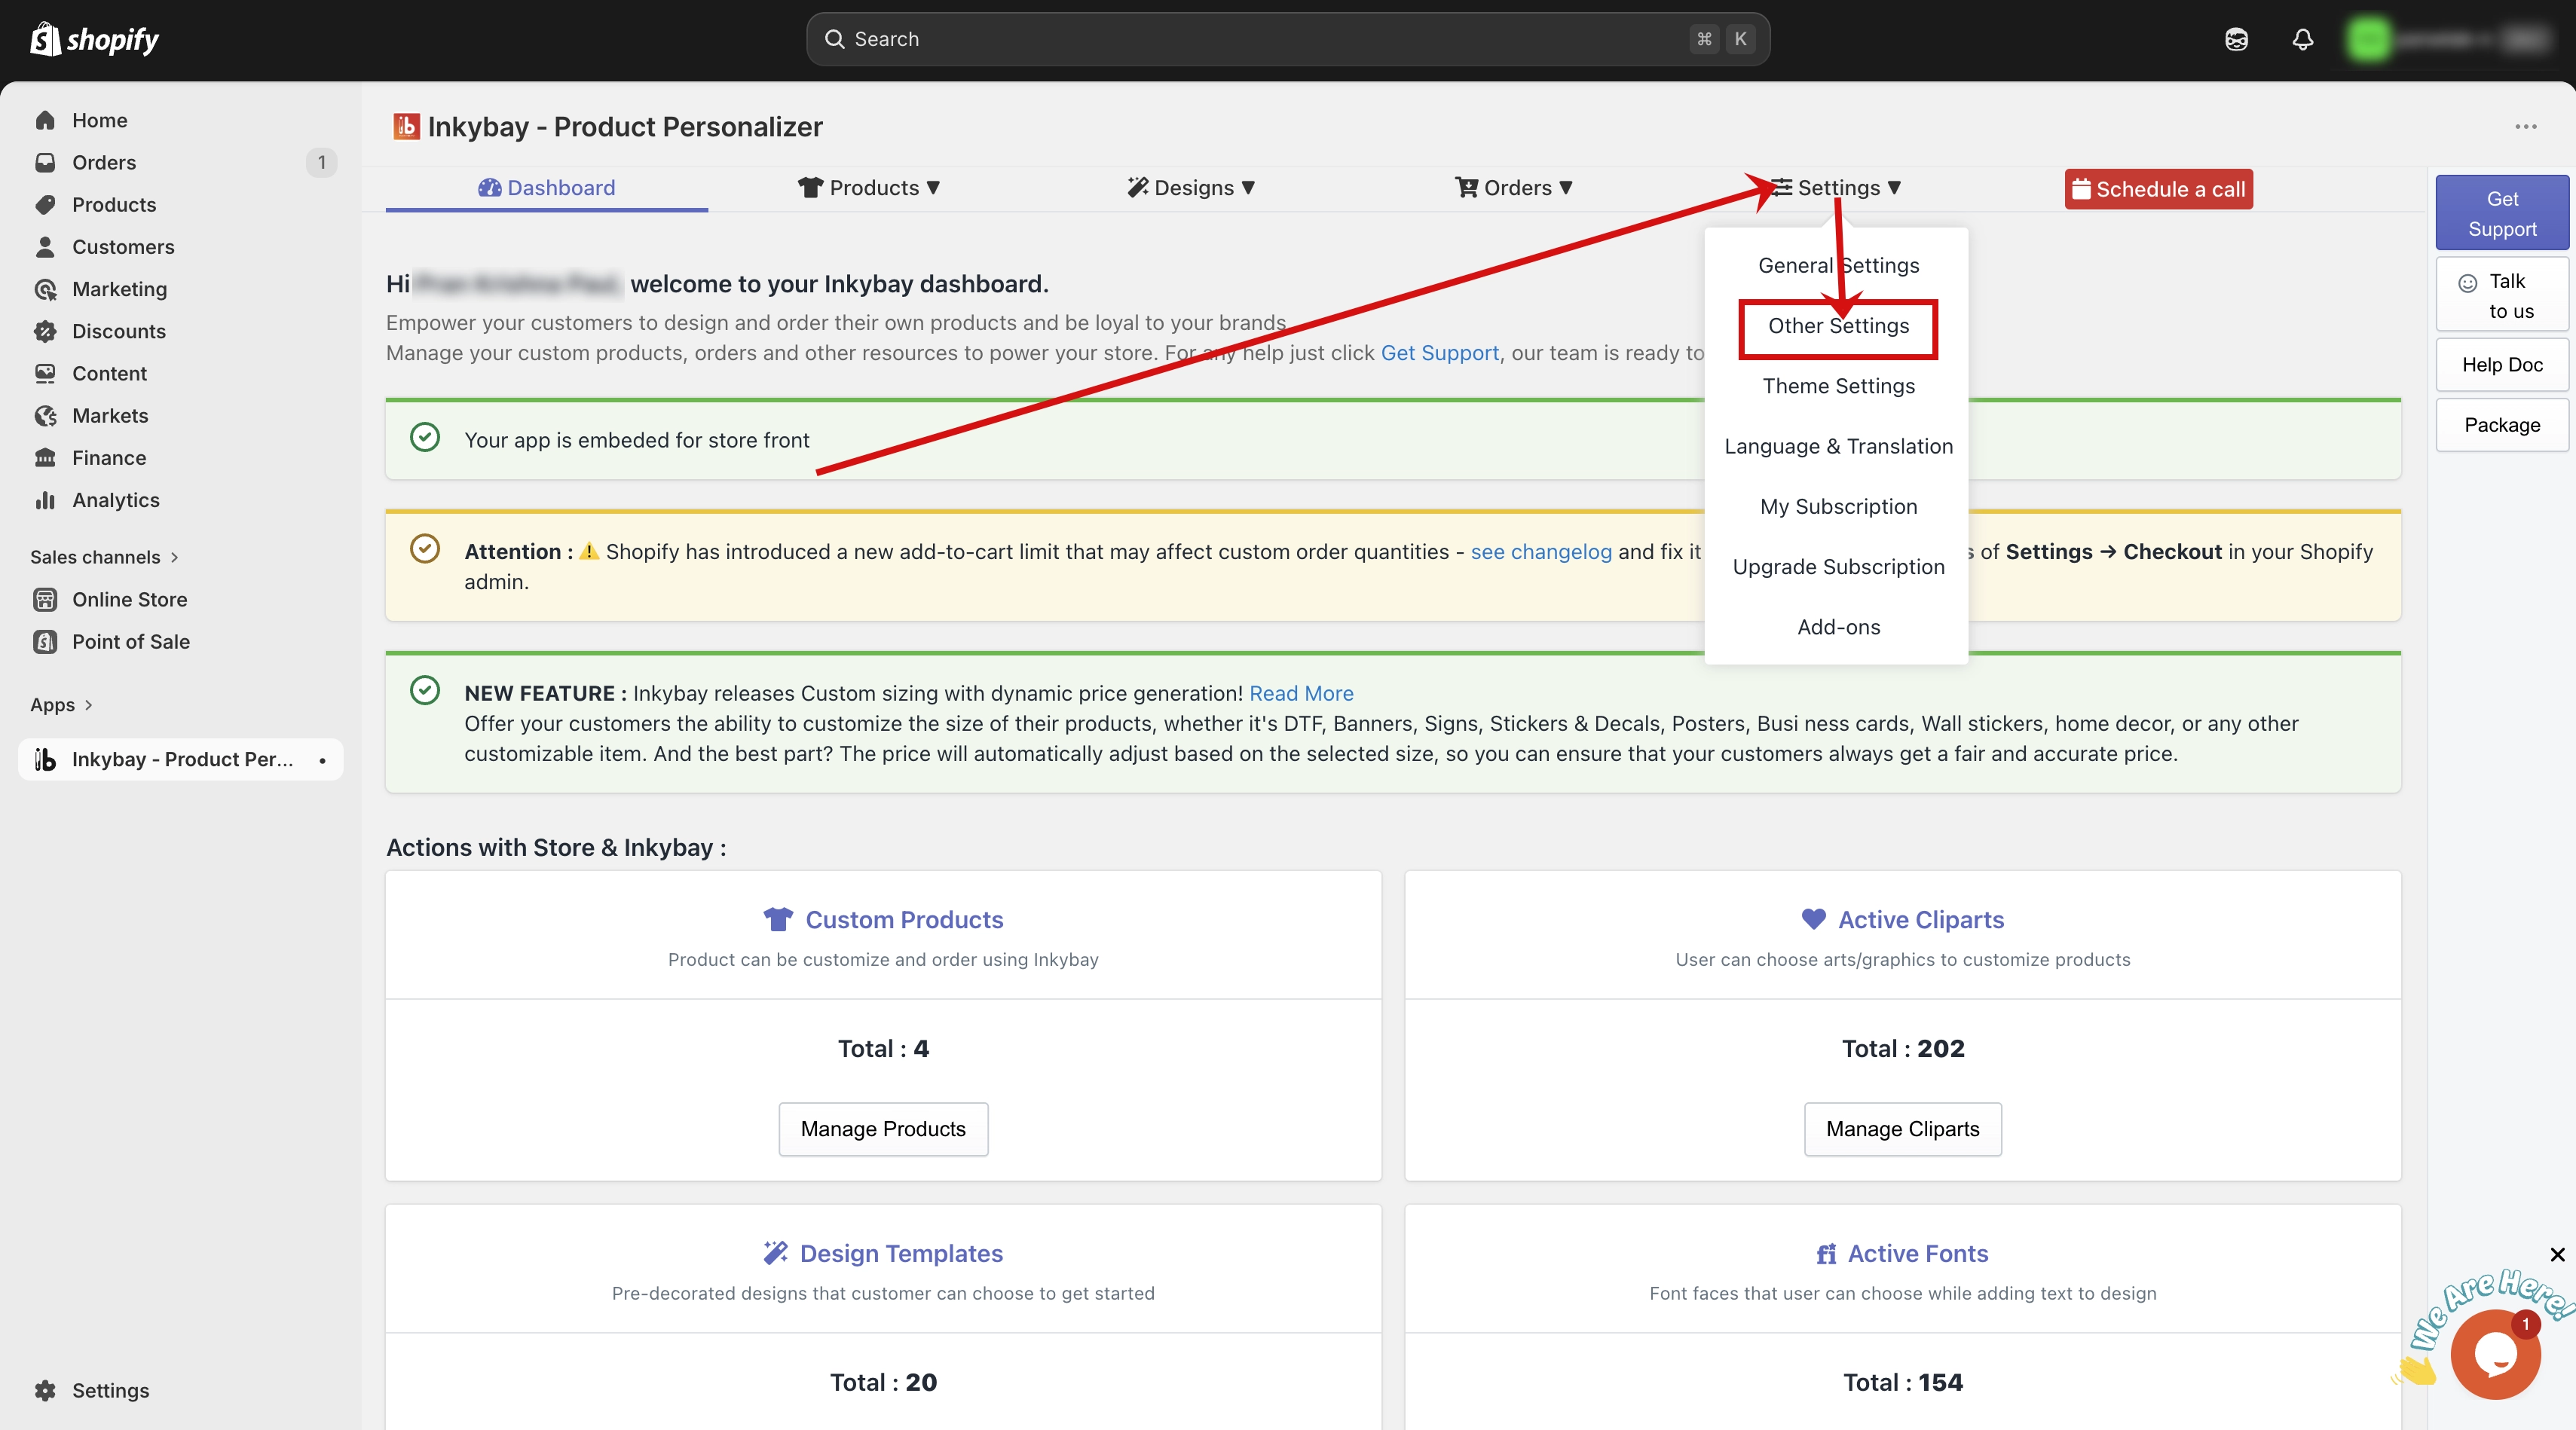
Step 3: Find the import permission section. Locate the section labeled Allow Import from Other Stores. You will see an input field there.
Step 4: Enter the store URL prefix. Type the part of your store URL that comes before “.myshopify.com”. For example, if your store URL is “yourstore.myshopify.com”, you will enter “yourstore” in the field.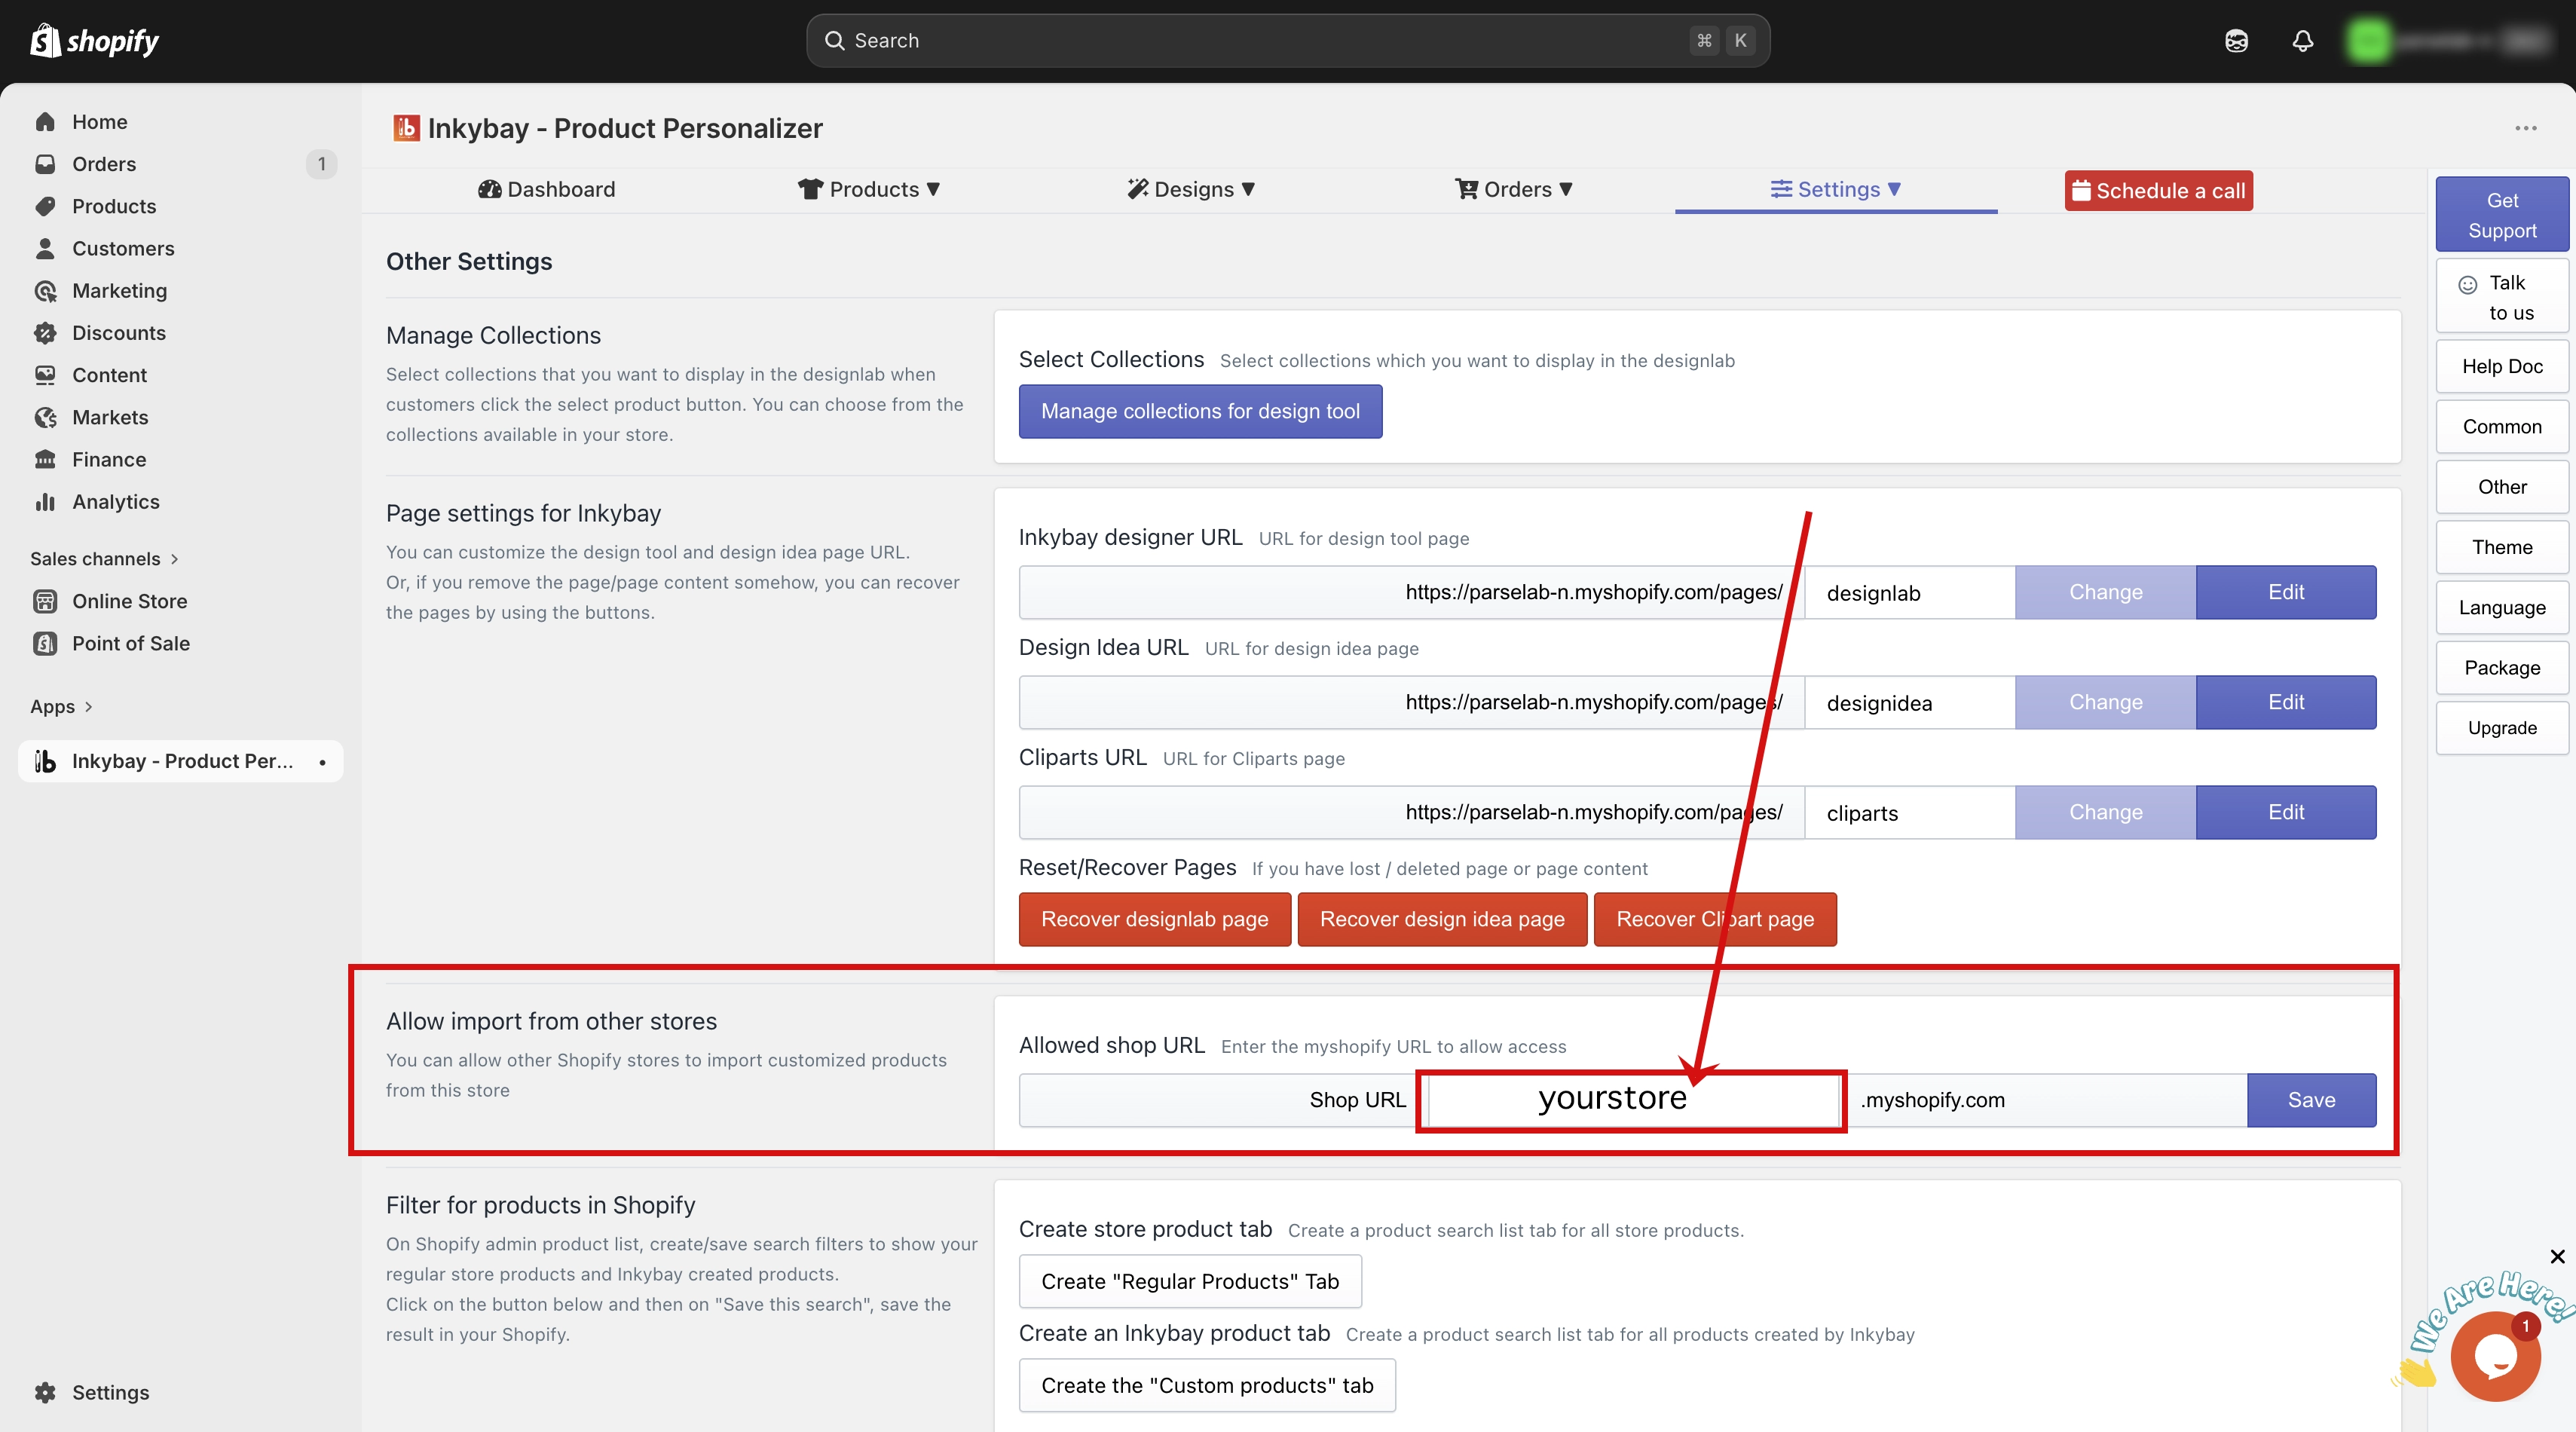
Step 5: Save your changes. Click the Save button to confirm the permission.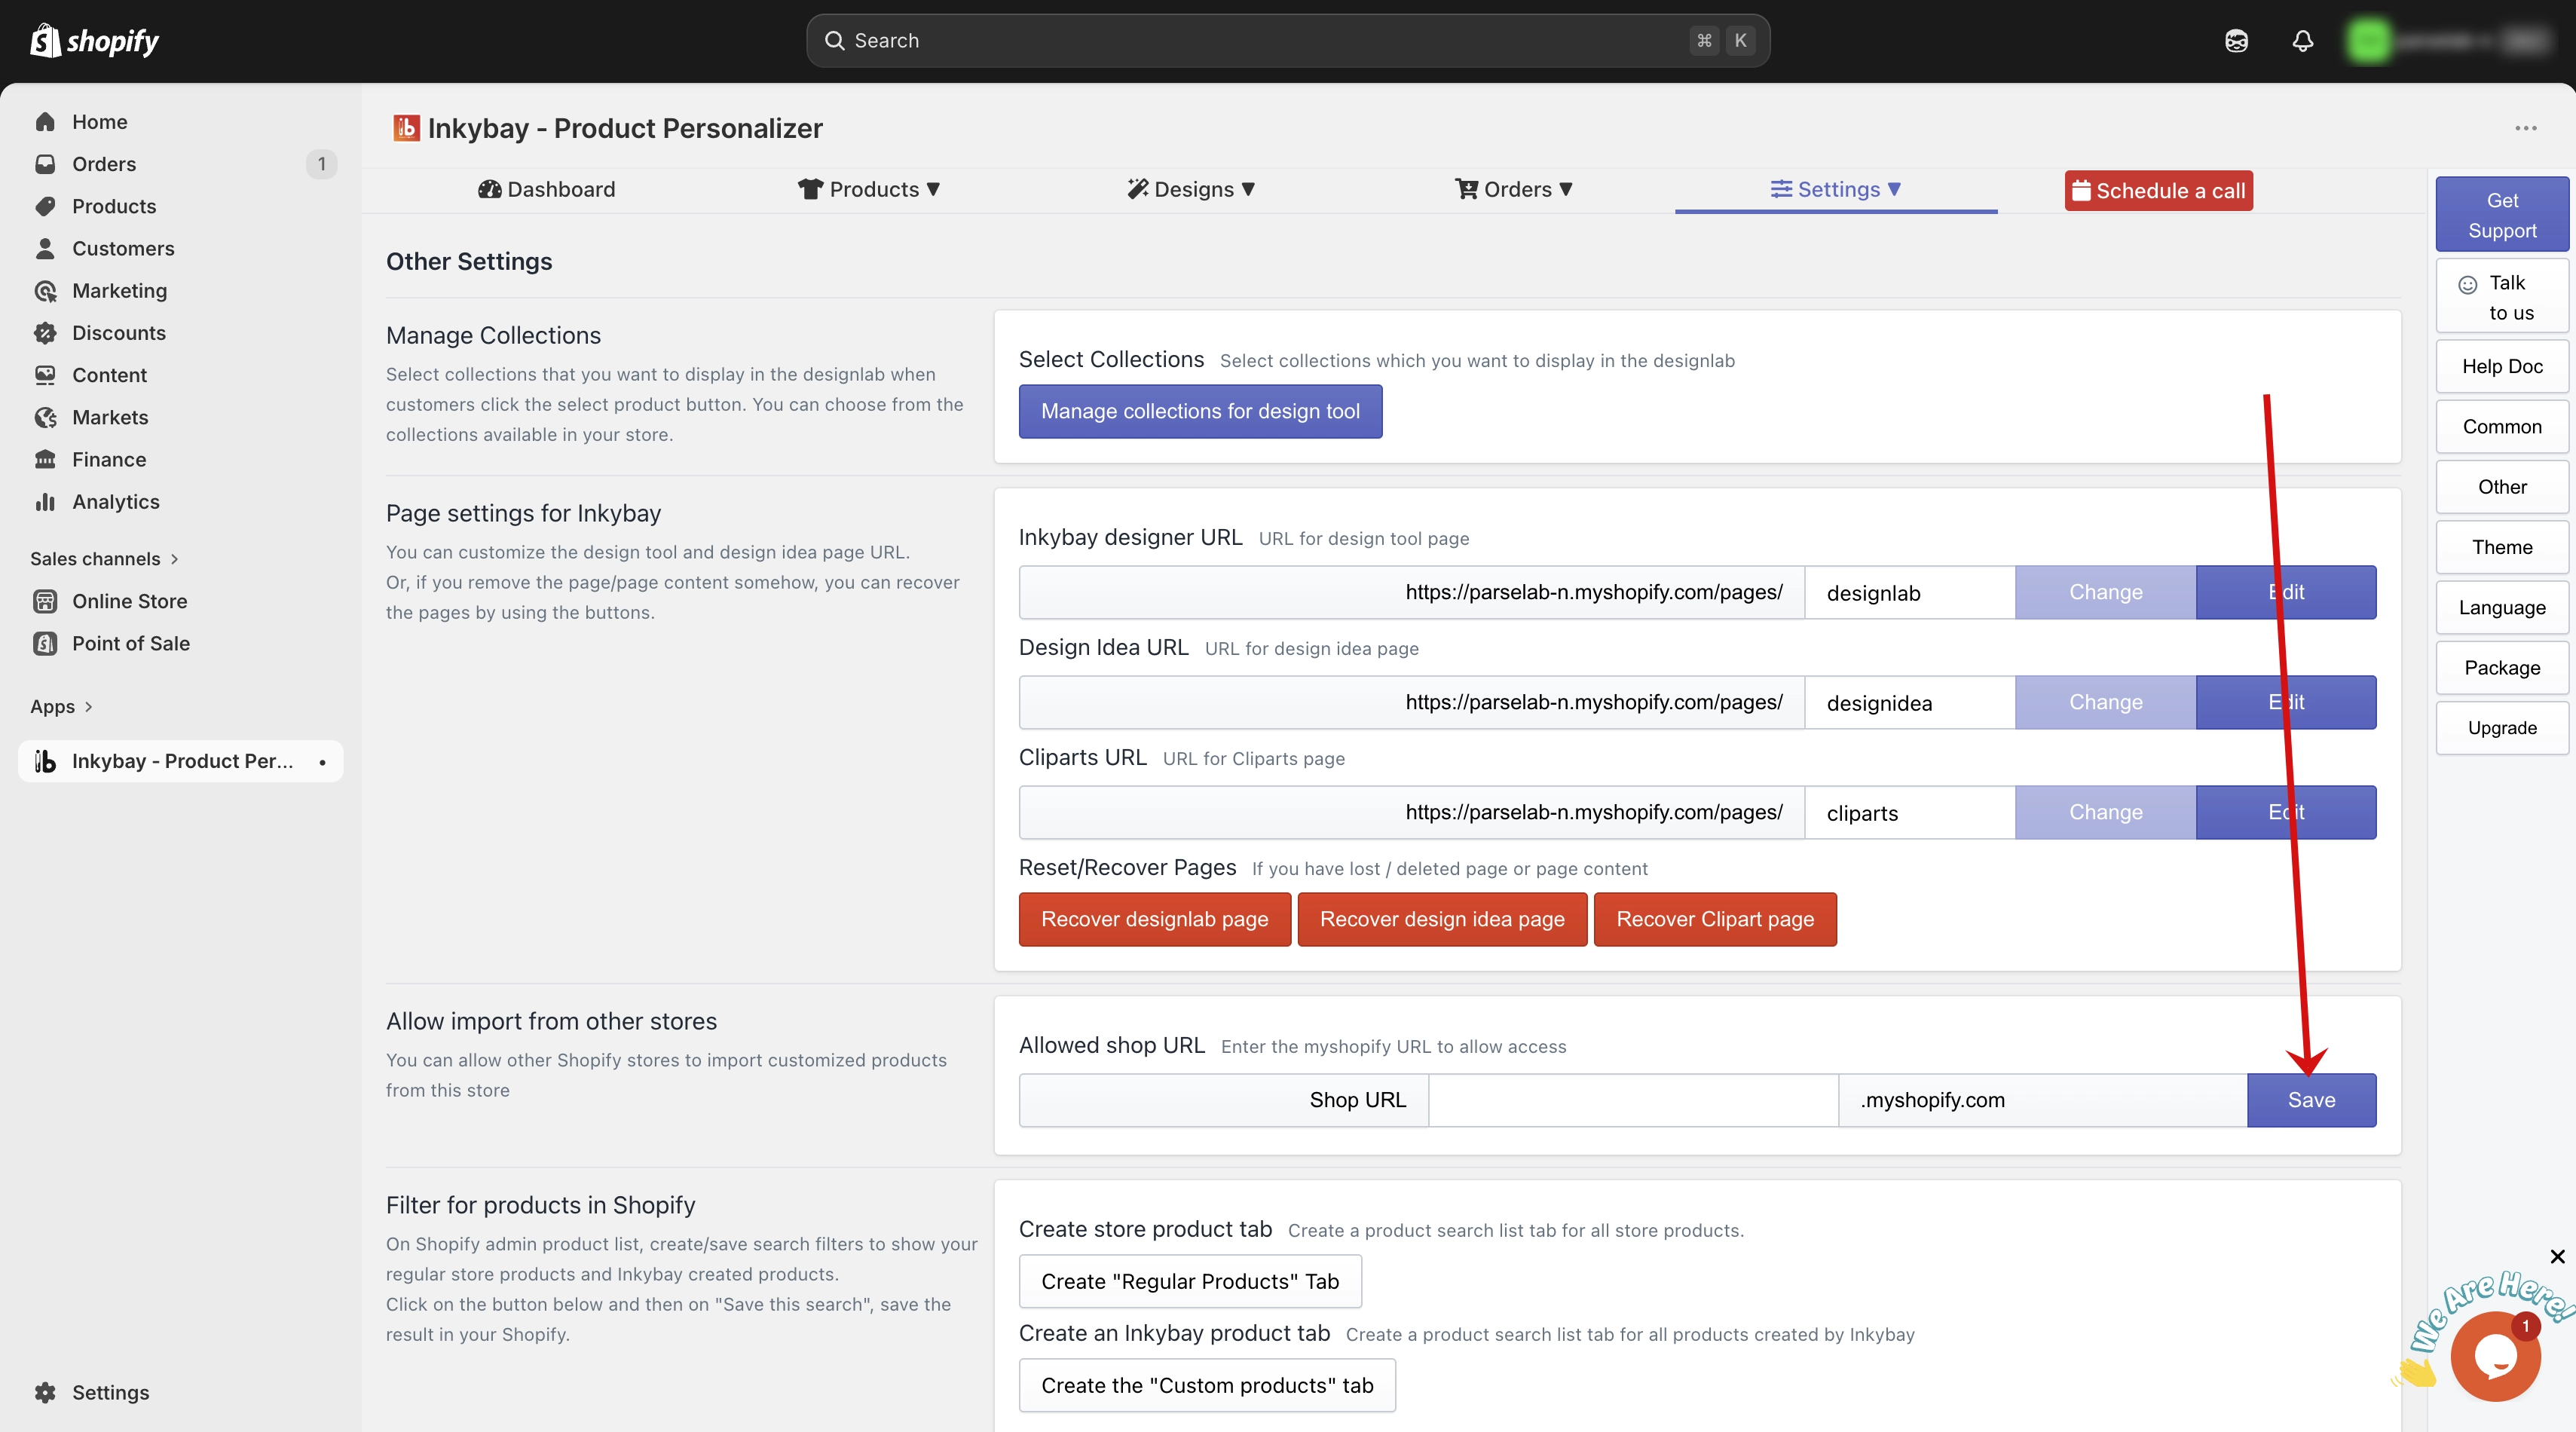
💡 Important: Permission must be granted from the source store before you can import its products. Without this step, the store will not appear as an import option in your dashboard. |
Part B: Import from the permitted store
Step 1: Access your store products. Go to your admin dashboard. Hover over the Products, then click on Import Custom Products.
Step 2: Select the source store. You will see a dropdown menu where you can choose the source. By default, InkyBay is selected. Switch it to the store you have already granted permission for.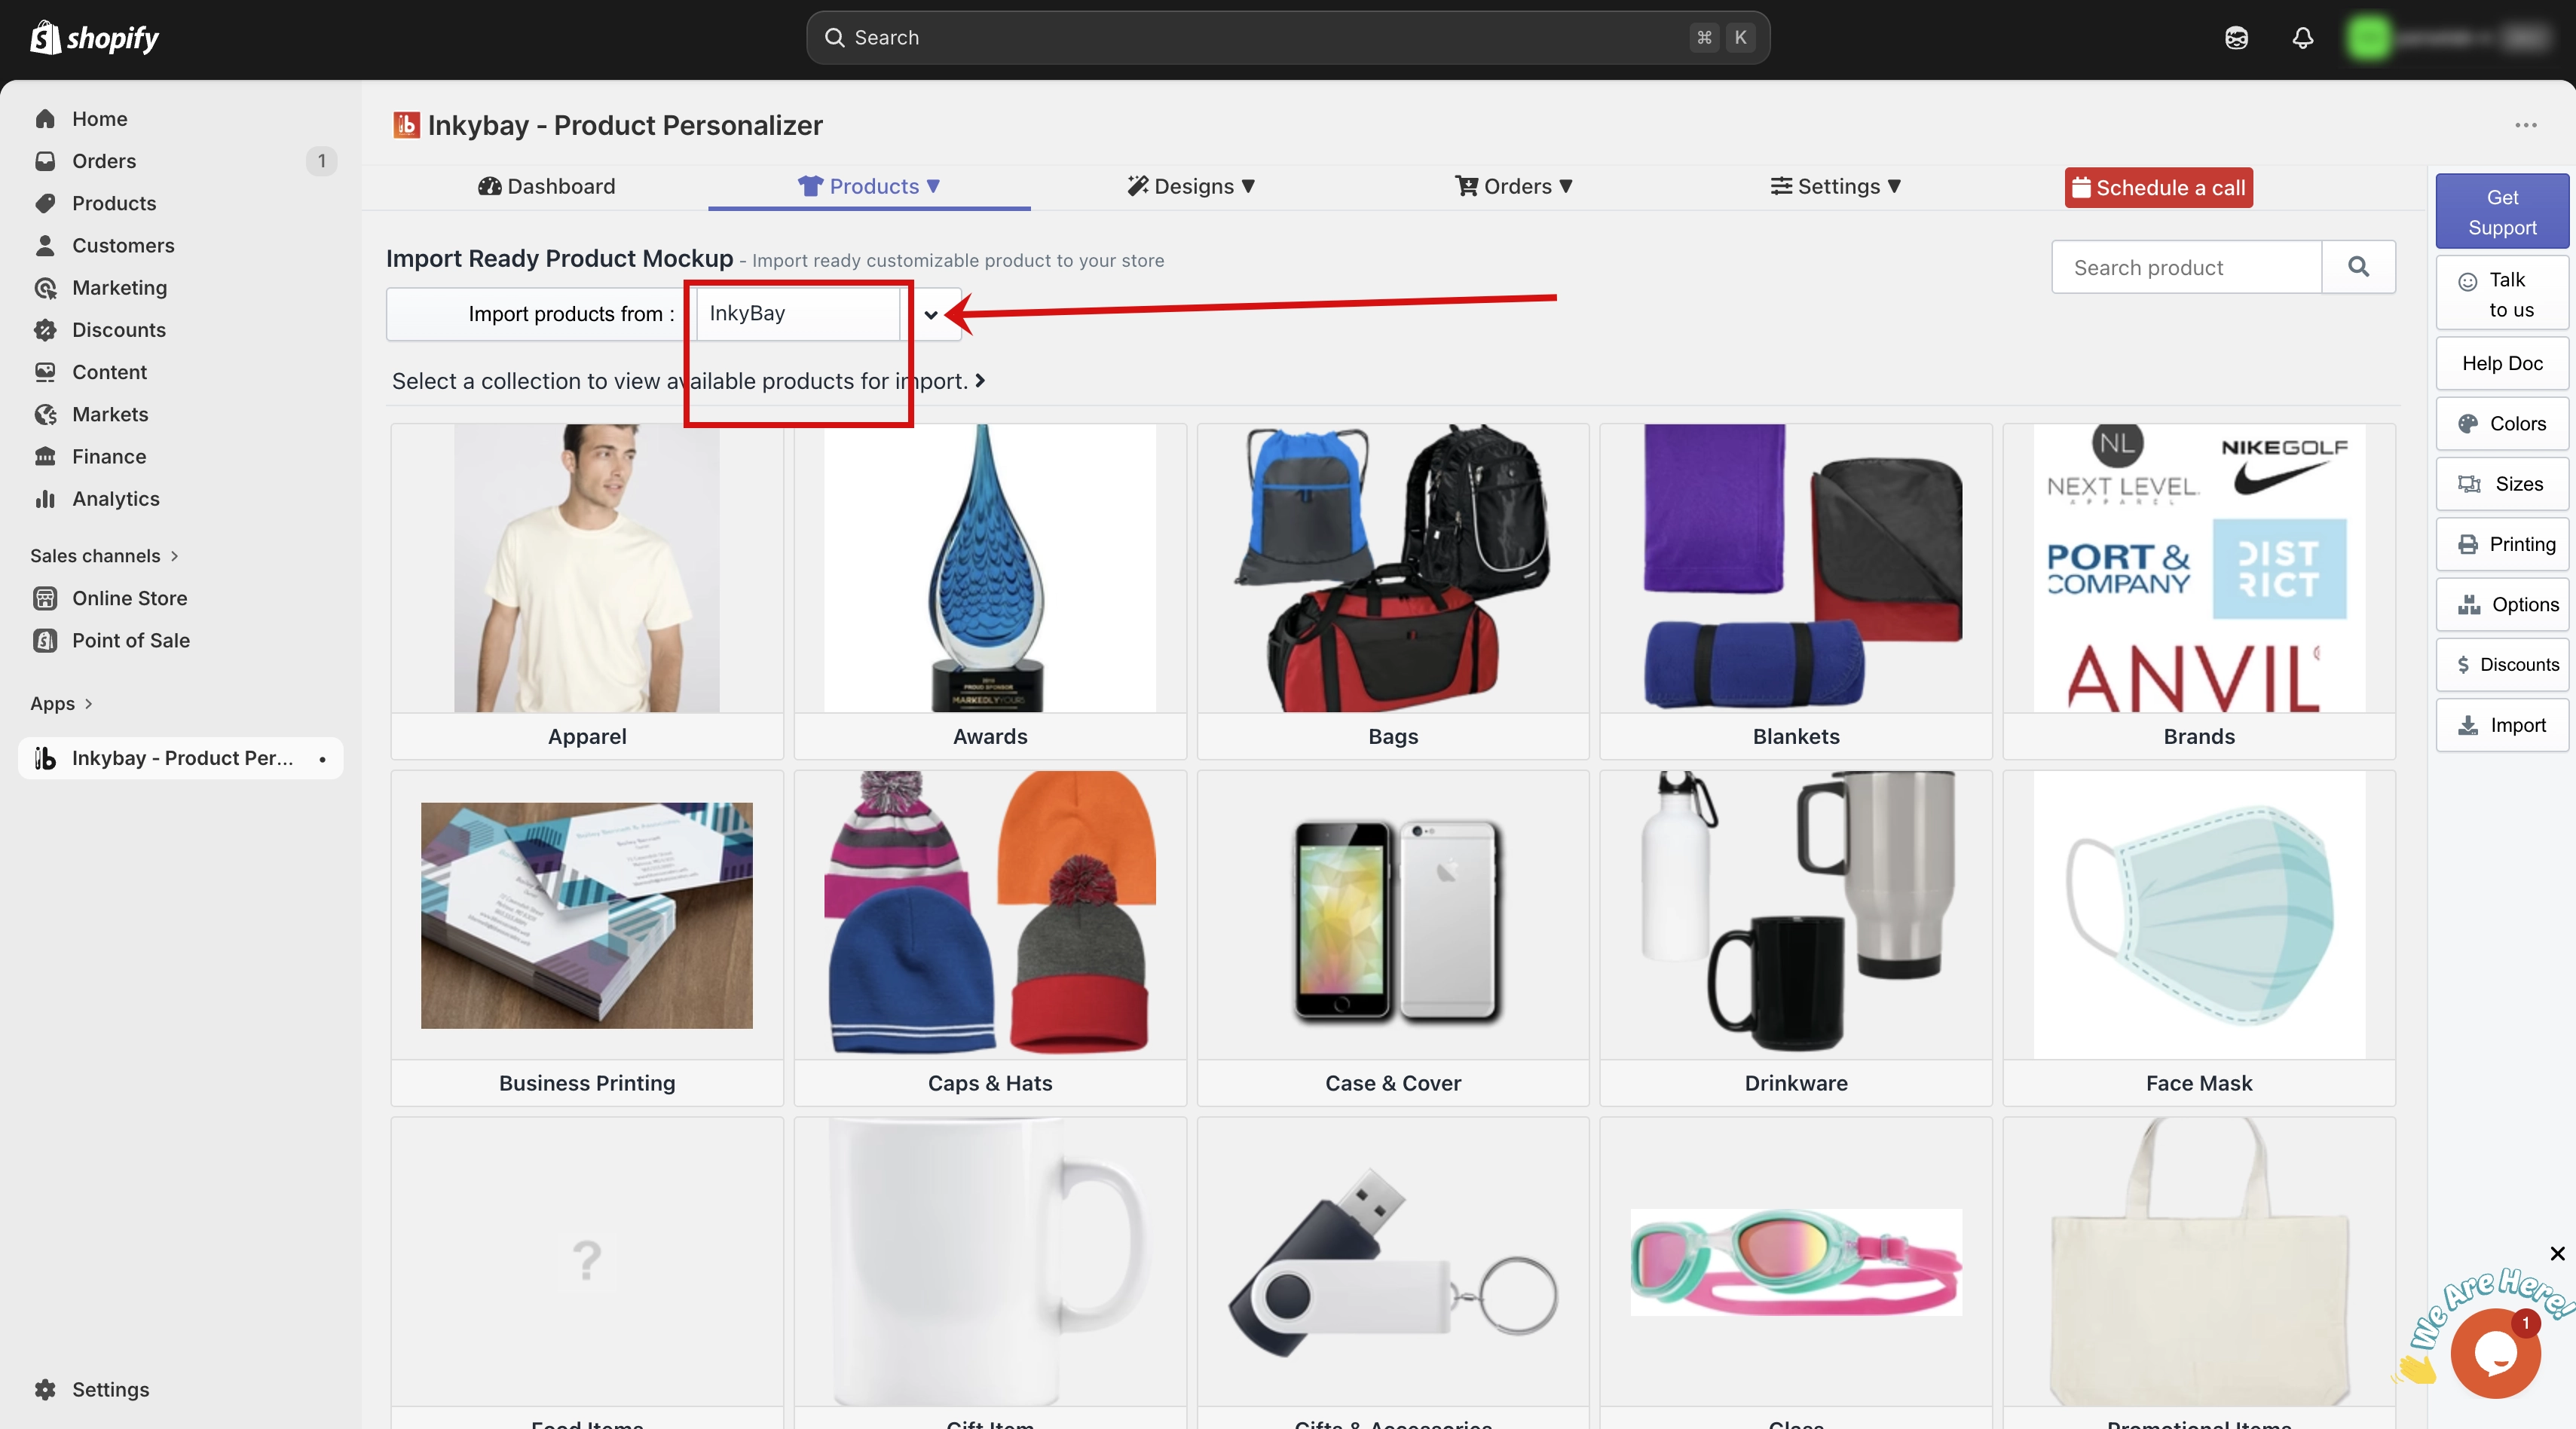
🎯 Note: The permitted store will only appear in this dropdown after permission has been saved from the source store. |
Step 3: Choose a collection. Select a collection from that store. The product categories will appear.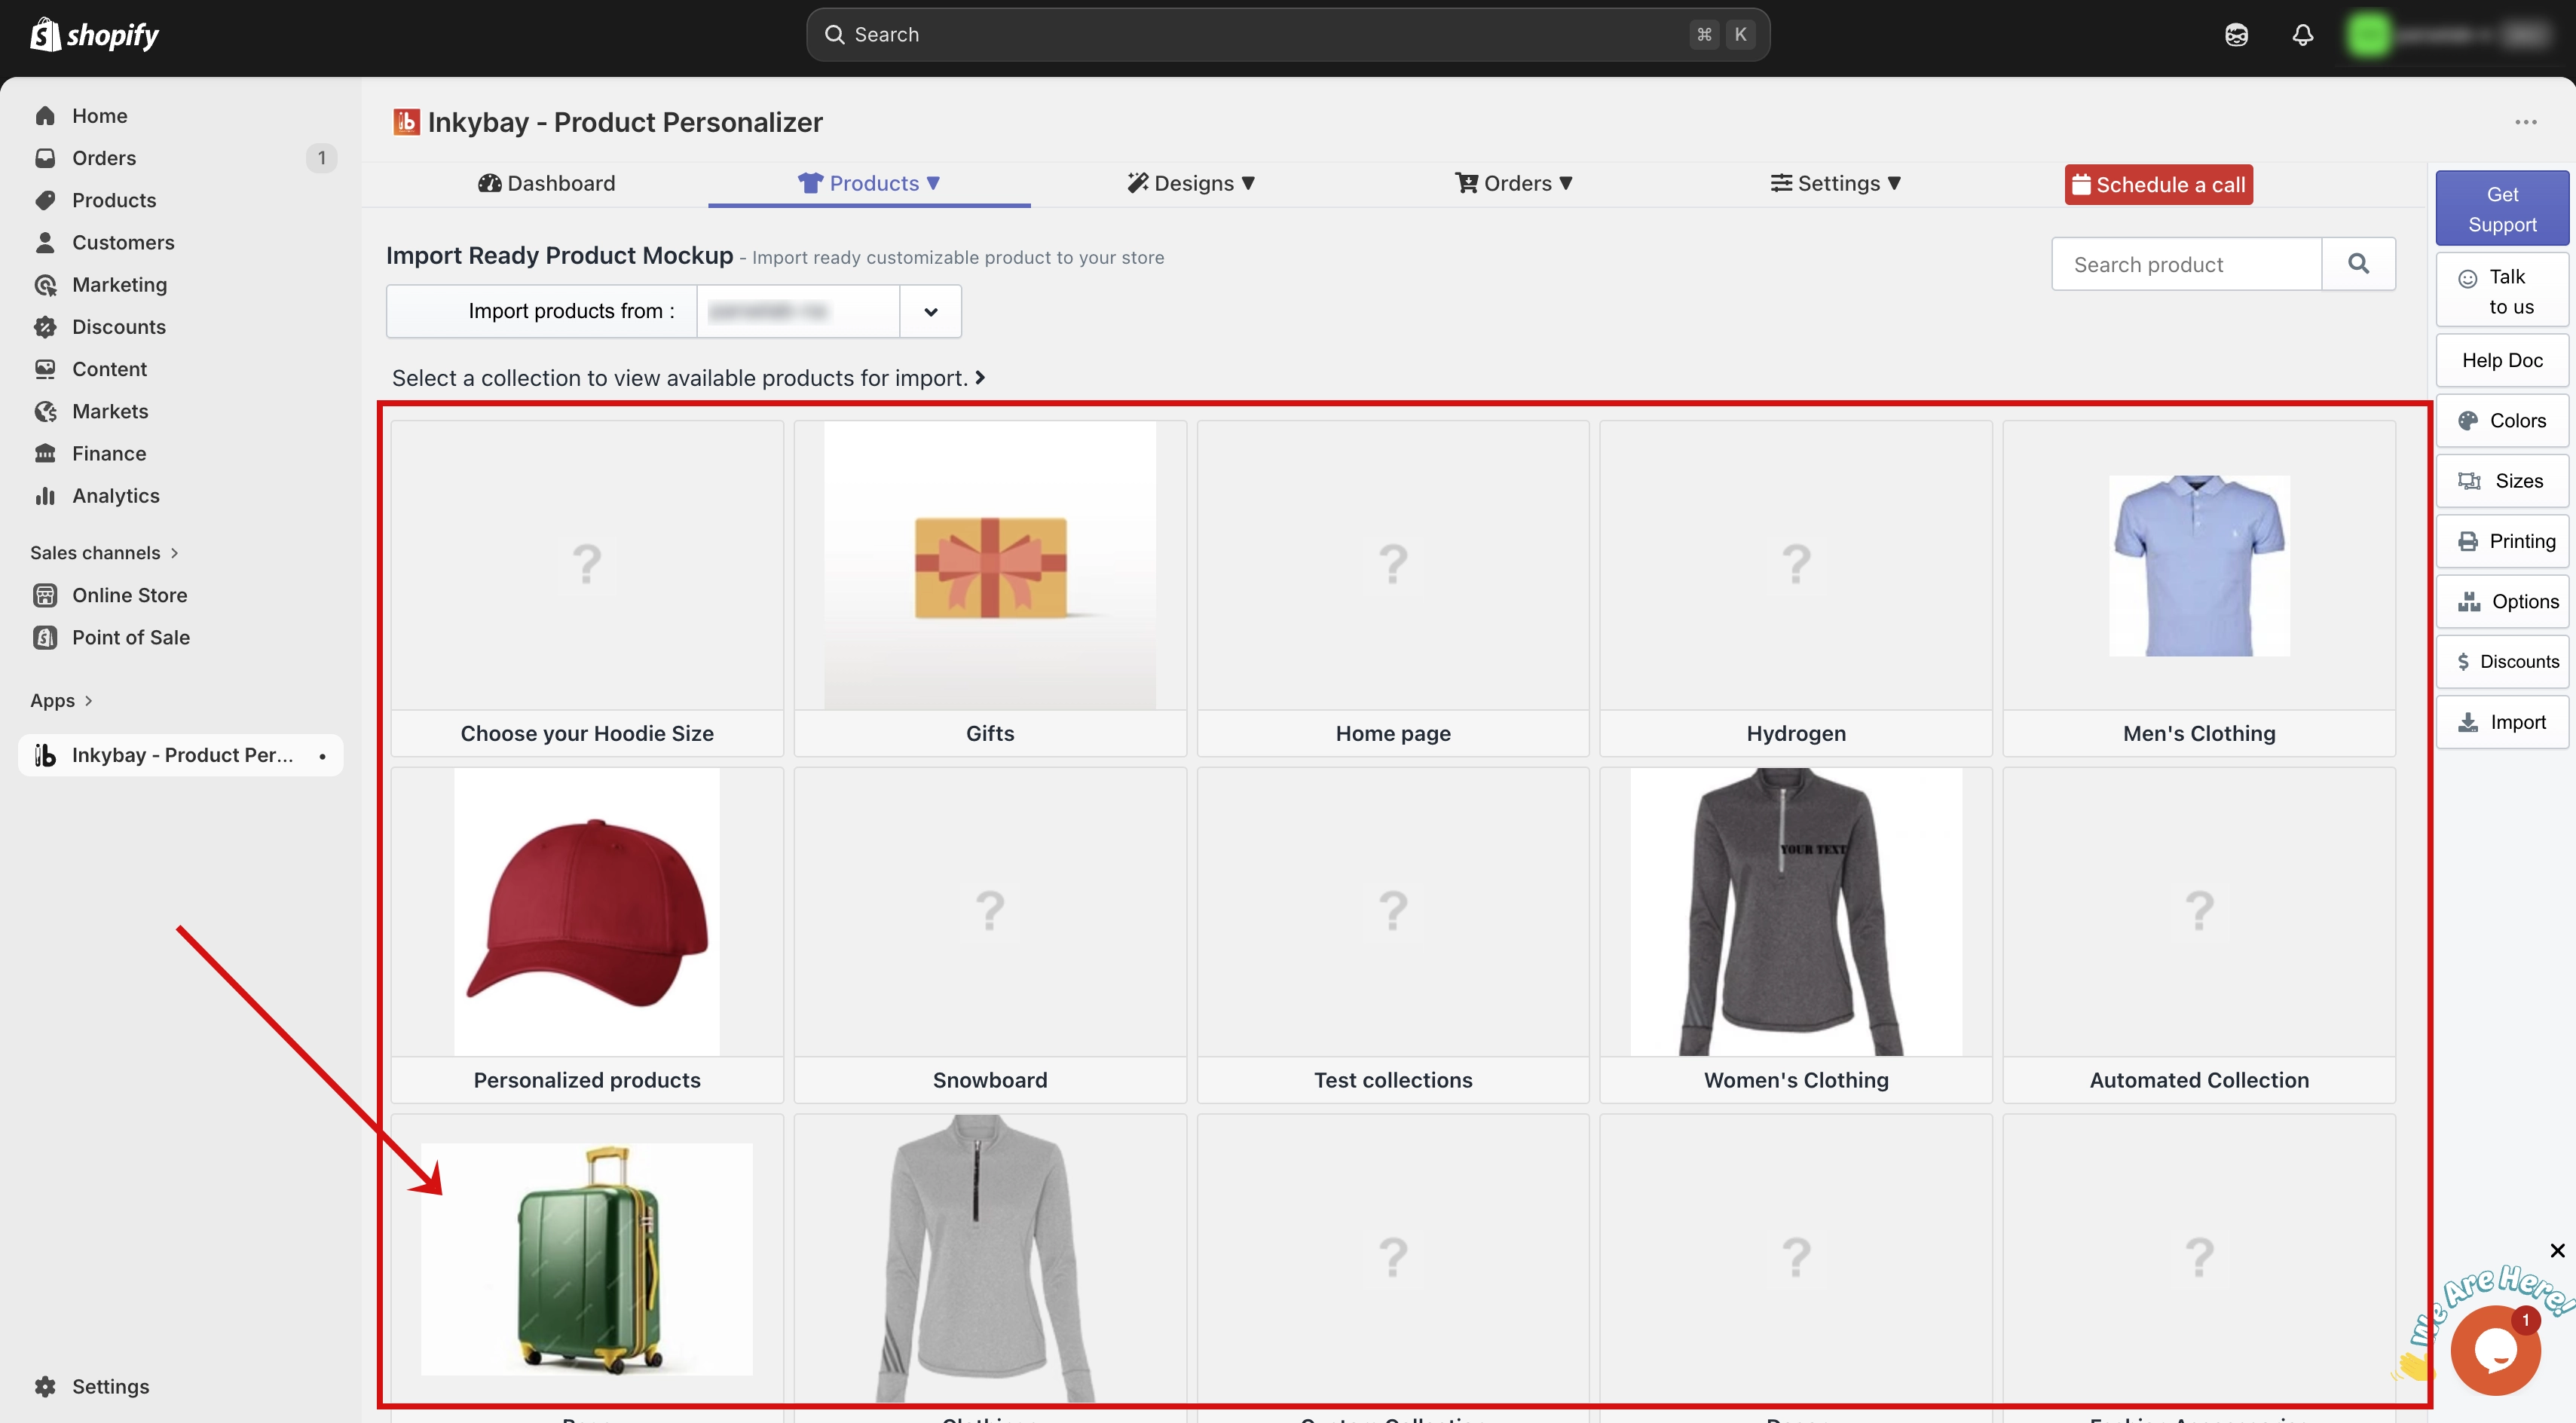
Step 4: Choose a category. Select a category. All available products will be listed. If this store has not described the category of the product, then you will see the product list directly. Which is step 5. 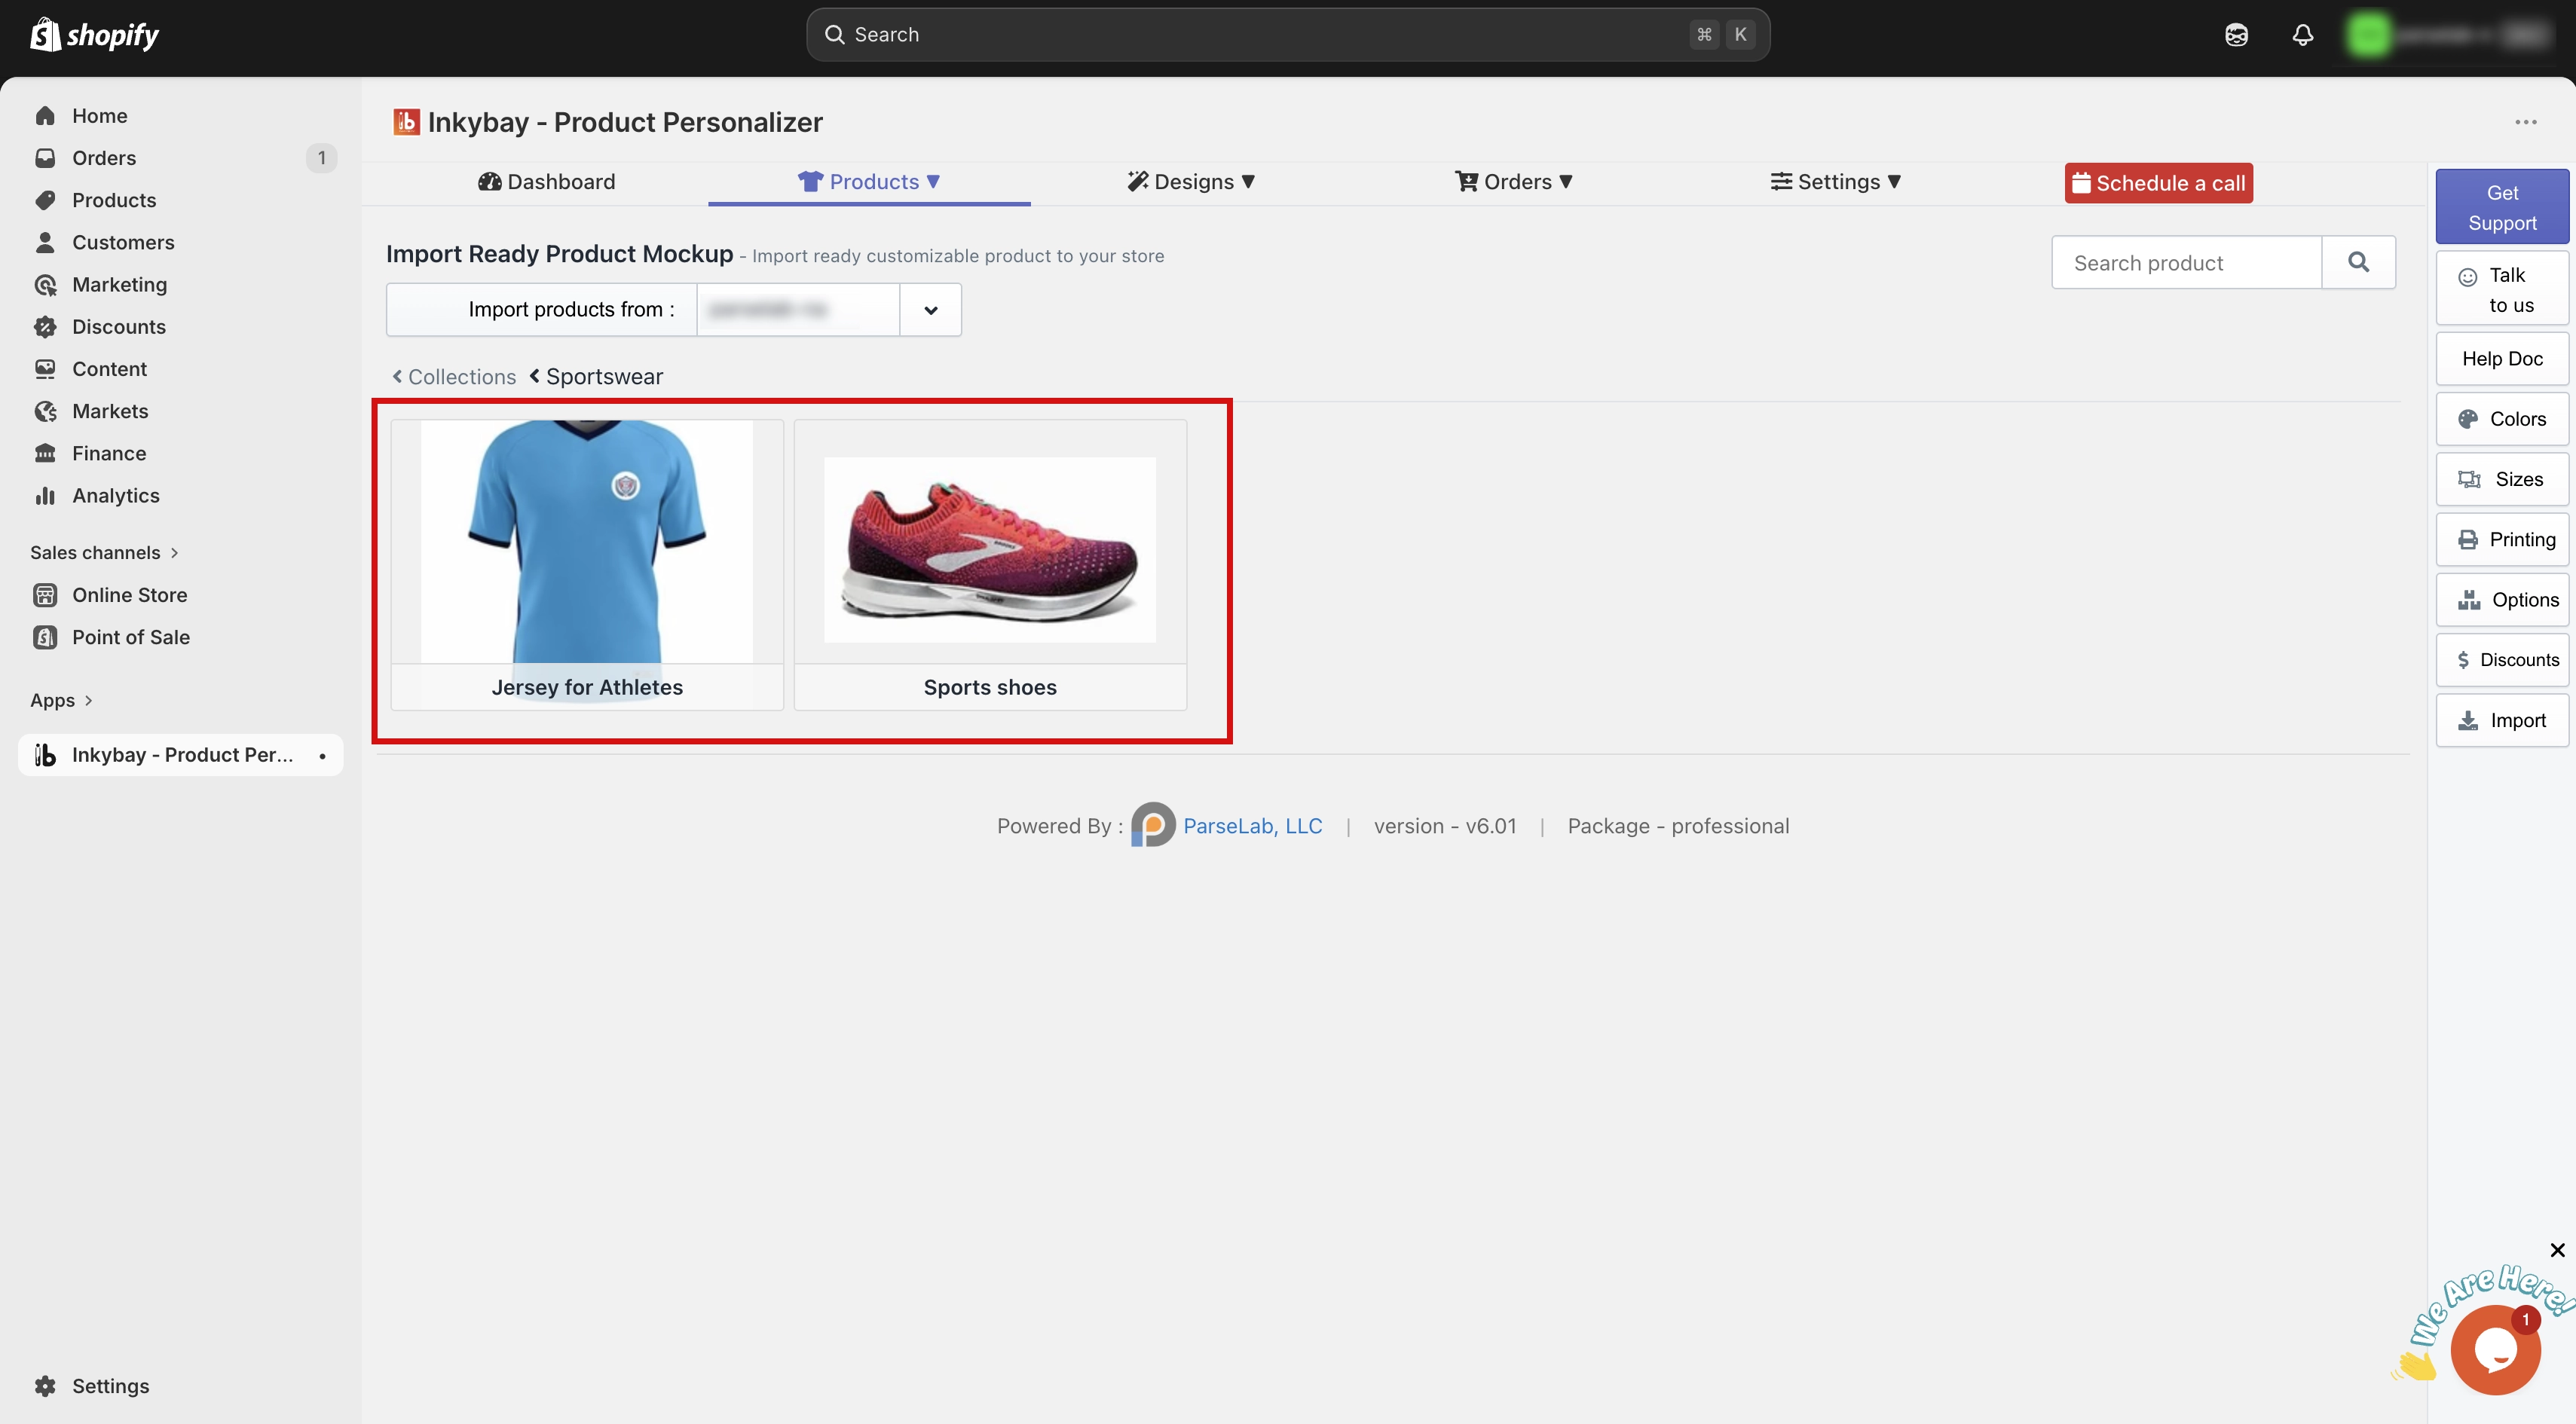
Step 5: Select a product. Click on the product you want to import. Then choose the collection in your store where you want to place it.
Step 6: Create the product. Click the Create New button. The product will be imported into your store.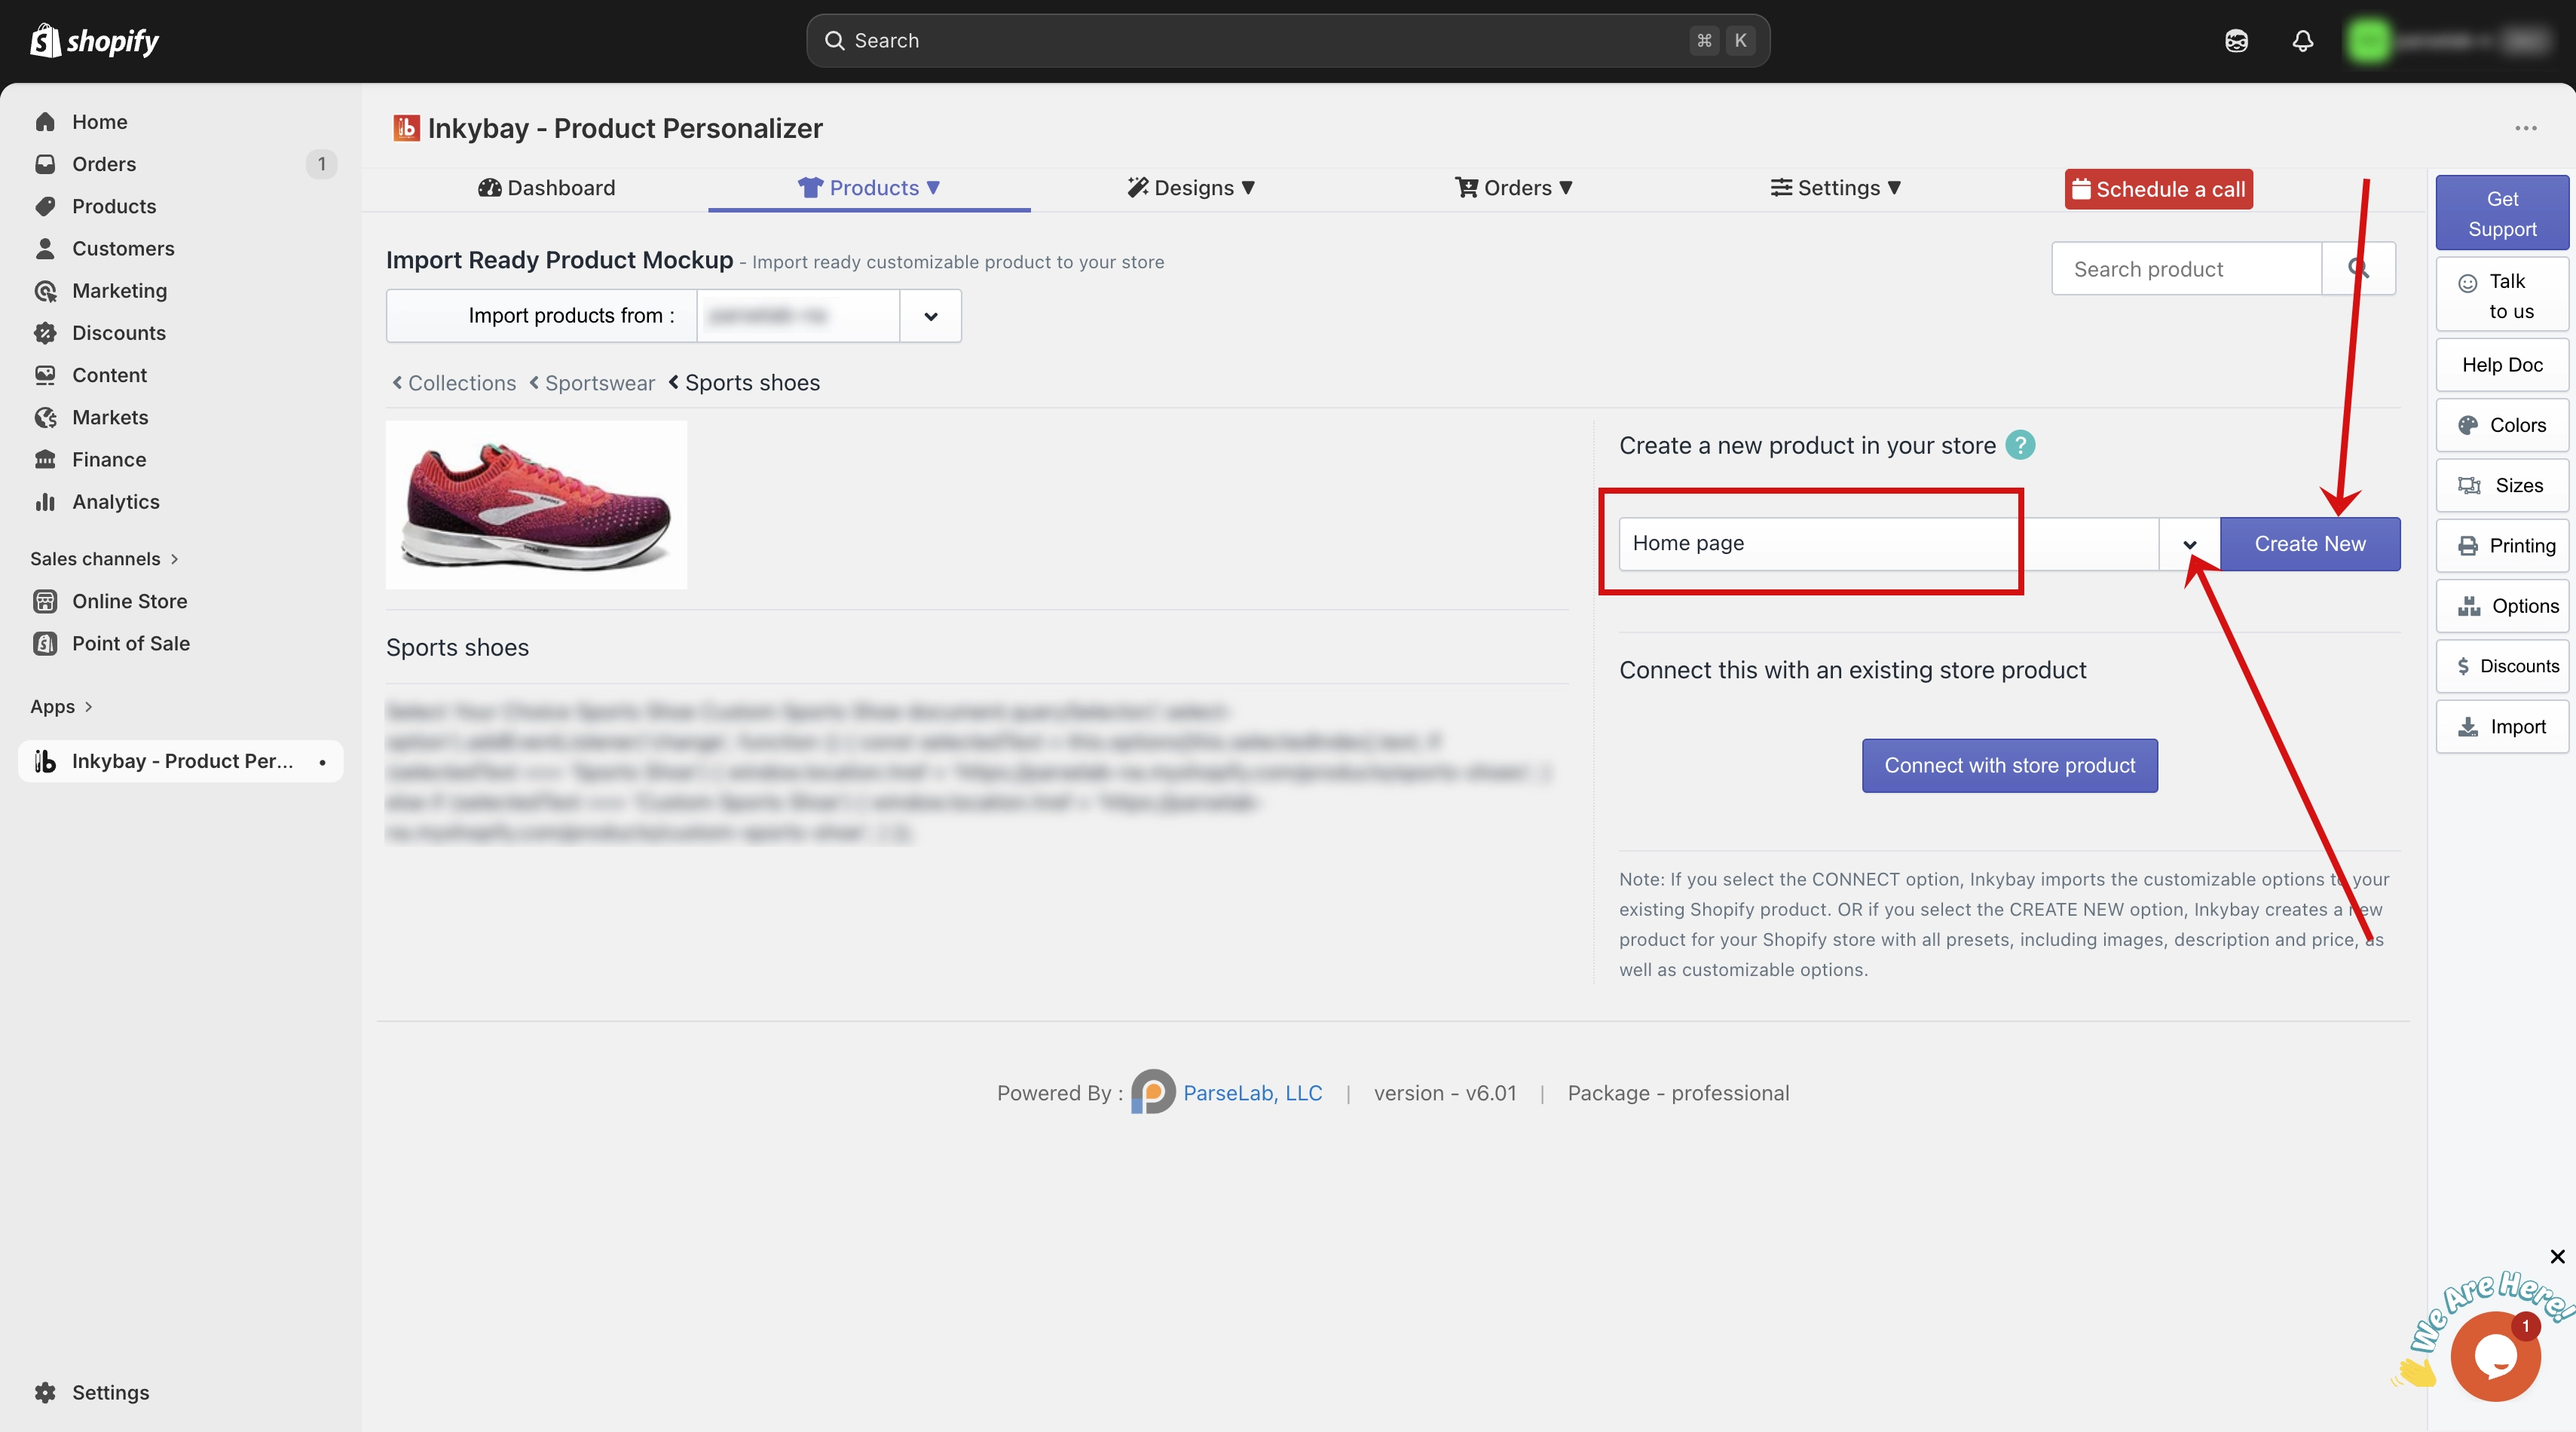
🎯 Note: After importing, you will see the same three options from Option 1 — Edit This Product, View in Design Lab, and Create and Connect Another Product. |
Connect with an Existing Store Product
This option is available for both Option 1 and Option 2. If you already have a product live in your store and want to link it with an imported product instead of creating a new one, use this feature.
Step 1: Click the Connect with Store Product button. This will open your existing product list.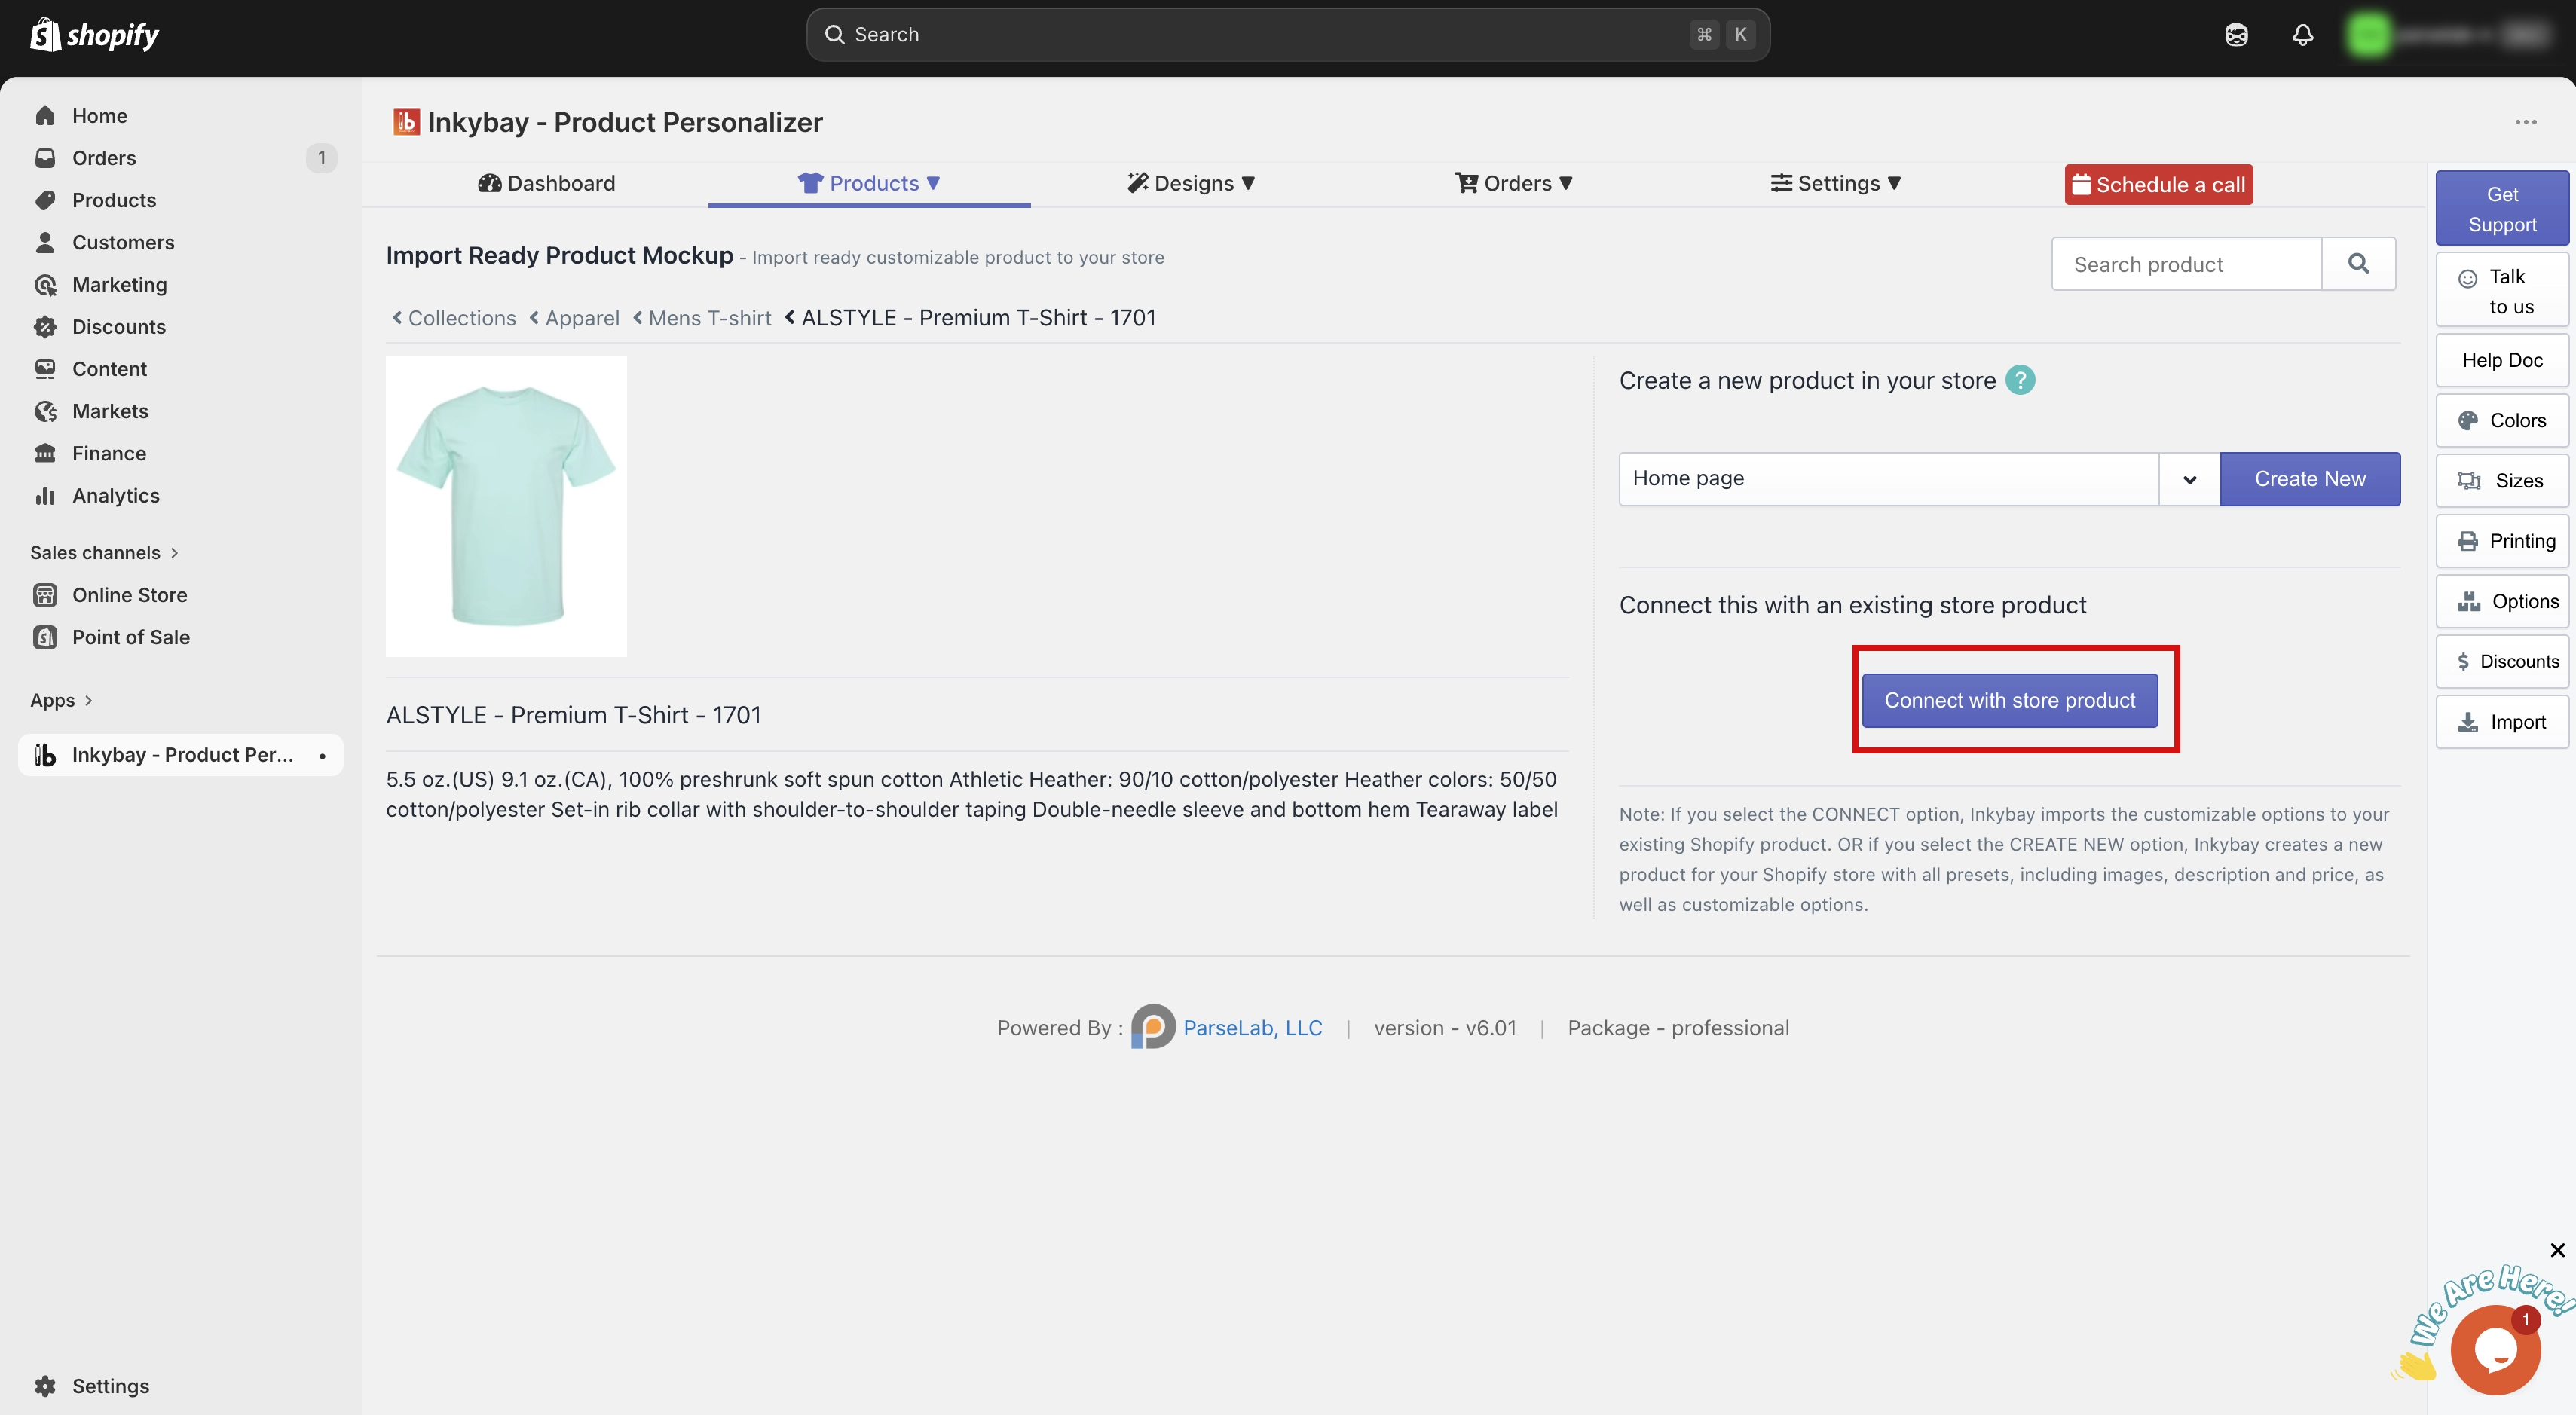
Step 2: Filter and find your product. You can also filter the list by selecting a collection from the collection list to narrow things down.
Step 3: Choose a product. Select the product you want to connect with. It will automatically link with the imported product, carrying over all customization setups, including product color variants and other configurations.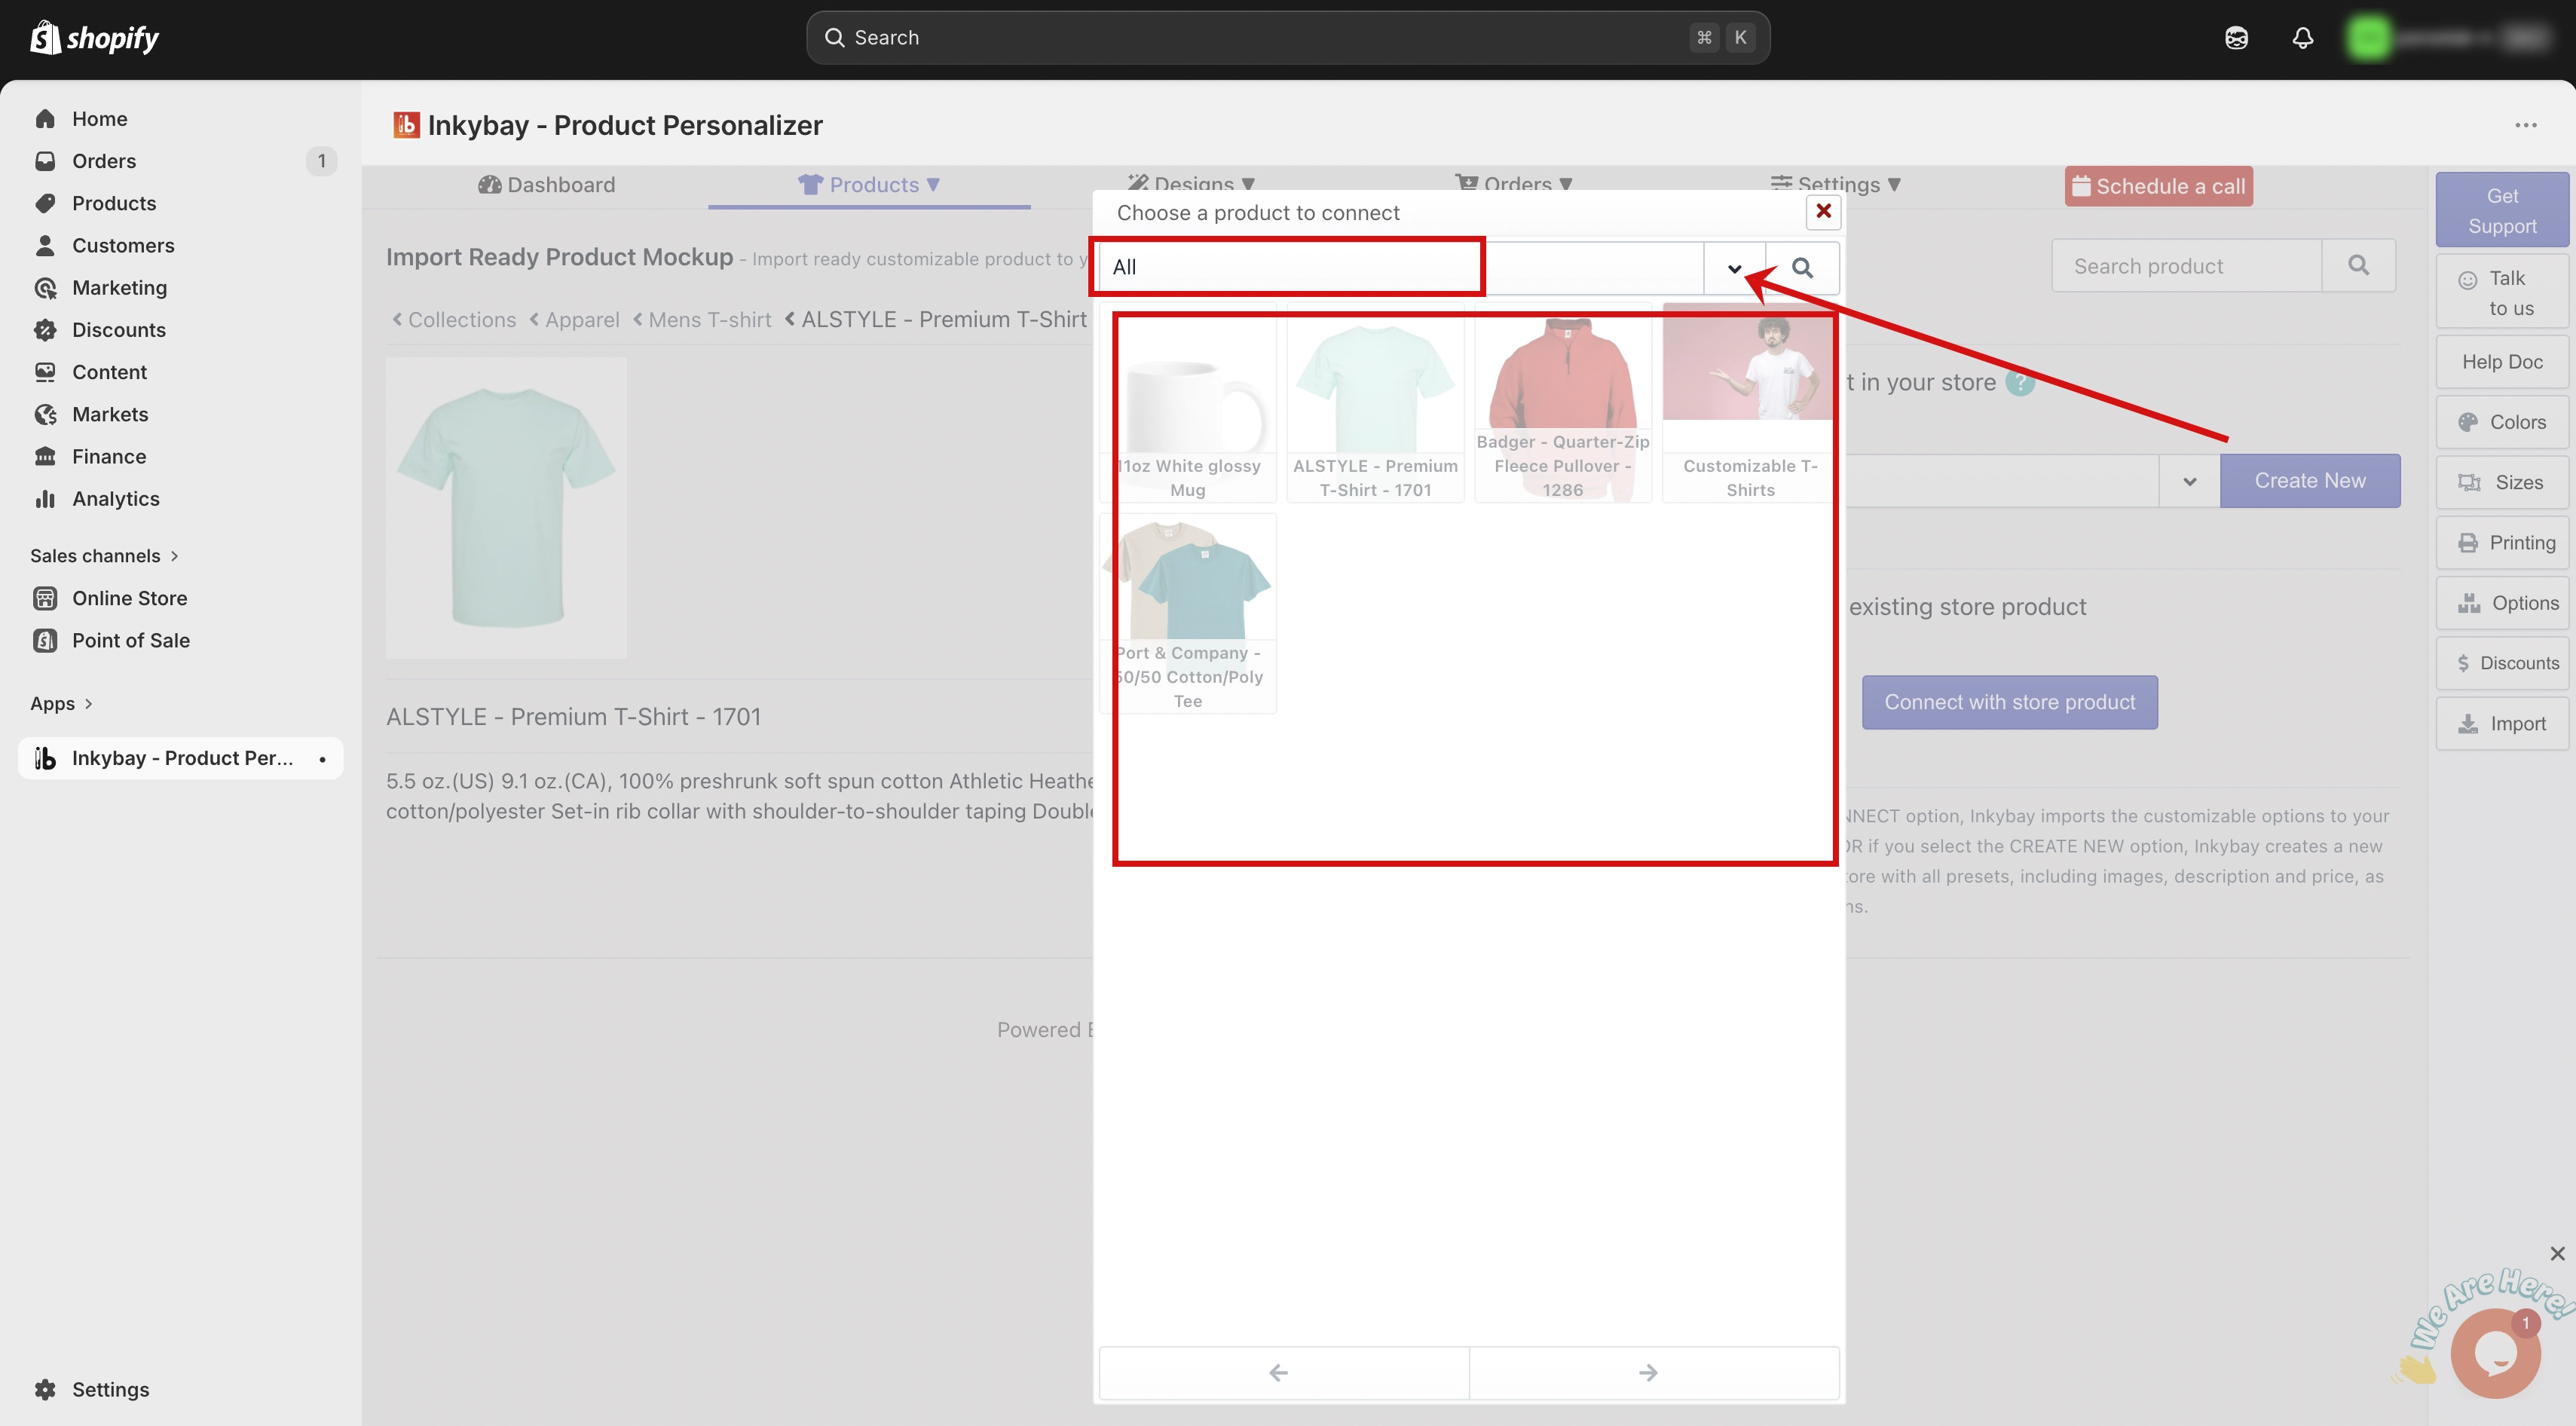
🎯 Note: Use this option when you want to apply an imported product's full setup to a product that is already live in your store, instead of adding a new one. |
Need more help? Feel free to contact us whenever you face any issues or need assistance. We're available 24/7. You can also reach us:
InkyBay app Live chat
Support ticket from the InkyBay app
Email to support@productsdesigner.com