Category
2 min to read
Last Update on 05 May 2026
How to Set Printing Price per Color
This option allows you to set up, manage, and configure tiered custom pricing based on the number of print colors (ink colors) used in the customer’s design and the quantity of products ordered.
Key settings of Price per color are:
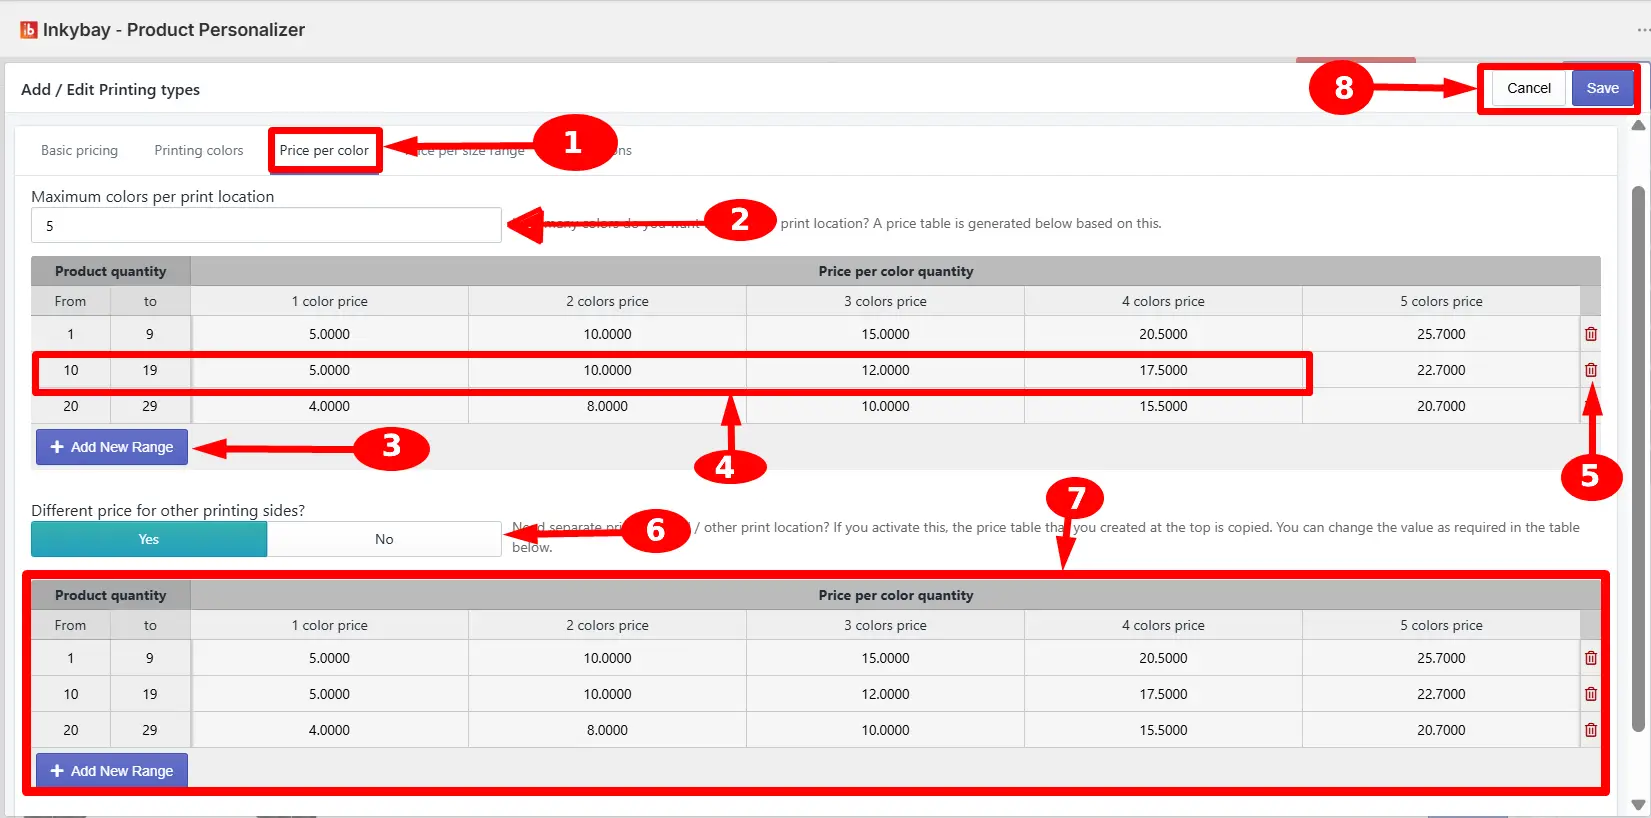
Price per colors tab - Click the tab to set up a customization price based on the number of print colors.
Maximum colors per print location - Enter the maximum print colors per print location. Based on this number, a pricing table will be generated below.
🎯Note Customers will not be able to use more colors than you set the limit on any single print location. |
+ Add New Range - Click the button to add a new quantity range row to the pricing table.
Price input table - Based on the specific combination of product quantity range and color count, enter the per-unit customization price.
Trash icon - To remove a row, just click the trash icon.
Different price for other sides? - Select Yes to apply a separate pricing table for the second and any additional print locations. Suppose your Back print pricing differs from your Front print pricing.
🎯Note
When set to Yes, the table from the first print location is copied automatically as a starting point, and a second table appears below for you to modify independently.
Second print location pricing table - Set the price and click + Add New Range as you’ve done for the first pricing table.
Save Changes - Click the button to save all pricing configurations on this tab.
Still, facing difficulties or need help? Feel free to contact us. You can also reach us:
InkyBay app Live chat
Support ticket from InkyBay app
Email to support@productsdesigner.com
Did this post help you?