Category
7 min to read
Last Update on 05 May 2026
How to Upload Custom Clipart in InkyBay
Provide ready-to-use graphics to your customers so they can use them to design their products. The feature makes the design process fast and user-friendly.
You can upload clipart, change the clipart title, its category, and add additional prices for the cliparts.
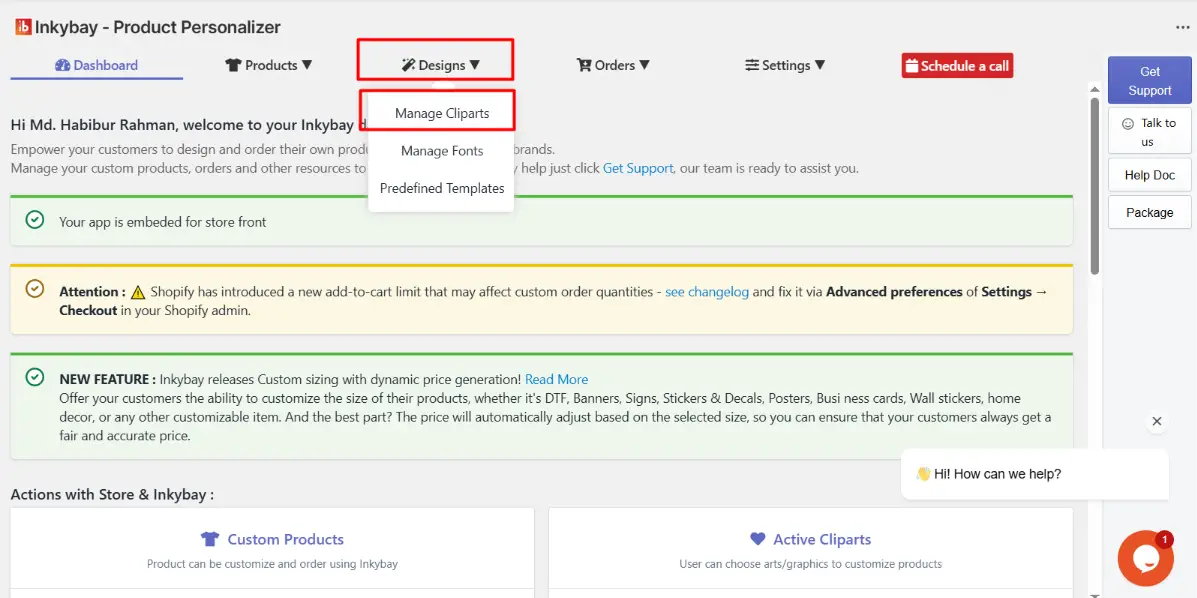
How to Access Manage Cliparts
View, edit, organize, remove, or add a price to cliparts that are already uploaded in the InkyBay designer library.
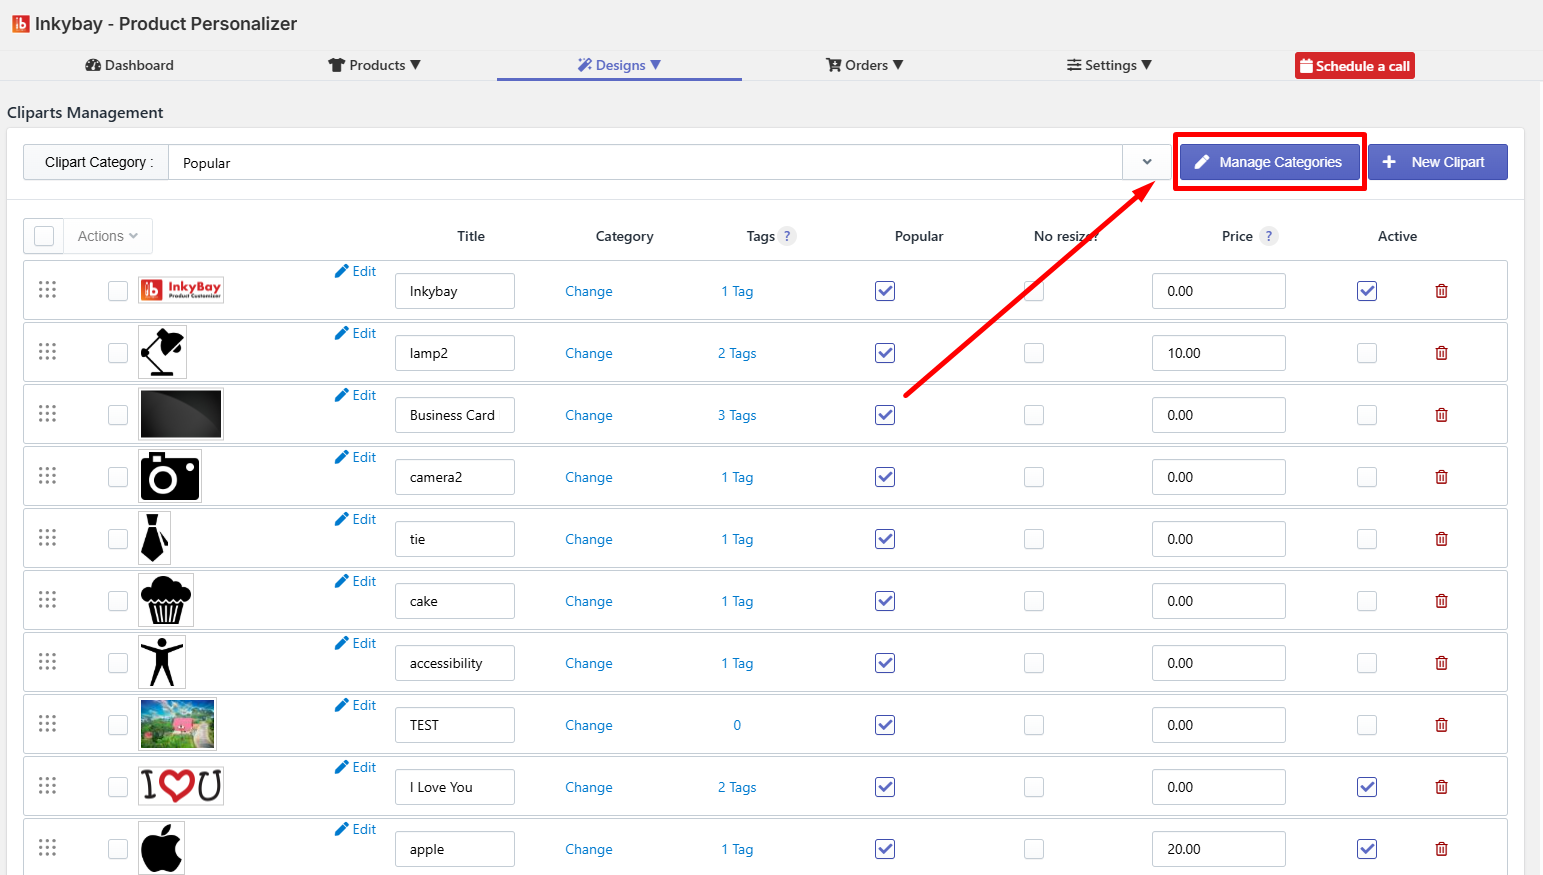
Step 1: Go to Designs settings and select Manage Cliparts.
Step 2: Manage Cliparts settings.
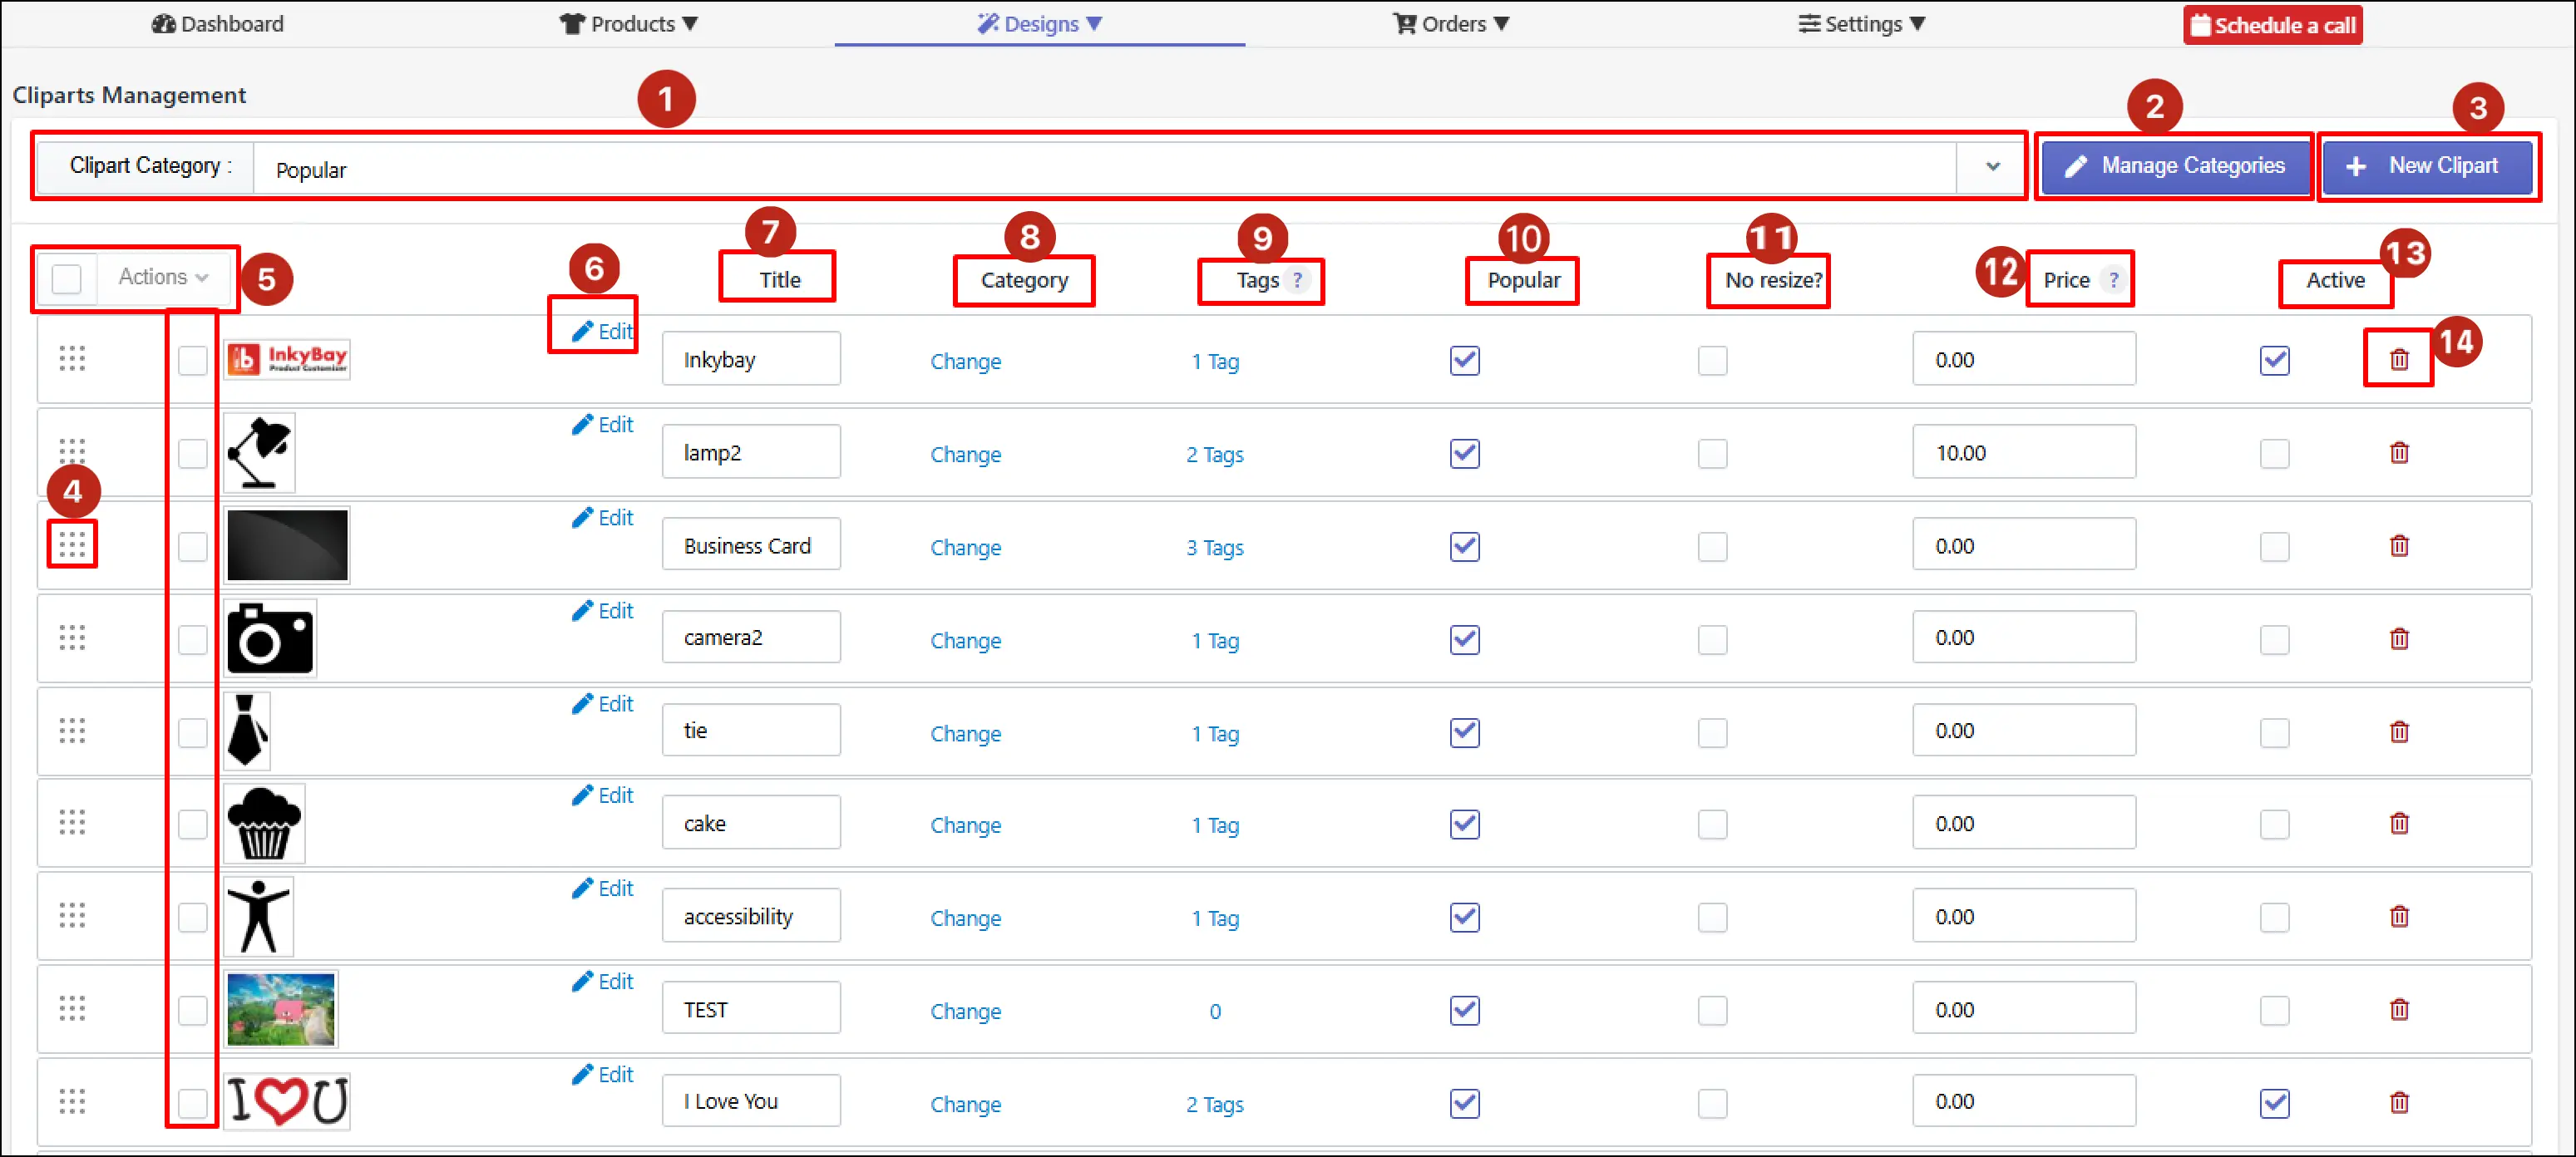
Clipart Category filter - Use the category dropdown to filter the clipart list by a specific category. In the example, the list is currently filtered to show the Popular category.
Manage Categories - Click Manage Categories to open the category management panel, where you can create, rename, reorder, and delete clipart categories.
+ New Clipart - Click + New Clipart to upload a new clipart asset to the library. This opens the clipart upload panel, where you provide the asset file, title, category assignment, tags, pricing, and active status for the new entry.
Drag handle (reorder) - Click and drag the dotted grid handle on the far left of any clipart row to reorder it within the list. The order set here determines the display sequence of clipart assets within a category in the customer-facing design tool.
Bulk select checkbox and Actions - It helps to take bulk actions. Select multiple cliparts, and choose an option from the Action drop-down menu.
Edit - Click the edit button on any clipart row to open the full edit panel for that asset. From the edit panel, you can replace the clipart image file, update its title, reassign its category, modify tags, adjust pricing, and change its active status.
Title - You can change the Clipart asset title from here.
Category - The category Change option allows you to change the category/ or subcategory assigned for that clipart.
Tags - You can add or remove Tags from clipart. Tags help your customers to find clipart easily.
Popular - Check the Popular checkbox to define that the clipart will be added to the popular clipart category. It would not change the original category of that clipart; it will work as an additional category.
No Resize? - Prevent customers from stretching, scaling, or altering the size of specific cliparts or custom graphics once they are added to a product in the DesignLab.
Price - If needed, you can add additional Price here. This additional price will be added if your customers use that clipart on a product.
Activate/ Deactivate - Check the checkbox of a clipart to make it visible and available to customers in the design tool. Only activated cliparts will be shown on the Designer Page.
Trash icon - Click the red trash icon to delete clipart.
How to add a new clipart/graphic
InkyBay has a bunch of preloaded clipart. You can easily upload your own vector (SVG) or raster (JPG & PNG) cliparts to your Shopify store.
When you upload Vector files as clipart/graphics, your customers will have access to change the color of the clipart/graphics. On the other hand, Raster file colors can’t be changed.
🎯Important
|
To add new clipart, follow the steps:
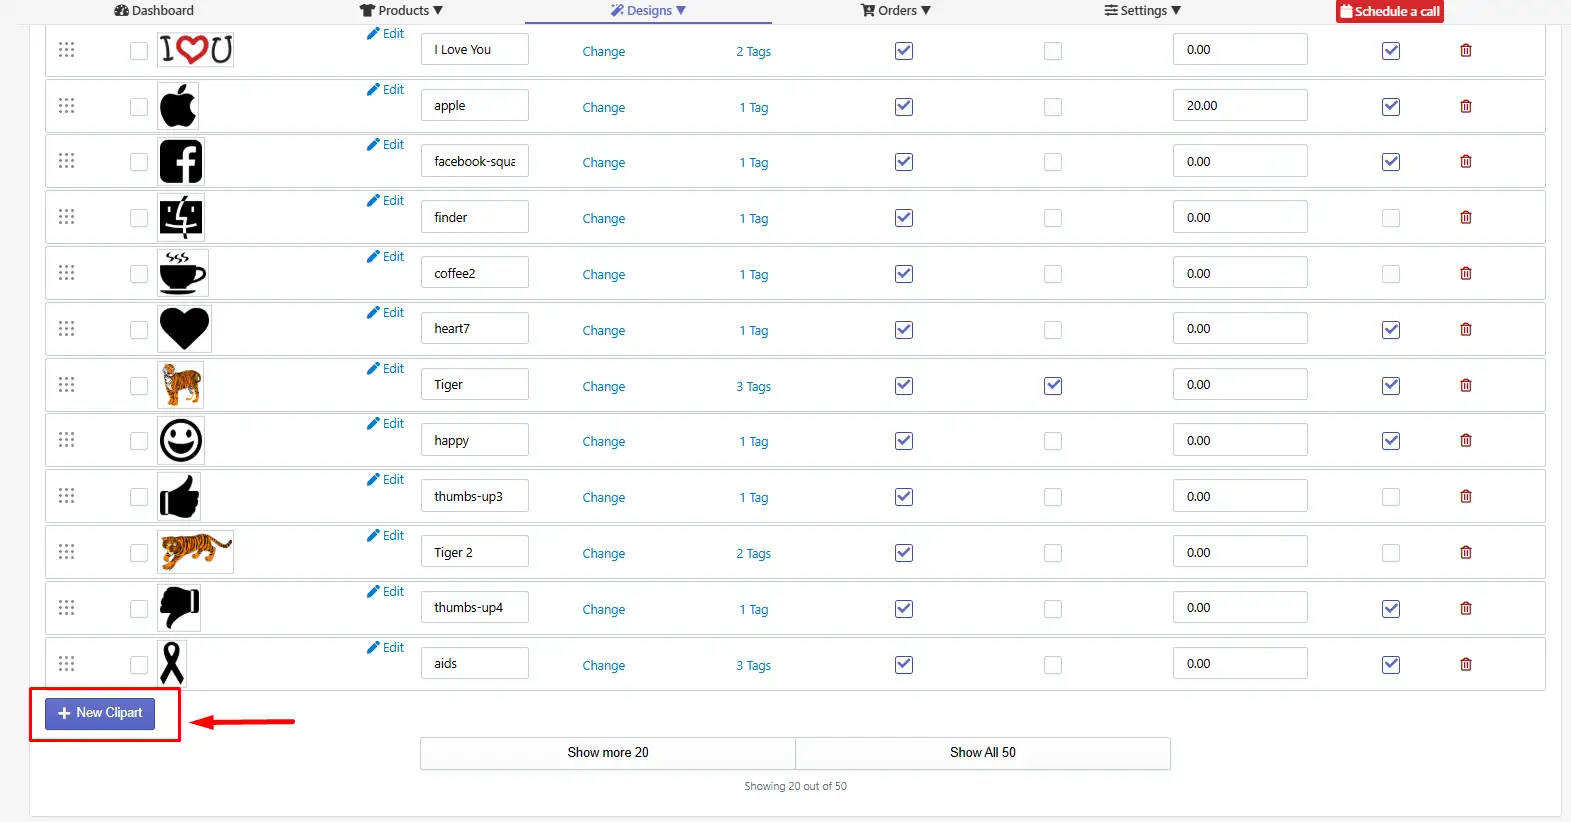
Step 1: In the Manage Cliparts page, click the + New Clipart button as shown in the image below.
Step 2: Select your clipart type (e.g., Vector clipart or Raster Clipart).
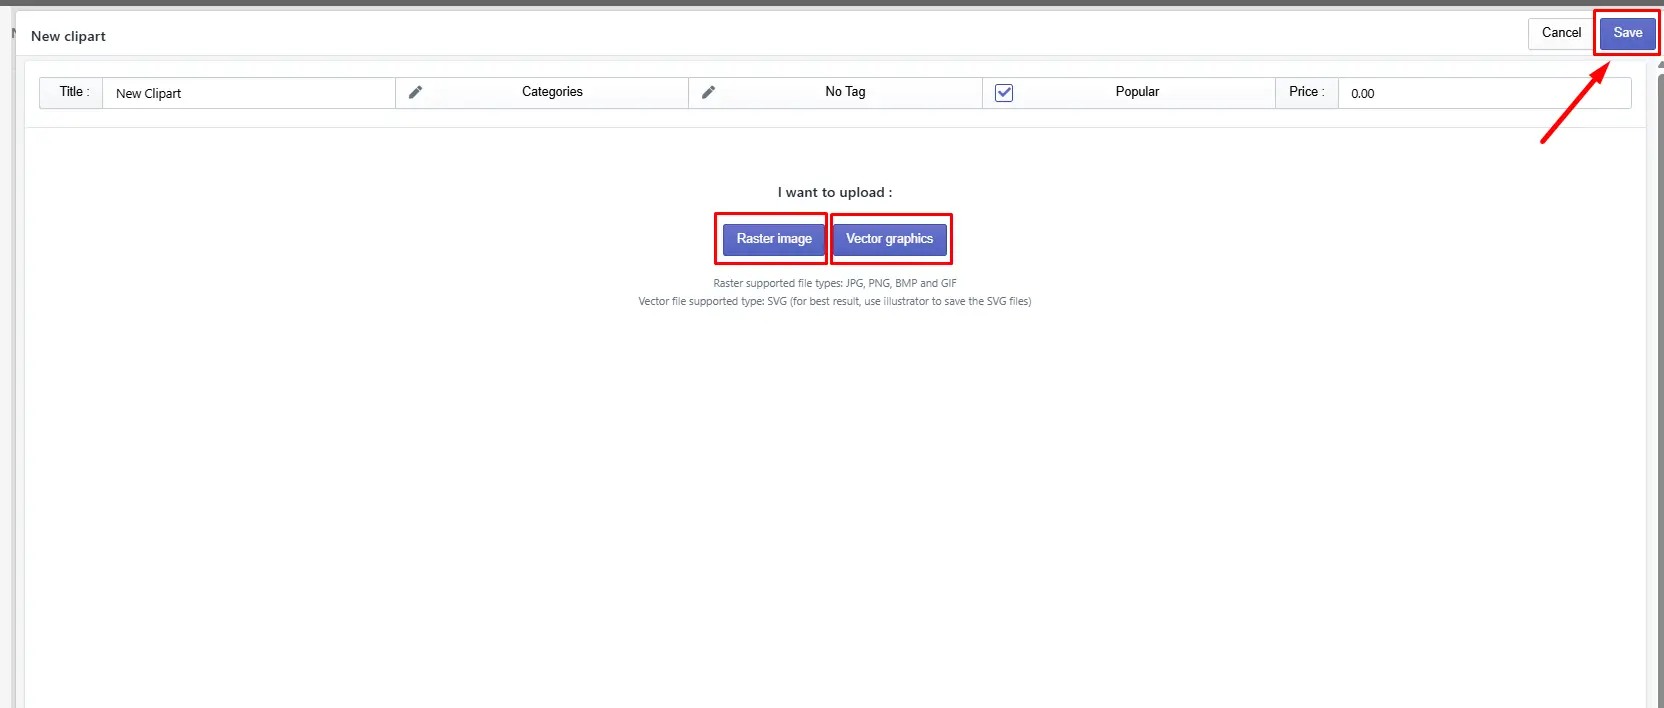
Step 3: Upload cliparts and click the Save button. [Note: Check out how to add Raster & Vector clipart for in-depth details.]
How to add raster clipart
Select Raster clipart for JPG or PNG image format.
Step 1: Click Change/Upload clipart, choose your file from your device, and select Ok.

Step 2: Set new clipart details as discussed below:
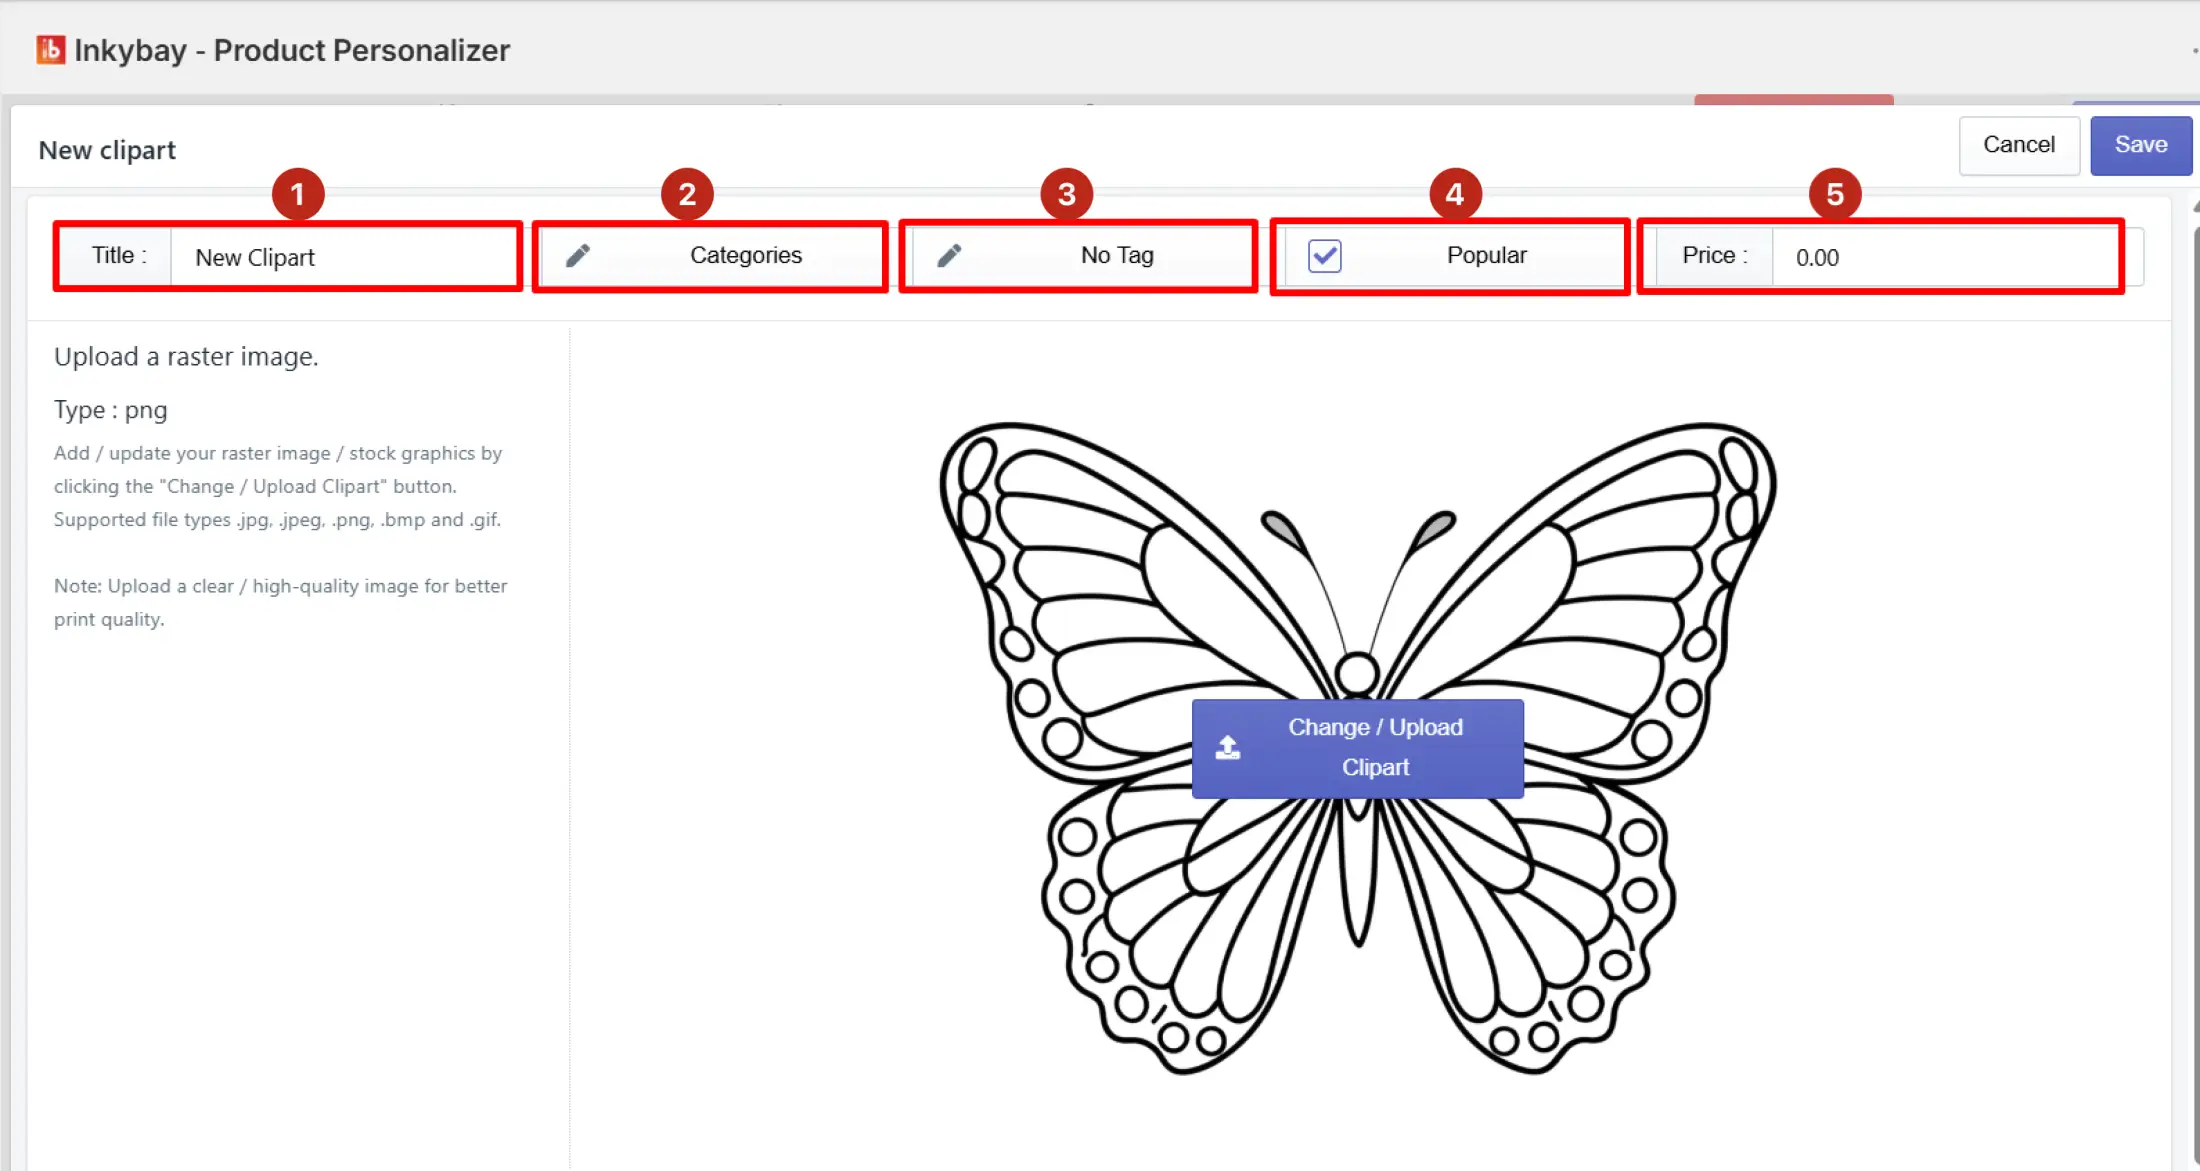
Enter Clipart Title
Select Category
Add Tags
Check "Popular" (to add to the popular category)
Add Additional Price (if any)
Step 3: Click the Save button to store the new clipart details.
📝Note Supported Raster file types: .jpg, .jpeg, .png, .bmp, and .gif. |
How to add vector clipart
For Vector clipart, choose only the SVG file. A step-by-step guide is shown below:
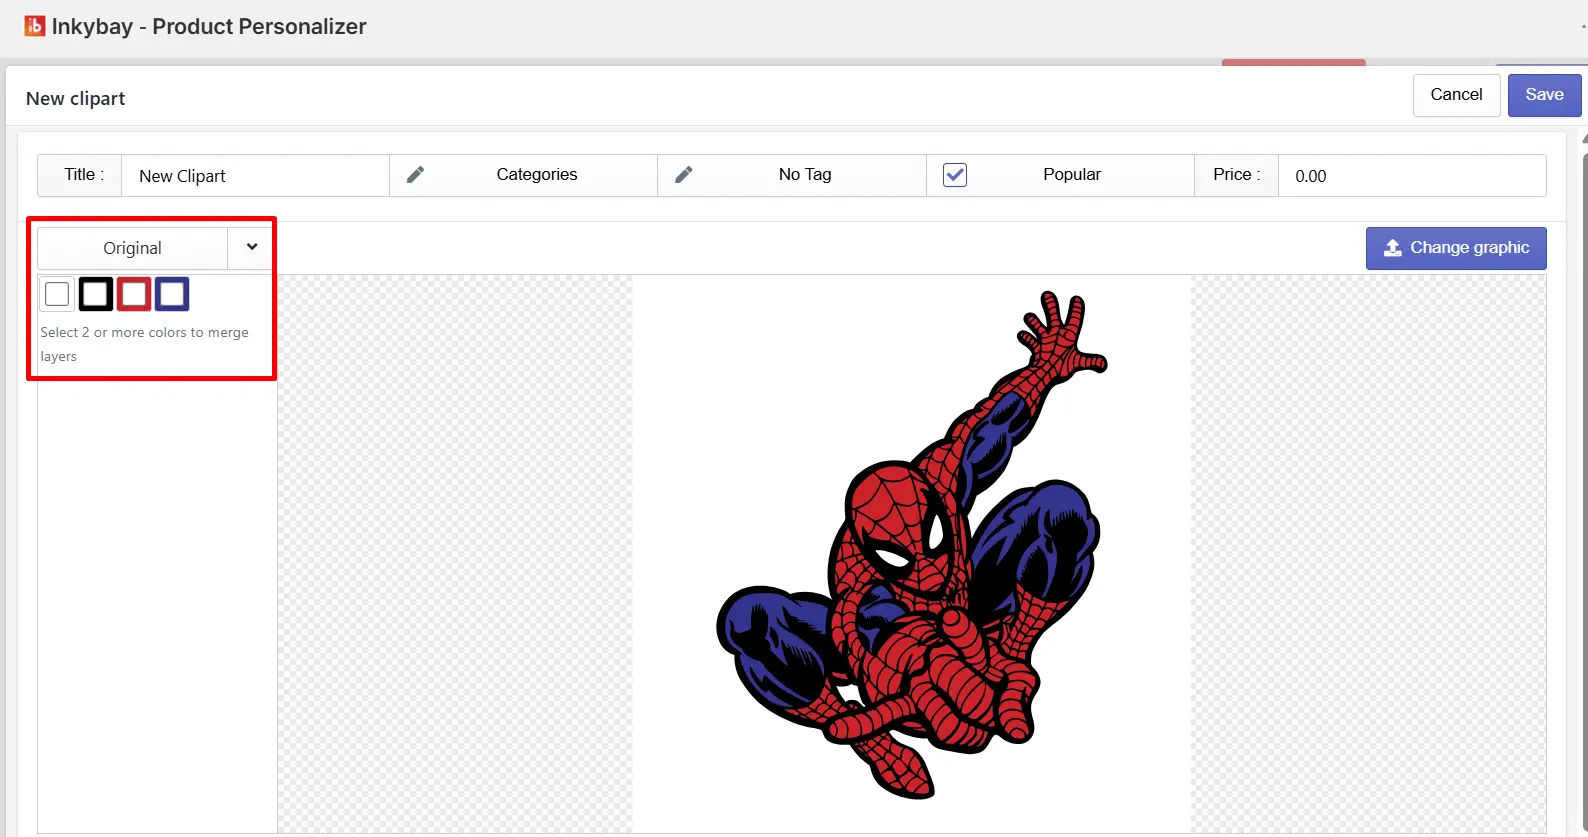
Step 1: Select the Vector Graphic button and then click Upload SVG File.

Step 2: After uploading, you’ll see all the colors used in that clipart. Recheck all color variations and then click the Save button.
Step 3: If you want, you can merge colors to limit the number of colors for the clipart. Must select more than two colors and click Merge Color Layer.
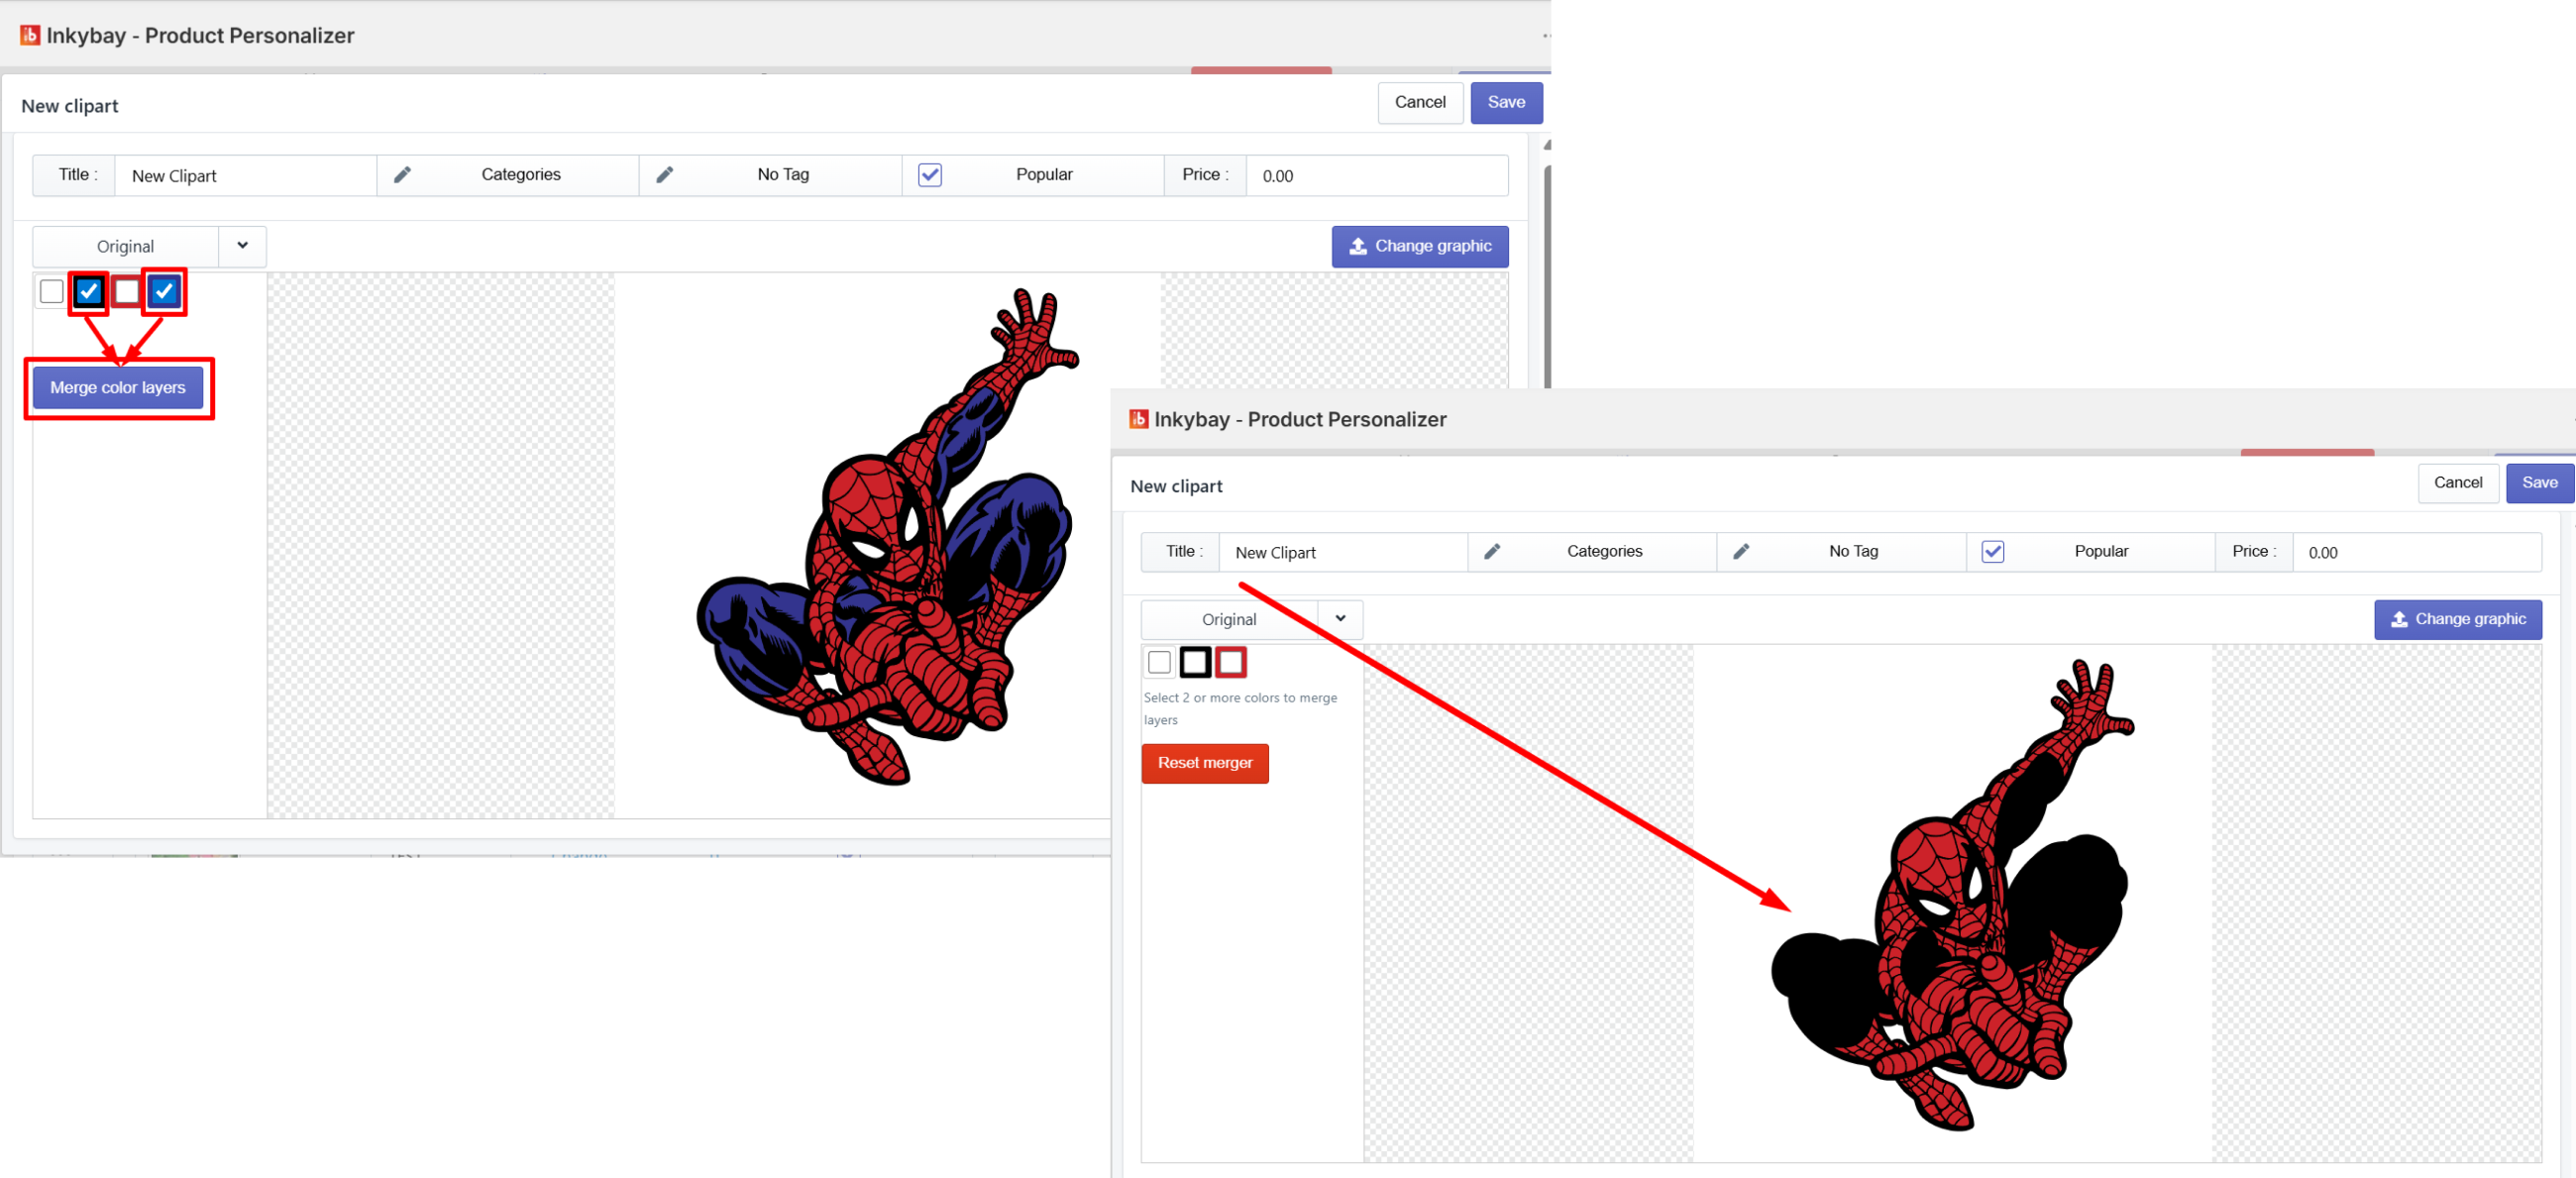
📝Note The color you select first will be the dominant color. For example, if you select Black first, then blue (Image below), the black color will replace the blue color. |
Step 4: Set up additional clipart settings as discussed below:
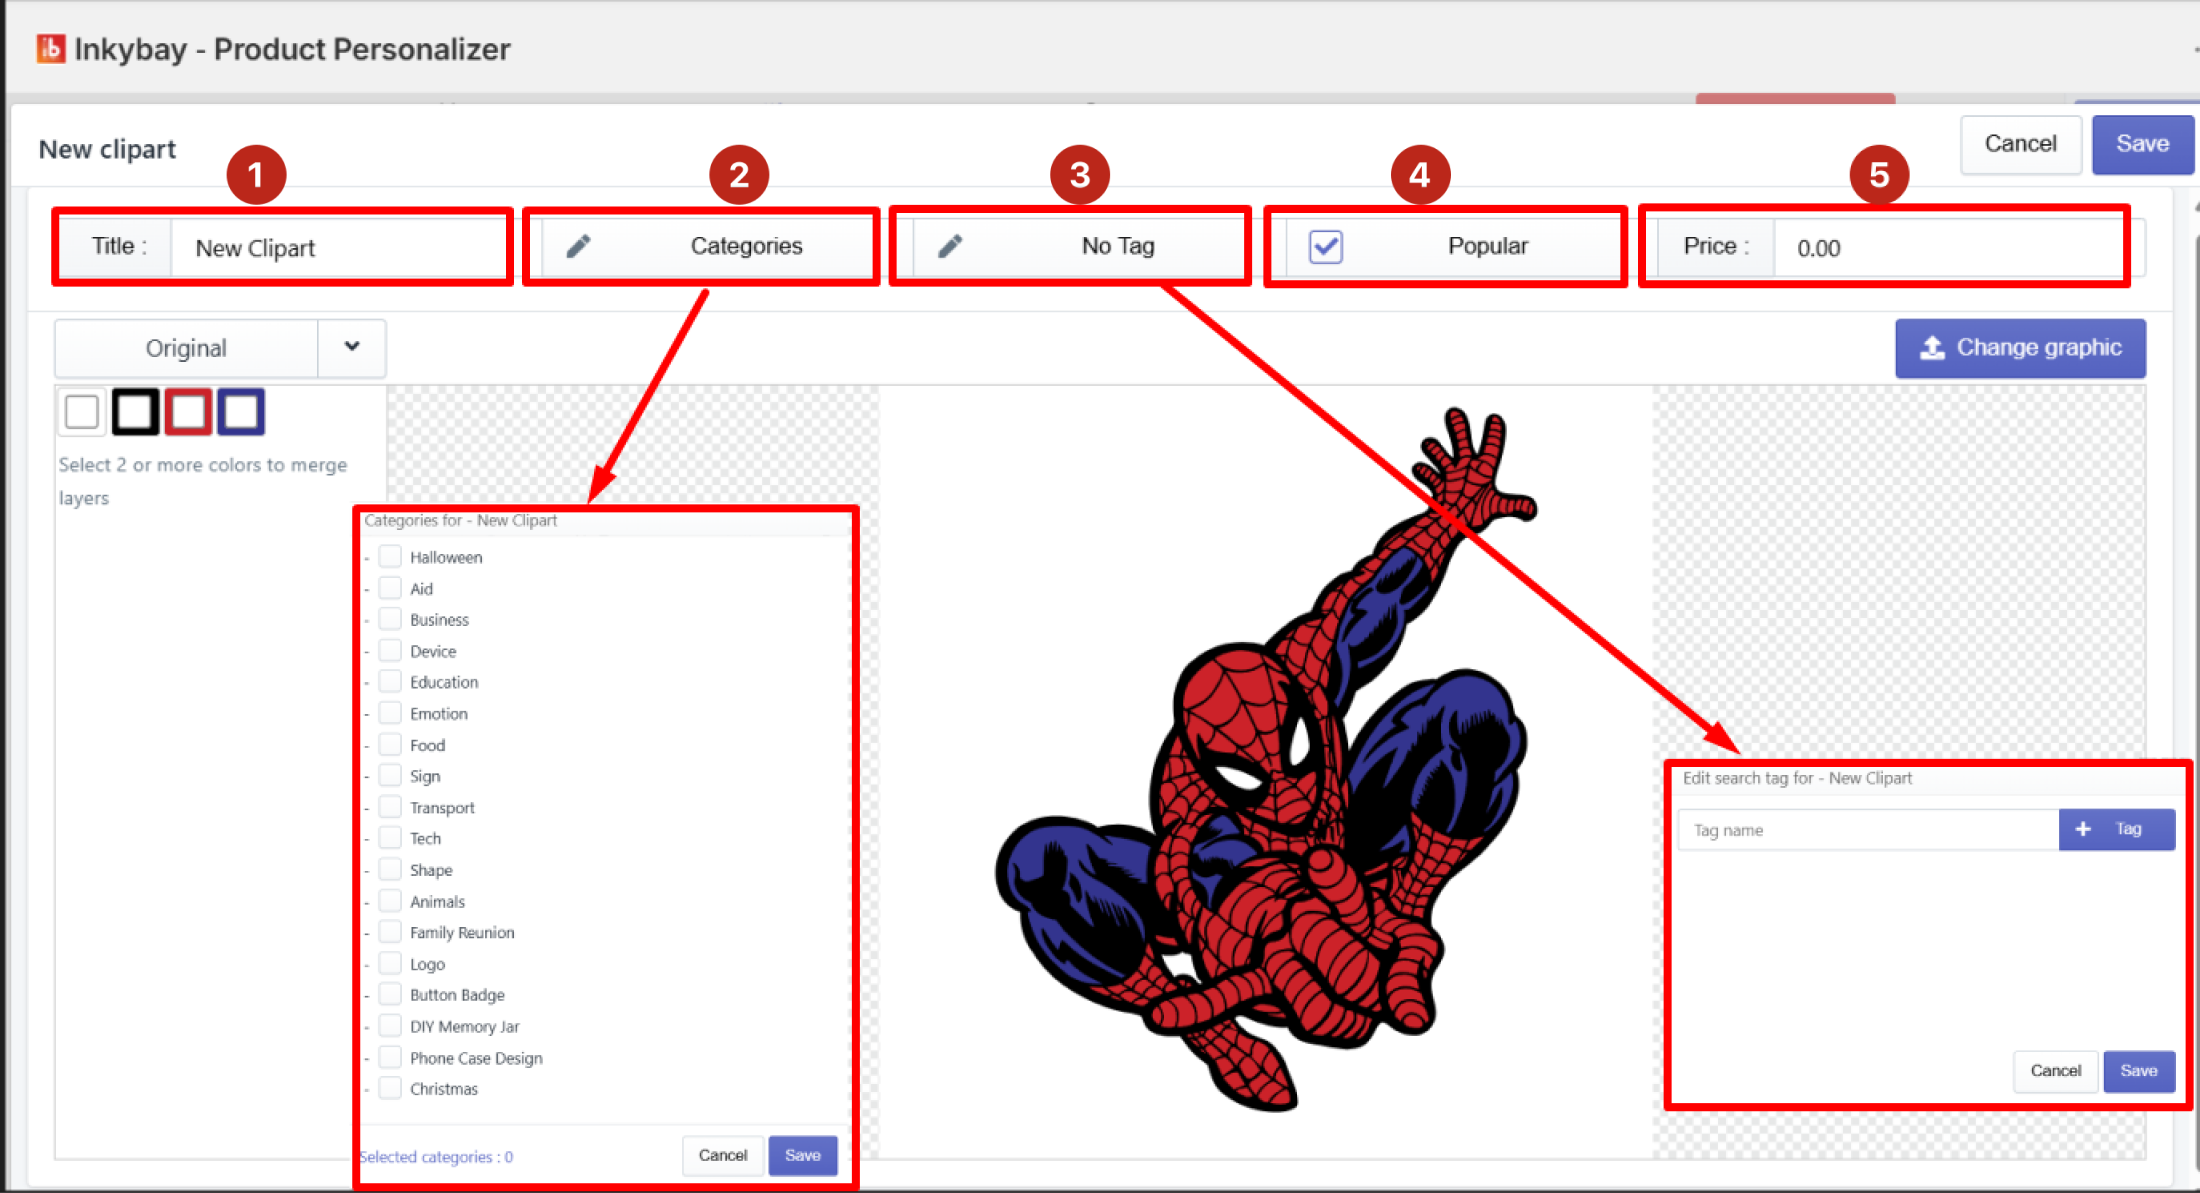
Add a Title: Enter a title in the text field for the clipart you added.
Set Category/Sub-category: Select the category or sub-category where you want to add the clipart. Click the category field to view the list, then choose one.
Add Tags: Click "No Tag" to add a tag name. Tags act as keywords; if a customer searches for a keyword, the associated clipart will be displayed.
Popular: Check the "Popular" box if you want to include this clipart in the popular list.
Add Price: Enter an additional price for the clipart (if applicable).
Step 5: Click the Save button to finish adding the new clipart.
How to Manage Clipart Categories & Subcategories
This option allows you to organize your clipart into categories and subcategories so customers can quickly browse and find specific designs. It streamlines the user experience by making your clipart library easy to navigate.
Example: If you create heart-shaped clipart and add it to a category named 'Romantic,' your customers will easily find it when looking for designs to print on their Valentine's Day gifts.
How to manage existing categories
Follow the steps below:
Step 1: From the Designs menu, select Manage Categories option.
Step 2: Each row in the list shows existing clipart categories' option details:
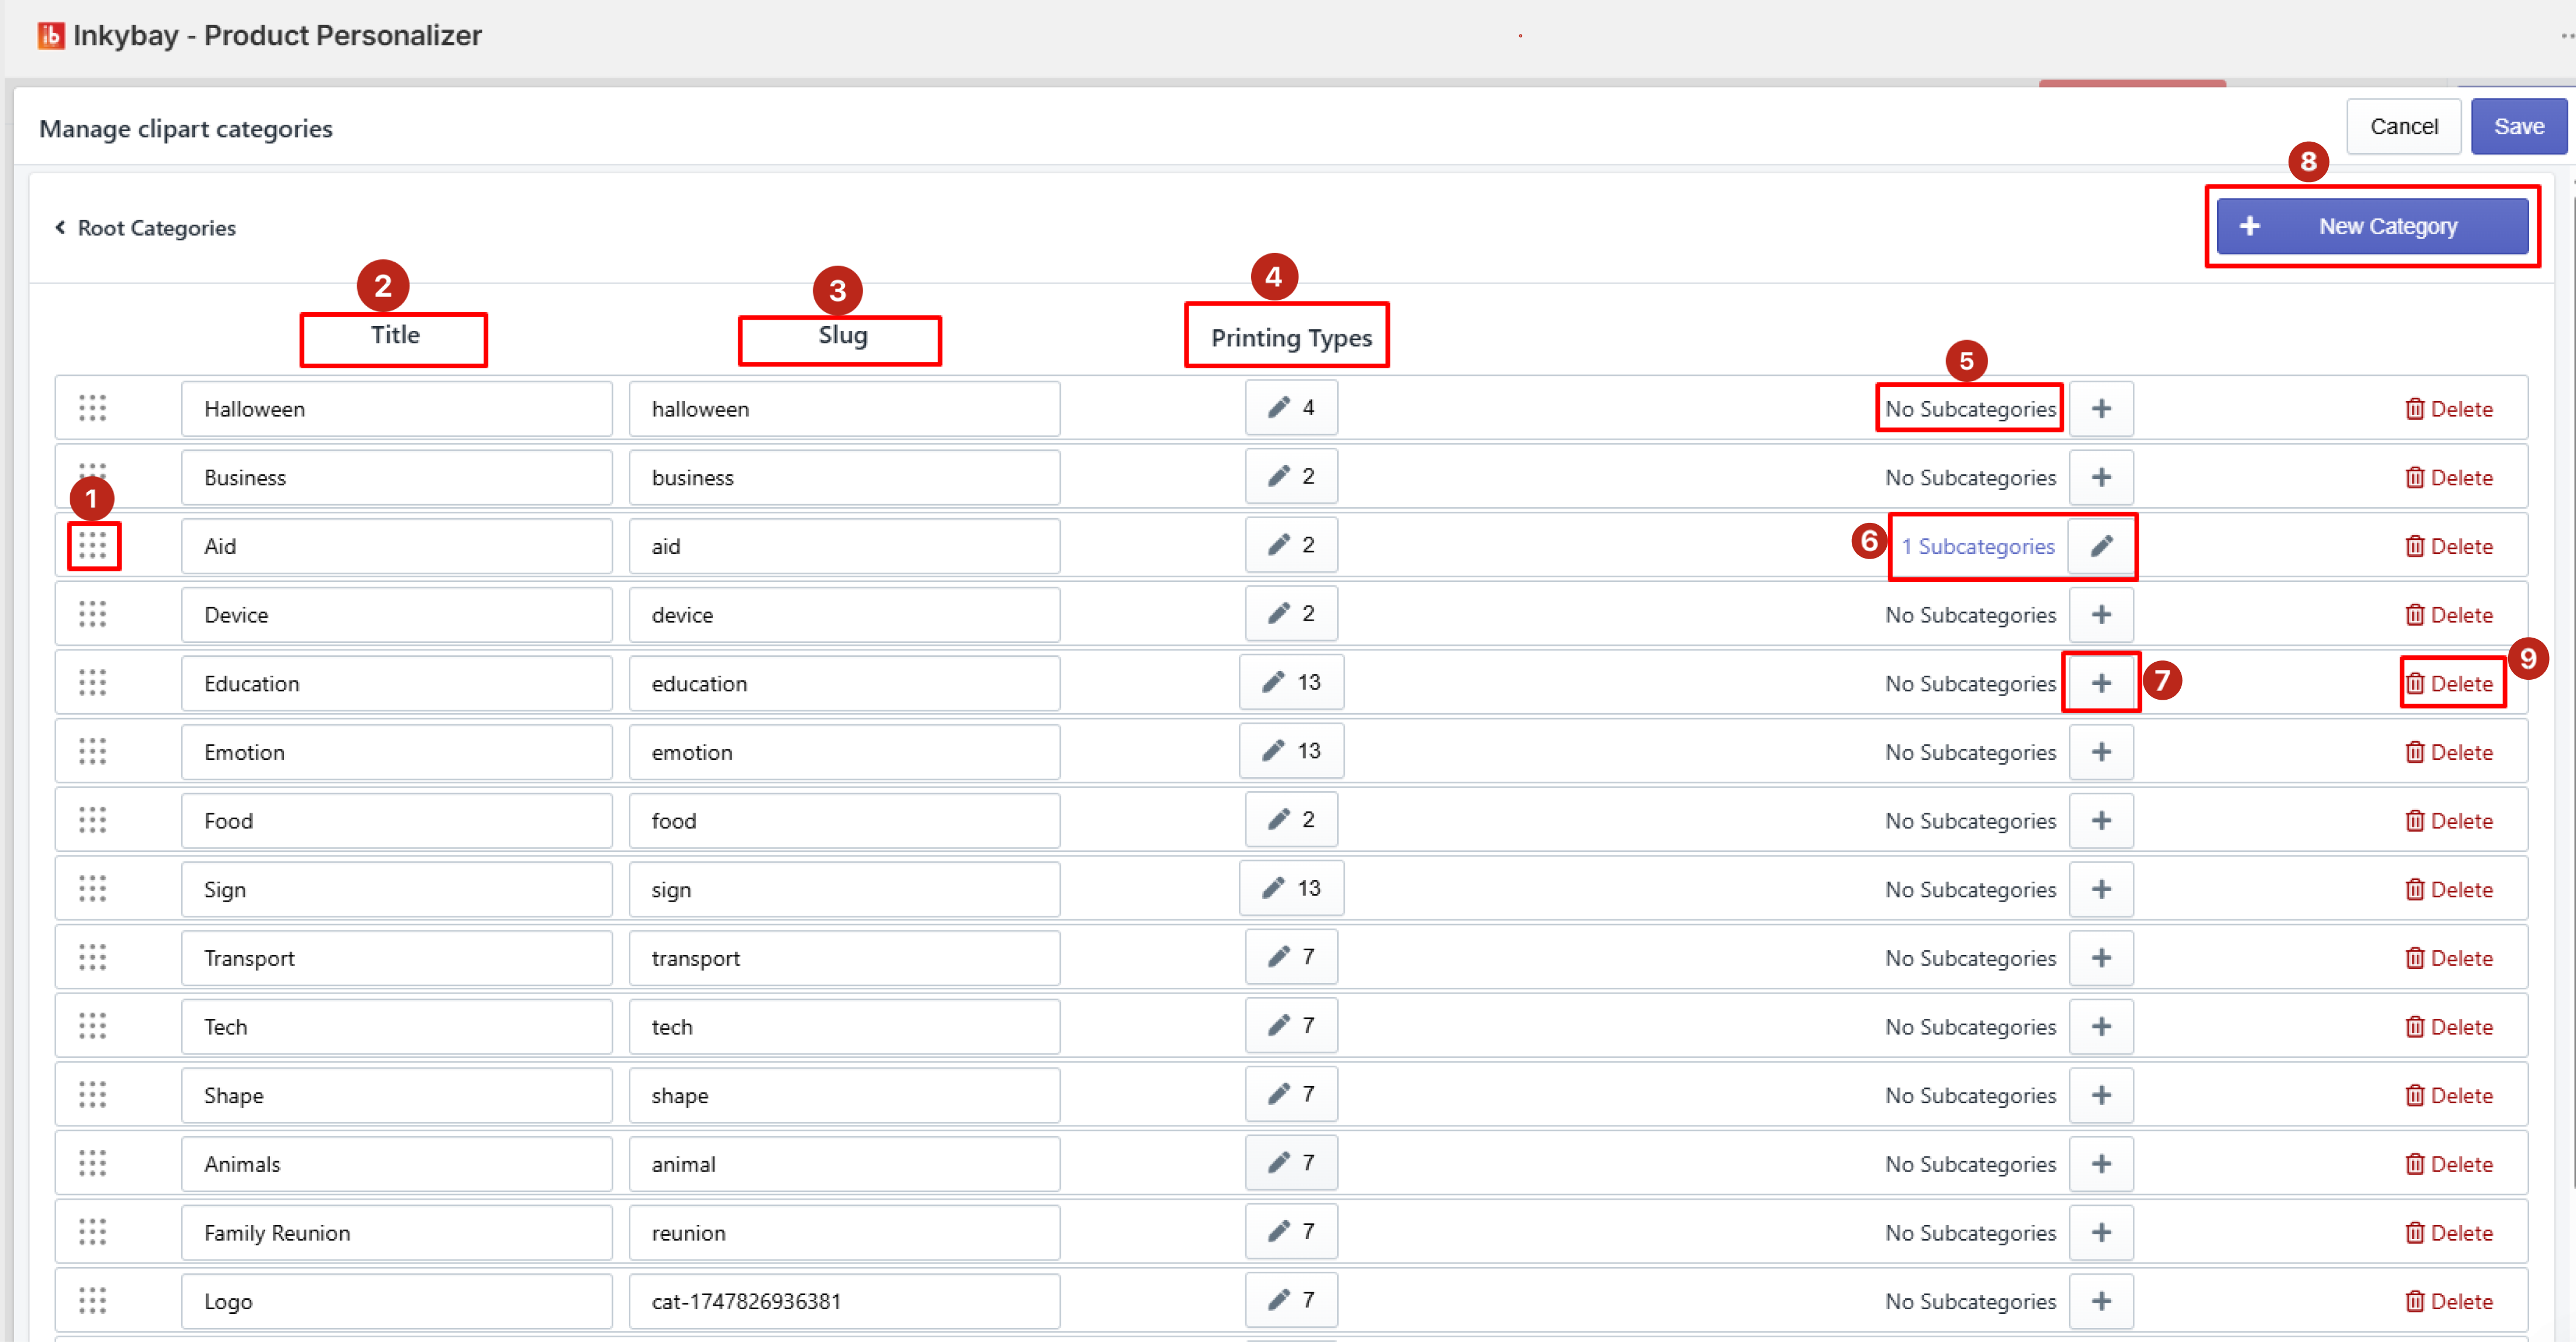
Reorder: Click and drag the dotted grid icon to reorder the category. The order set here determines the sequence in which clipart categories will appear in the designer tool.
Clipart title: Edit existing clipart title.
Slug: Edit the slug name of the individual clipart.
Printing types: Add clipart printing types.
No Subcategories: Displays the subcategory status of the individual category. Once a subcategory is added, the No Subcategories indicator updates to reflect the subcategory count.
Edit Subcategories: Click the edit icon to add changes.
Add Subcategories: Click the “+” icon to create one or more subcategories under a specific category.
New Category: Click the button to add a custom category in your clipart category list.
Trash icon: Click the red trash icon to delete clipart categories.
Step 3: Click the Save button to save details.
How to create a new subcategory
Follow a simple step-by-step guide to create a new sub-category from scratch:
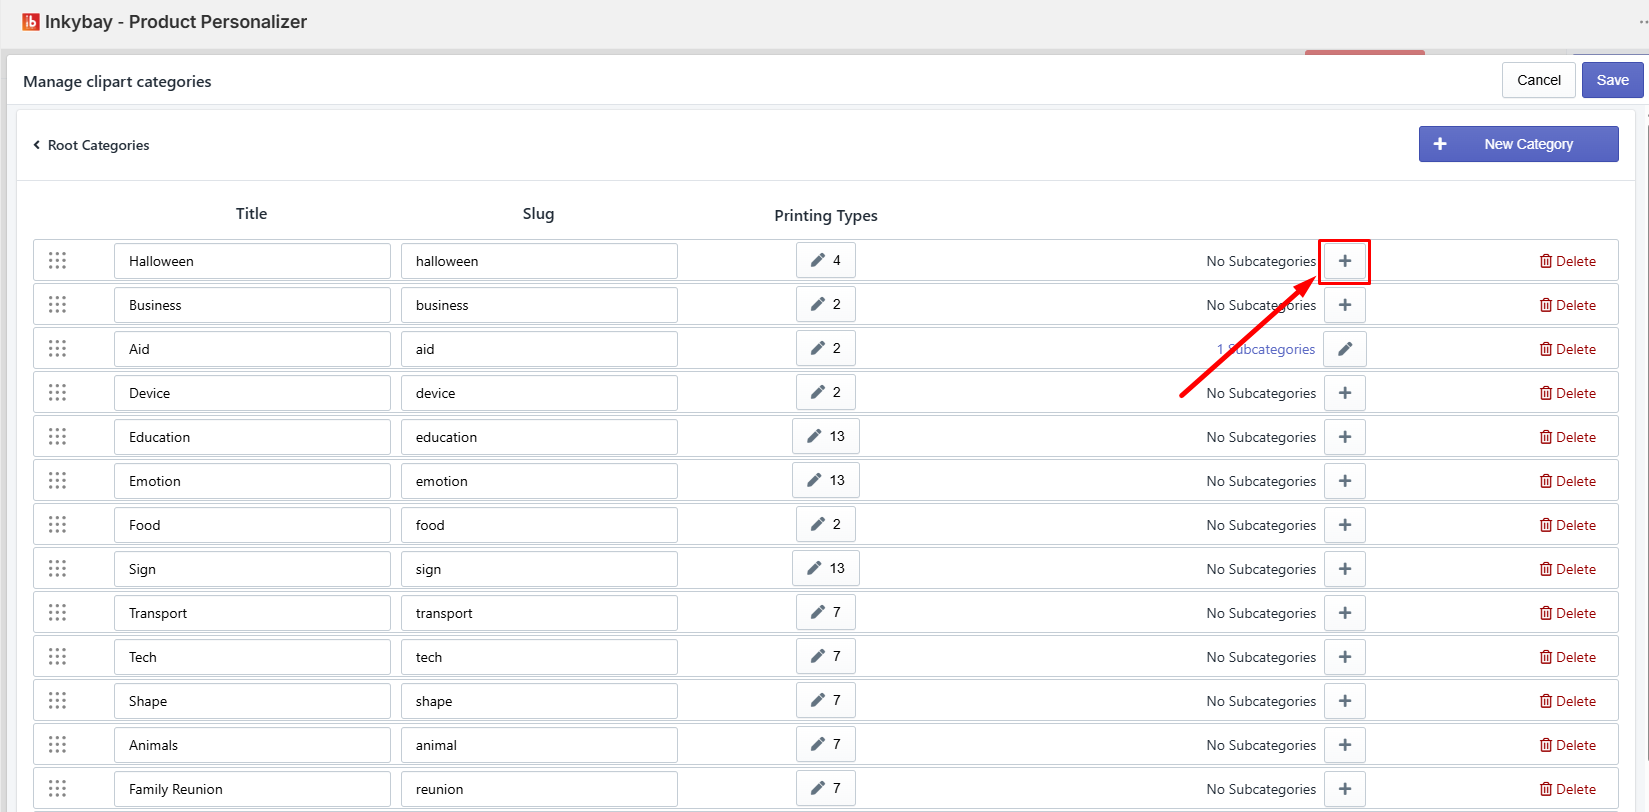
Step 1: Click the "+" icon next to "No Subcategories" within the Manage Categories panel.
Step 2: Enter all new subcategory details as highlighted in the image below:
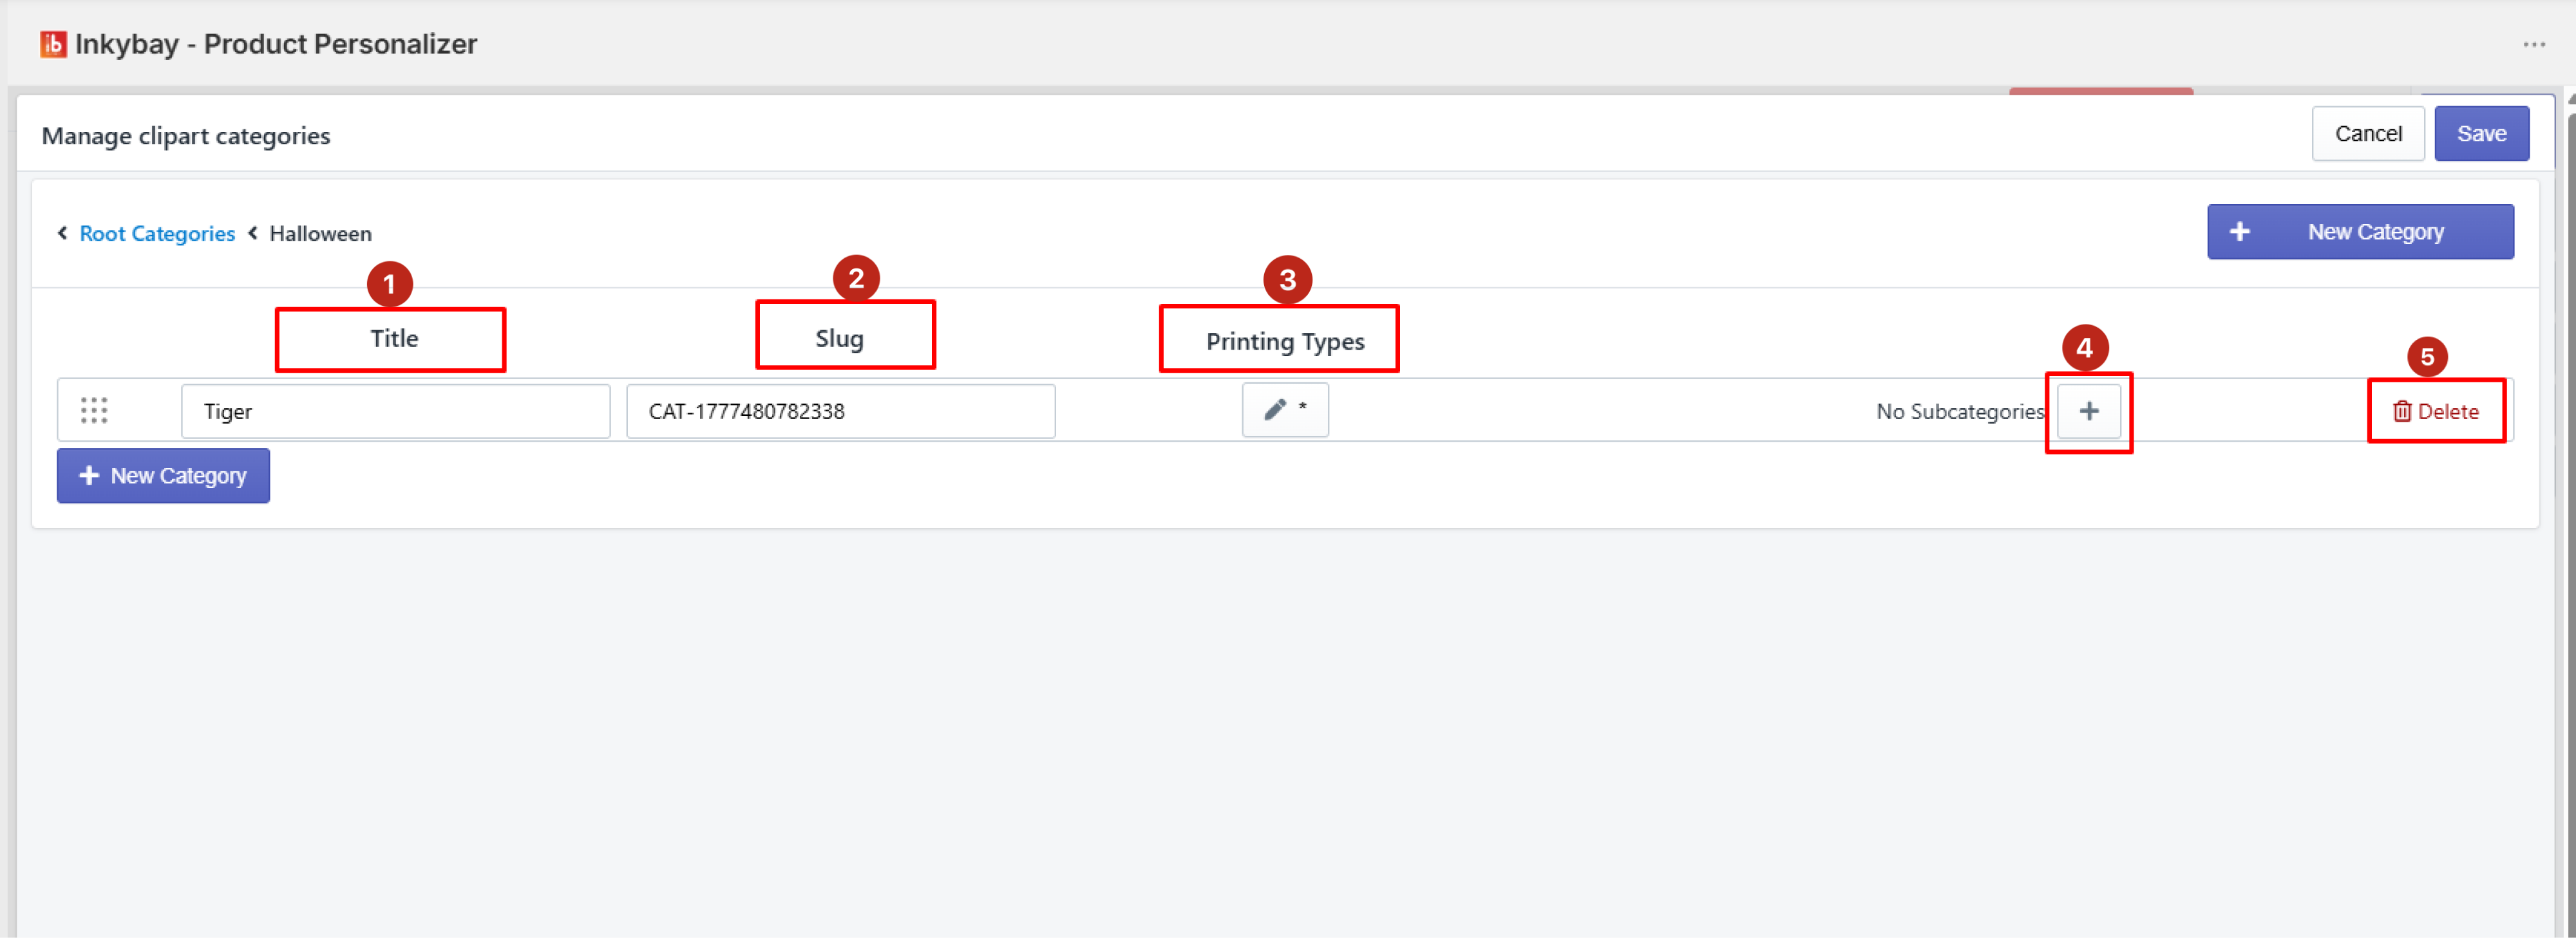
Enter name of clipart subcategory (e.g., Category: Animals & Subcategory: Tiger)
Add Slug name (if any)
Edit/add Printing types
Add one or more subcategories (if any)
Delete (if you want to remove the new subcategory)
Step 3: Now, click the Save button to save all details.
Feel free to contact uswhenever you face any issues or need assistance. We’re available 24/7. You can also reach us:
InkyBay app Live chat
Support ticket from the InkyBay app
Email to support@productsdesigner.com
Did this post help you?