InkyBay offers 150+ pre-installed fonts. If you want, you can upload custom fonts, change font titles and organize their categories, change their indexing or order, or delete fonts.
Edit, reorder, change font title, manage categories, add a new sub-category, set Active status, and delete existing fonts in the InkyBay designer library.
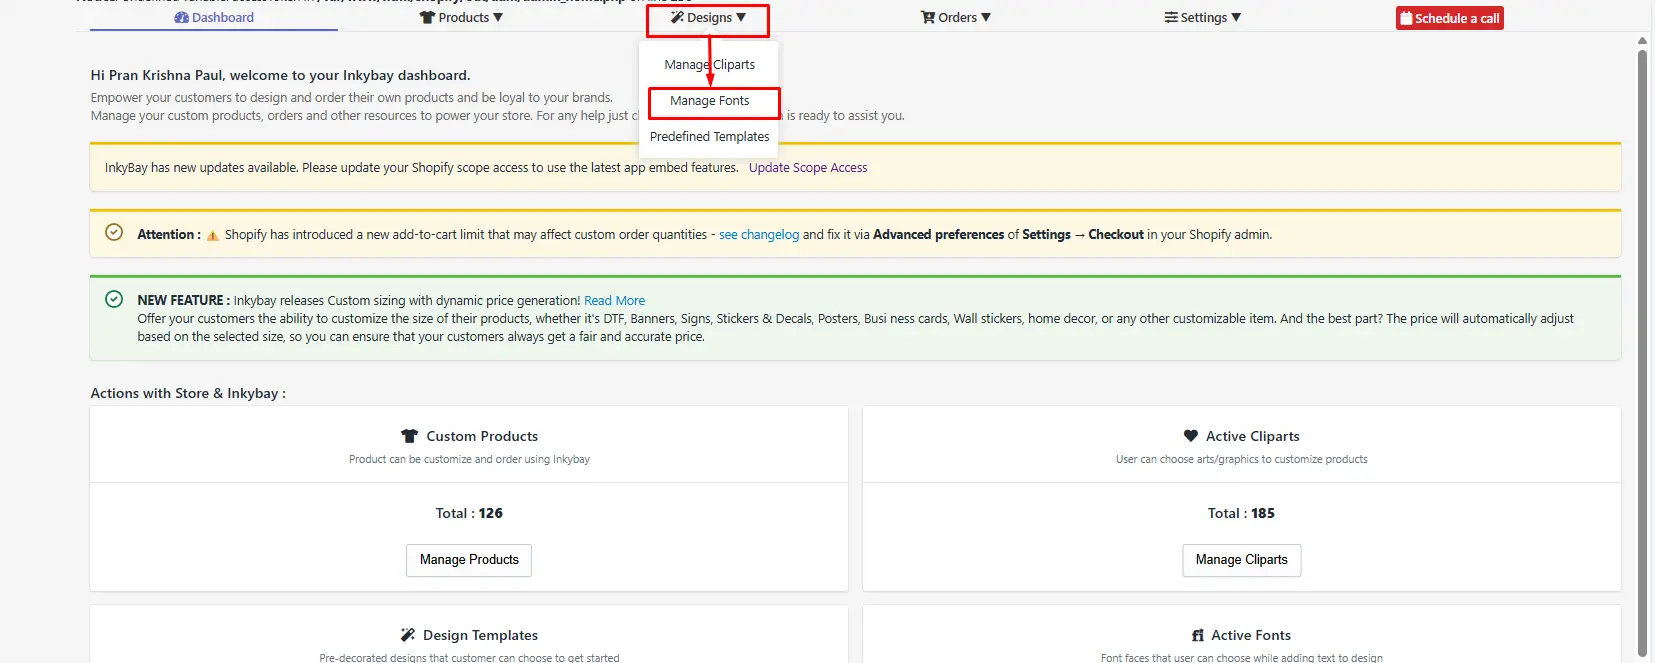
Step 1: Hover over the Designs option and click Manage Fonts.
Step 2: Manage Fonts settings.
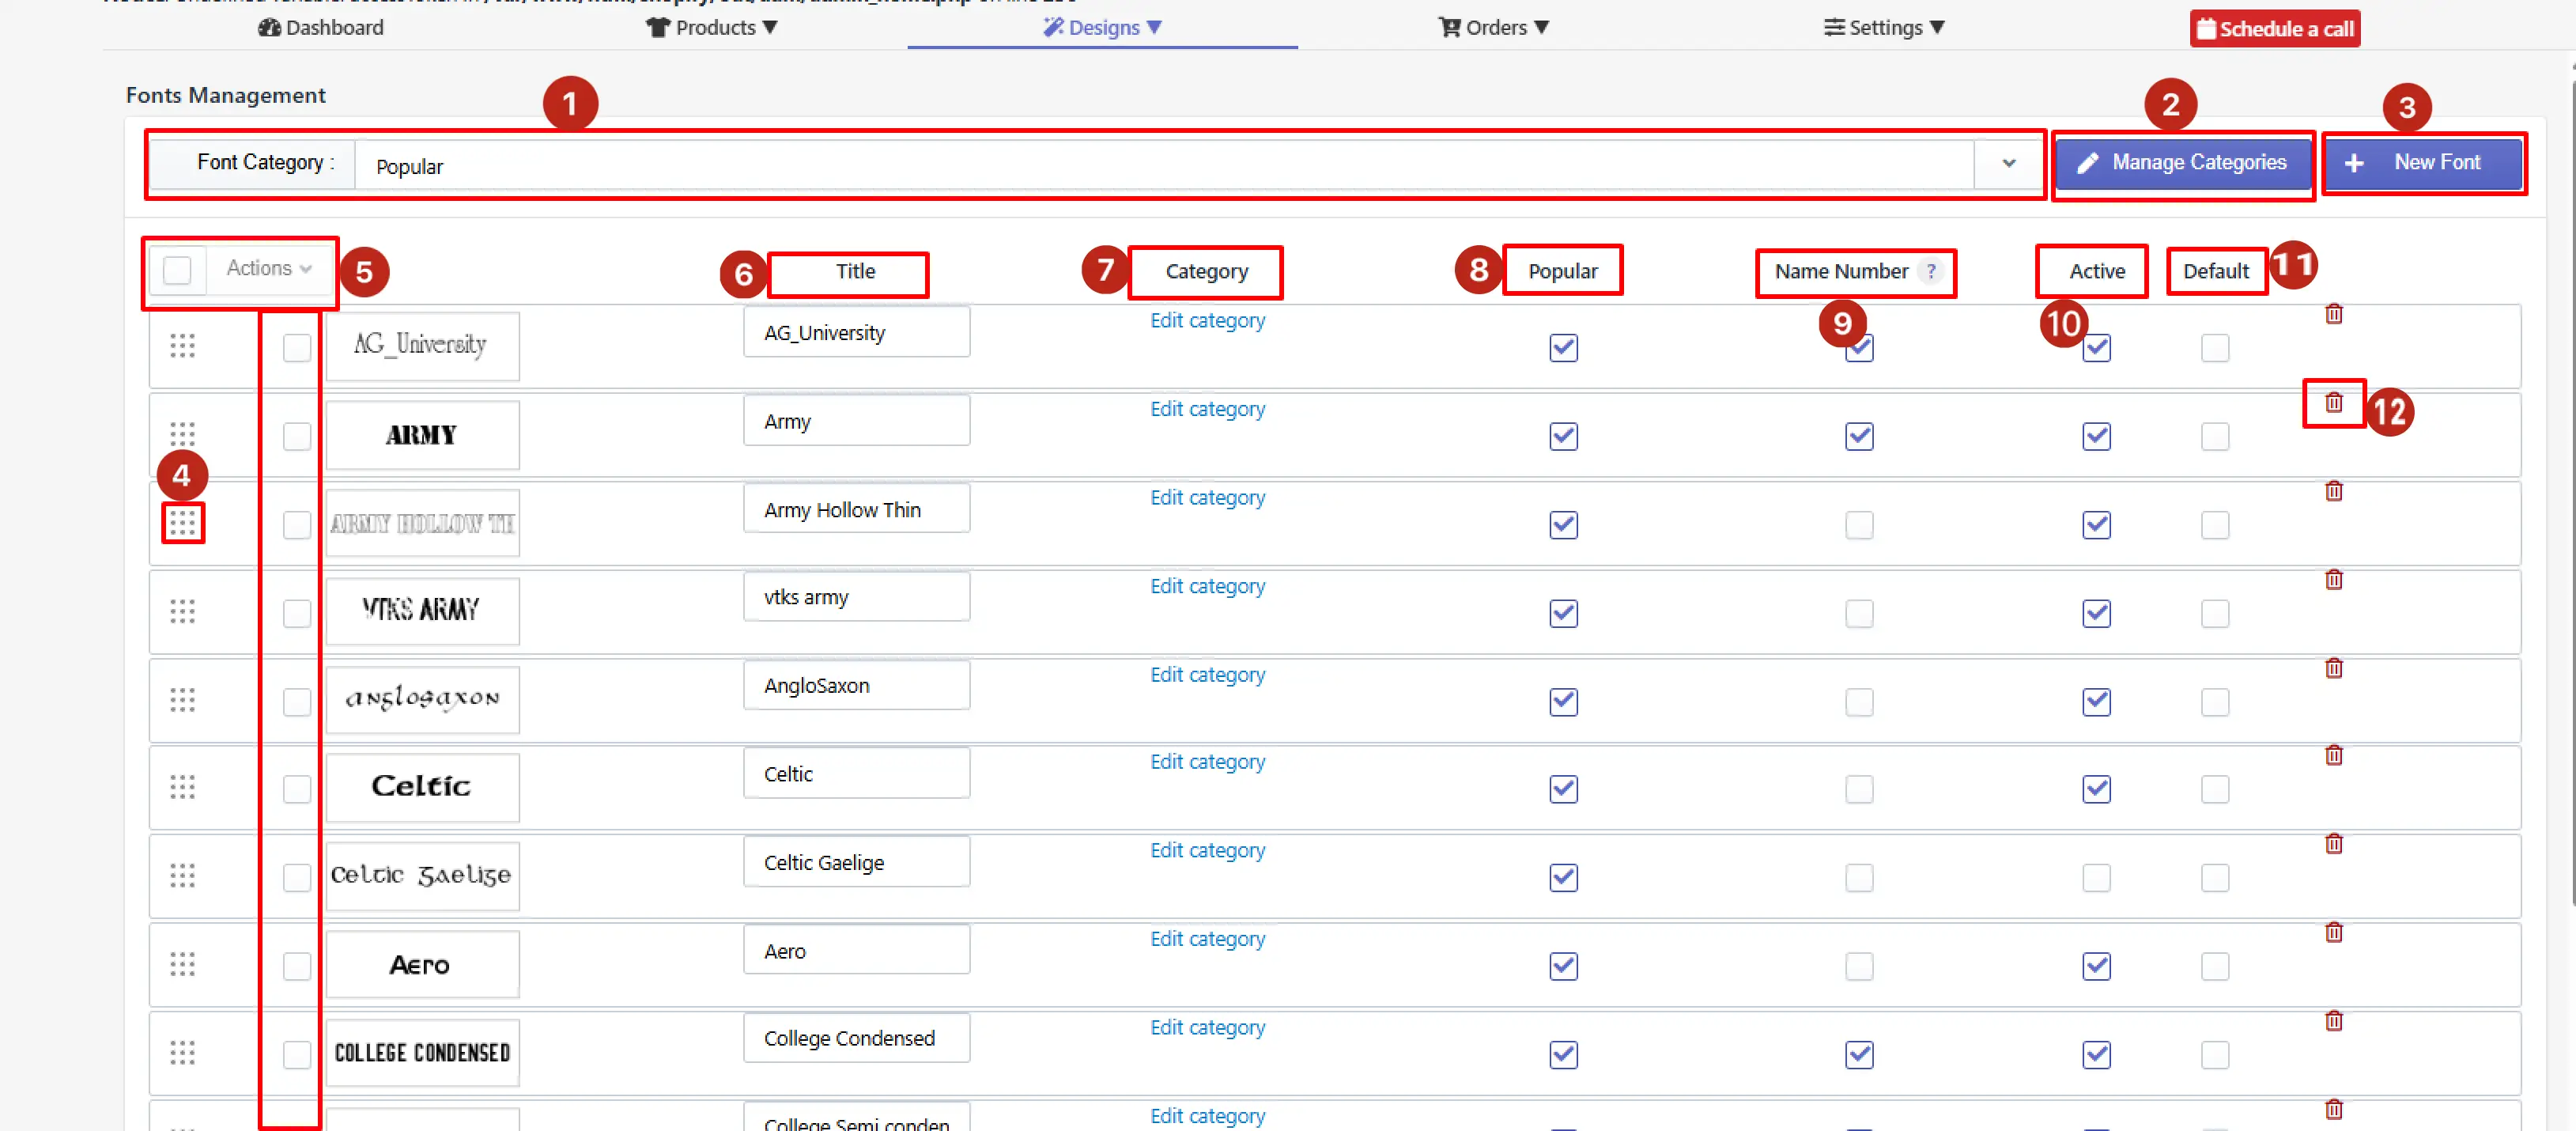
Font category filter - Use the Font Category dropdown to filter the font list by a specific category. In the image above, you see that the list is currently filtered to show the Popular category.
Manage categories - Click Manage Categories to open the font category management panel. In this section, you can create categories, add sub-categories, rename, reorder, and delete font categories.
+ New Font - Click the option to upload a new font to the design library.
Reorder - Click and drag the nine dotted grid handle to reorder the font. The order set sequence in the DesignLab displays the same order you arrange.
Actions - Select multiple fonts, then choose an option from the Action drop-down menu. It helps to take bulk actions: deleting multiple fonts, reassigning categories, or toggling active status.
Title - Edit the font title to show customers in the font selection panel inside the design tool.
Edit Category - Change the existing category or subcategory assigned for that font.
Popular - Check this checkbox to mark the font as popular. Fonts marked as popular appear in the Popular category in the design tool, making them accessible to customers without the need to browse specific categories.
Name & Number - Check this checkbox to make the individual font available specifically in the Name and Number personalization feature. It is commonly used for sports jerseys or team apparel, where customers enter a name and number for each item in the order.
Active - Check this checkbox to make the font visible and available to customers in the design tool.
Default - Mark the Default checkbox to refer to the primary font library.
Trash icon - Click the red trash icon to permanently delete this font from the library. This action can’t be undone.
You can upload custom fonts in Web Fonts (.woff) format. If you don’t have a font in .woff format, use free apps or websites (e.g., WebFont Generator) to convert.
Step 1: Click the + New Font button beside the Manage Categories.

Step 2: Click on Change/Upload Font. Only the .woff file is allowed.
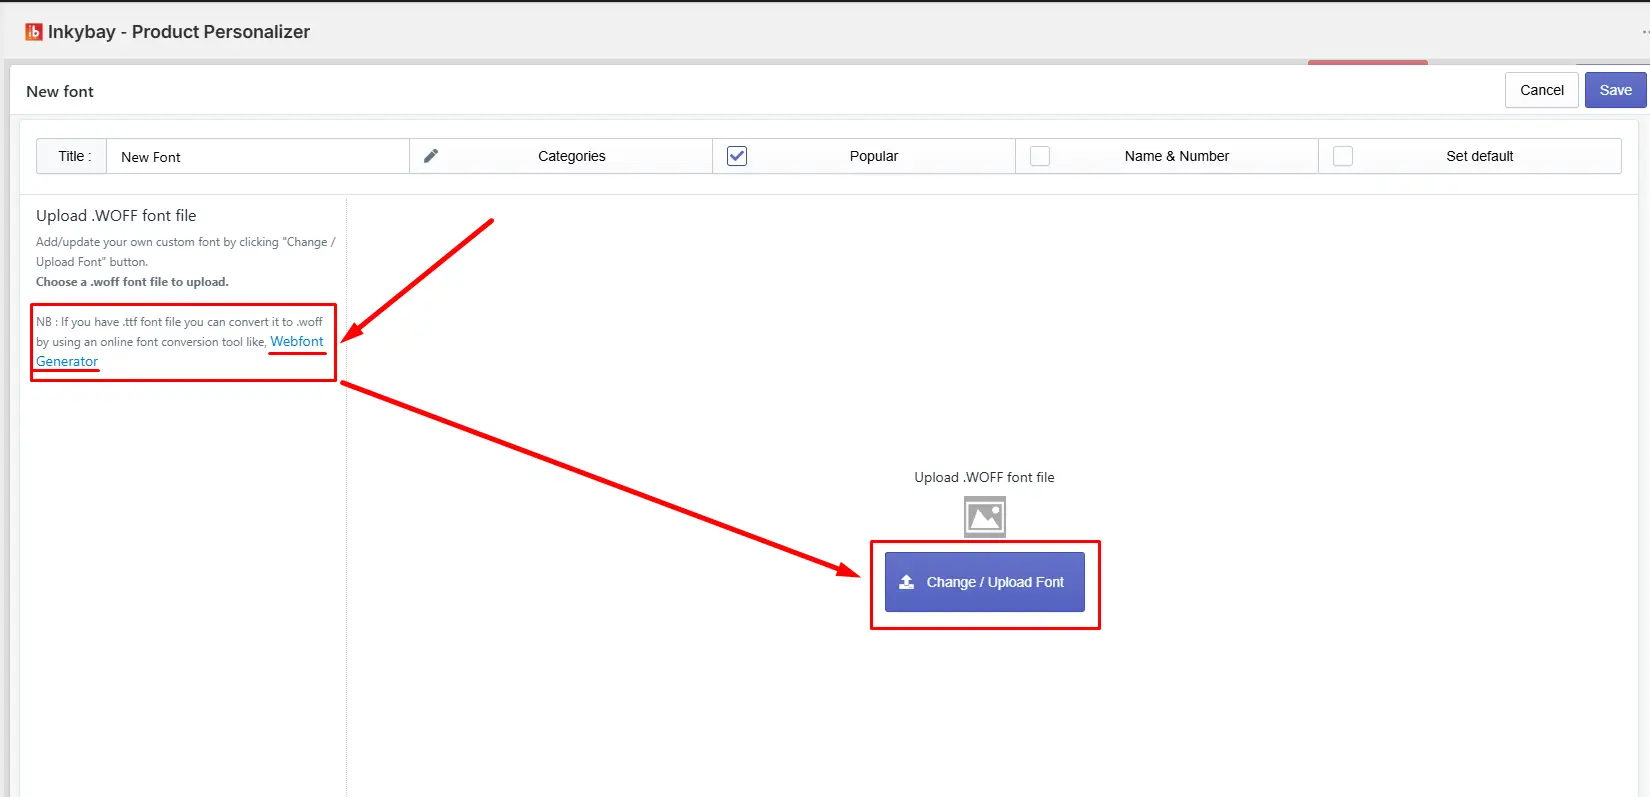
Step 3: Add relevant details to activate the new font.
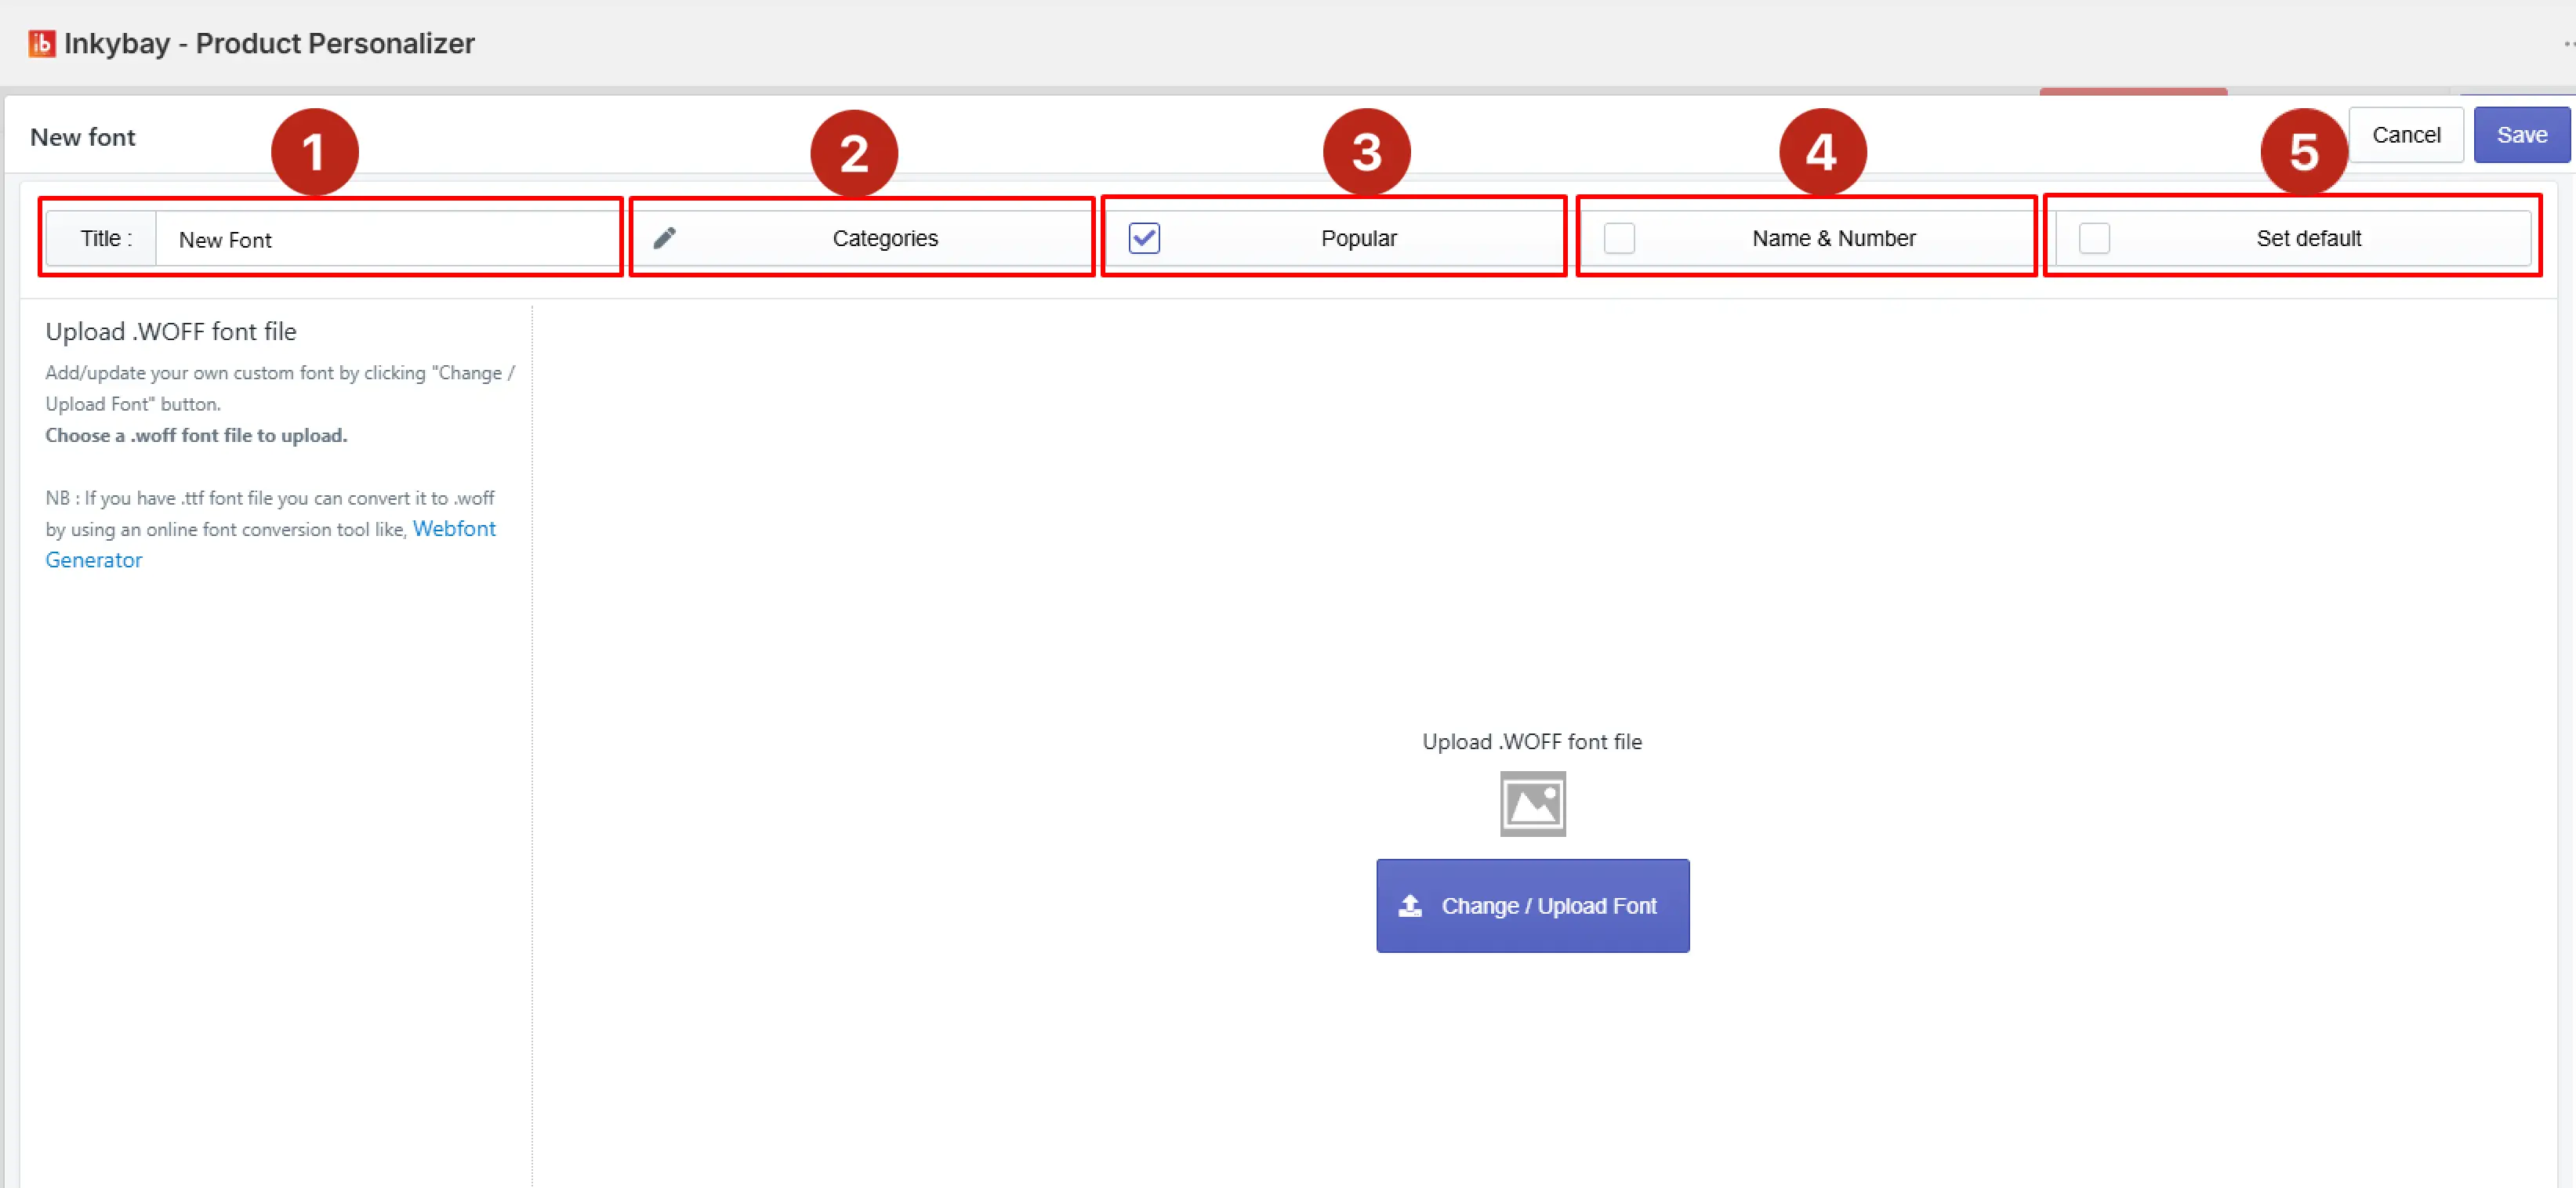
Enter a title name.
Set a category for the Font.
Check (✔️) the Popular to add to the popular list.
Check/ uncheck the Name & Number checkbox to add to the available Name & Numbers.
Check (✔️) the Set Default box for a specific font as the primary, pre-selected font in the product designer tool.
Step 4: Now, click the Save button. The New Font is ready and active

Feel free to contact us whenever you face any issues or need assistance. We’re available 24/7. You can also reach us:
InkyBay app Live chat
Support ticket from InkyBay app
Email to support@productsdesigner.com