Category
4 min to read
Last Update on 02 May 2026
Set Up a Configurable Product
This feature allows your customers to personalize complex products section-by-section in real-time, such as changing colors on different panels of a jersey, adding text to specific areas, and more.
It is useful for stores offering products in different sizes, colors, materials, or other customizable attributes, enabling dynamic pricing and design flexibility.
How to add a configurable product
To create a configurable product, you must first set up a custom product within the app: select a base product, define printable areas, and configurable options.
Step 1: Create a custom product.
Navigate to Products and select the Create a Custom Product option. After that, follow all basic steps & settings to create a custom product from scratch as shown in the previous section.
Step 2: Access the Advanced Settings option.

Click the Advanced Settings button after completing the custom product setups.
Step 3: Configure panels, groups, color sets, and styles for each product side.
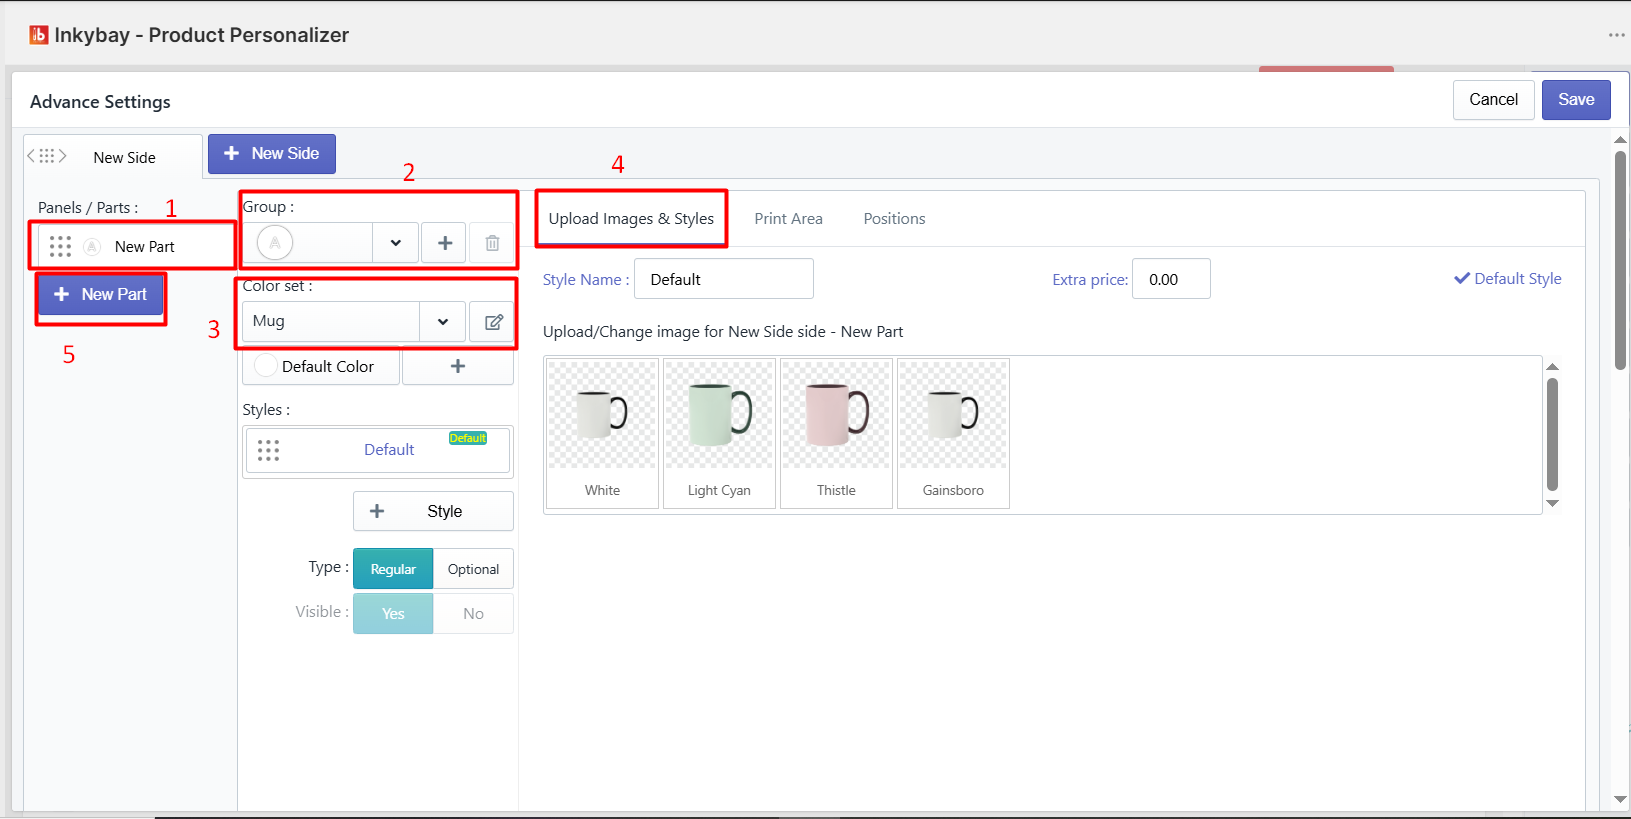
Each configuration here controls how that side appears and behaves on the customer-facing design tool. To create and manage product parts/panels, go through the following instructions:
Panel edit - Click the pencil icon next to an existing panel or part name to rename or edit it. [Note: We renamed it as Base Layer]
Group - Select a Group for the base layer. By default, it is set to Group A. To create a new group, click on the + (plus icon), or to remove the current group, click the trash icon.
💡Important
- Groups are used to link multiple panels or sides together for multi-panel product setups.
- If you select the same group for different parts/panels, those will be interconnected.
- When a customer changes the color on a part, it’ll also change the connected part colors.
Select Color Set - Click the dropdown to select a color set for this group. The selected color set determines which color options customers can choose for this panel in the design tool.
Use the Default Color field to set the color that appears pre-selected when the customer first views this product.
Click the + icon next to Default Color to add a new color directly to the assigned color set.
Click the edit icon on the right of the dropdown to modify the currently selected color set.
💡Important
If no color variation is required for this panel, leave the dropdown set to No Color.
(4) Upload images & Styles - Click the Upload icon to upload a product mockup for the base layer PNG image.

Before uploading, create an individual part/layer of the sneaker shown in the image above as a transparent PNG. For this:
Open the PSD file in Photoshop or your preferred photo editing tool.
Create multiple layers on a single file (PSD) as the demo image above.
Make all layers visible and then hide every layer except the one you want to export by clicking the eye icon next to each layer.
Export or save it as a transparent PNG.
Repeat for every panel layer you want to add to your configurable product.
Step 4: Set up the print area for each panel.
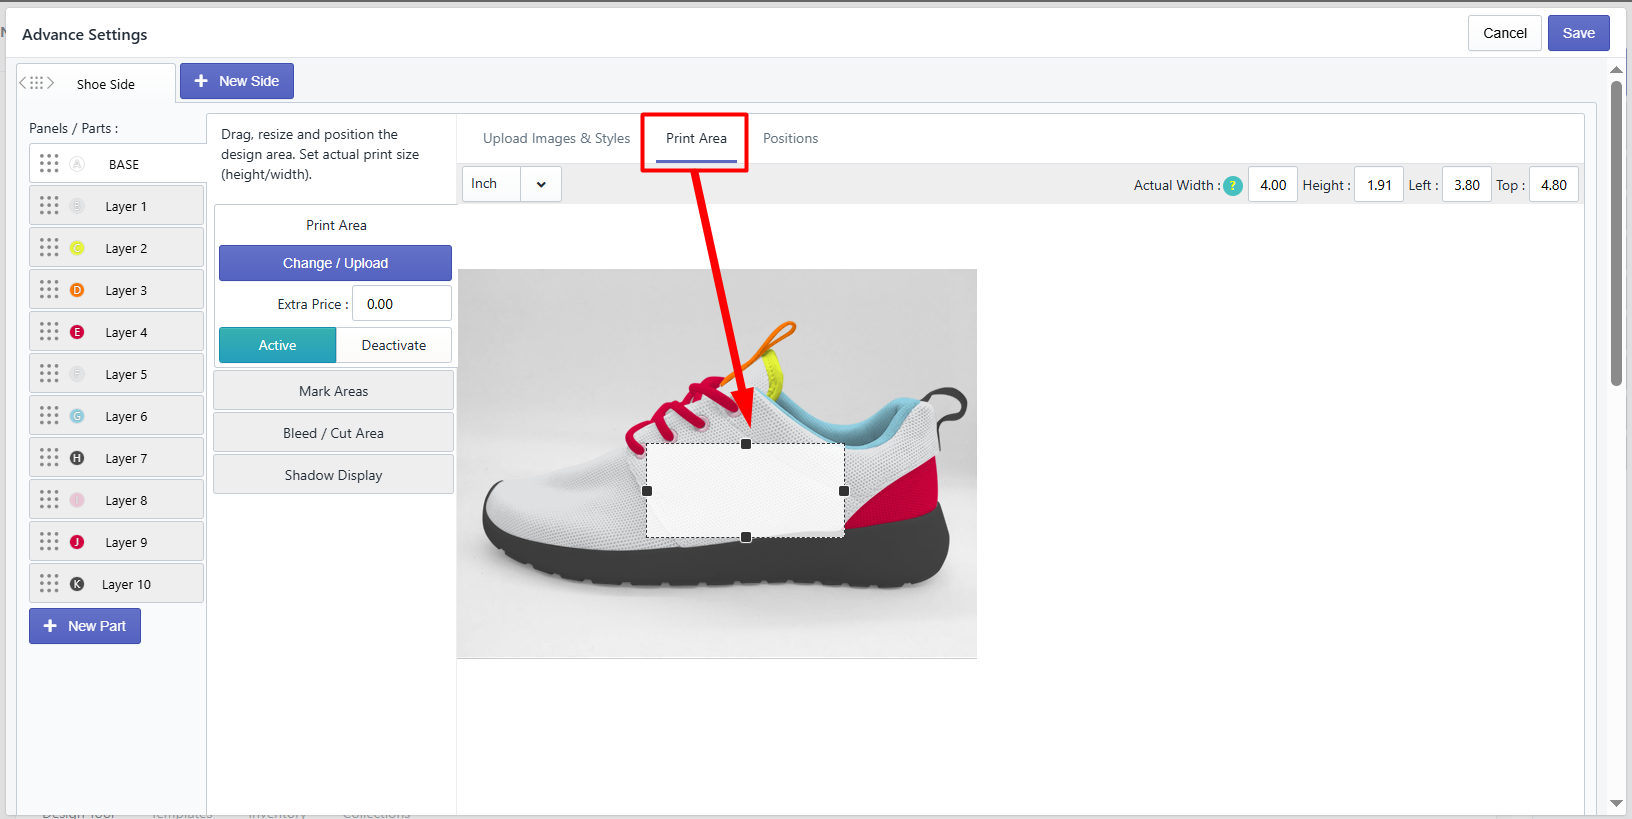
Click the Print Area tab beside Upload Images & Styles to set the precise printable area where customers add additional designs (e.g., text, graphics, cliparts, etc.).
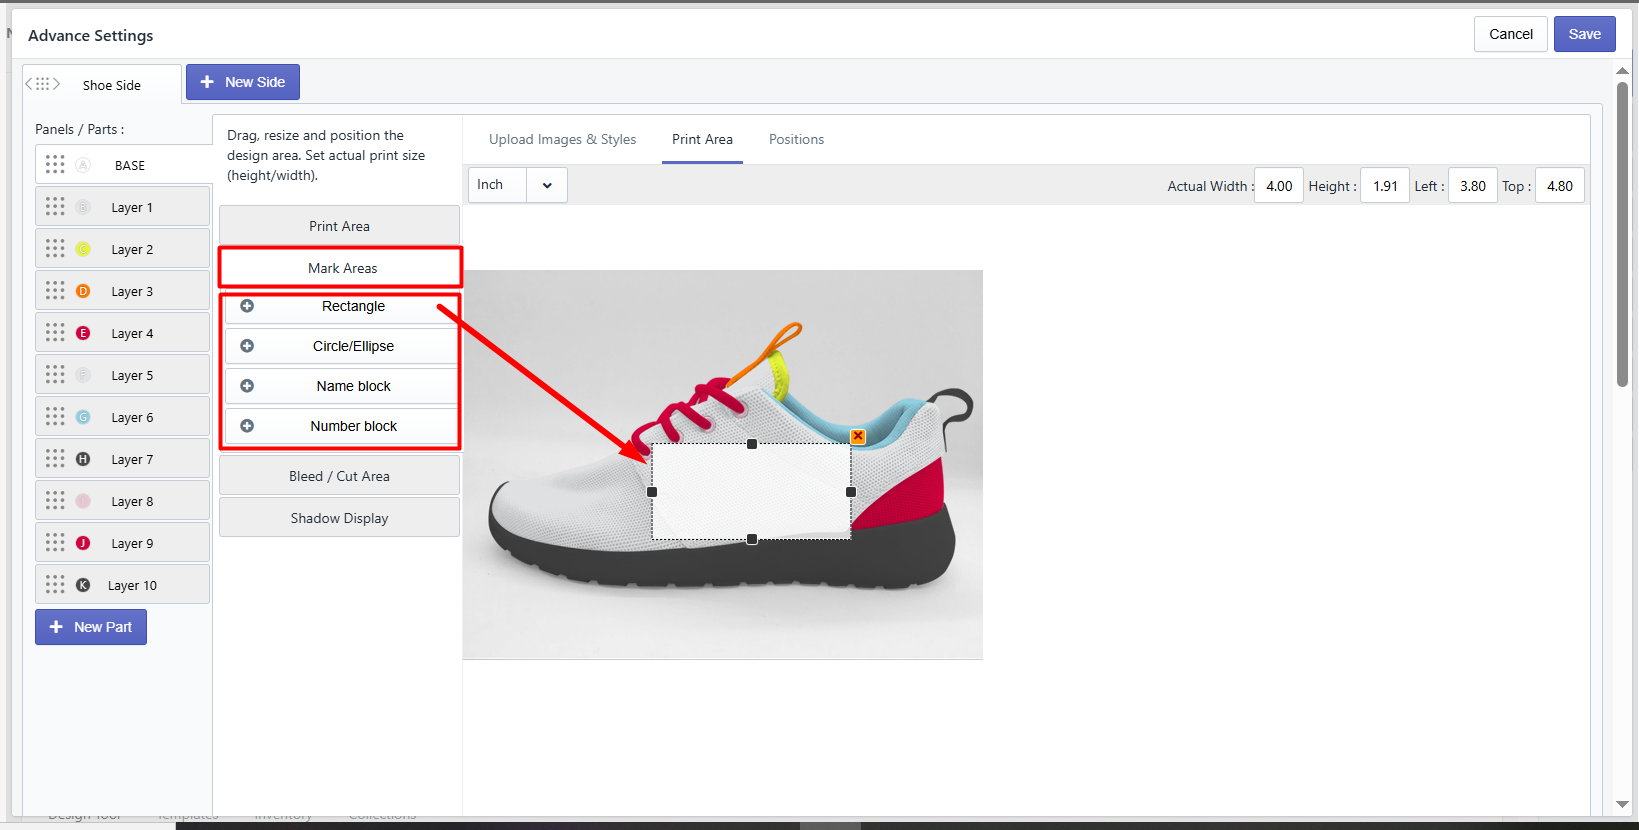
Mark Areas - Click the Mark Areas to show a dotted mark in the design tool. Select and drag the mark area dots to your preferred area as shown in the image above.

Active/Deactive - Click the Deactivate button if you don't want to allow customers to add any extra design except the product configuration.
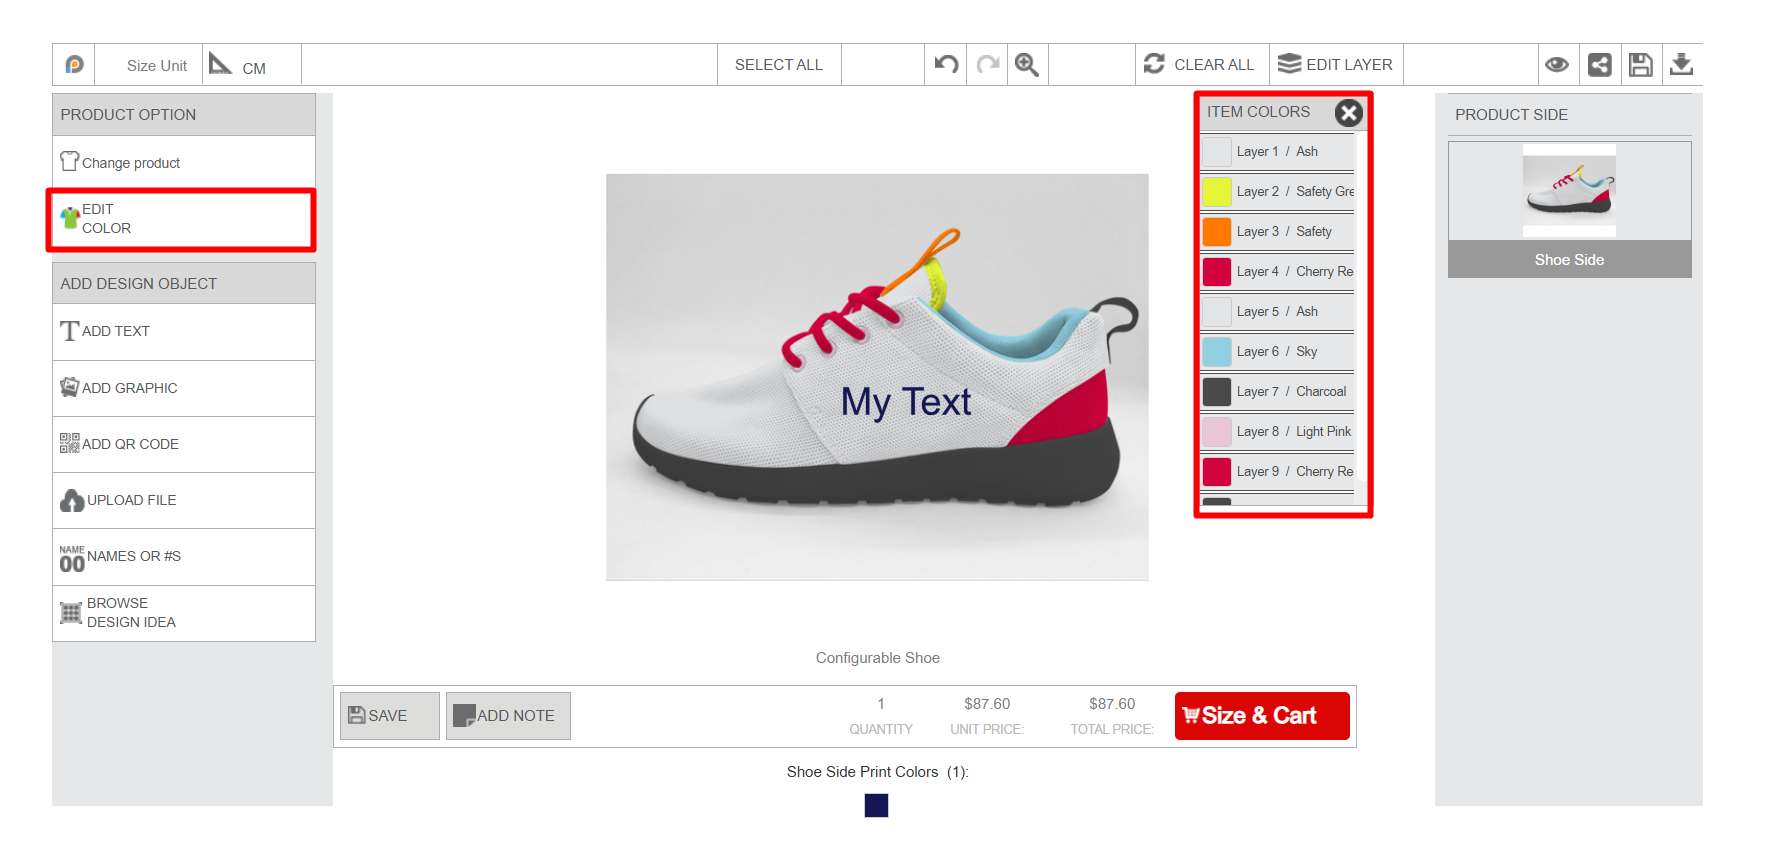
Step 5: Publish your configurable product.
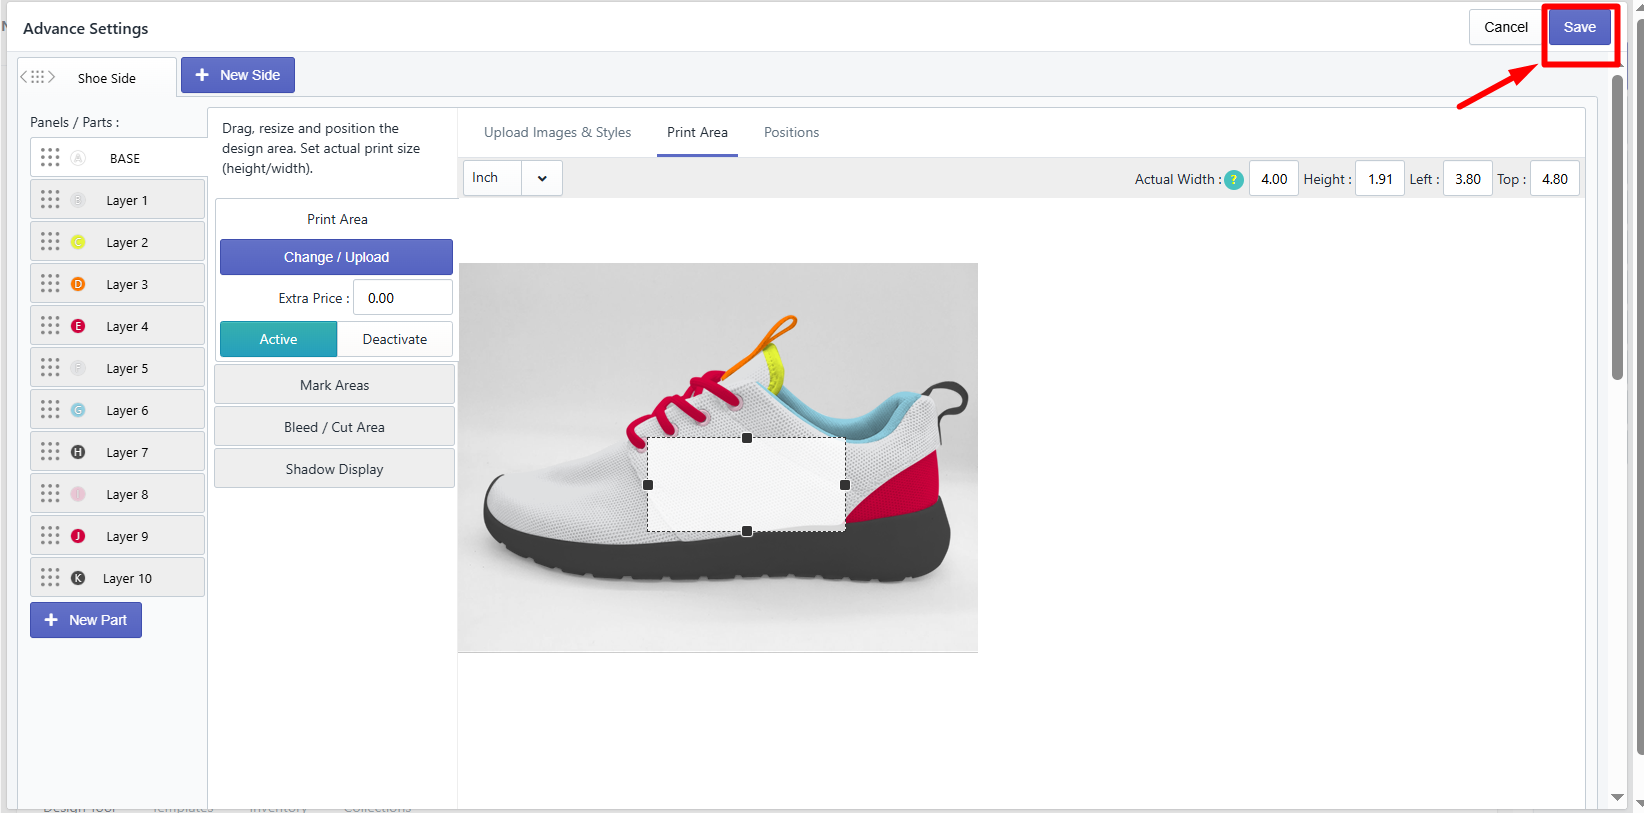
Click the Save button, and your configurable product is set. The final look in the designer window with the layers is shown exactly the same as the image below:
Still, facing difficulties or need help? Feel free to contact us. You can also reach us:
InkyBay app Live chat
Support ticket from the InkyBay app
Email to support@productsdesigner.com
Did this post help you?