With this feature, you can charge an additional price for specific color variants of your product. This helps you manage costs for colors that may be more expensive to produce while keeping your pricing flexible and fair.
💡 Important Make sure you have already assigned a color set to your product before setting up color-based pricing. |
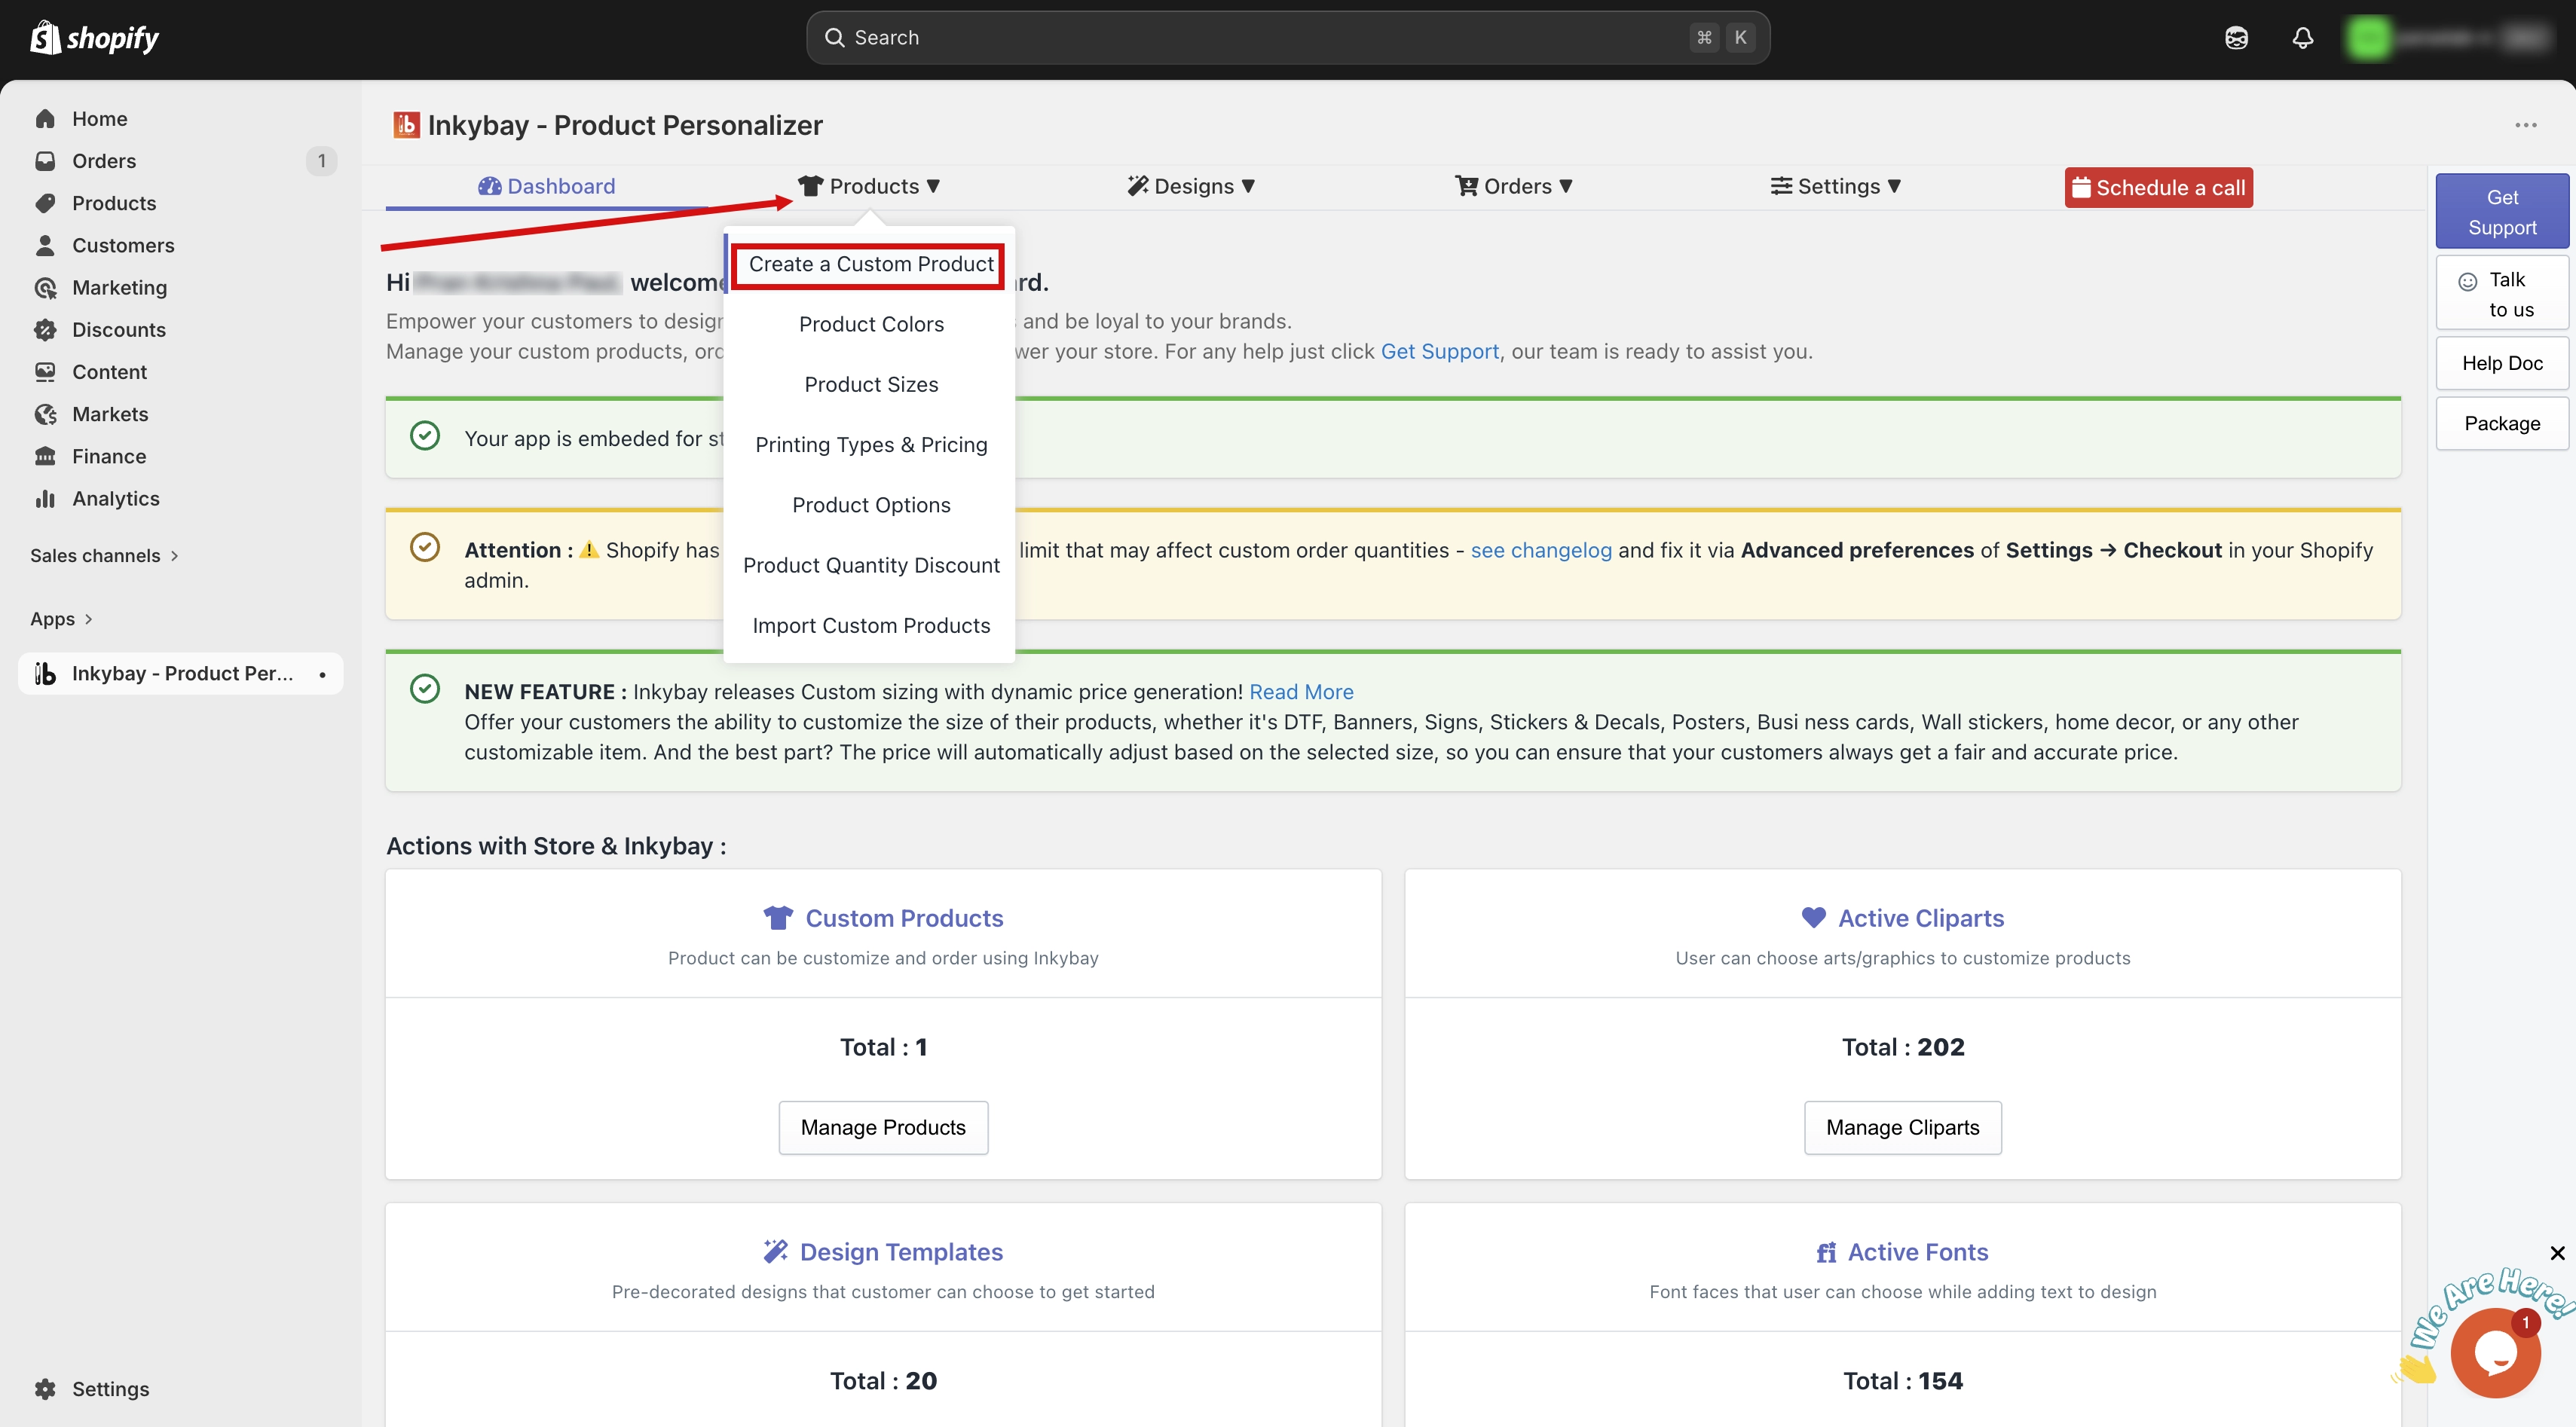
Step 1: Access your store products.
Go to your admin dashboard. Hover over the Products option, then select Create a Custom Product.
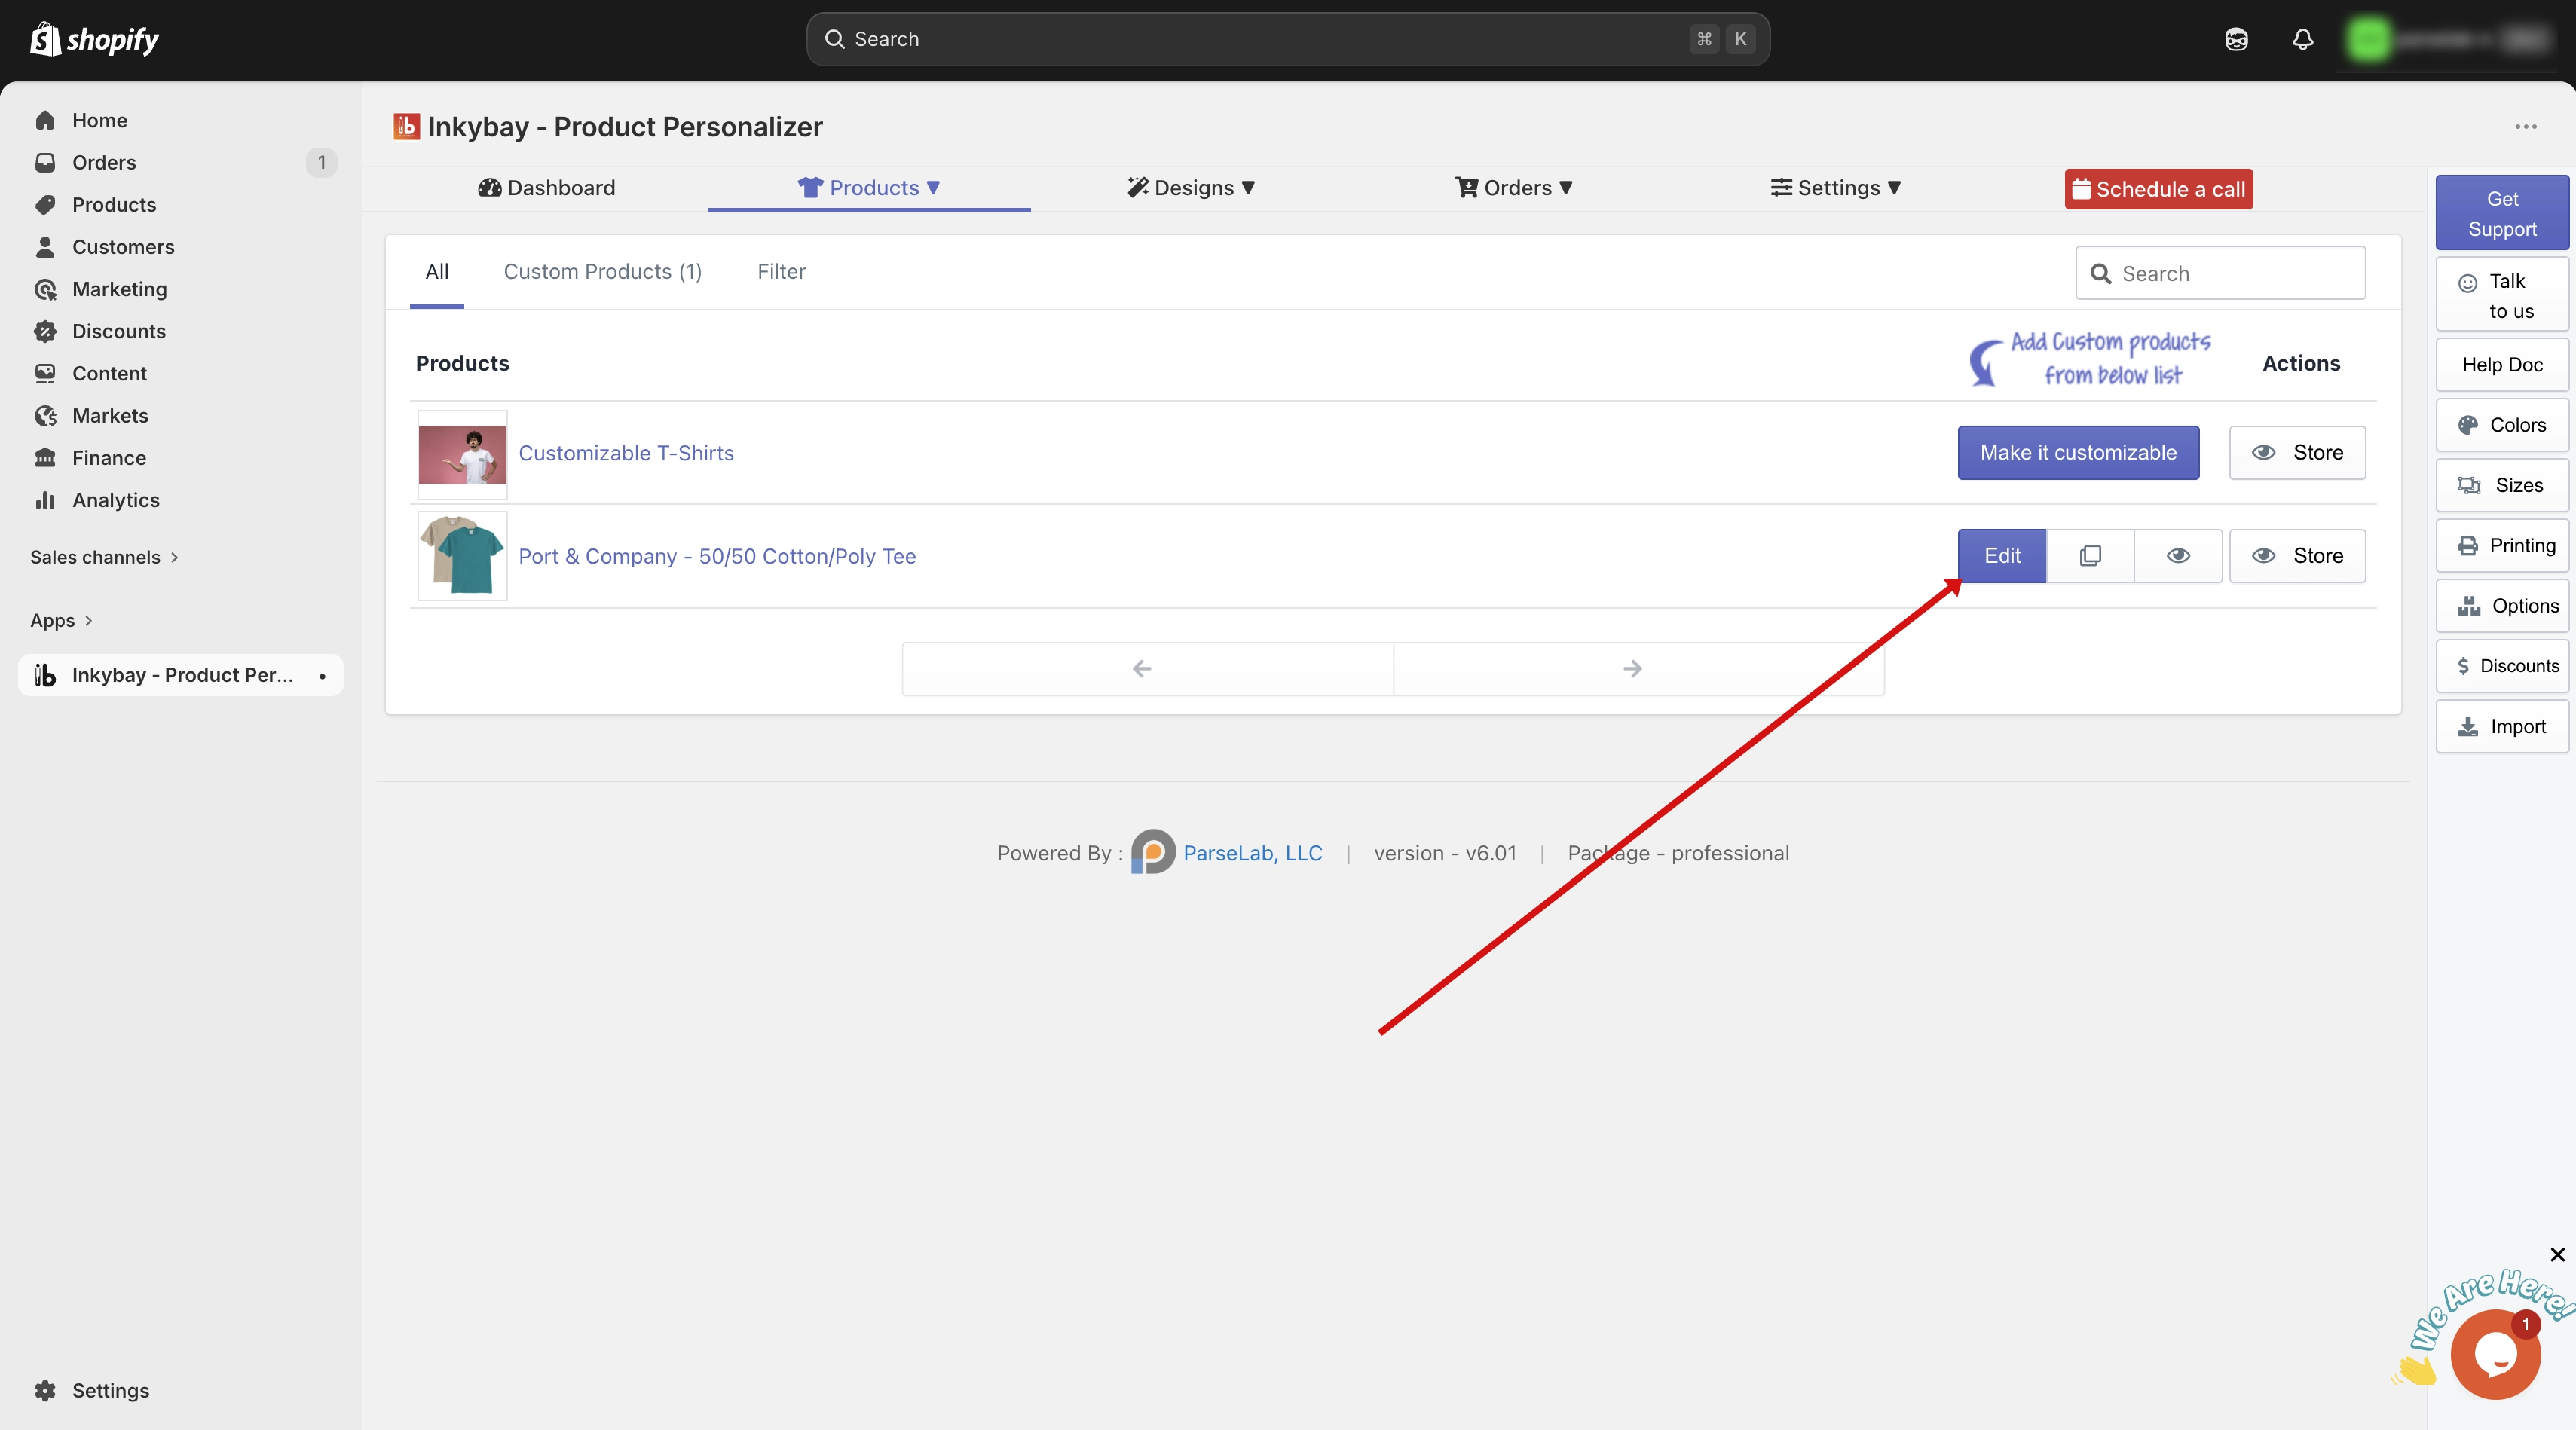
Step 2: Find and edit the product.
Locate the product you want to update and click the Edit button next to it.
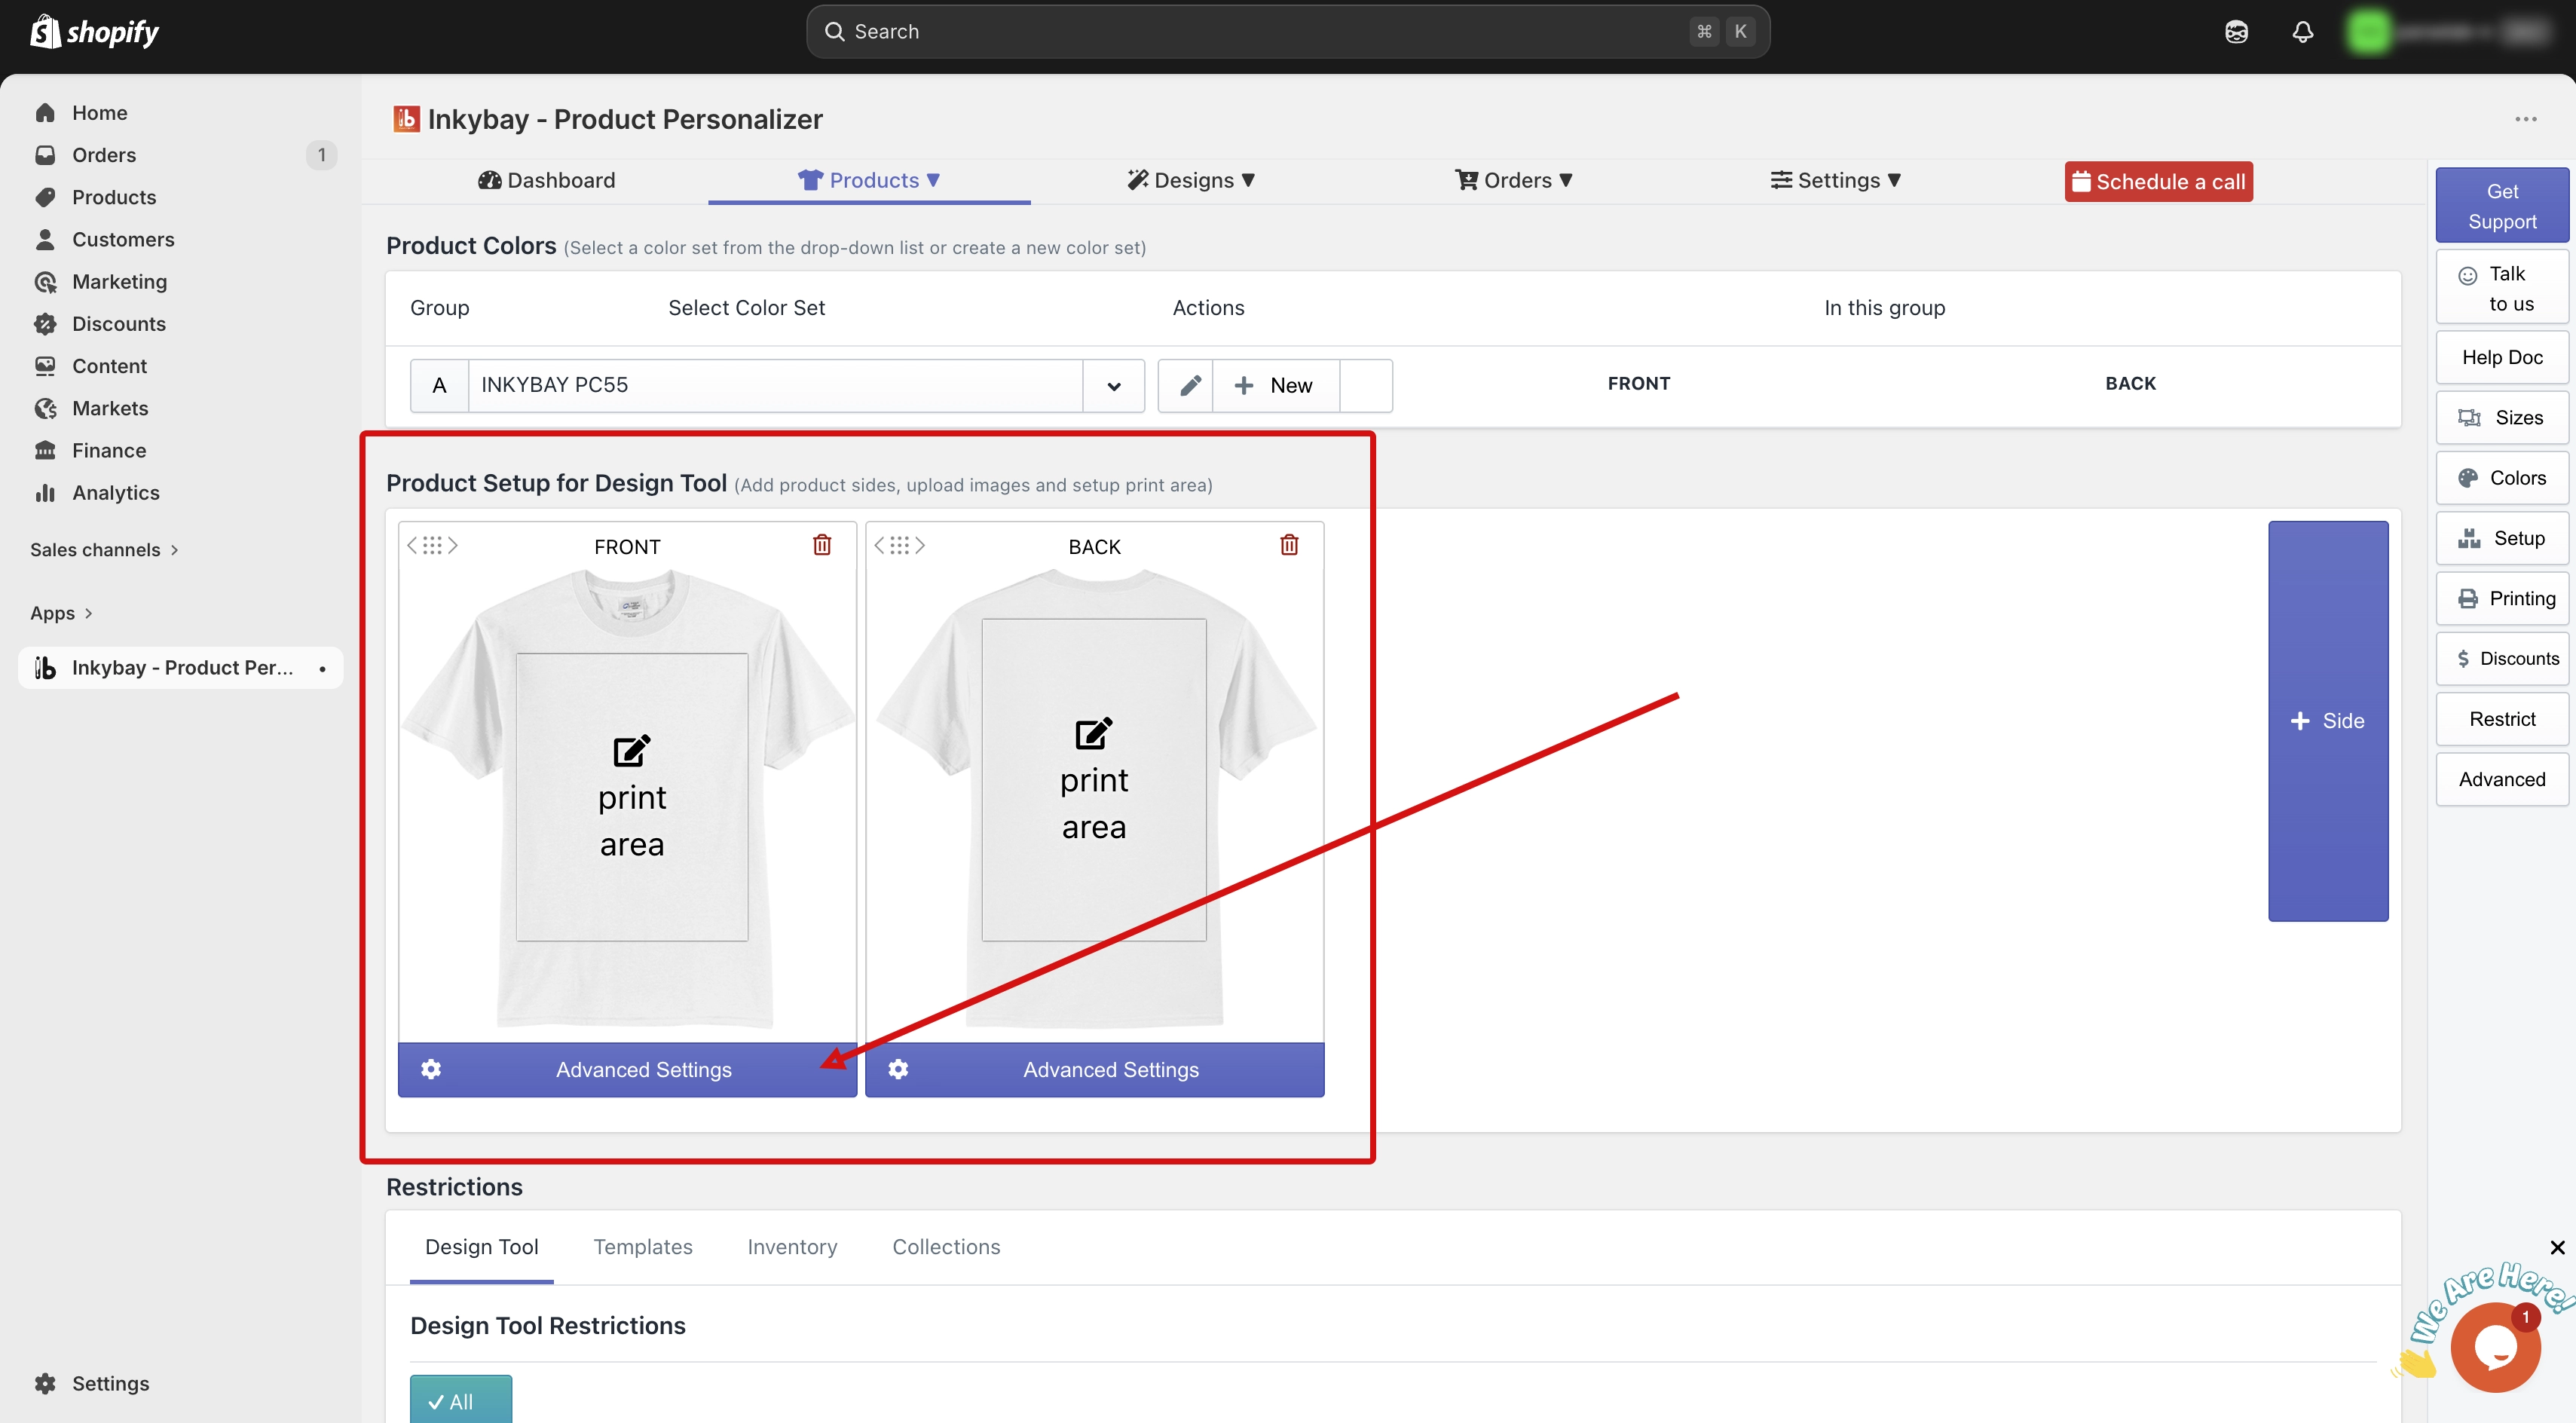
Step 3: Open Advanced Settings.
Scroll down to the Product Setup for Design Tool section and click the Advanced Settings button.
Step 4: Select the product side.
You will see all your created product sides. By default, the first side stays open after clicking Advanced Settings. If you want to configure a different side, click on that side tab and it will open for that particular side.
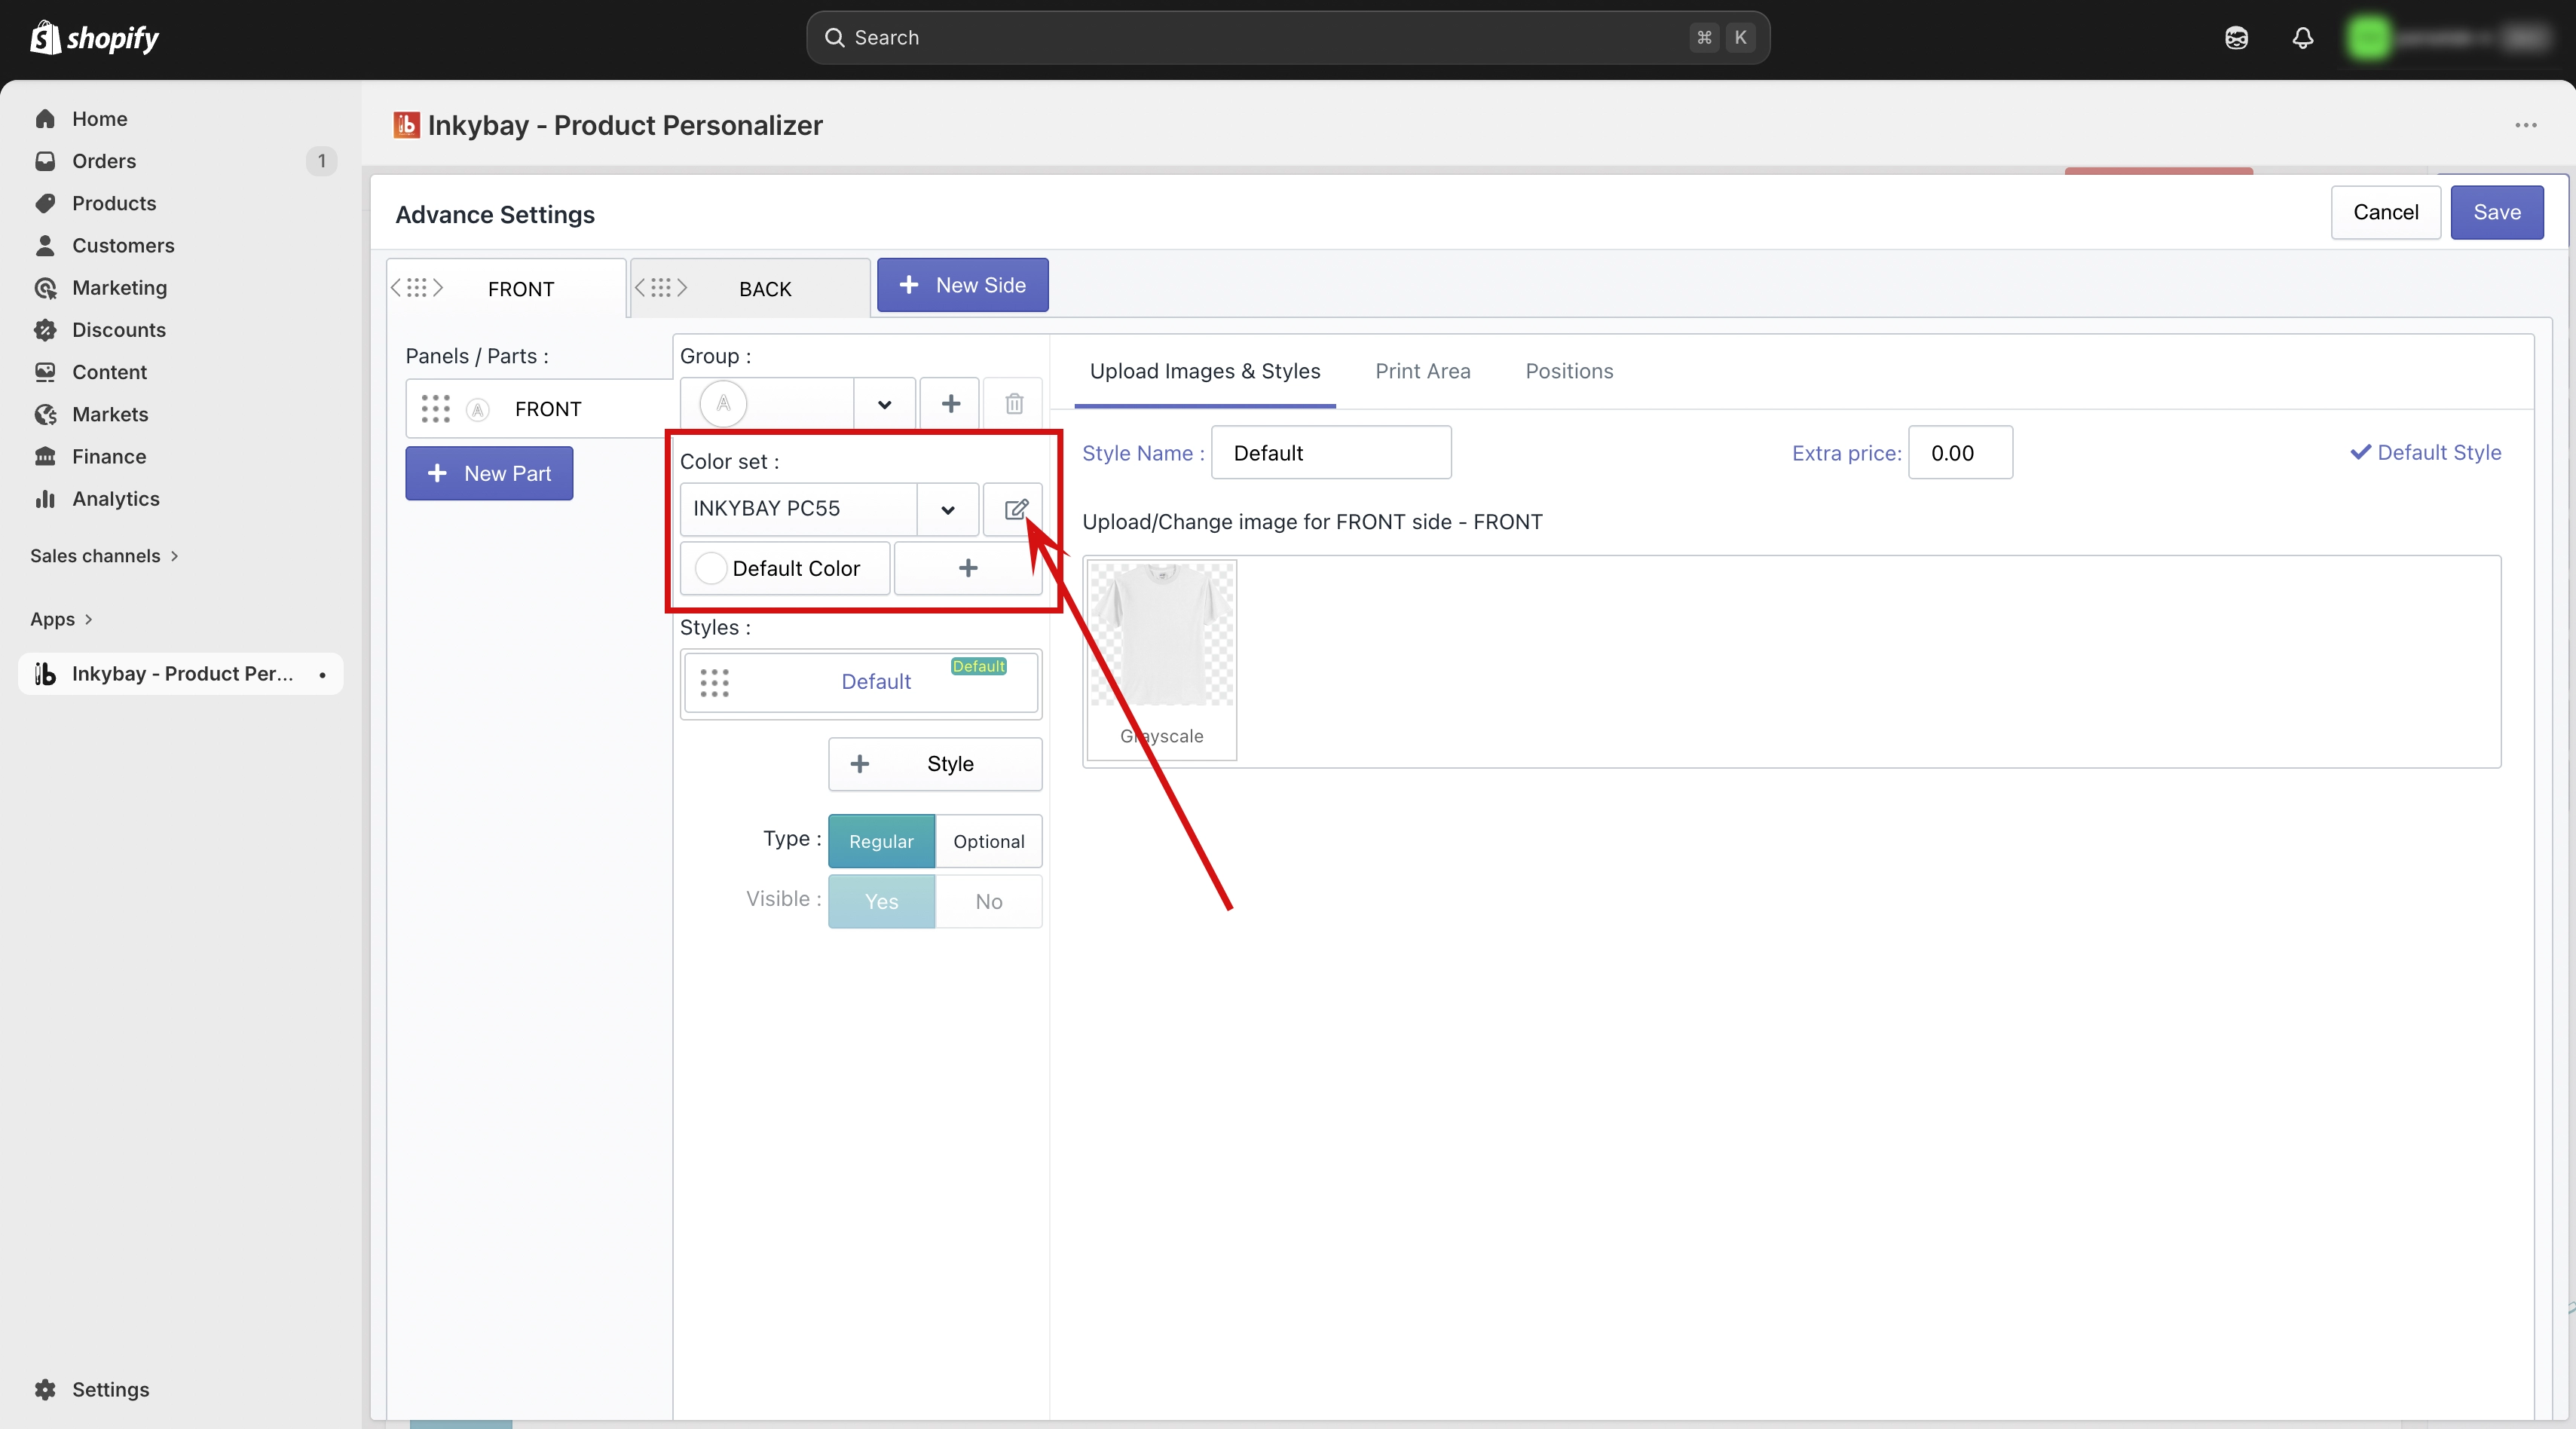
Step 5: Find the Color Set section.
On the selected side, look for the Color Set section. Here you will see the color set that is currently assigned to your product.
(5.1) Change color set — Click the down arrow button to see all your existing color sets and choose a different one if needed.
(5.2) Edit color set — Click the Edit icon to open the assigned color set. You will see all the colors available in that set.
Step 6: Set the extra price for each color.
Inside the color set, you will see an Added Price column next to each color.
(6.1) Added Price field — Enter the additional amount you want to charge for that specific color. This amount will be added on top of the product base price when a customer selects that color.
(6.2) You can set a different extra price for each color or leave it empty for colors that have no additional charge.
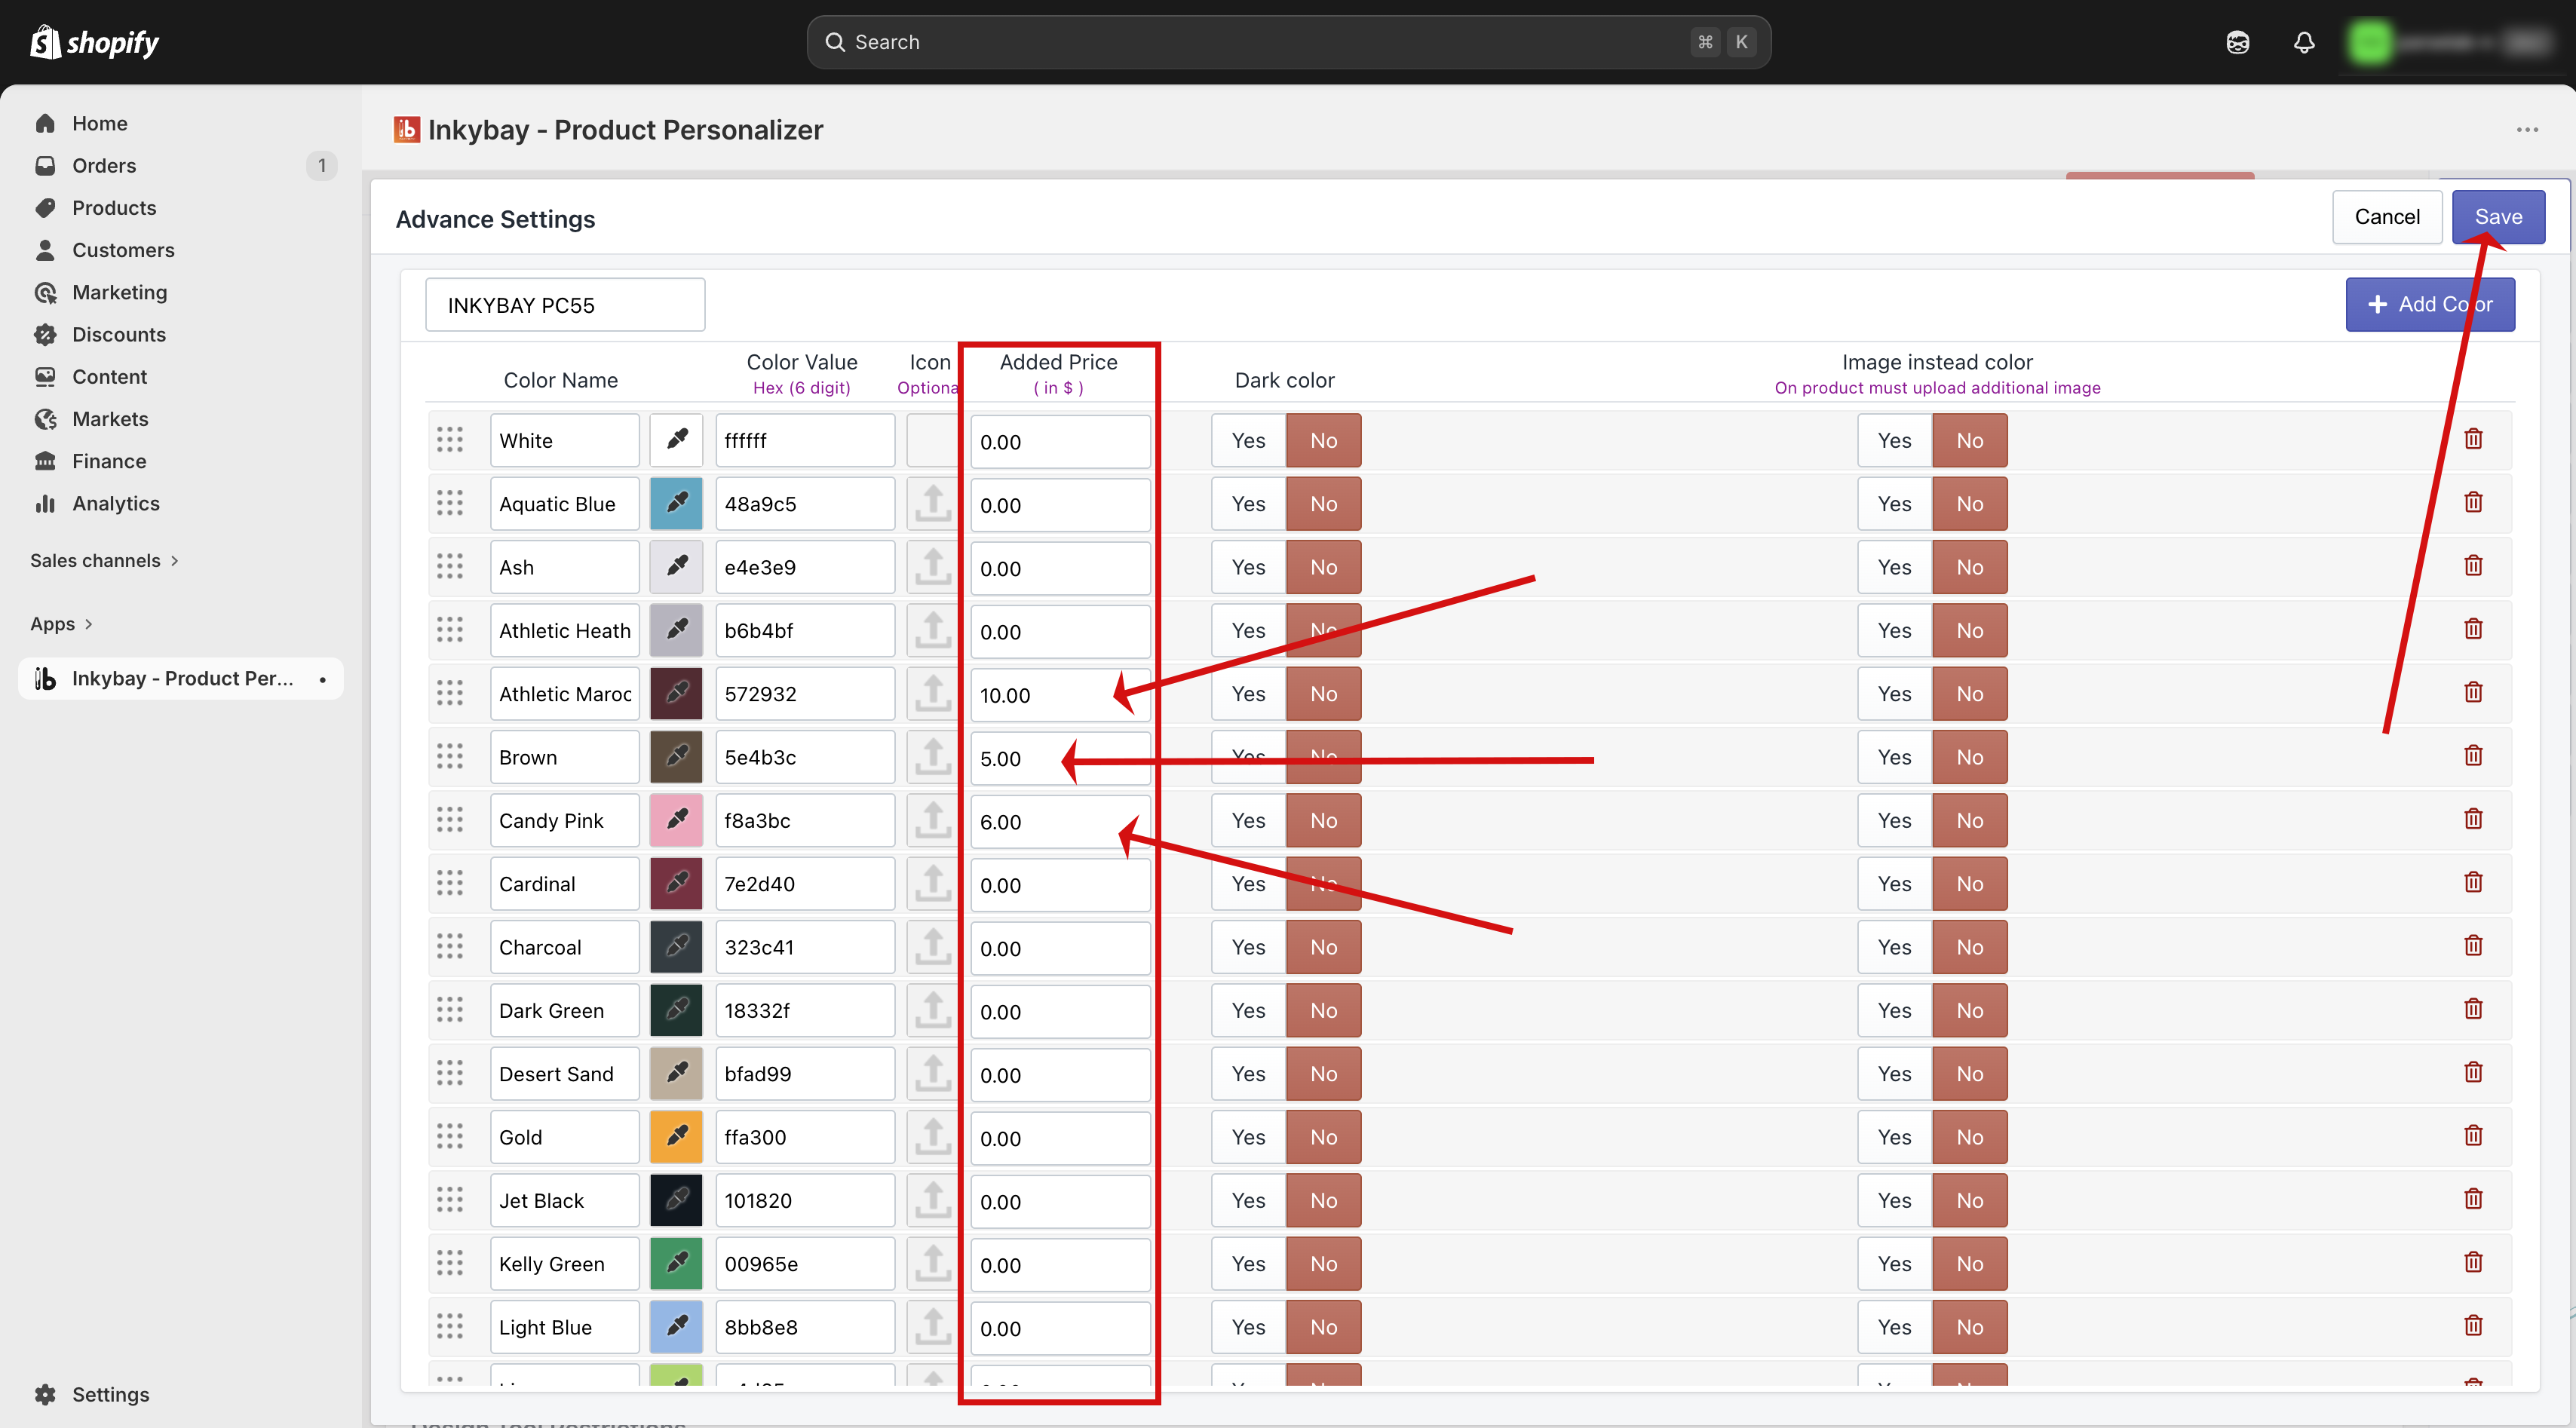
Step 7: Save your changes.
Click the Save button. The extra price will now be applied automatically whenever a customer selects that color variant.
🎯 Note You only need to add an extra price for colors that cost more to produce. Colors with no extra price will simply use the base product price as usual. |
Need more help? Feel free to contact us whenever you face any issues or need assistance. We’re available 24/7. You can also reach us:
InkyBay app Live chat
Support ticket from InkyBay app
Email to support@productsdesigner.com