Category
3 min to read
Last Update on 05 May 2026
How to Add Multiple Attributes to Product Options
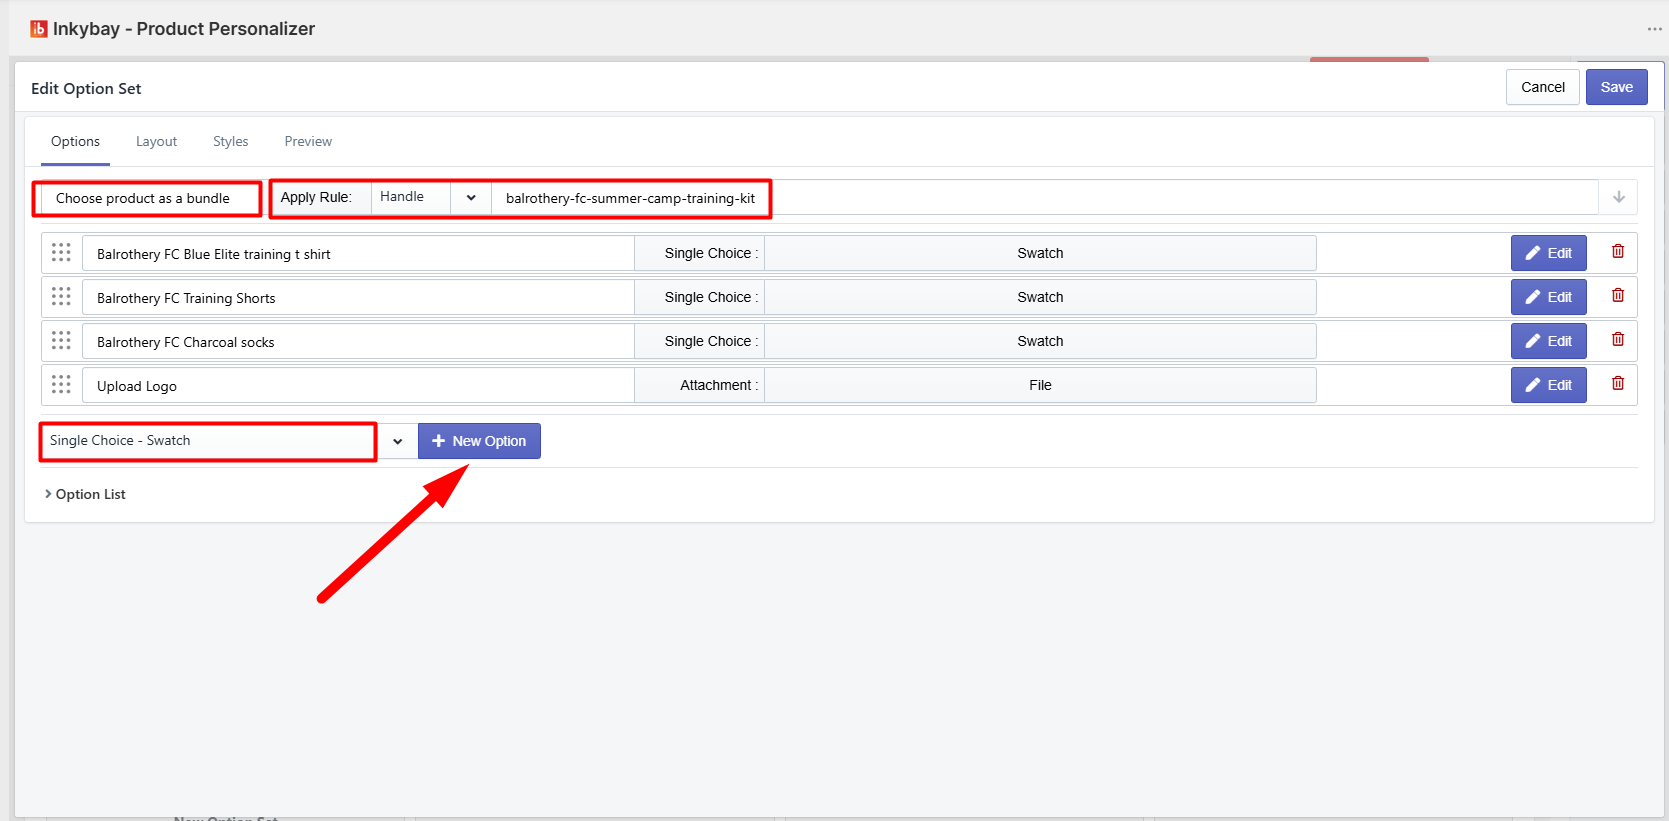
After providing the option name, applying the rule and selecting the option type, click on the +New Option.
Add Attribute to Option set
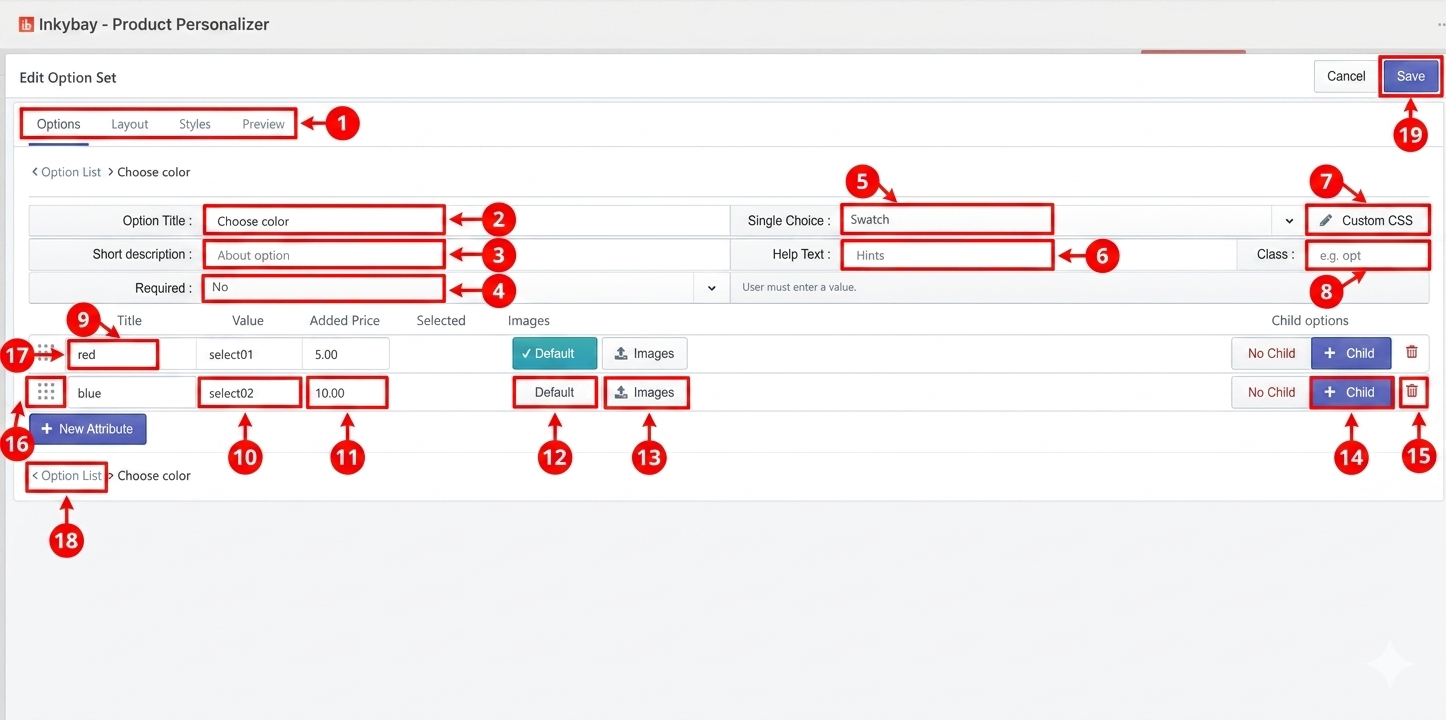
Navigation : You can click here to go to different settings for the option. You will find:
- Options: Here you can add/manage all your options, attributes, and images for option preview or conditional child options
- Layout: You can change the option set display layout using HTML code.
- Style: Here you will find CSS codes to customize the option preview in the front end, swatch size, color, adding a border, position, or anything related to match with the theme style.
- Preview: It will show how the option would look. Select Options to configure it (by default, Options will be selected)
Options Title: Provide a title for the option
Short Description: Provide a short description of the option. It will let your customers know about the option.
Required: If you want this option to be required for the order, select Yes, otherwise select No. By default, No will be selected.
Single Choice: If you want to change the previously selected Option Type for this option, you can do it from here by clicking and selecting from the dropdown list.
Help Text: You can add option hints from here. If you add any text here, it will add a help icon with the current option.
Custom CSS: If you want to add custom CSS for this option, click here to add.
Class: Mention the class/ID here if you want to match with your store theme.
Title: Provide the options attribute name here.
Value: You can provide value for the attribute here. This value will be shown in and with the order as a selected option.
Added Price: If you want to charge extra for the attribute, put the added price here. This price will be added to your base product price.
Default: Click here to make the attribute as the default. It will be shown as the default attribute on the product page
Image: Click and upload an image for the attribute. You will be asked to upload an image for the icon, and the attribute itself. For the swatch, you can upload a 100×100 px image, and when the customer clicks on the swatch, the product image will be shown in the preview.
+ Child: If you want to add any conditional option for the attribute, click here. It will create a sup-option for that particular attribute. Then you need to add details to it just like a new option (processes are the same).
Delete: Click on the red trash icon to remove the options attribute, including all of its conditional child options (if any)
+ New Attribute: Click here to add another attribute
Reorder: Click and drag this dotted icon to arrange attributes.
Options List: CLick here to go back to the options list.
Save: Click the Save button to activate options with attributes.
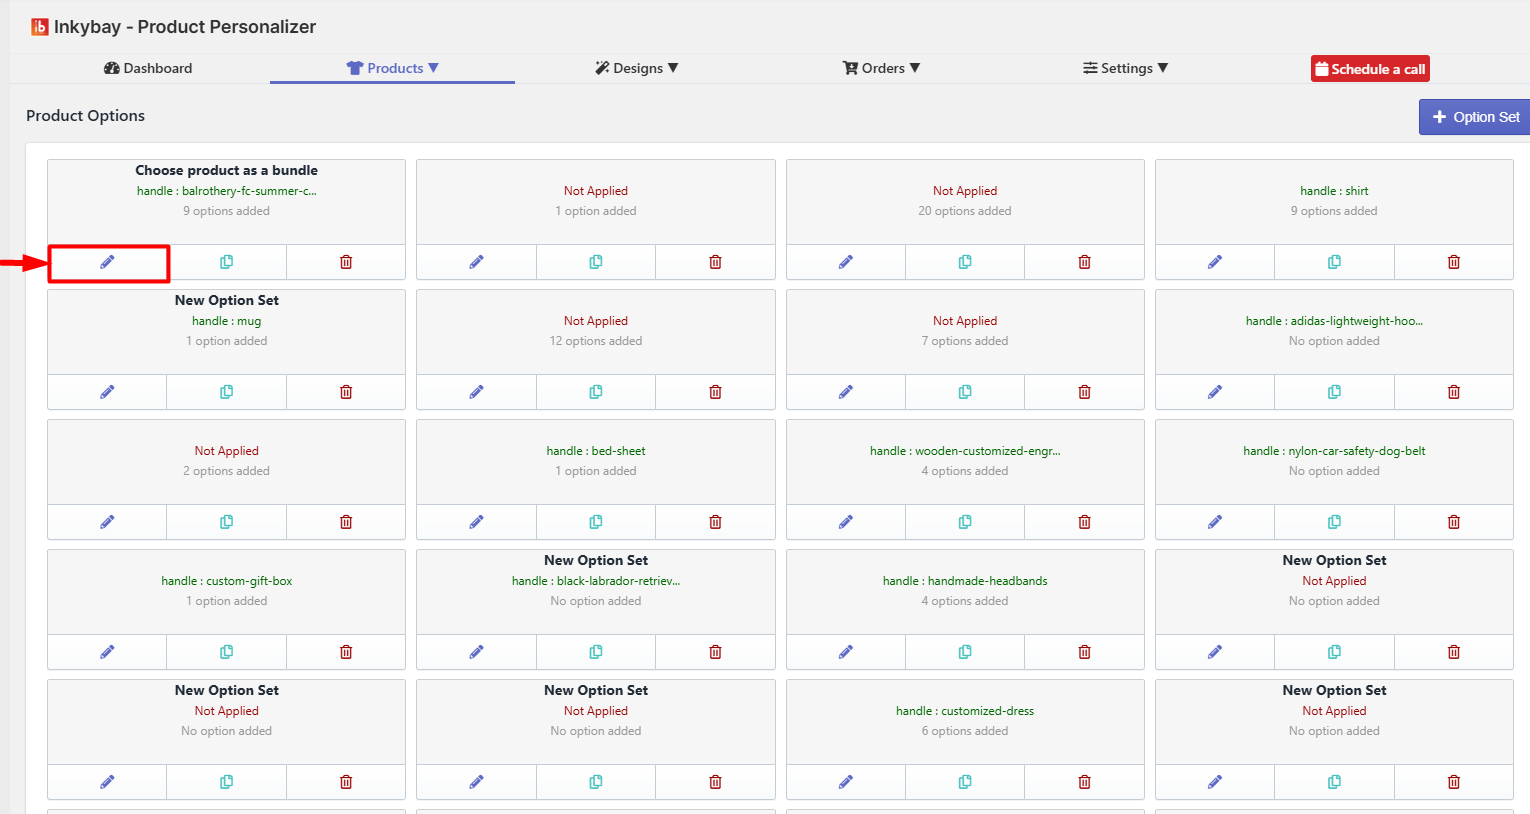
Extended product options
If you want to add an additional option to an already created option set, then go to Product Options, then find the option set, and click on the Pen Icon as shown in the image below.
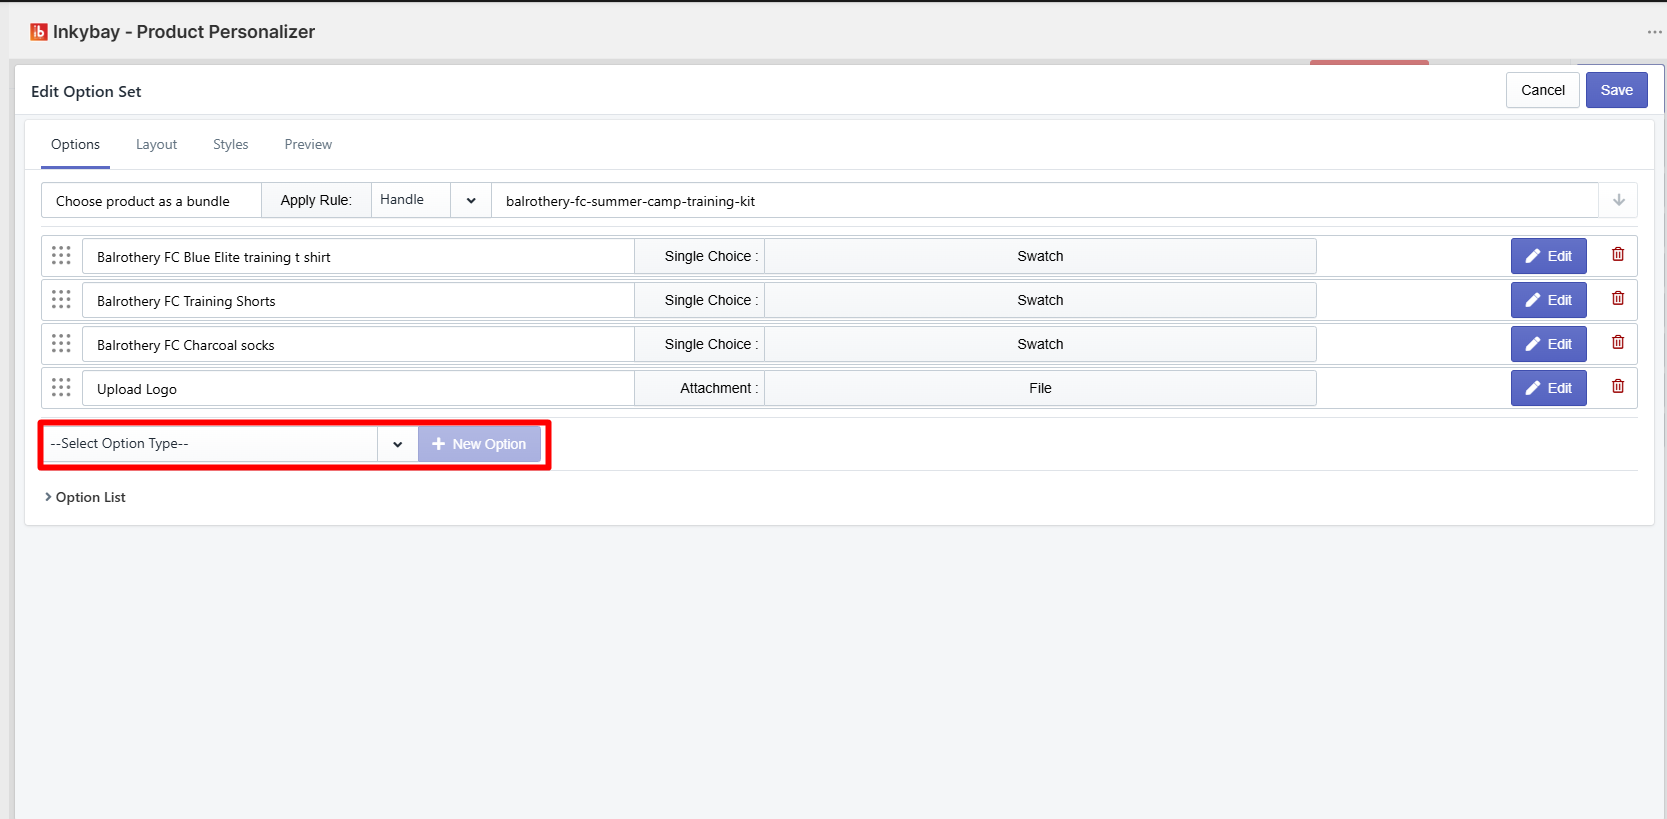
Now, go and select the Option Type and provide a type, then click on the + New Option.
Feel free to contact us whenever you face any issues or need assistance. You can also reach us:
InkyBay app Live chat
Support ticket from the InkyBay app
Email to support@productsdesigner.com
Did this post help you?