Category
3 min to read
Last Update on 05 May 2026
How to Add Pricing to Print Area and Styles
With this feature, you can set an extra price for each print area side and style of your product. This price is automatically added to the base product price whenever a customer adds a design to that specific side or selects a particular style.
What is the print area? The print area is the defined space on a product where customers can add their designs to personalize it. Setting a price for this area allows you to charge accordingly based on which side or style of the product is being customized.
💡 Important
This setting applies per product side. Make sure your product sides are already created before configuring print area and style pricing.
To set up a price for the Print area and styles, follow these steps below-
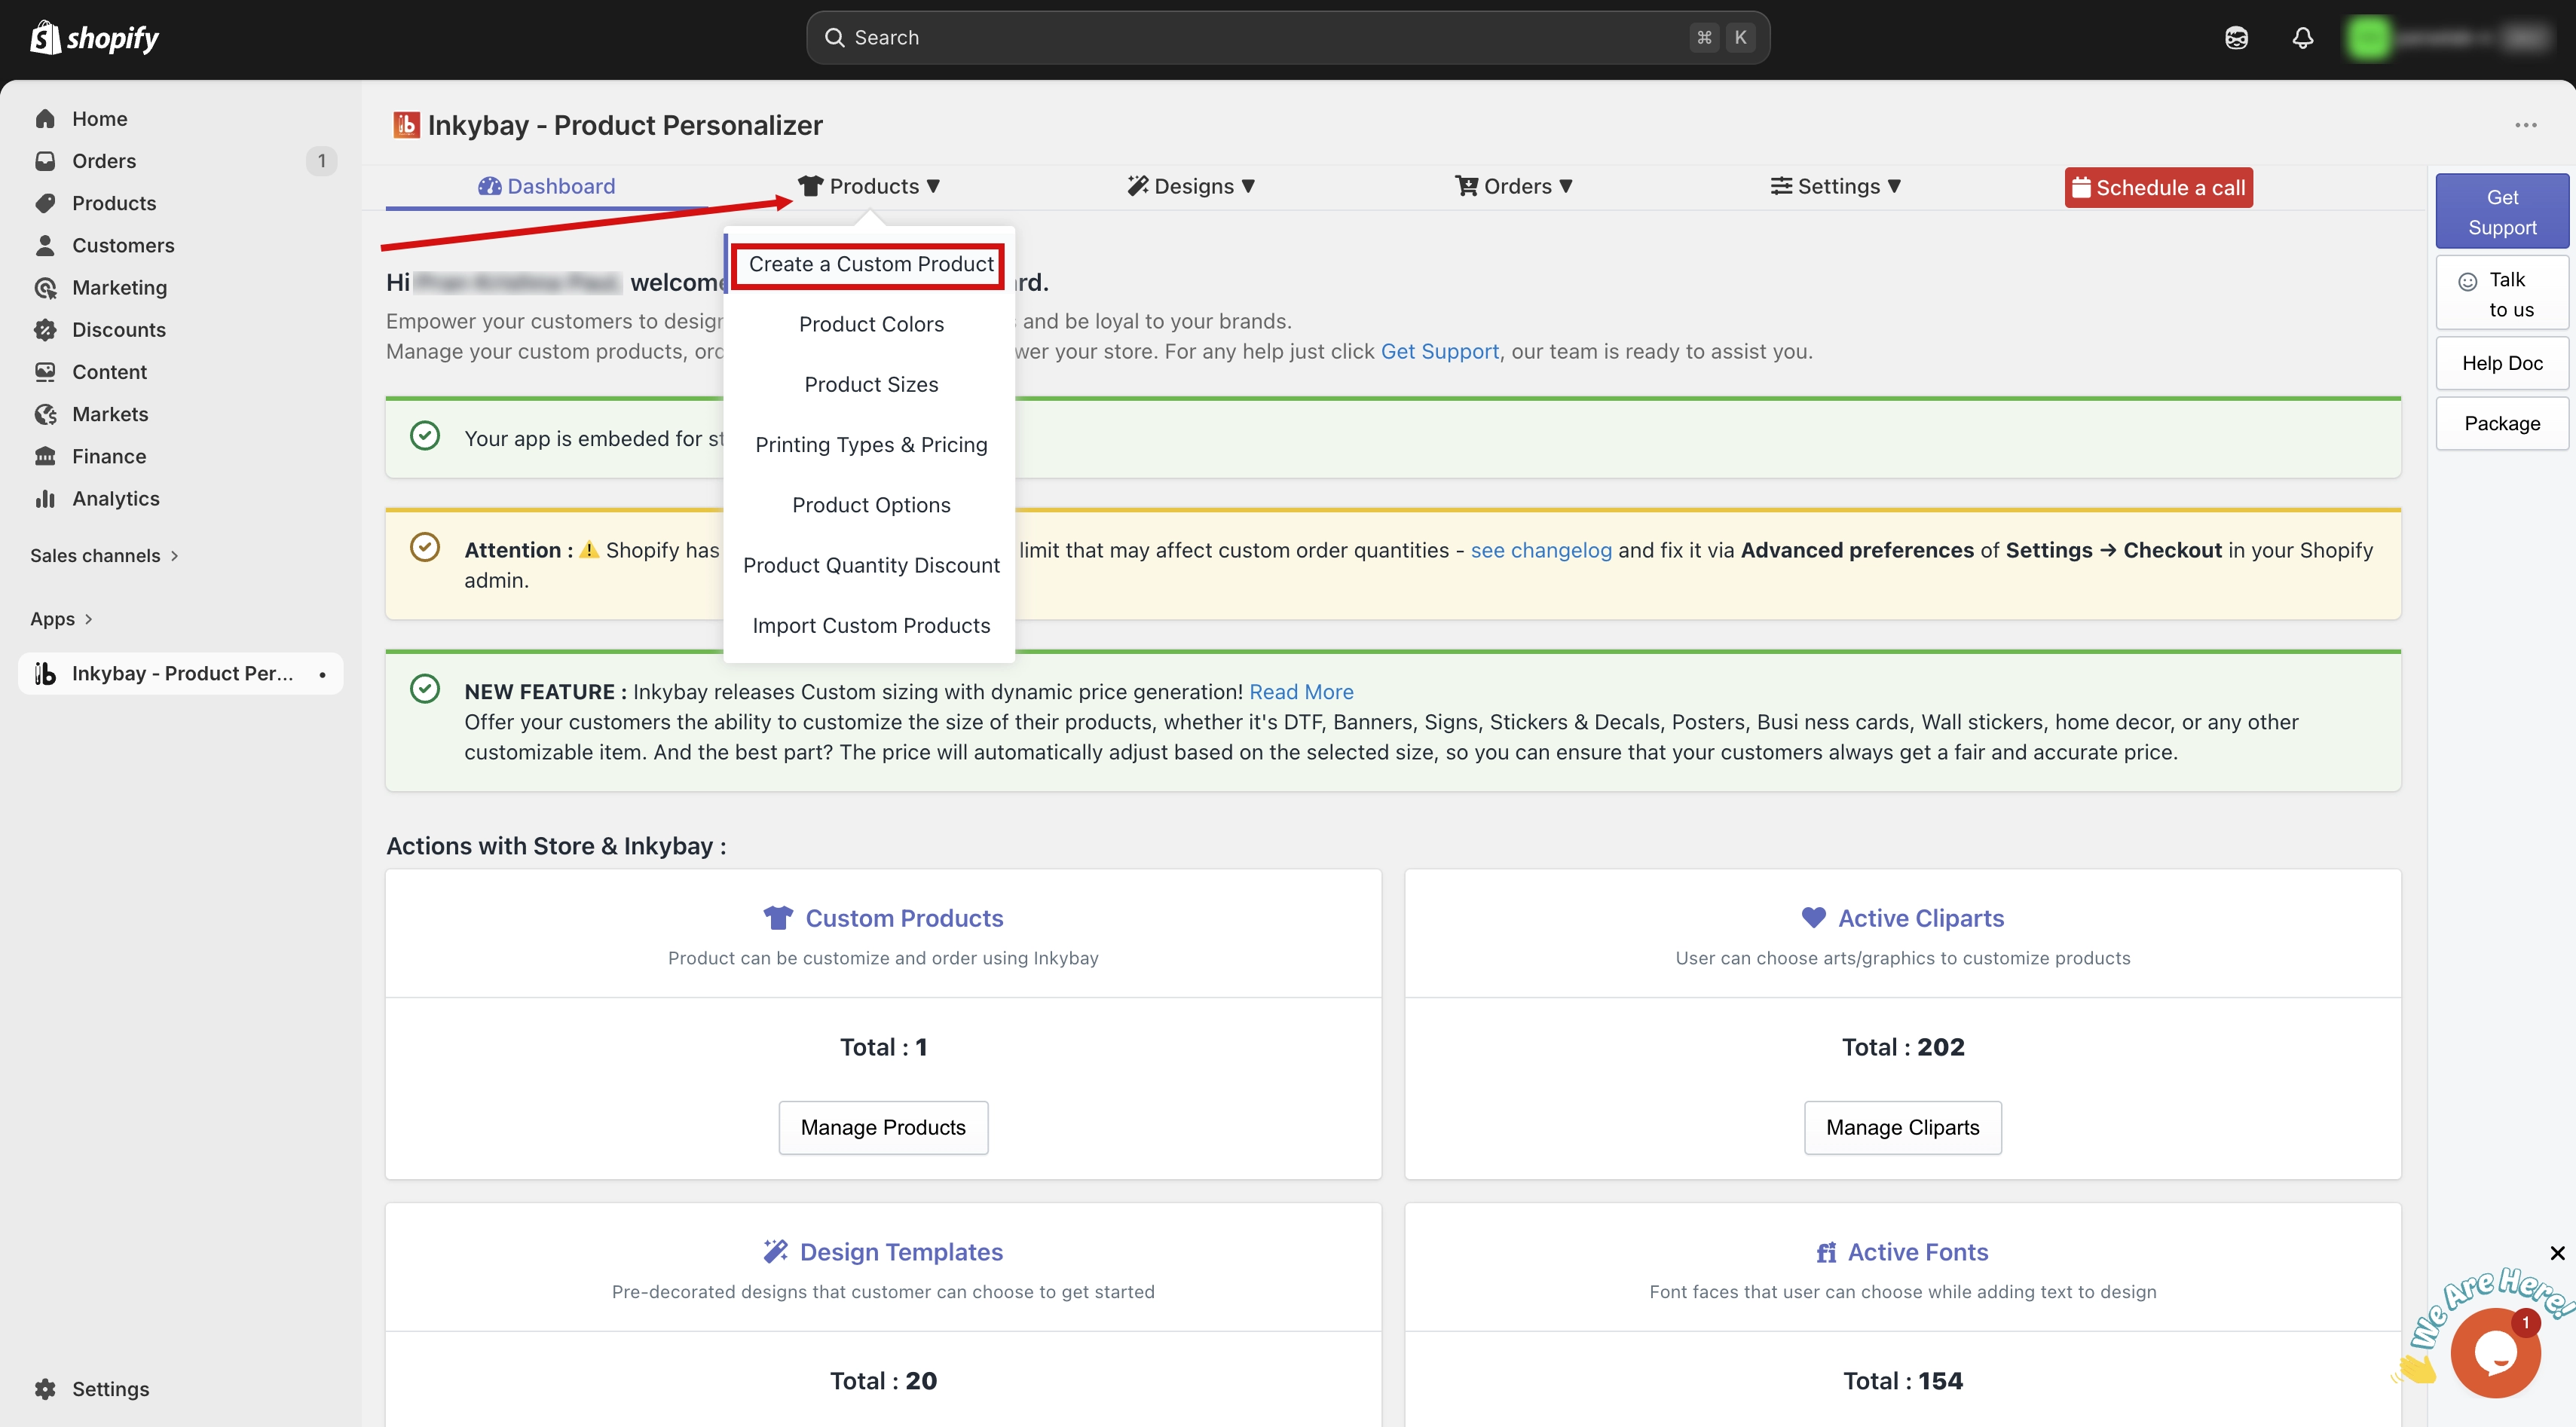
Step 1: Access your store products.
Go to your admin dashboard. Hover over the Products option, then select Create a Custom Product.
Step 2: Find and edit the product.
Locate the product you want to update and click the Edit button next to it.

Step 3: Open Advanced Settings.
Scroll down to the Product Setup for Design Tool section and click the Advanced Settings button.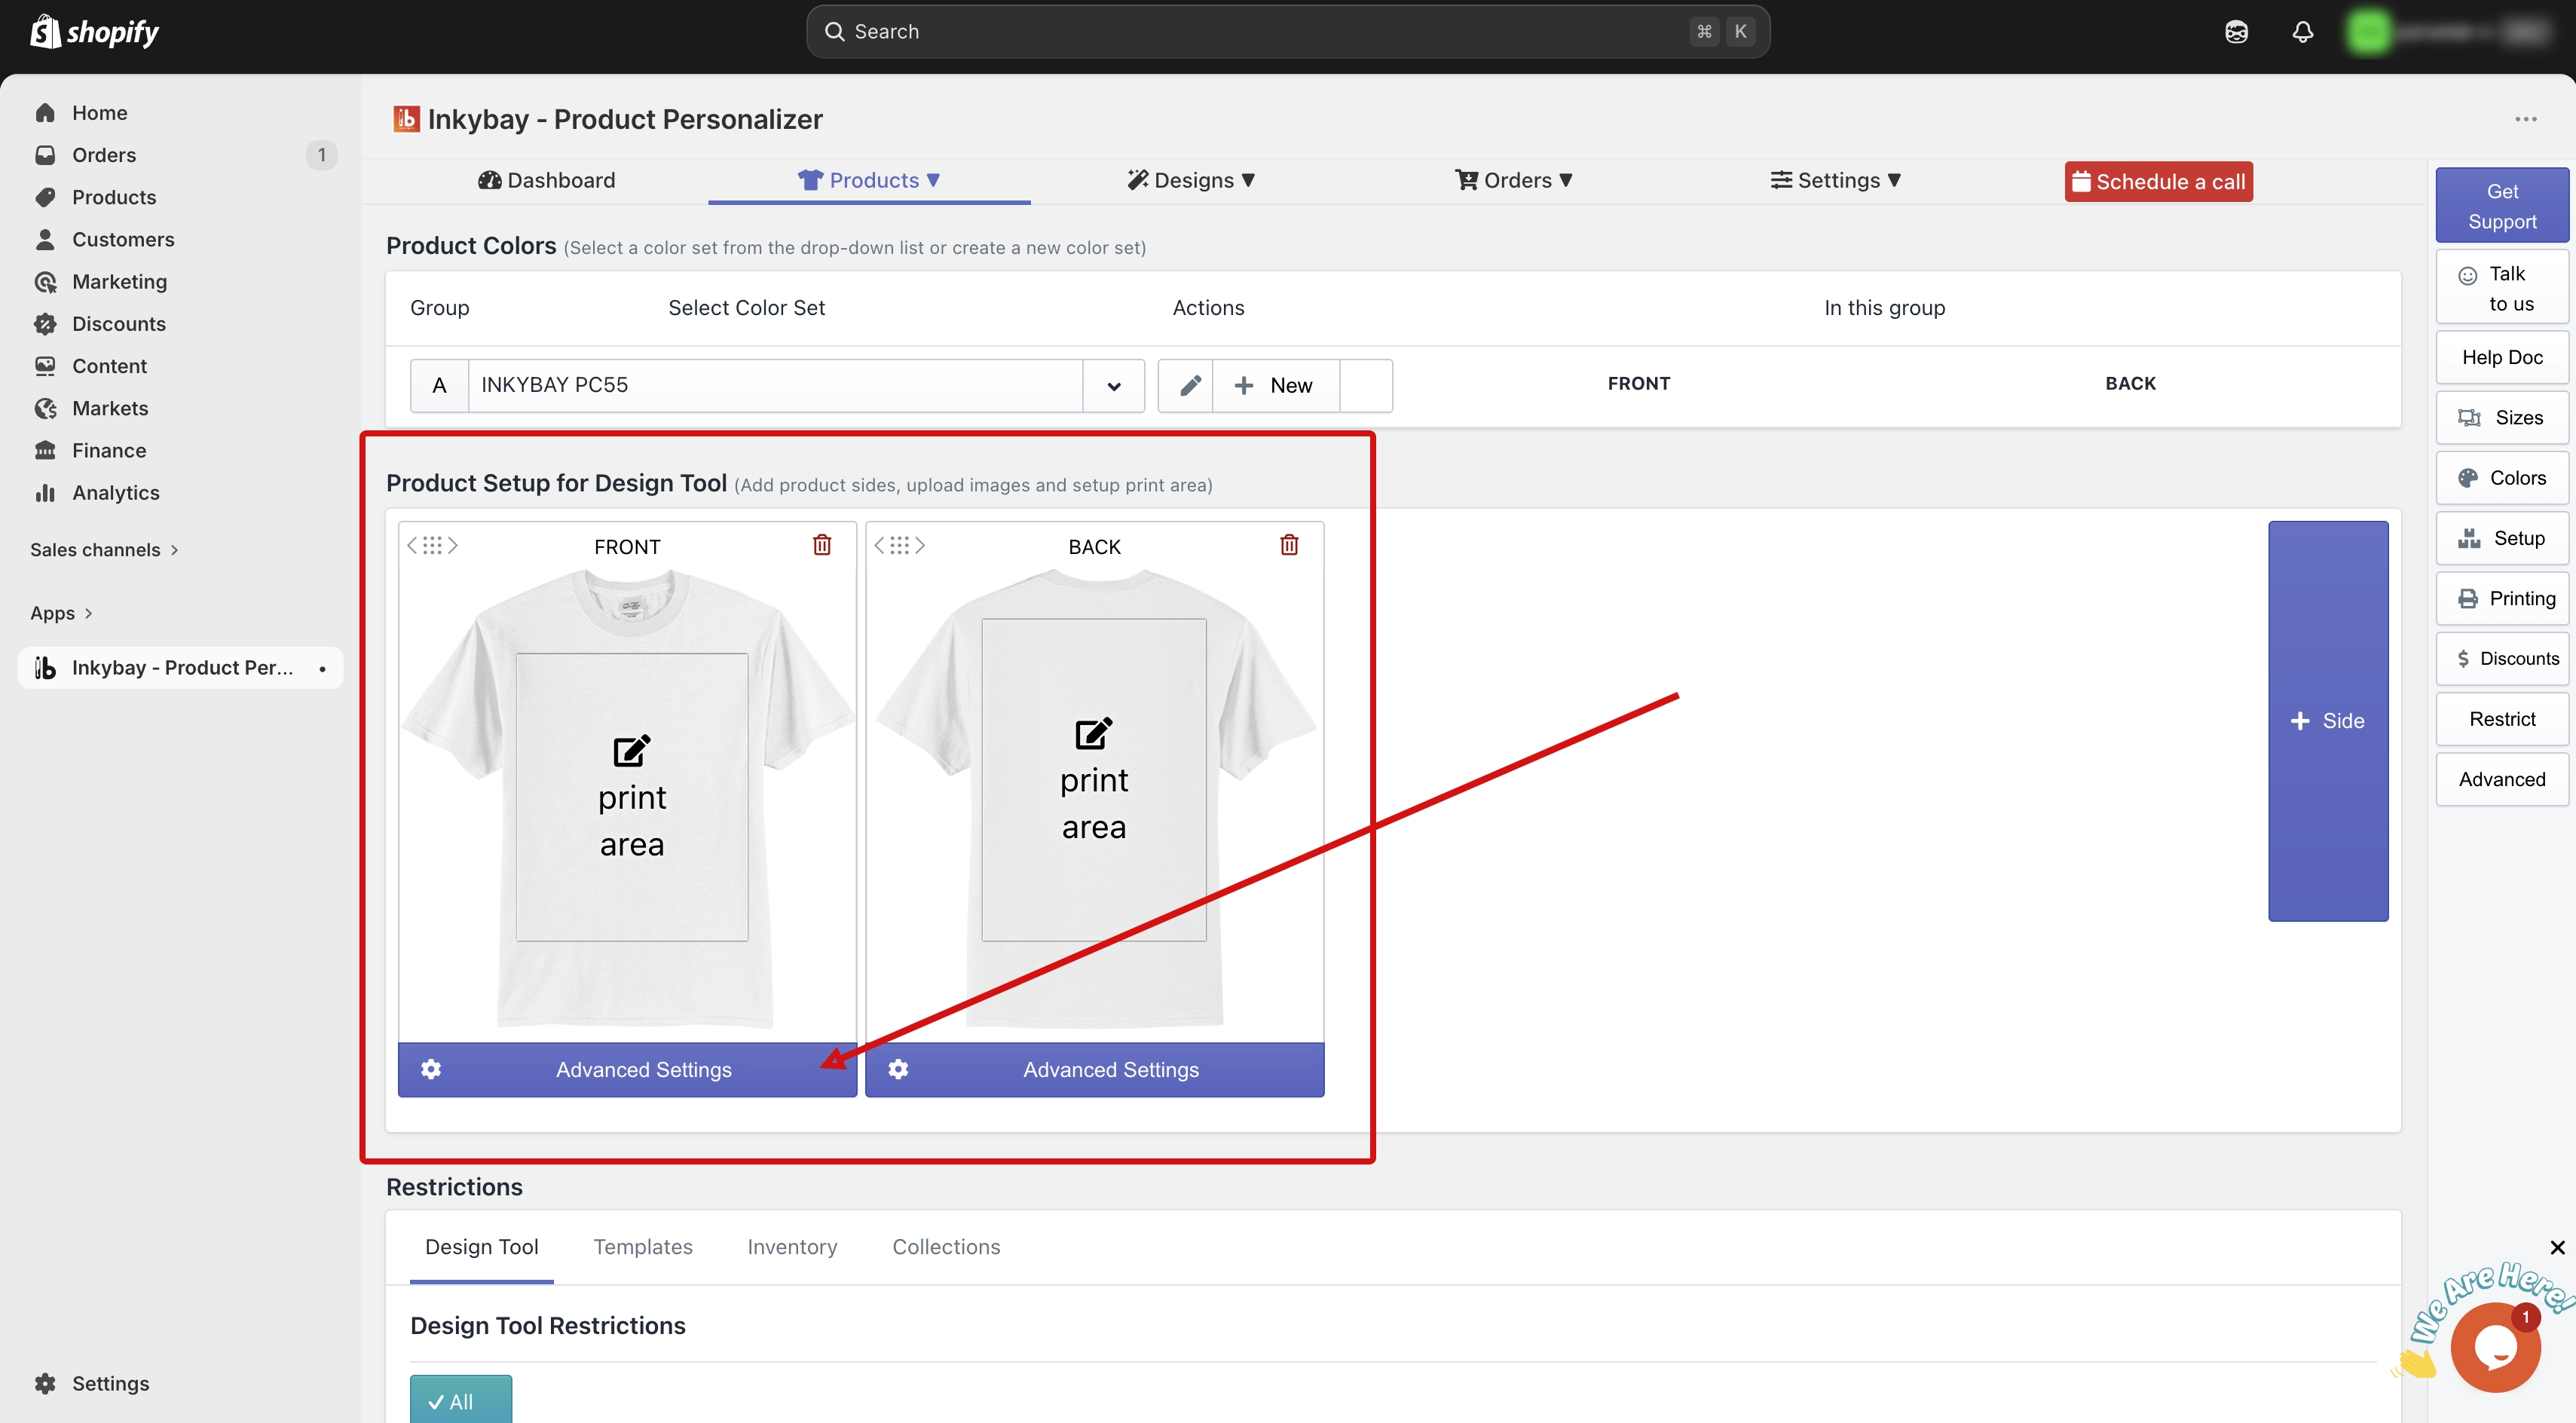
Step 4: Select the product side.
You will see all your created product sides. By default, the first side stays open after clicking Advanced Settings. If you want to configure a different side, click on that side tab and it will expand for that particular side.
Set Up Price for Styles
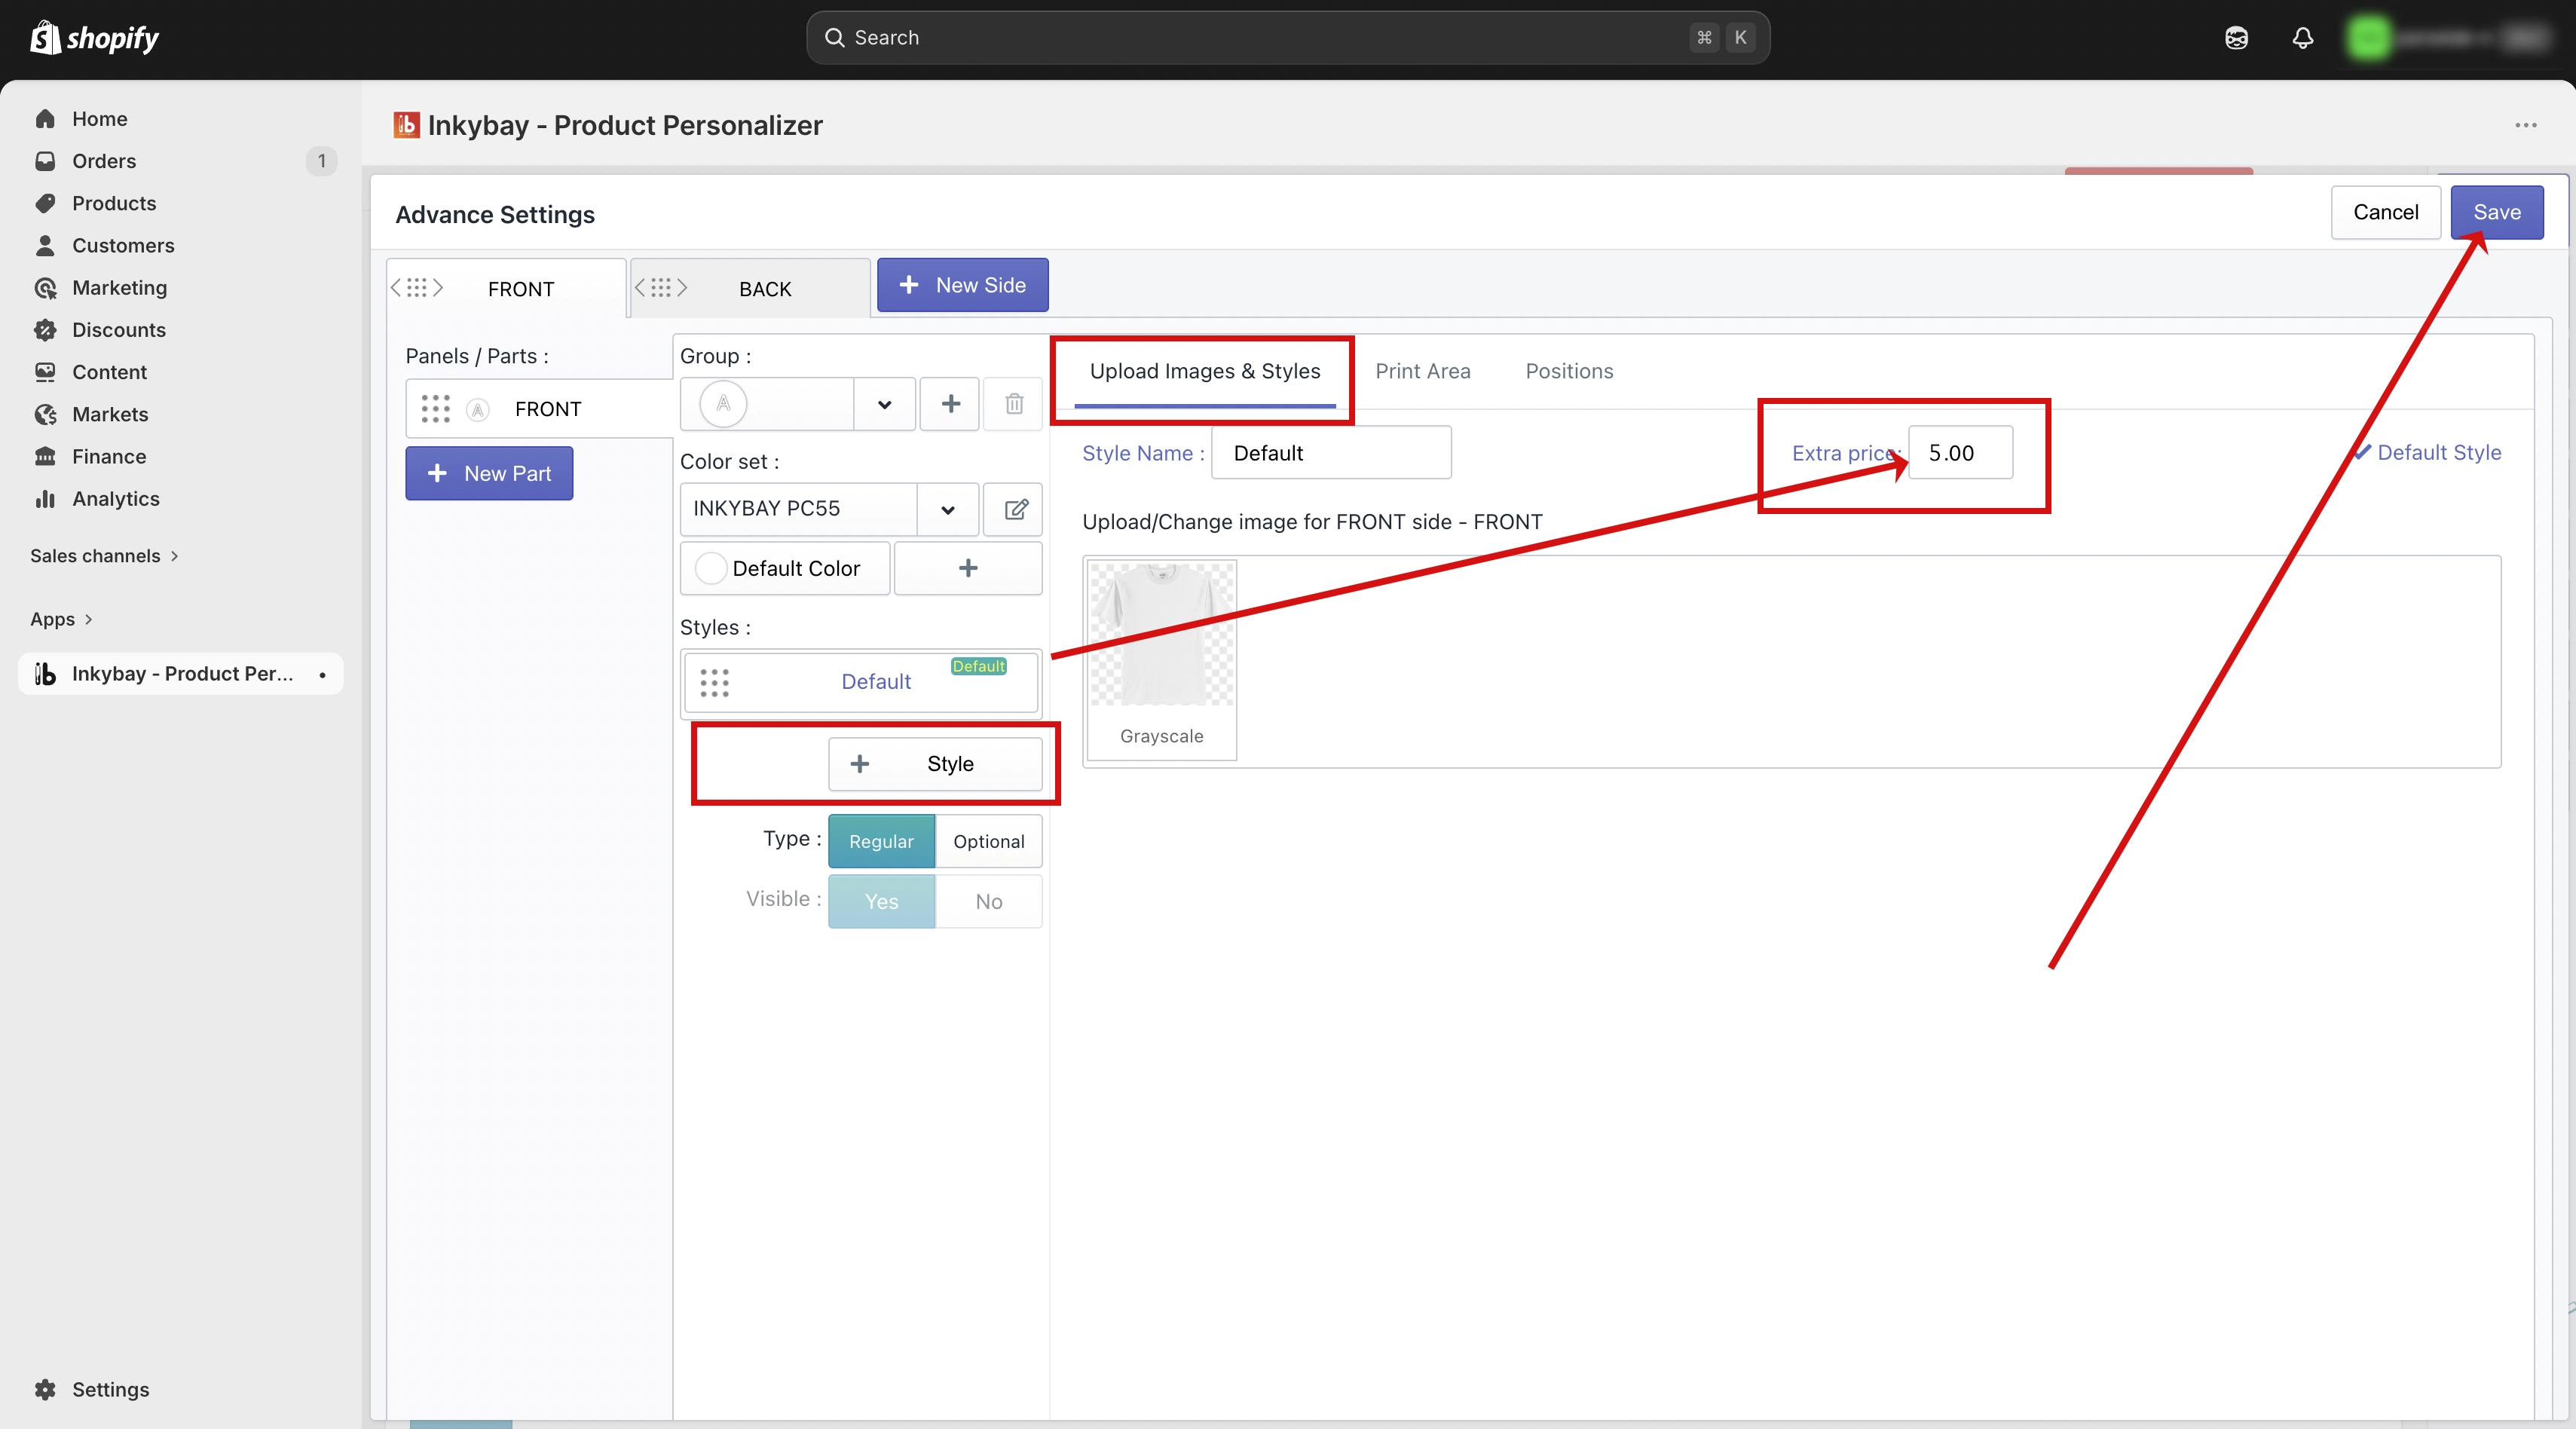
Step 5: Set the extra price for styles.
By default, the Upload Images & Styles tab is open for the first side. Here you can set pricing per style.
(5.1) Extra Price field — Enter the extra price you want to charge for this specific style. This amount will be added to the product's base price when a customer selects that style.
(5.2) Multiple styles — You can add multiple styles for a single side. Each style can have its own extra price, and the price of whichever style the customer selects will be added to the total.
Step 6: Save your changes.
Click the Save button to apply the style pricing. The configured amounts will now be included in the total price when a customer selects a style for your product.
Set Up Price for Print Area
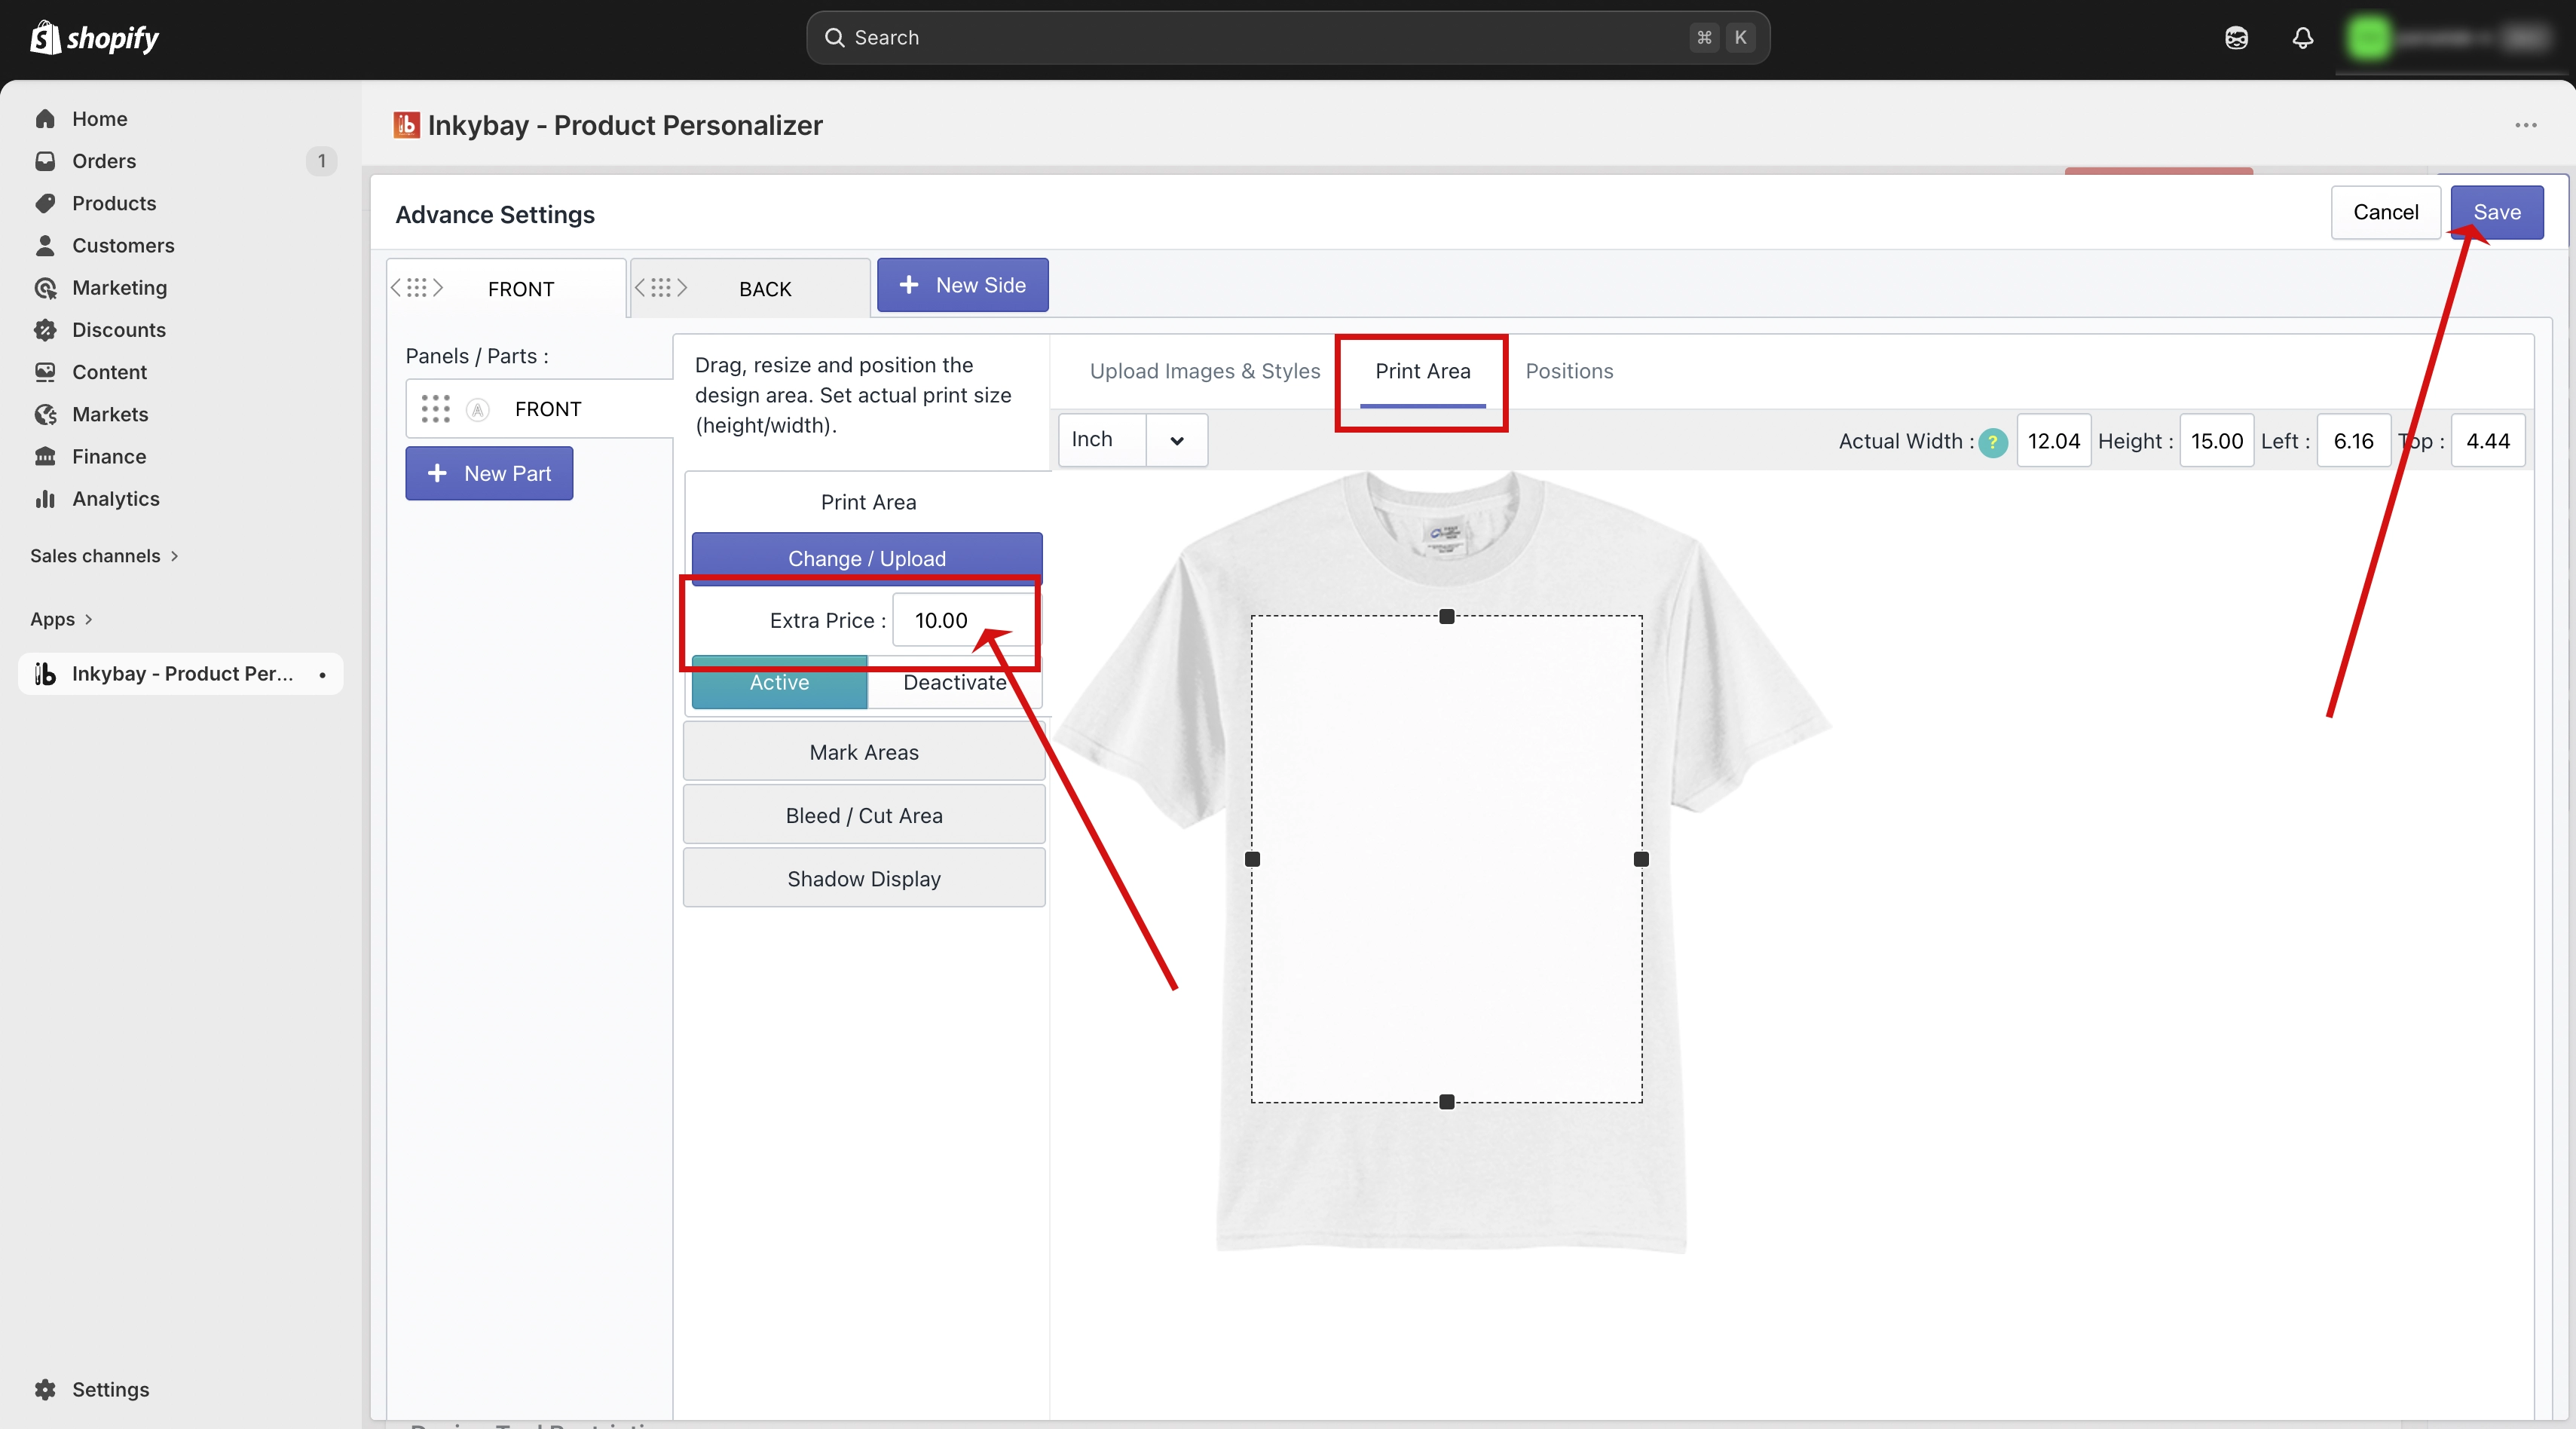
Step 5: Set the extra price for the print area.
Click on the Print Area tab within the selected side. You will see a field named Extra Price.
(5.1) Extra Price field — Enter the price you want to charge for this specific product side. This amount will be added to the product's base price whenever a customer adds a design to this side.
Step 6: Save your changes.
Click the Save button to apply the print area pricing. This amount will now be included in the total price when a customer designs on that side of your product.
🎯 Note
You can set a different extra price for each product side and style independently. For example, you may charge more for a front print than a sleeve print, or price premium styles higher than standard ones.
Need more help? Feel free to contact us whenever you face any issues or need assistance. We’re available 24/7. You can also reach us:
InkyBay app Live chat
Support ticket from the InkyBay app
Email to support@productsdesigner.com
Did this post help you?