Category
4 min to read
Last Update on 06 May 2026
How to Set Quantity Discounts Using InkyBay
InkyBay’s Quantity discount feature is more useful for stores selling customized,
personalized, or print-on-demand products than 3rd party apps.
Shopify store owners use this feature because it dynamically calculates discounts based on complex customization pricing (colors, size, print location). But Shopify’s native discount app fails to account for added design costs.
You can create a multiple (no limit) quantity discount set and apply it to your custom products.
You can set up a quantity discount percentage or a fixed discount amount. You can choose the discount application type for:
-
Base product price
-
Design/customization price
-
Option price
How to set up Quantity Discount and Tiered Pricing
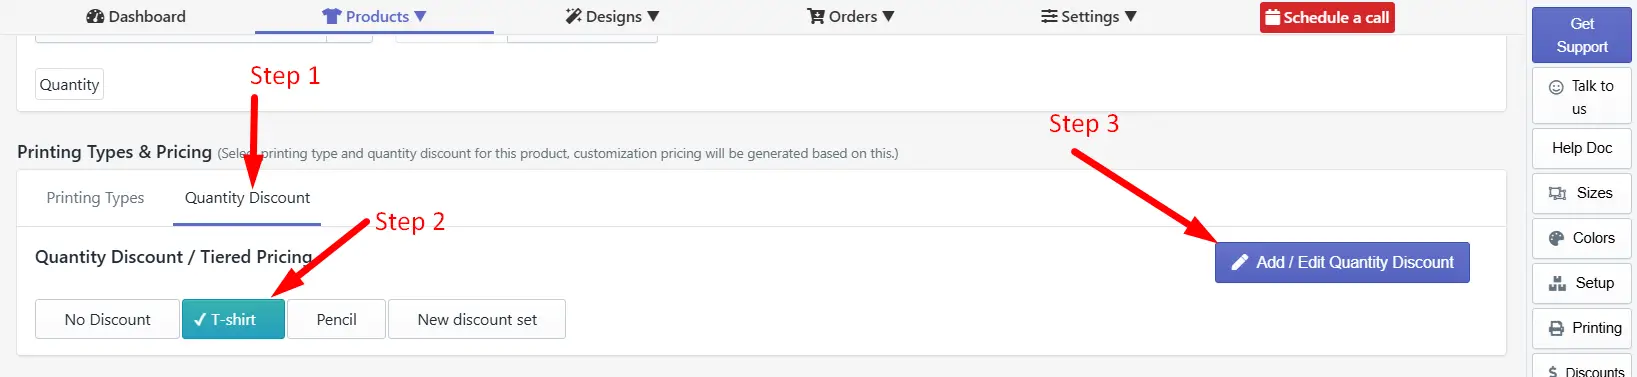
Step 1: Access to the Quantity Discount option.
Click the Quantity Discounts tab next to the Printing Types when creating a custom product.
Step 2: Click on the discount set.
Selected a quantity discount set for the product. You can select/deselect from the available quantity discount set for the current product.
Step 3: Add/Edit Quantity Discount set.
Add a new quantity discount set or edit an existing one.
How to add/edit a quantity discount set
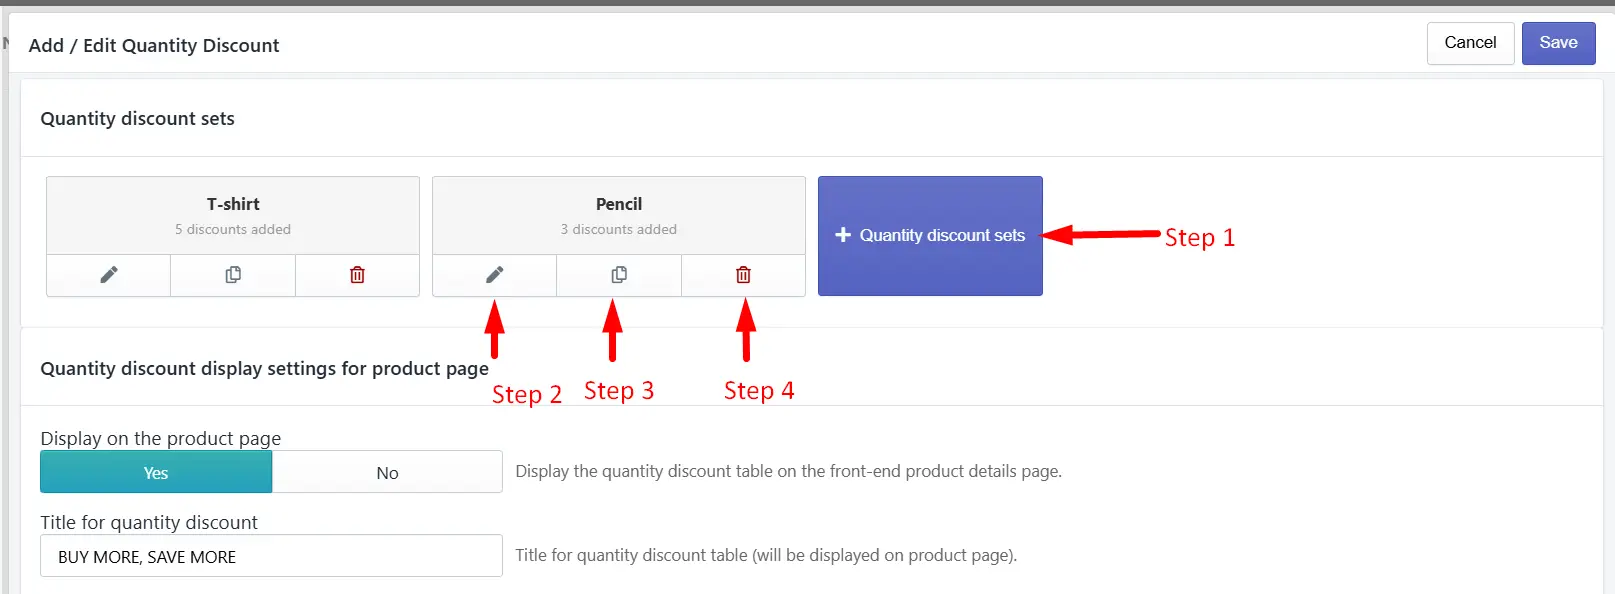
Step 1: Click the + Quantity Discount Set button to create a new set.
Step 2: Click on the edit icon to edit an existing discount set.
Step 3: Click on the Duplicate icon to duplicate any existing discount set.
Step 4: Click on the Delete icon to delete an existing option set.
Create a new quantity discount set
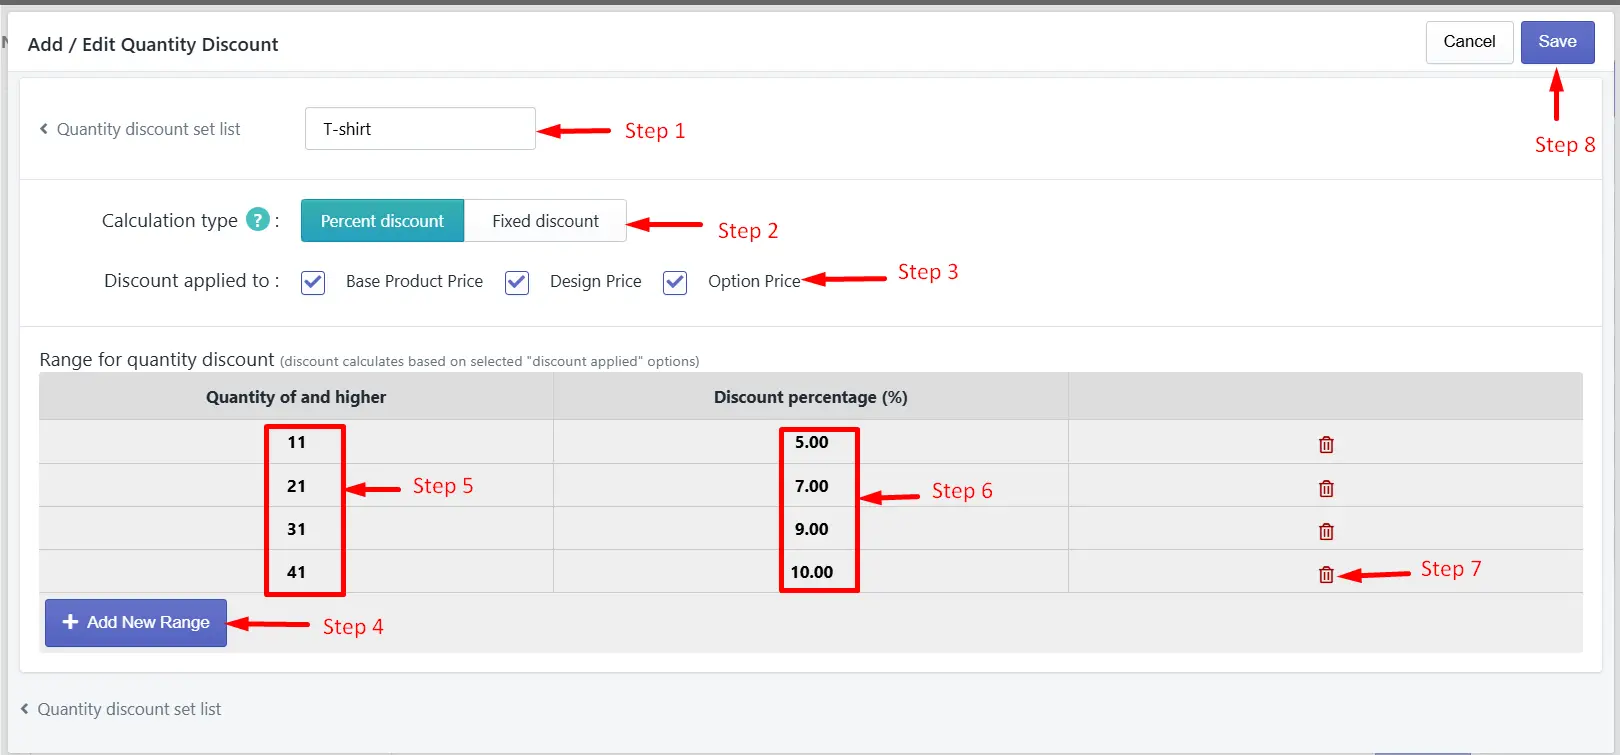
Step 1: Enter the Quantity discount set name.
Insert the name of the quantity discount set.
Step 2: Discount calculation type.
Click the percent discount to calculate the quantity discount with a % (e.g., product quantity 11 and above, discount 5%). Click the Fixed discount to calculate the quantity discount with a fixed discount amount.
|
🎯Note You have to enter only the discount amount, not the product's final price after the discount. This discount amount will be deducted from the base product price. |
Step 3: Select the Discount type.
-
Base Product Price: Check this to apply the discount from the base product price.
-
Design Price: Check this if you want the discount to be calculated for any additional customization pricing as well.
-
Option Price: Check this if you want the discount to be calculated based on the product option's additional price.
Step 4: Add a new discount range/row (product quantity and discount amount).
Add a new quantity range to add a new discount row.
Step 5: Quantity of and higher
Enter the product quantity to apply the discount.
Step 6: Add discount percentage (%).
This will be only the discount amount over the base product price, not the final discounted price.
Step 7: Remove the discount row.
Click the trash icon to remove the discount row.
Step 8: Save the changes.
Click the Save button to apply the changes.
How to display quantity discount on the product page
You can organize the quantity discount table data and decide whether to show it on the product page or not. Customize the display of the discount table format through Custom CSS.
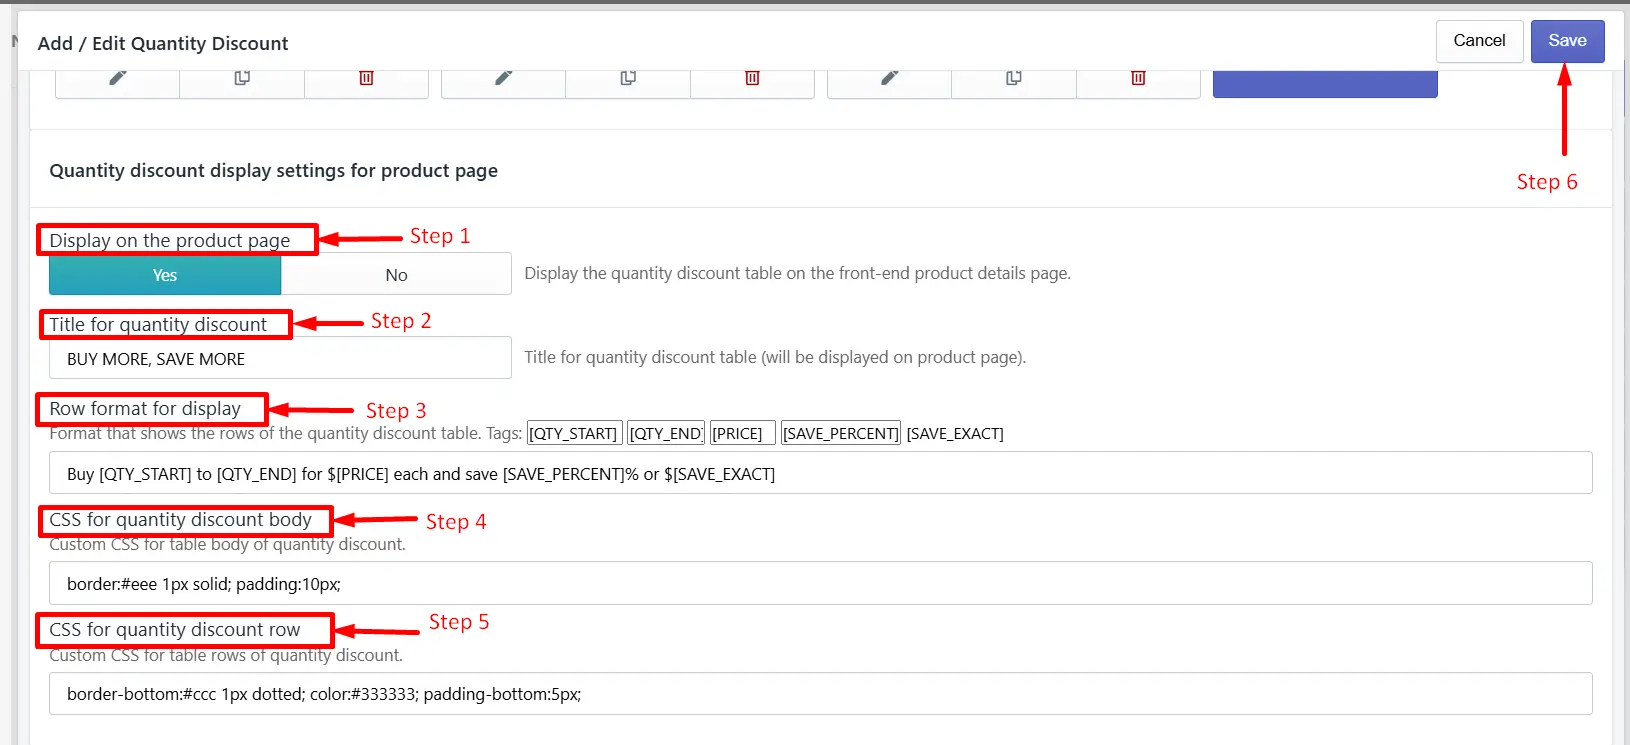
Step 1: Set the status to display the quantity discount table.
Select Yes to show the quantity discount table on the product page. If you do not want to show the table on the product page, select No.
Step 2: Set the Quantity discount title.
Add your preferred quantity discount title to show at the top of the discount table.
Step 3: Discount data display format per row.
You can customize the inner text, currency code, and the data display by using tags.
Step 4: Set the Quantity discount body CSS.
Edit or keep the default CSS for the Quantity discount body.
Step 5: Set the Quantity discount row CSS.
Edit or keep the default CSS for the Quantity discount table body.
Step 6: Save the changes.
Click the Save button to apply the changes.
Feel free to contact us. You can also reach us:
-
InkyBay app Live chat
-
Support ticket from the InkyBay app
-
Email to support@productsdesigner.com
Did this post help you?