Category
4 min to read
Last Update on 05 May 2026
How to Use Images Instead of Colors
With this feature, you can upload your own product image for each color variant — giving customers a more realistic preview in the designer window instead of a flat color swatch. This is especially useful for products with textures, patterns, heather finishes, or any color that cannot be accurately represented by a solid color code.
When Should You Use This?
Use this feature when:
Your product has a heather, marbled, or textured color variant that a plain hex code cannot represent.
You have a full-color product image for each color variant and want customers to see a realistic preview in the designer.
You want to display a patterned or printed product surface instead of a plain color block.
Not sure? If your product looks fine with solid color swatches, you do not need this feature. The default option (No) works well for solid-color products using a grayscale base image.
How It Works
Inkybay offers two ways to handle product color previews in the designer window:
Option | How it works | Best for |
No(default) | You upload one backgroundless grayscale PNG. Inkybay automatically colorizes it using the hex code of whichever color the customer selects. | Solid, single-tone products |
Yes | You upload a separate custom image for each color variant. Inkybay displays that exact image when the customer selects that color. | Heather, textured, patterned, or multi-tone colors |
Step-by-Step: Enabling Image Instead of Color
How to Upload Your Product Image
Follow these steps in your Inkybay admin dashboard:
Access your store products.
Go to your admin dashboard. Hover over the Products option, then select Create a Custom Product.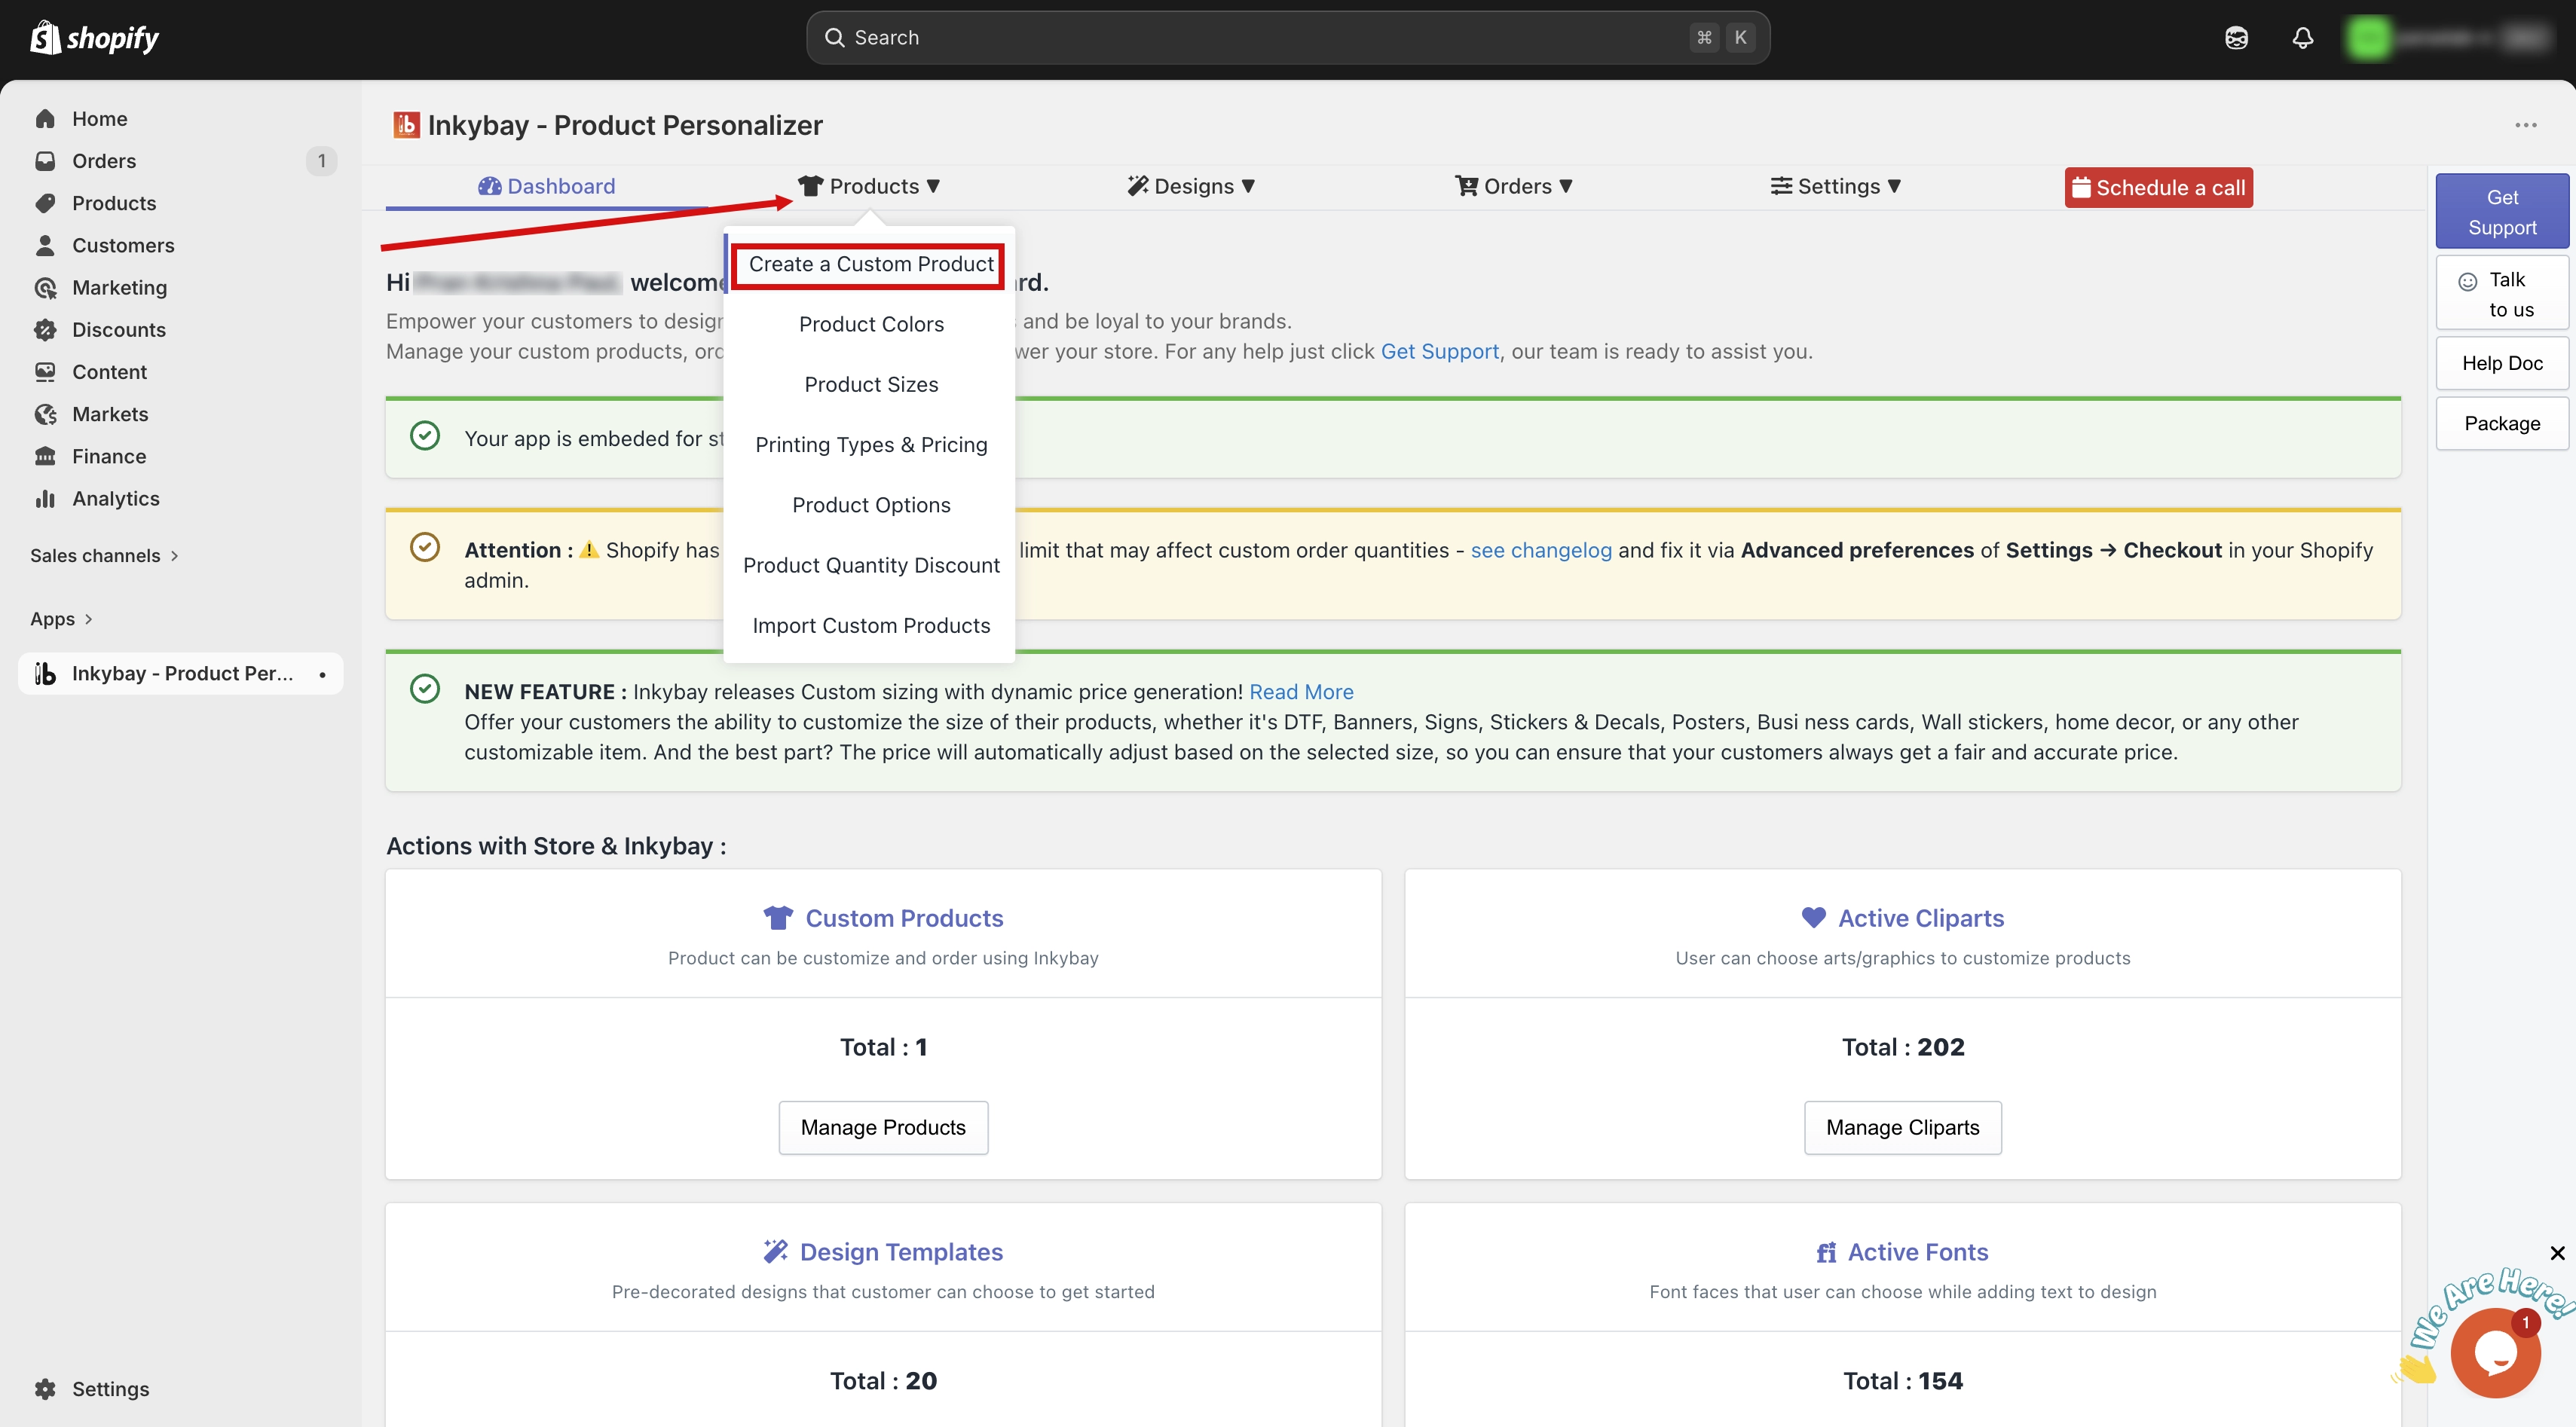
Find Your Product
Locate the product you want to update and click the Edit button next to it.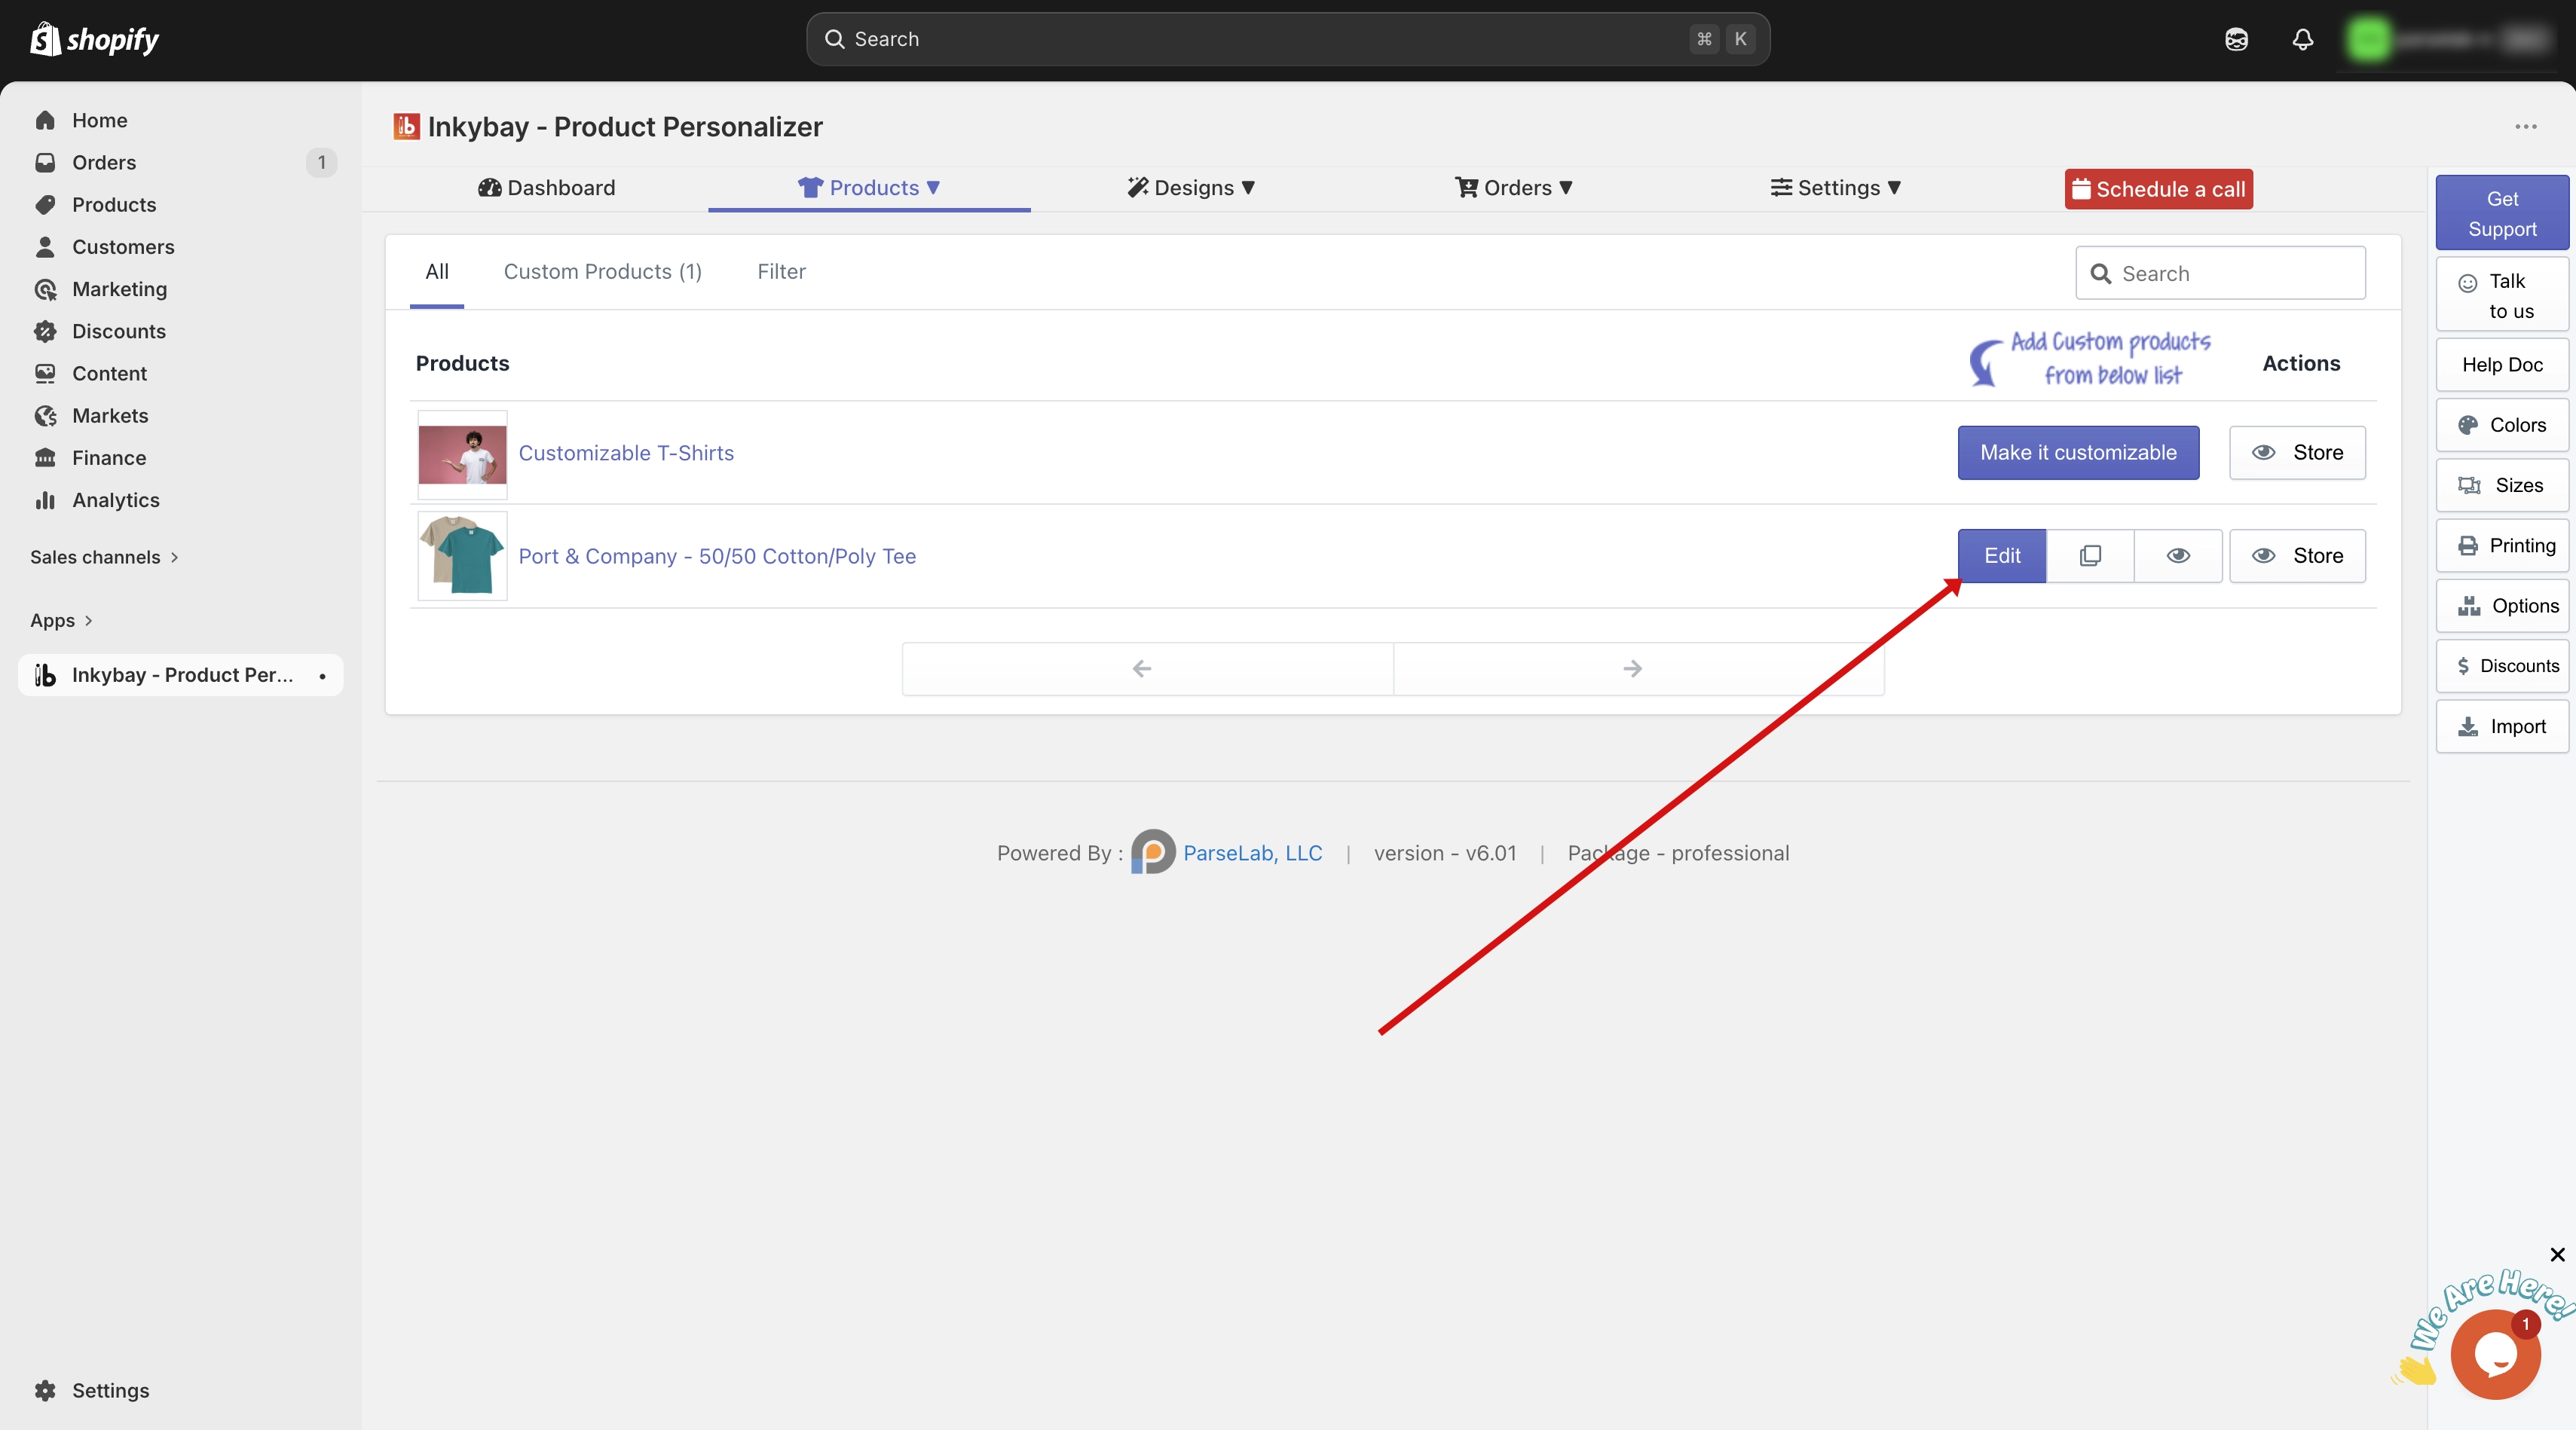
Open Advanced Settings
Scroll down to the Product Setup for Design Tool section and click the Advanced Settings button.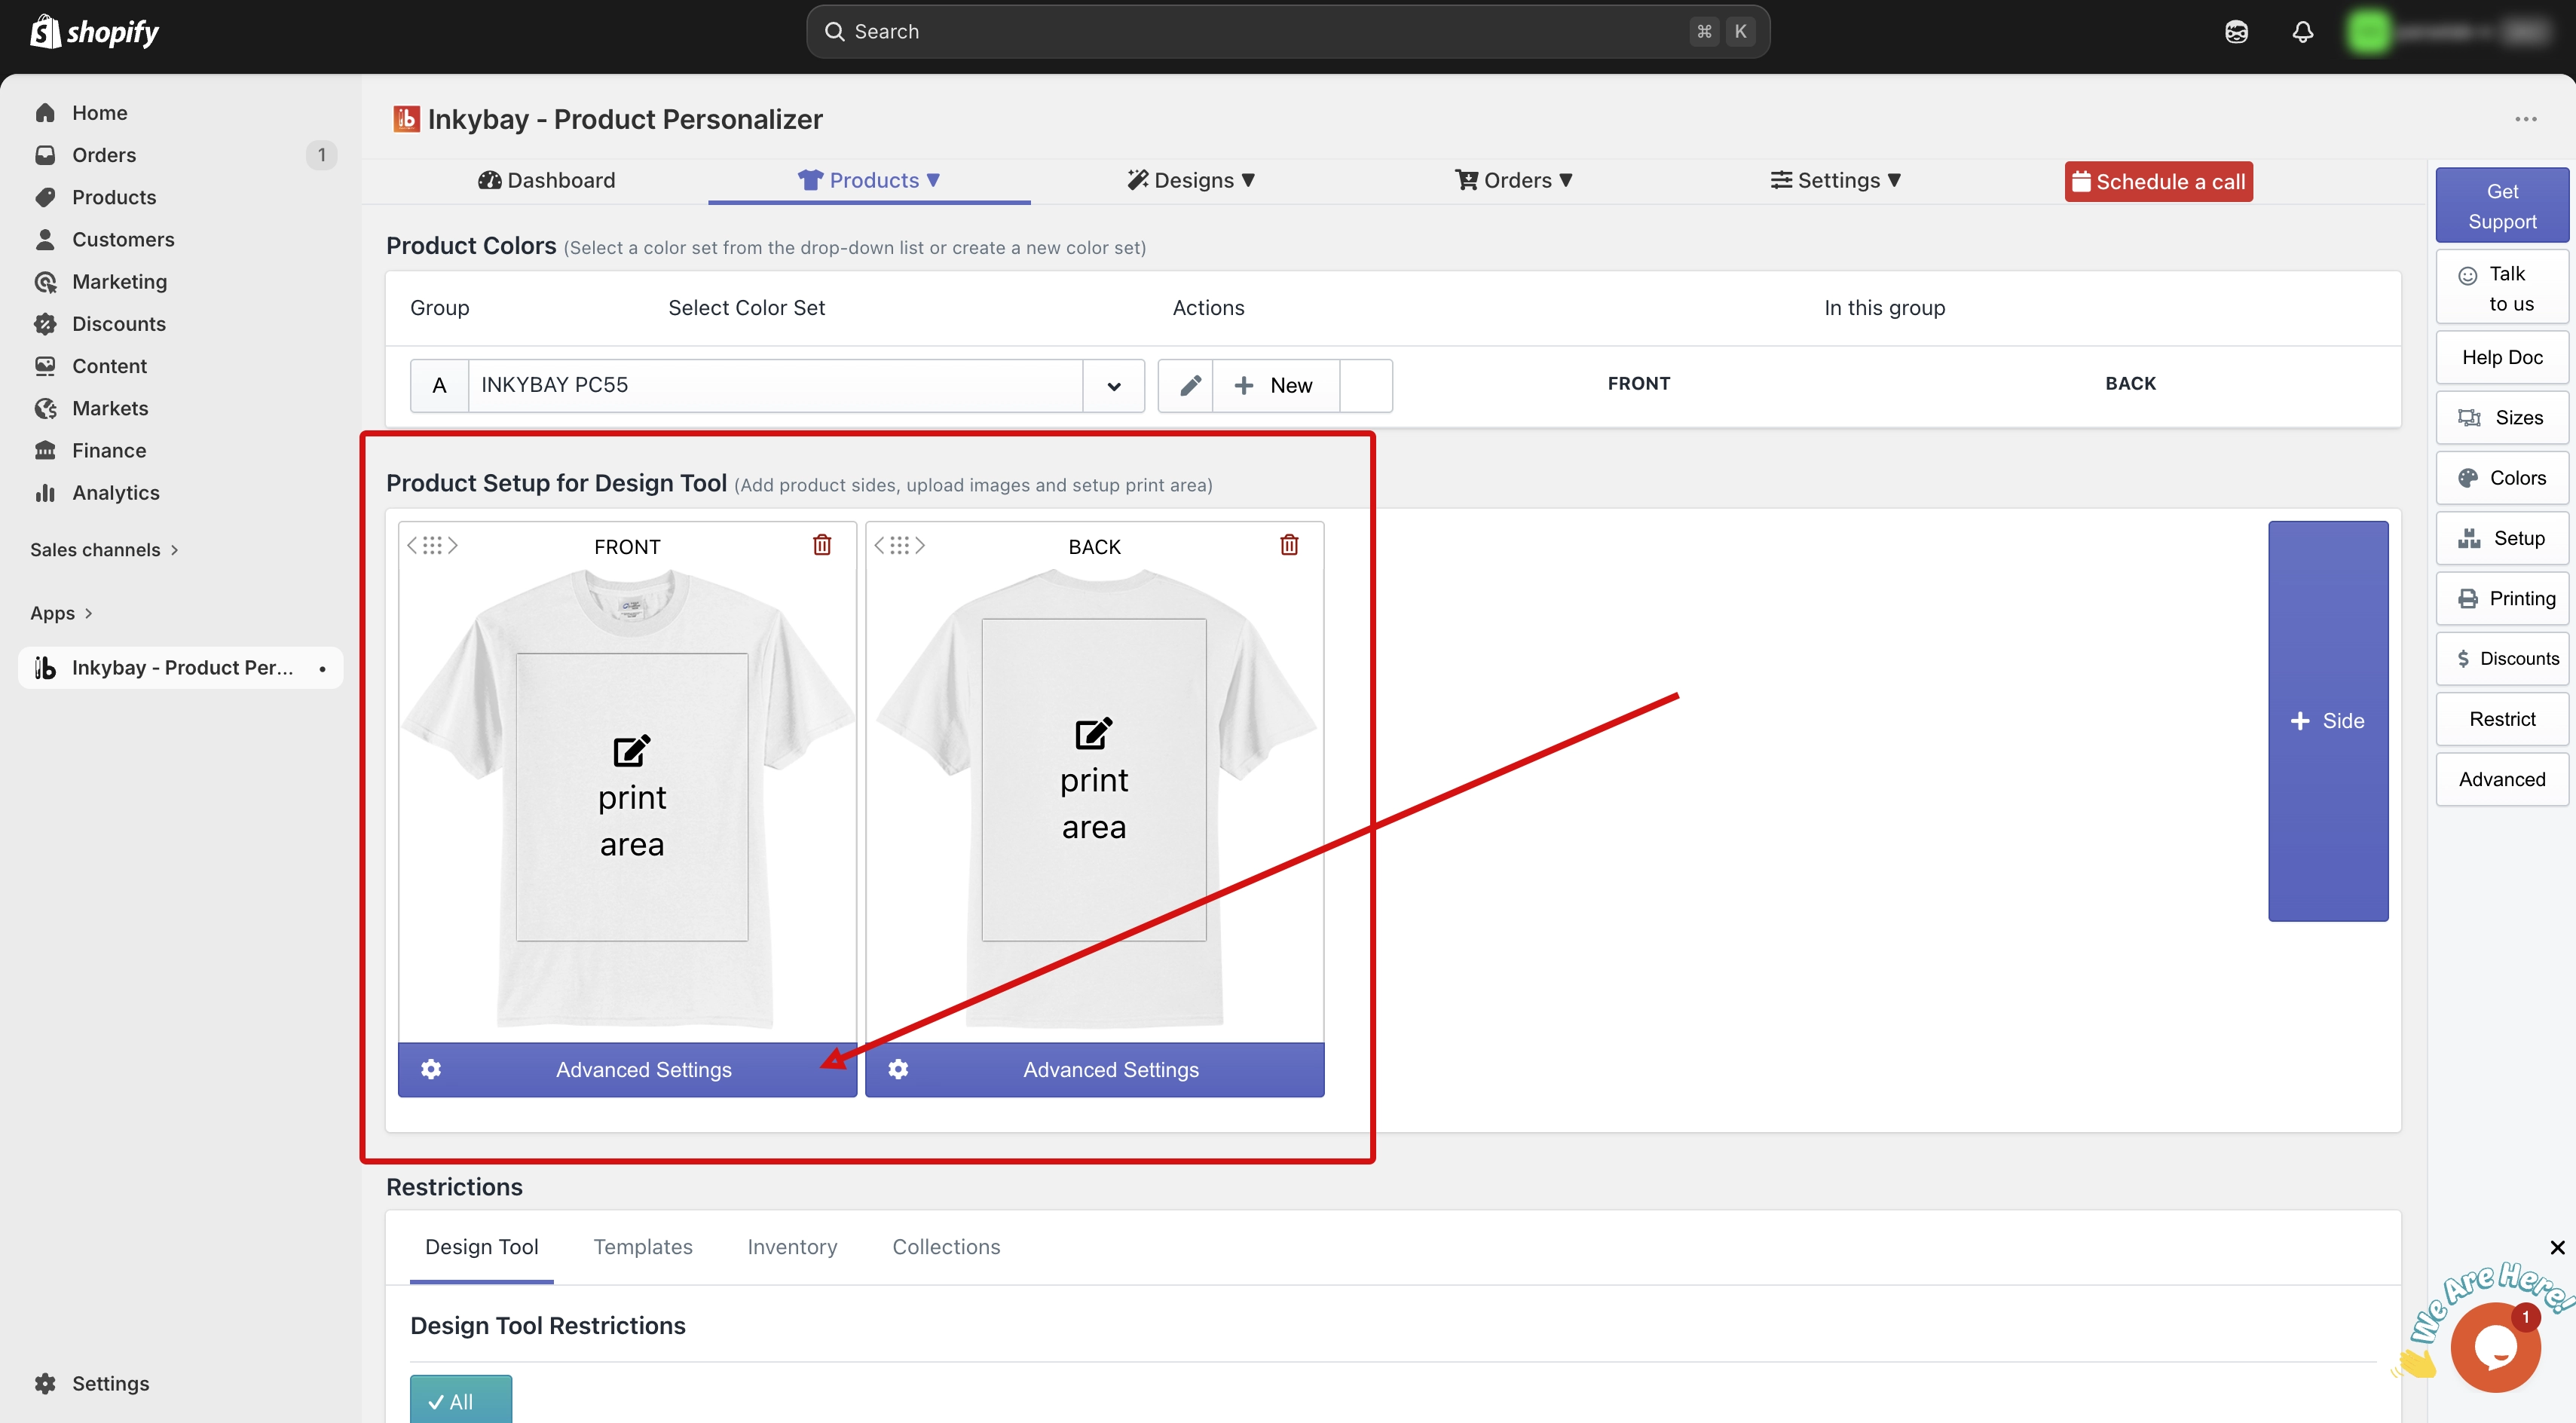
Find the Color Set section
On the selected side, look for the Color Set section. Here you will see the color set that is currently assigned to your product.
Change color set — Click the down arrow button to see all your existing color sets and choose a different one if needed.
Edit color set — Click the Edit icon to open the assigned color set. You will see all the colors available in that set.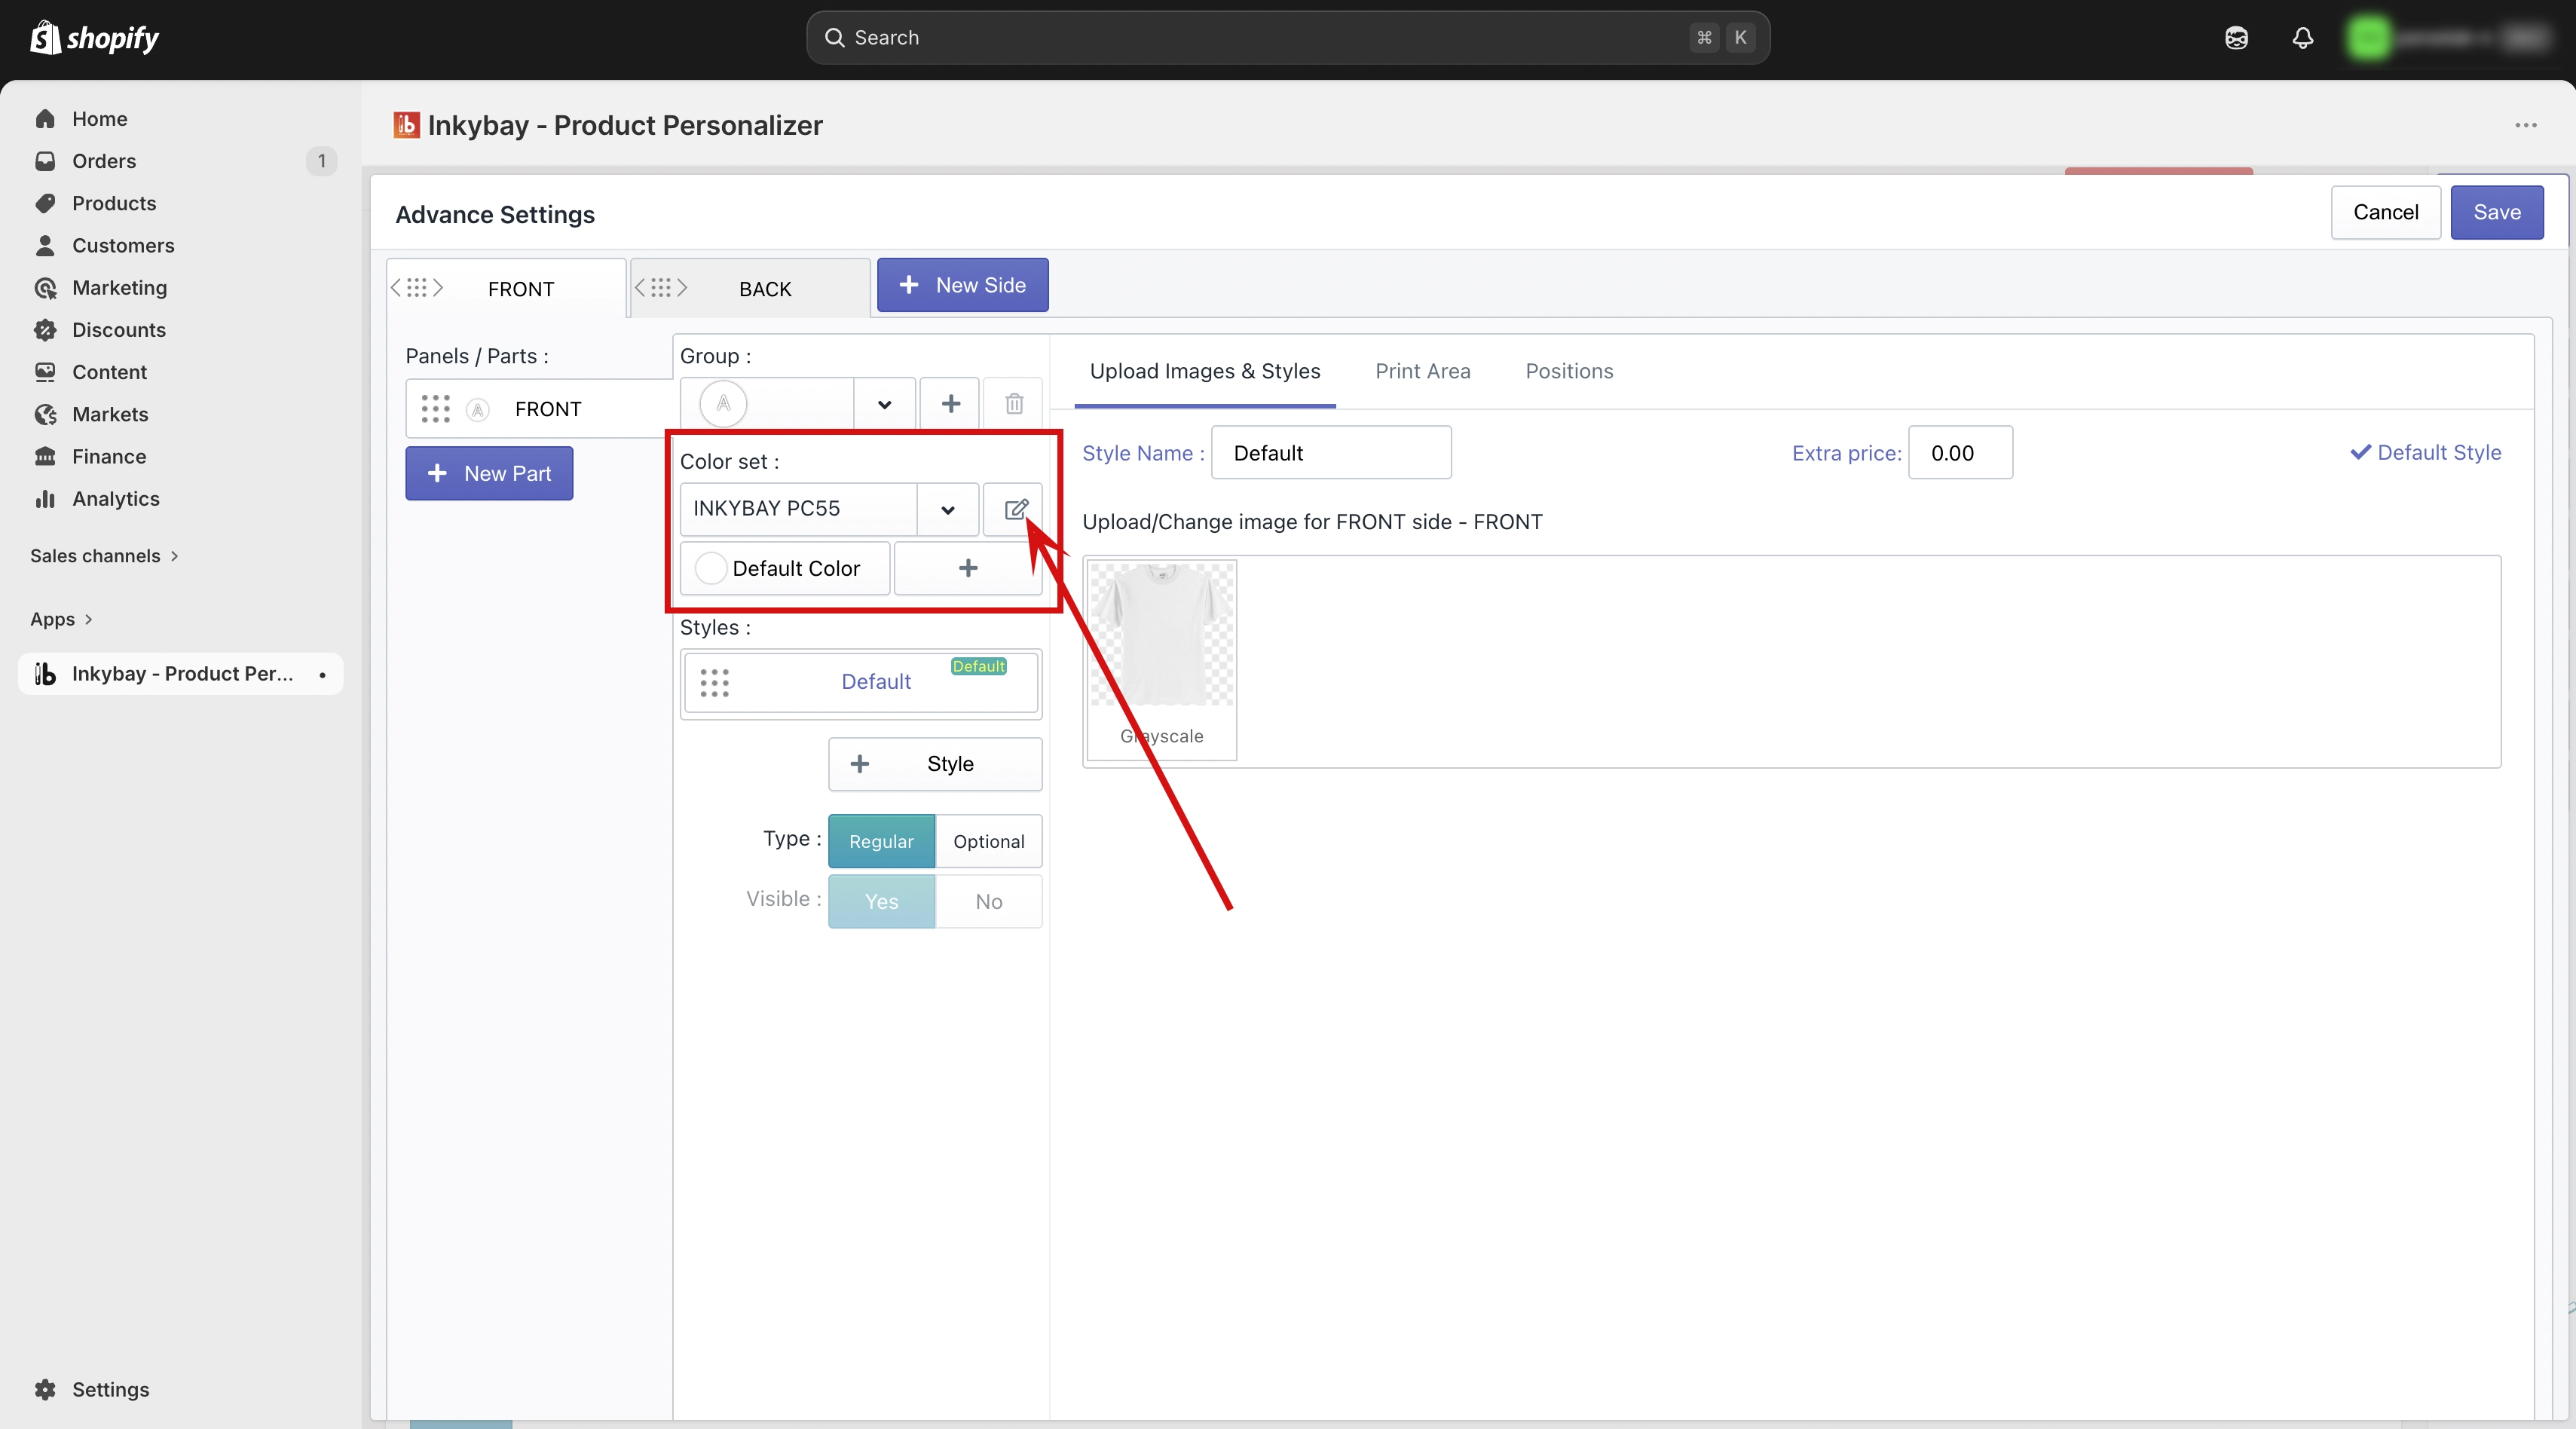
Go to Color Set Settings
Find the option called "Use Image Instead of Color".Turn the Image instead of color Option to YES
Once the Image instead of color option is enabled, and click on the save button, you will see an image upload field appear for each color variant.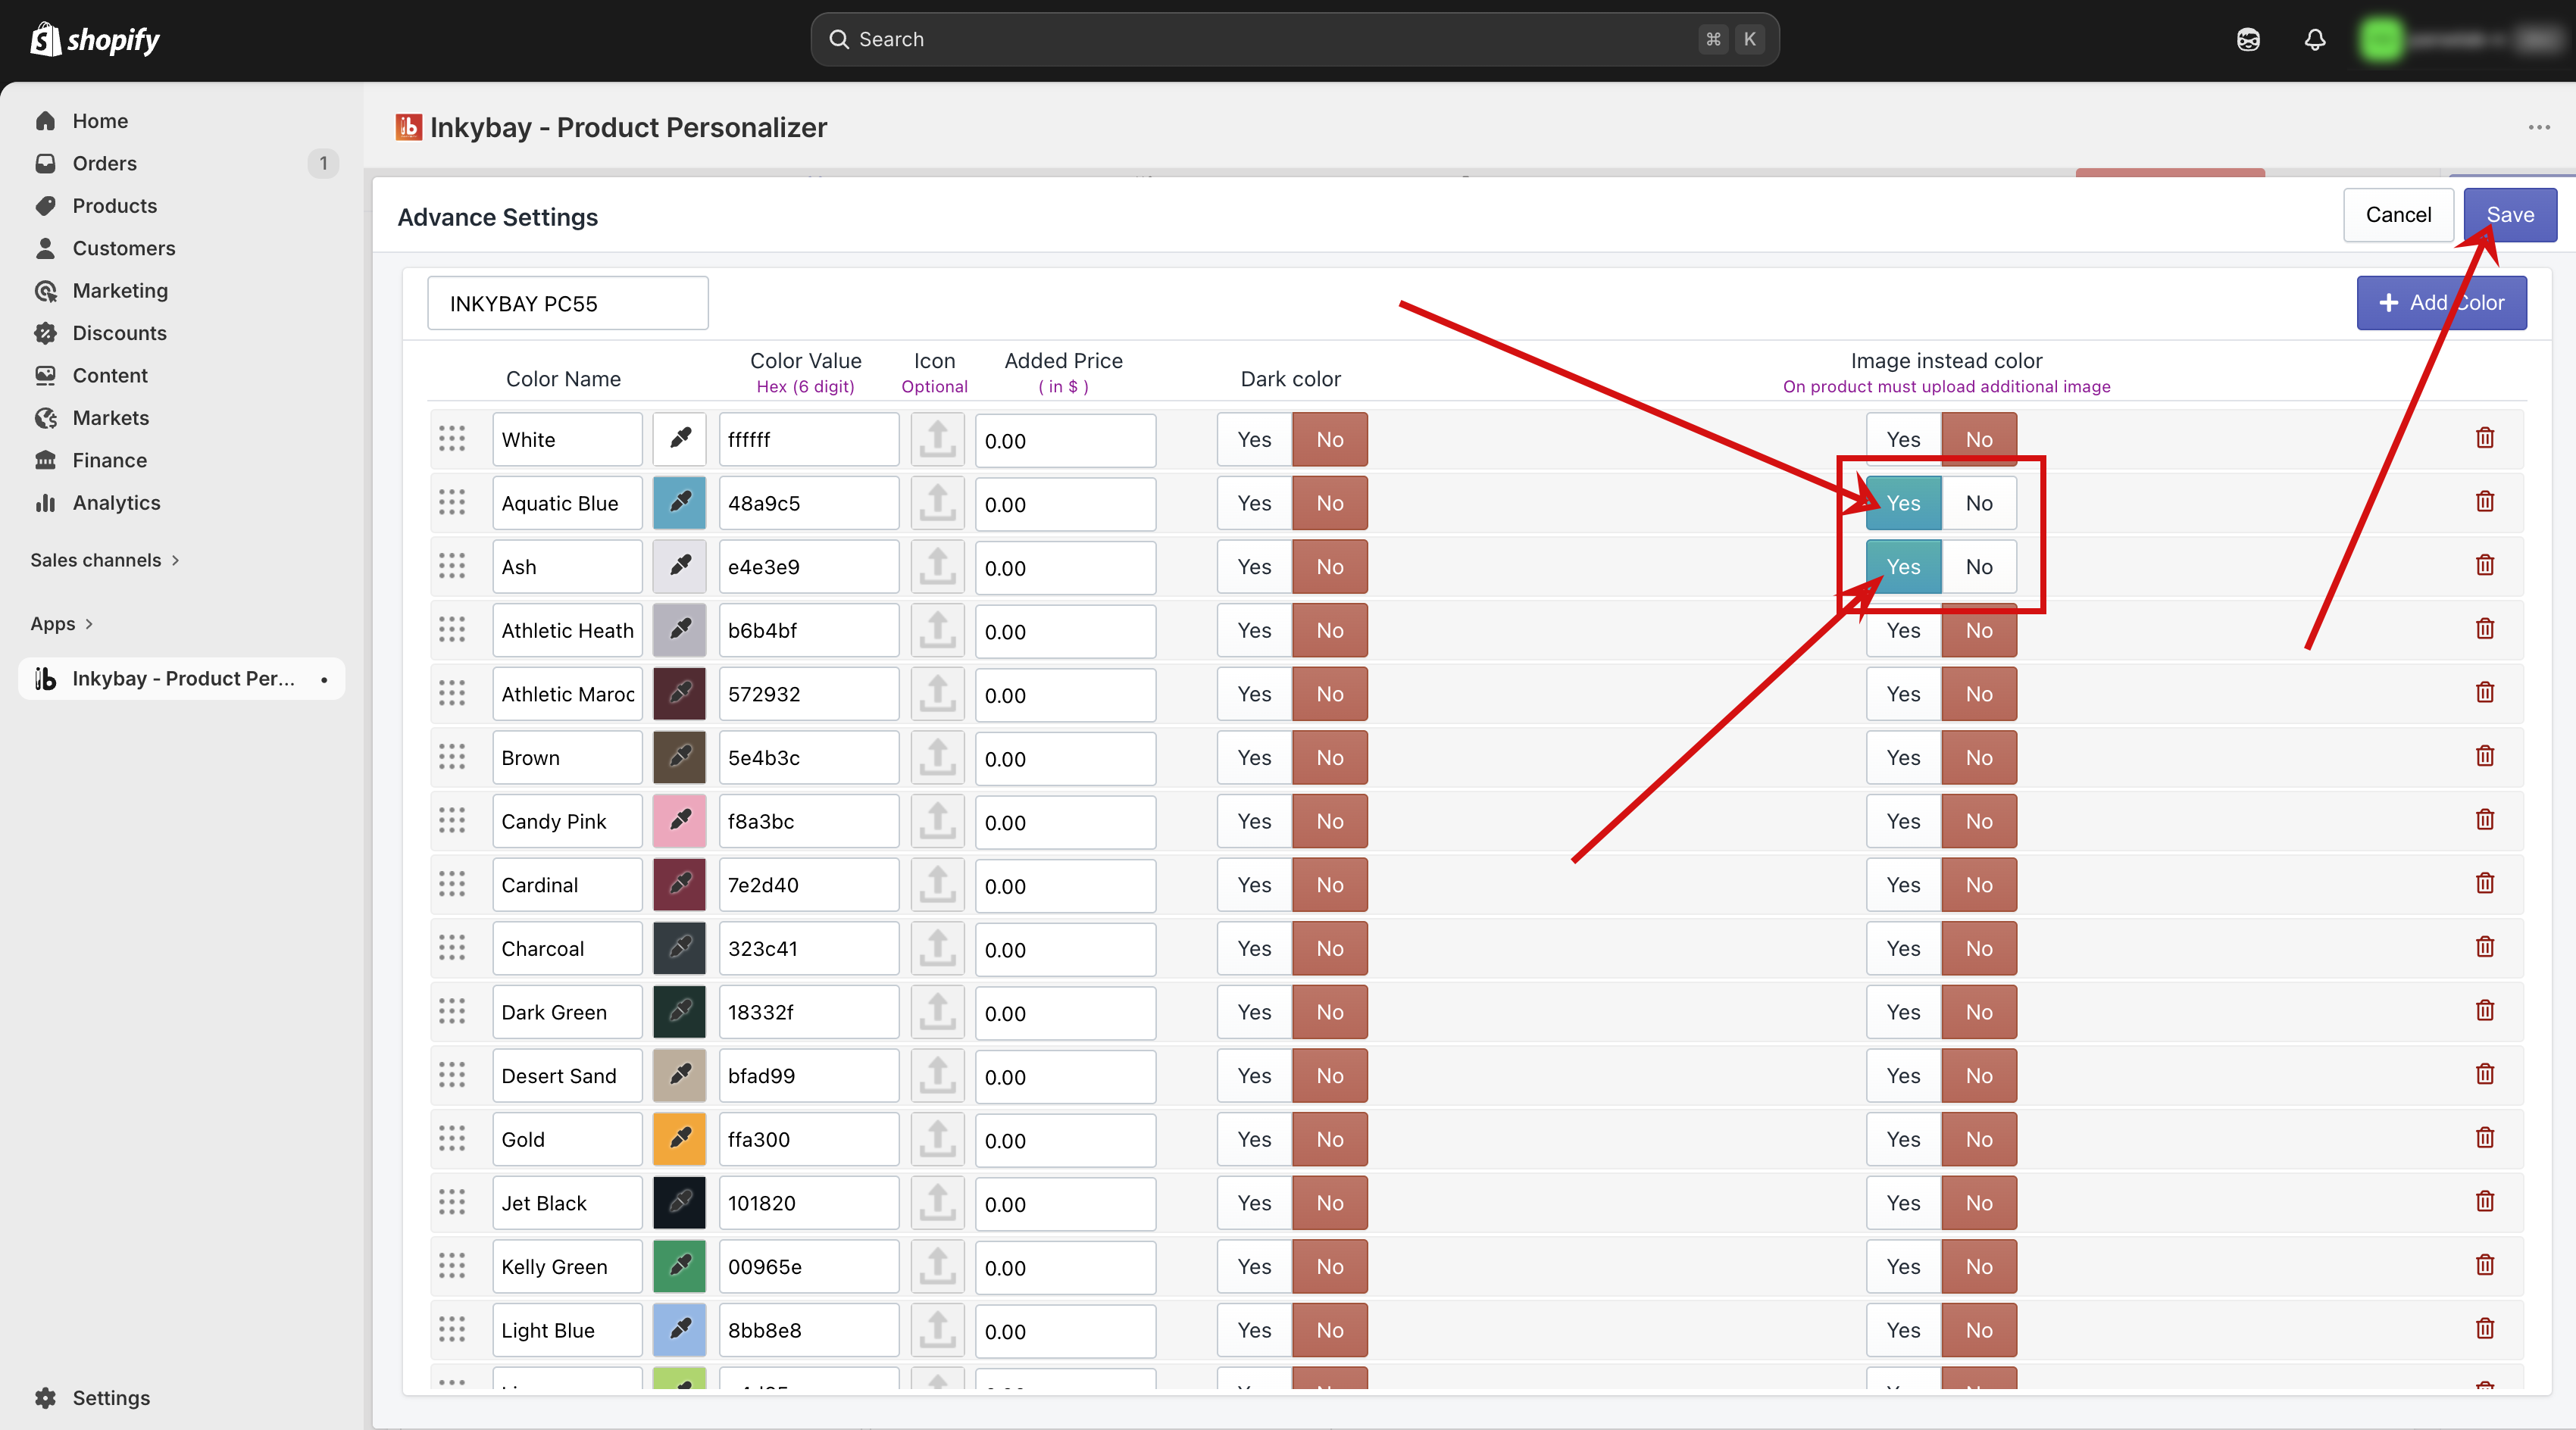
Upload an Image for Each Variant
Add your own product image to each color variant.
Save and Preview
Click Save to apply all changes. Then open the designer view to preview how the product image appears when a customer selects that color.
⚠️ Important — Keep Image Sizes the Same Because Inkybay uses one print area per product side, the print area position must stay consistent across all color variants. To ensure this works correctly, all uploaded images must have the same height and width across every color variant.
Quick Summary
Upload your product image in Advanced Settings on the product edit page.
Go to Color Set edit, Enable Image Instead of Color → Yes in the Color Set to upload your own image per variant.
Always upload images with the same height and width across all color variants.
Need more help? Feel free to contact us whenever you face any issues or need assistance. We’re available 24/7. You can also reach us:
InkyBay app Live chat
Support ticket from the InkyBay app
Email to support@productsdesigner.com
Did this post help you?