A Child Option is a sub-option that only appears when a specific parent option is selected. It allows you to create dependencies between options. You can create conditional logic with a child option.
+ Child: Use this option when you want to create a conditional (dependent) option for a specific attribute.
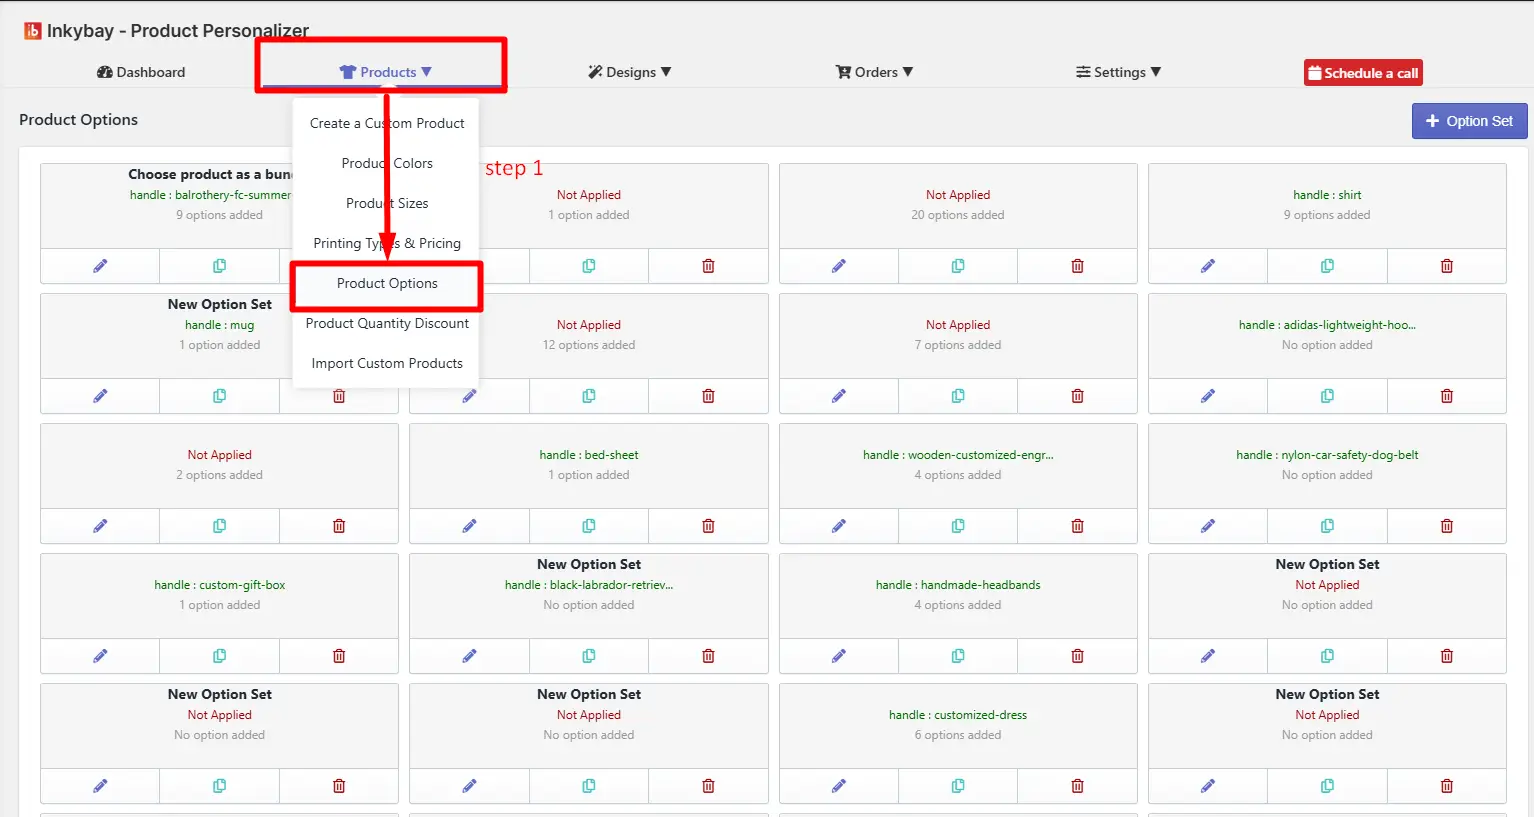
Step 1: Access your product options.
Go to your admin dashboard. Hover over the Products option, then click on Product Option. All your created product options will be listed here.
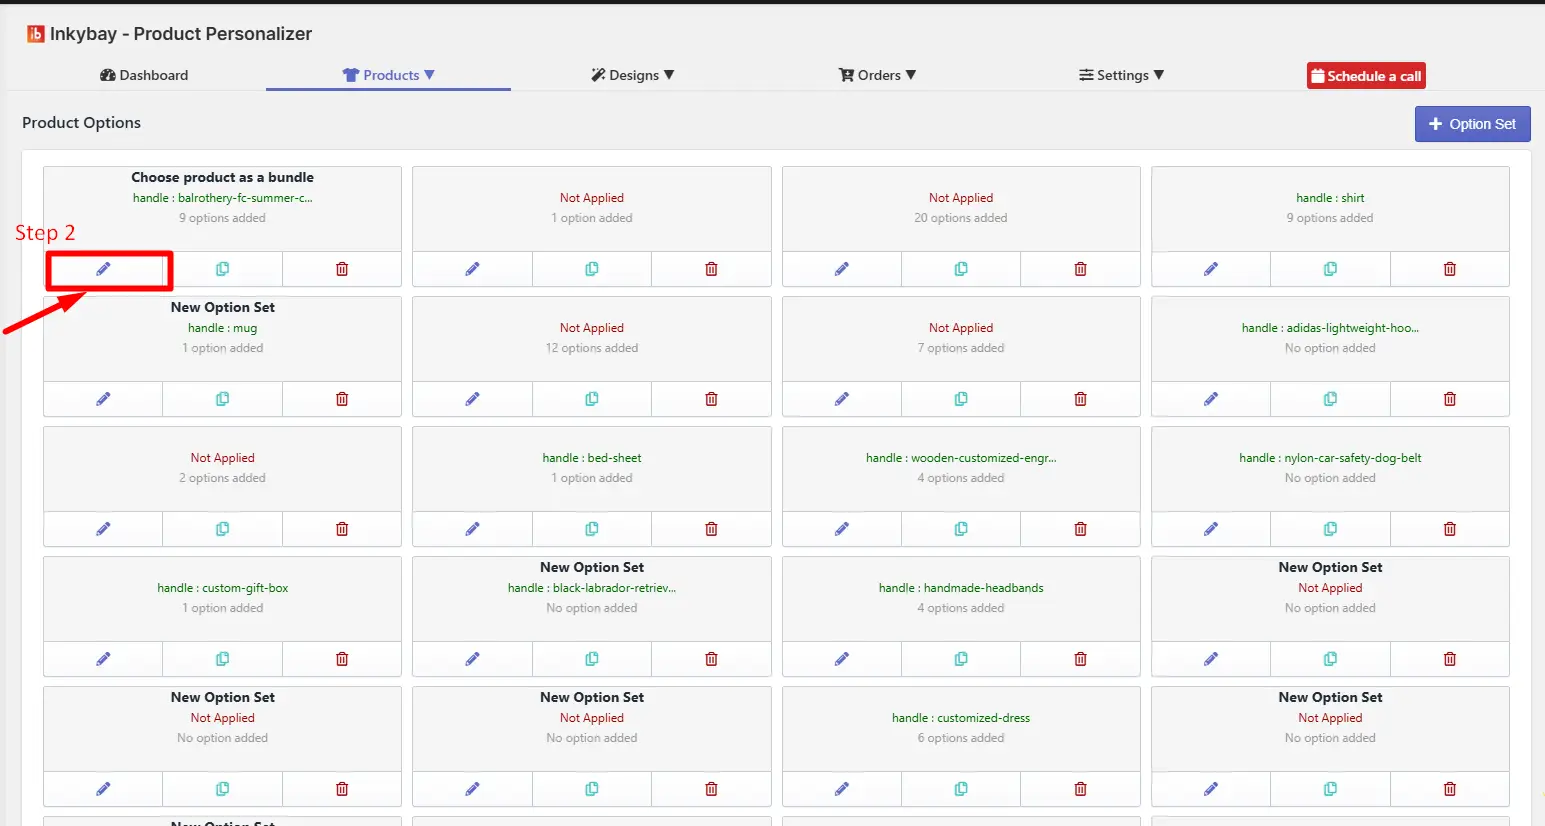
Step 2: Open the option set.
Click the Edit button for the option set you want to create the child option.
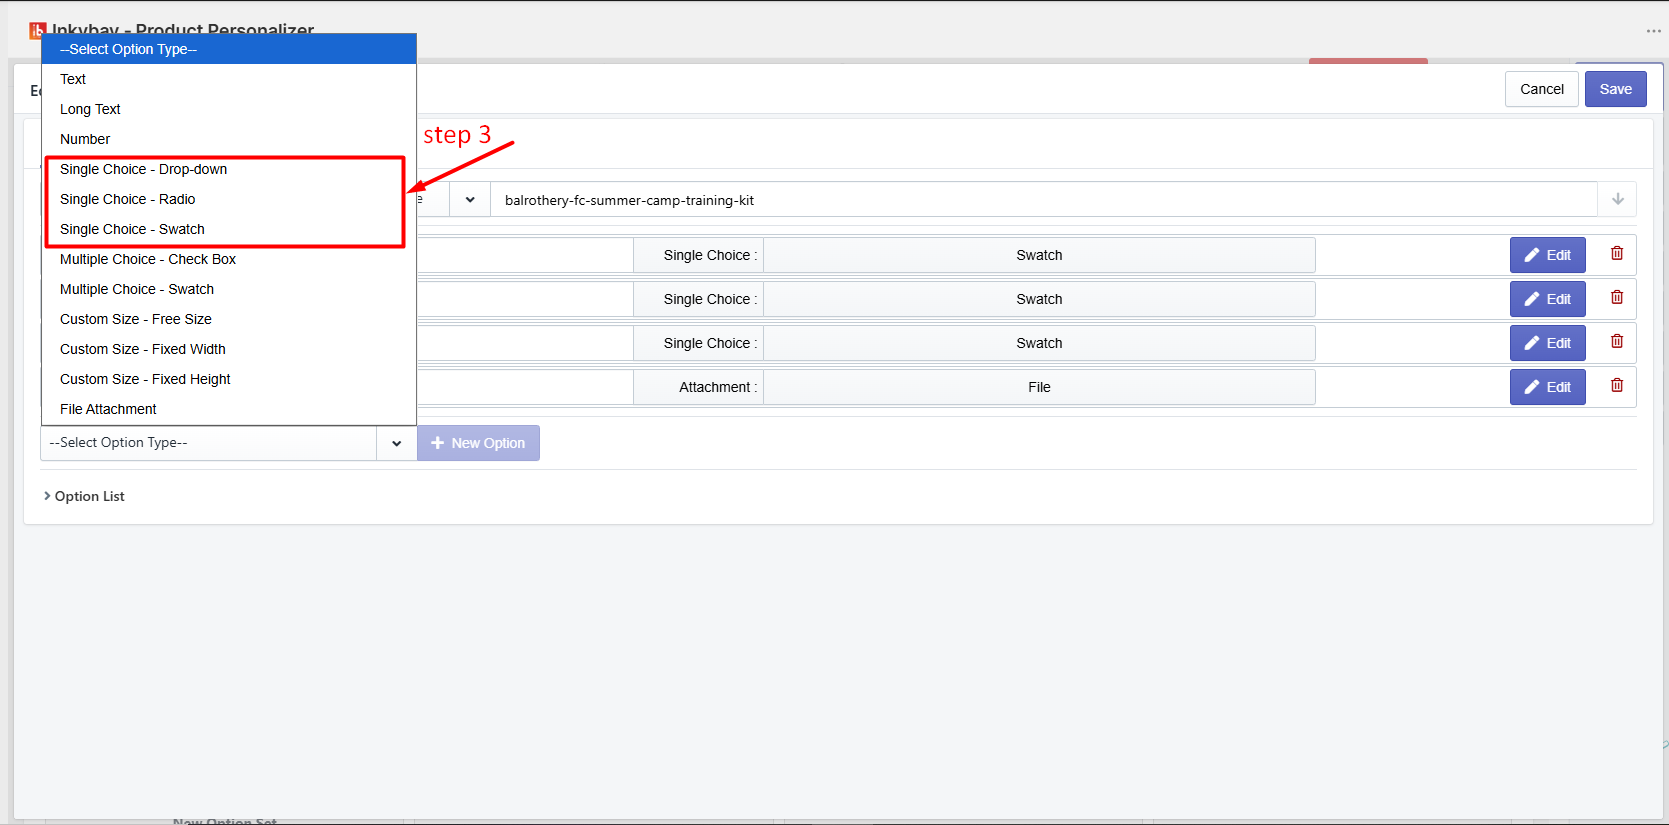
Step 3: Choose a single-choice swatch/drop-down/radio to create the child option
 Step 4: Click on the +child option to create one or multiple child options. You can create a nested child option with conditional logic.
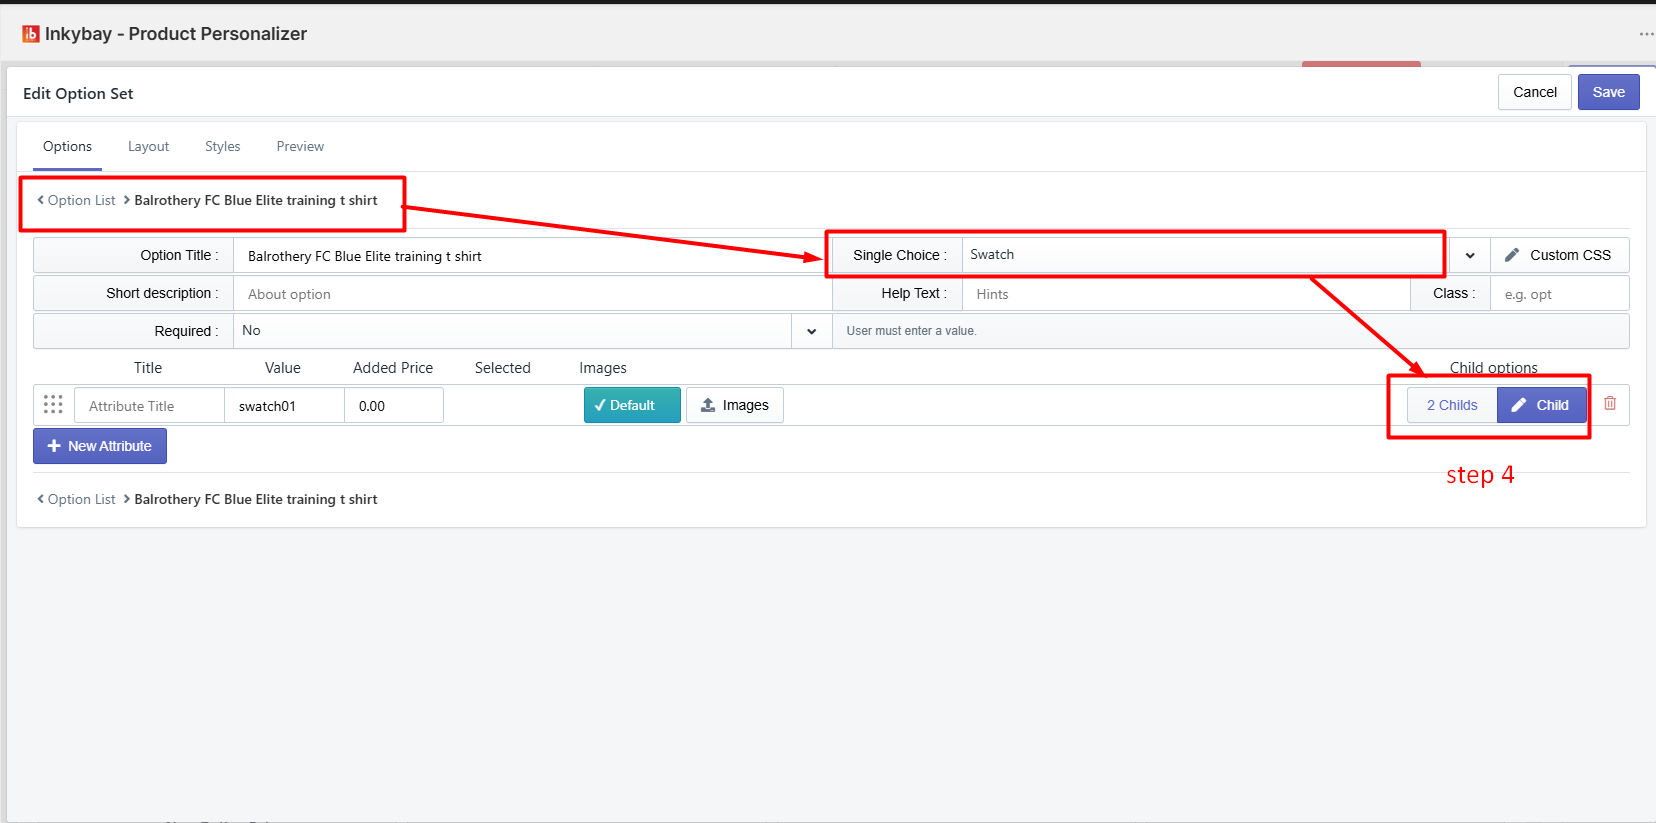
When you click + Child, a sub-option will be created under the selected attribute. This allows you to display additional options only when a specific parent option is selected.
After creating the child option, you need to configure it just like a new option. The setup process is the same as creating any standard option, including adding values, settings, and pricing (if applicable).
This feature is useful for building dynamic product customization flows where certain options appear based on previous selections.
Feel free to contact us whenever you face any issues or need assistance. You can also reach us:
InkyBay app Live chat
Support ticket from the InkyBay app
Email to support@productsdesigner.com