With this feature, you can add extra charges to specific product options your customers select. This gives you full control over how each option affects the final price of a product.
What are extended product options? Extended product options are additional choices you offer your customers beyond the standard product details. These can include things like custom text, number inputs, size selections, color swatches, file uploads, and more. Each option can have its own extra price, which is added on top of the product base price when a customer makes a selection.
Why does this matter? As a store owner, different options often come with different production costs. For example, adding a custom text engraving or a premium color swatch may cost more to fulfill. Dynamic pricing lets you charge the right amount for each option so your business stays profitable without any manual calculation.
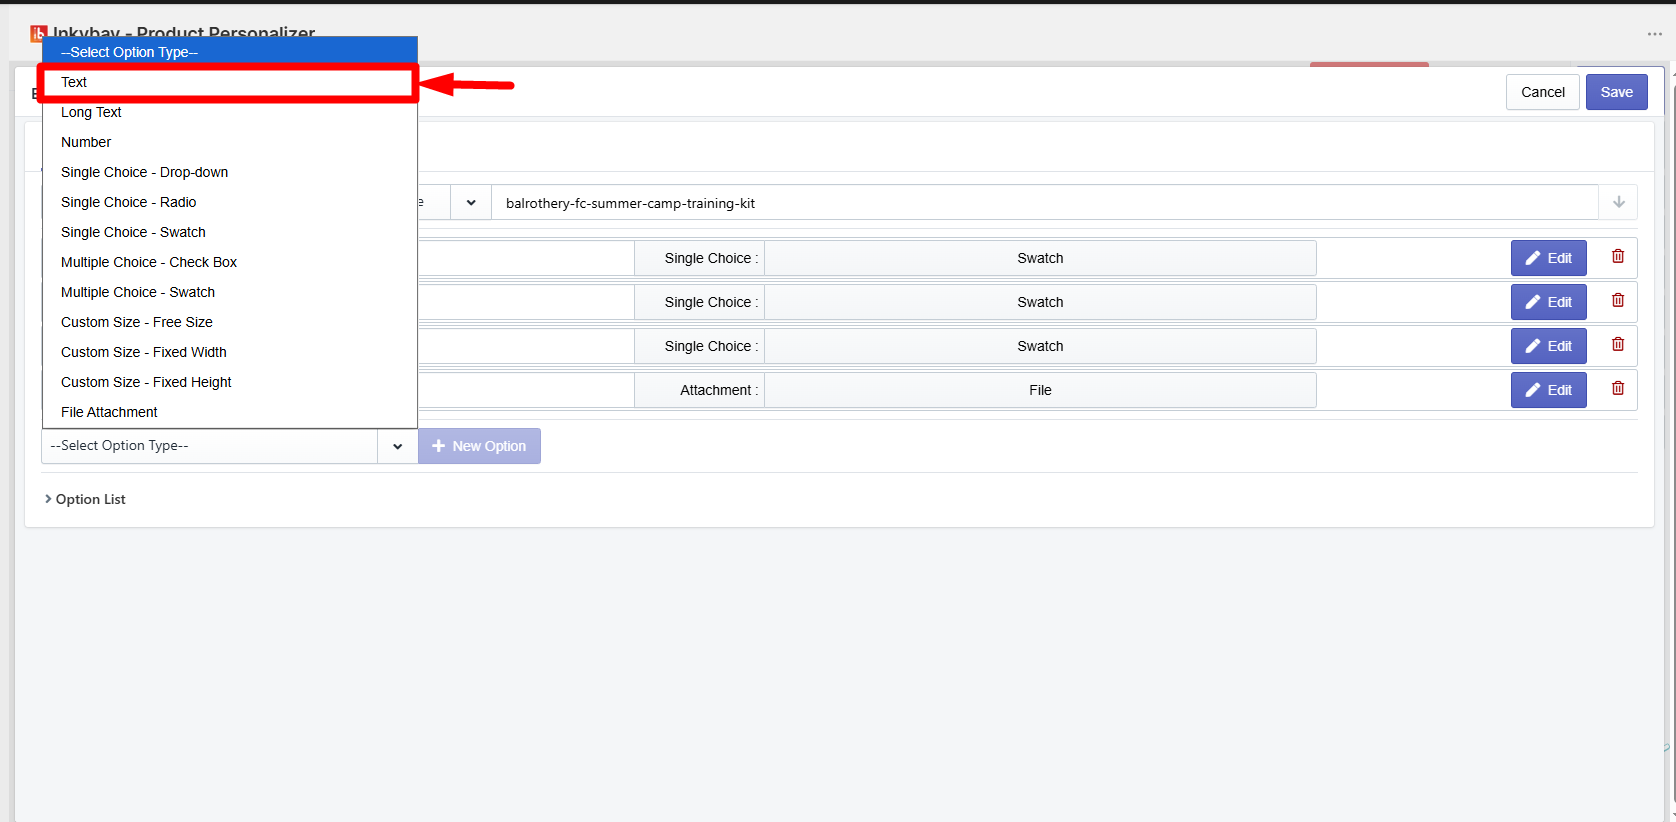
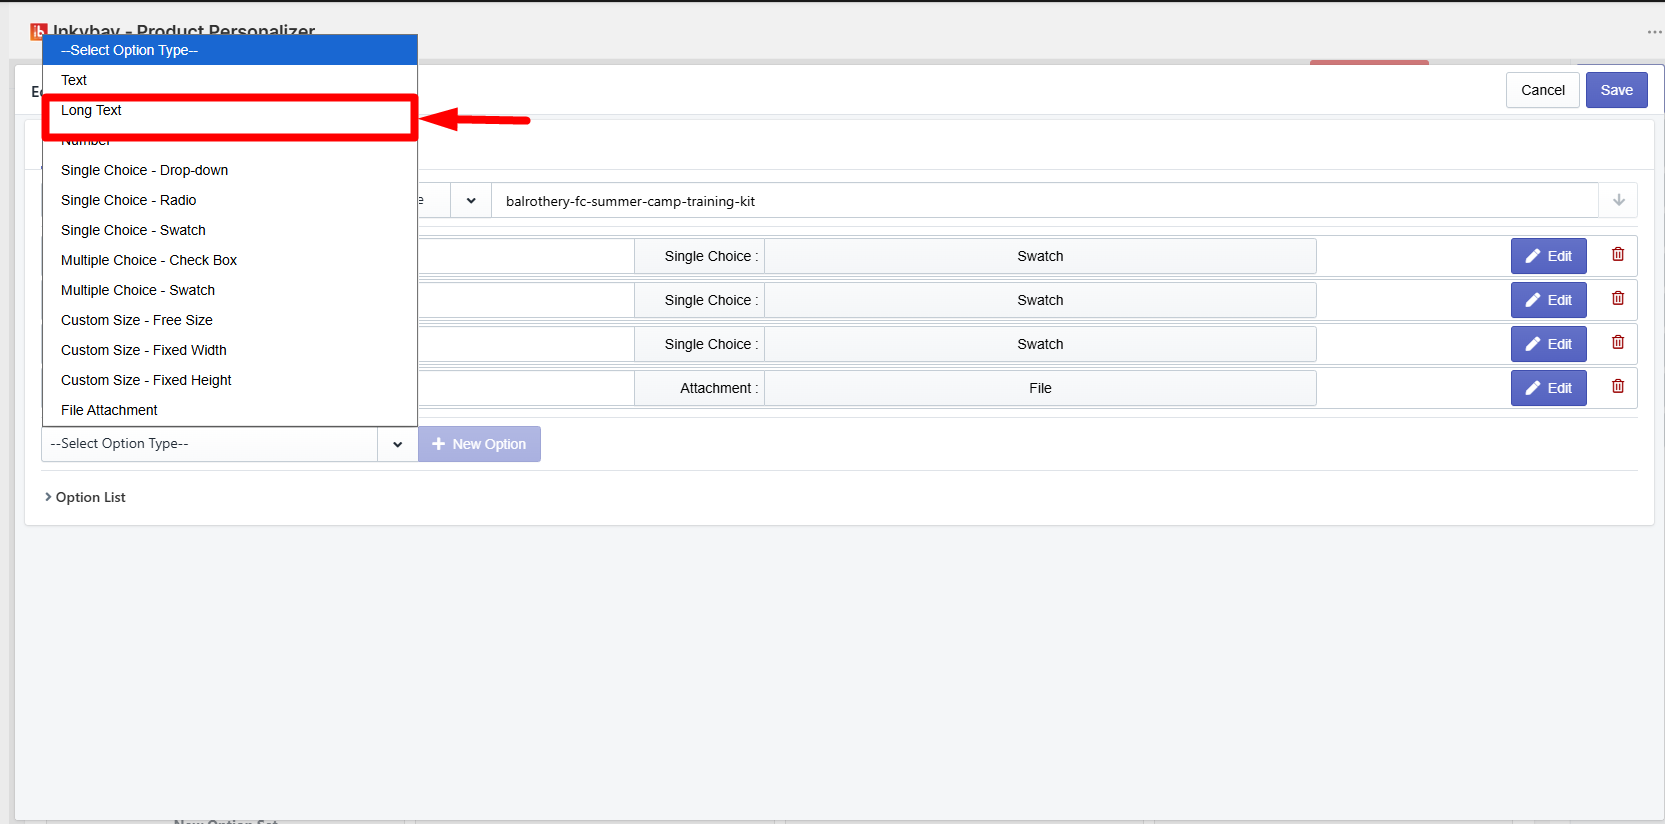
InkyBay supports the following extended product option types: Text, Long Text, Number, Single Choice Drop Down, Single Choice Radio, Single Choice Swatch, Multiple Choice Checkbox, Multiple Choice Swatch, Custom Size Free Size, Custom Size Fixed Width, Custom Size Fixed Height, and File Attachment.
💡 Important
Make sure your product option sets are already created before setting up extra pricing for each option.
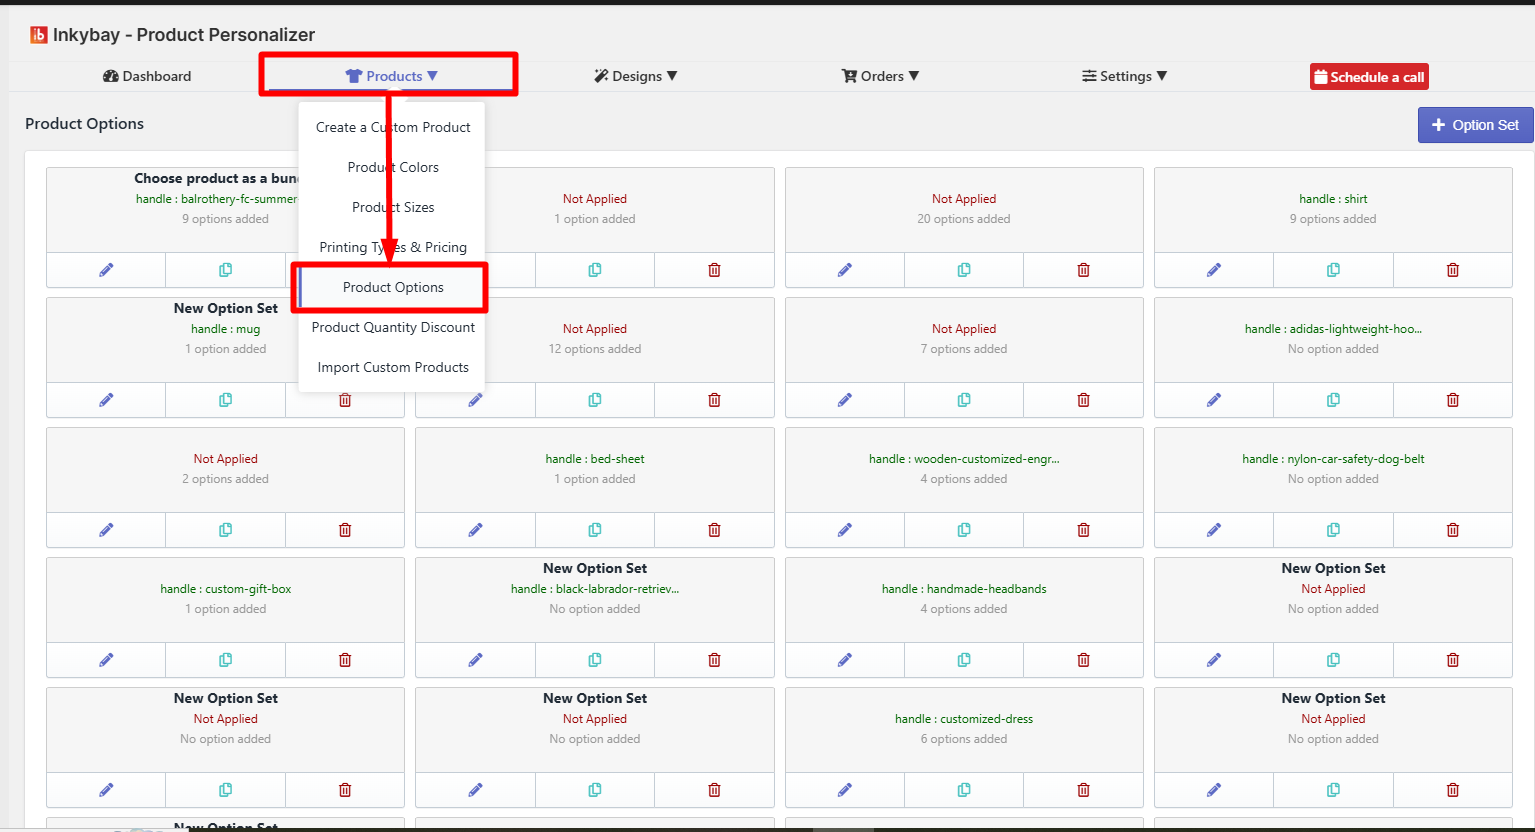
Step 1: Access your product options.
Go to your admin dashboard. Hover over the Products option, then click on Product Option. All your created product options will be listed here.
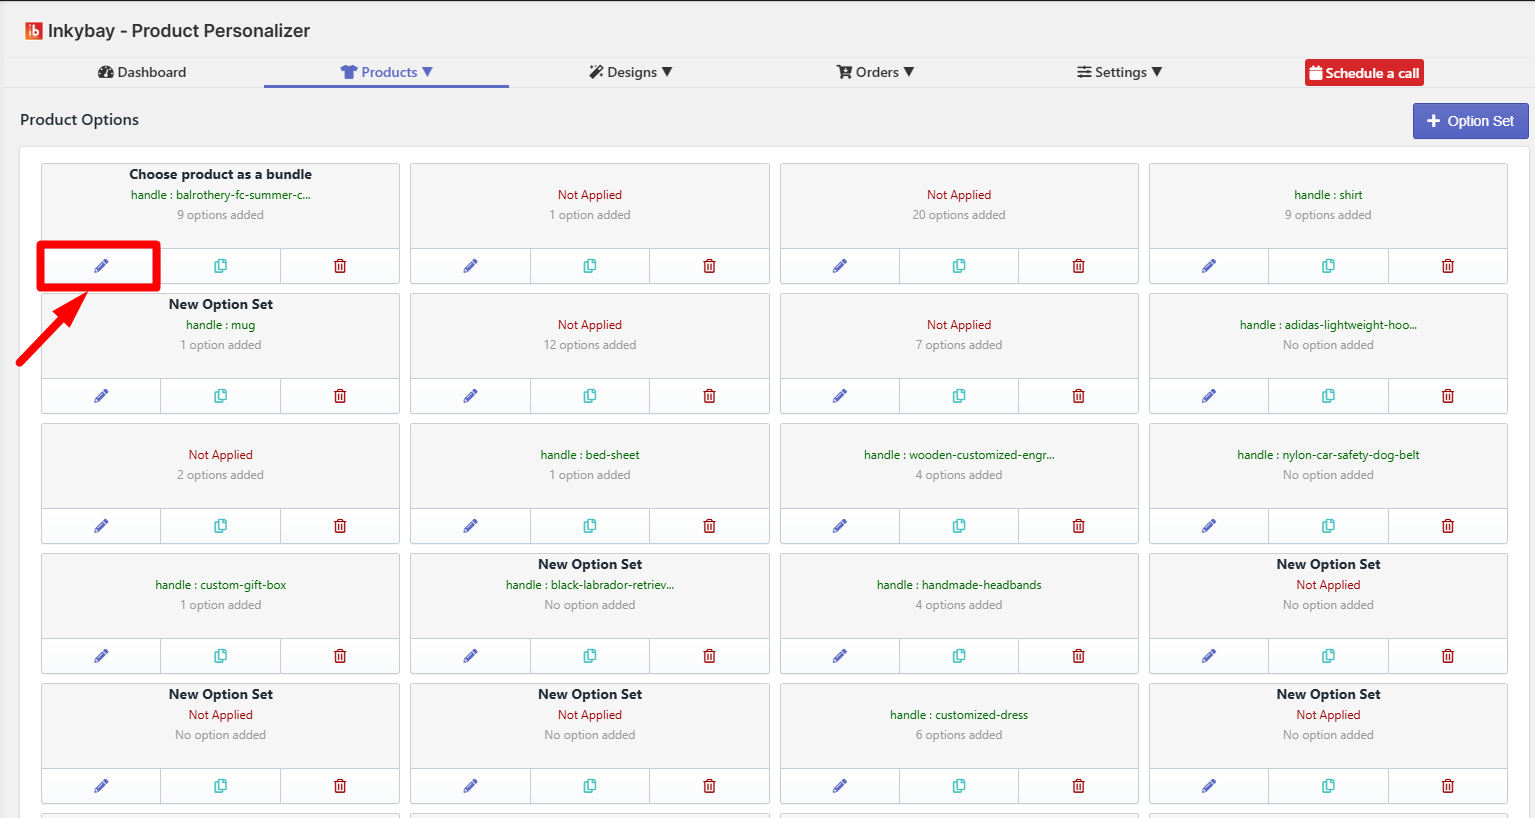
Step 2: Open the option set.
Click the Edit button for the option set you want to configure extra pricing for.
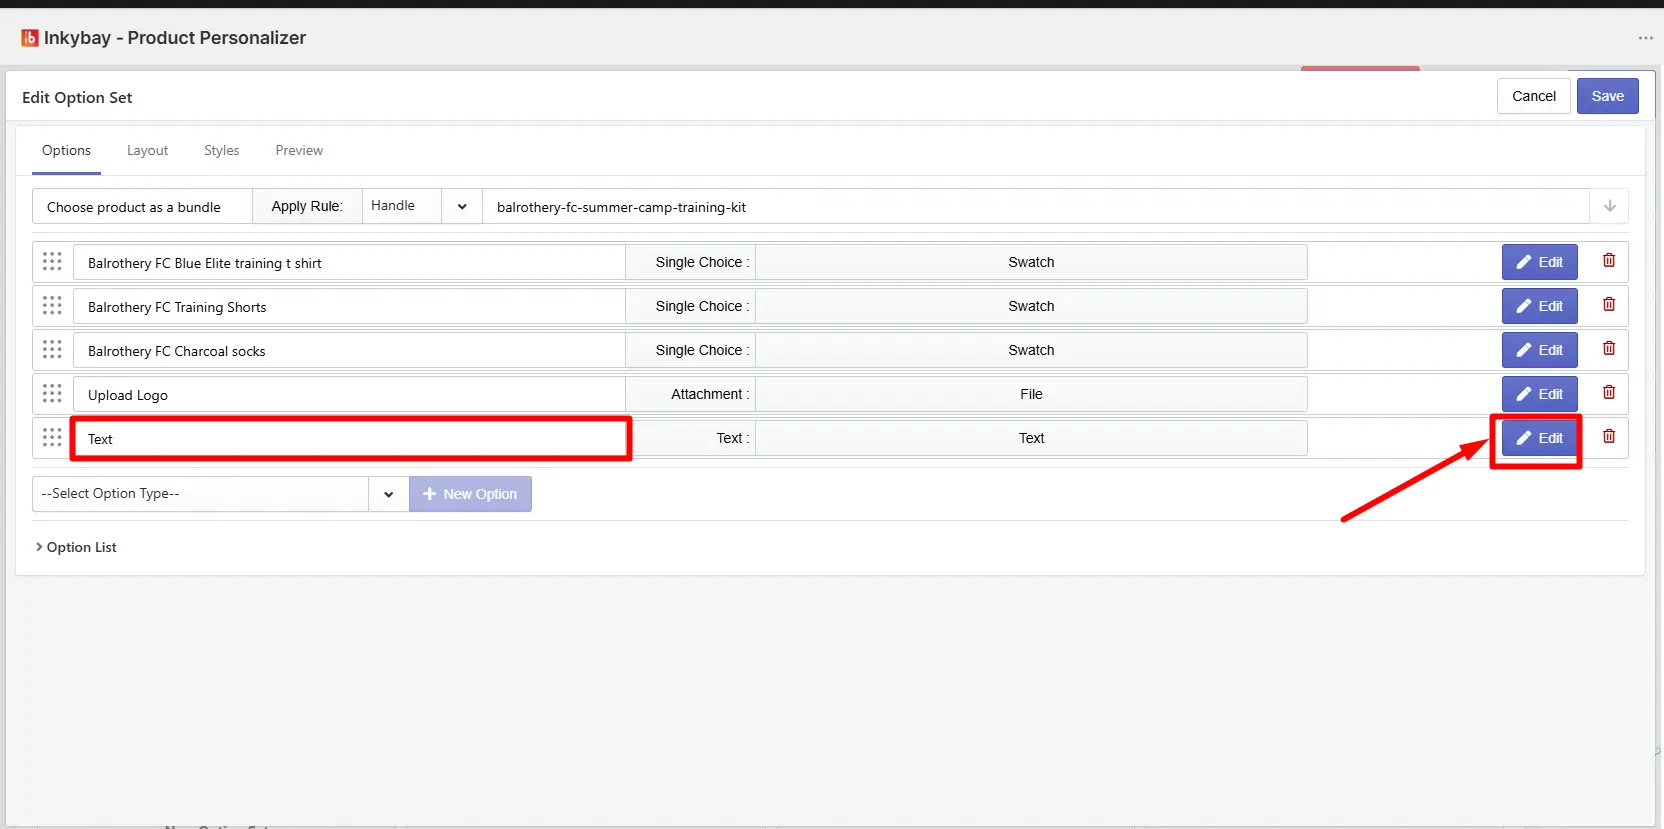
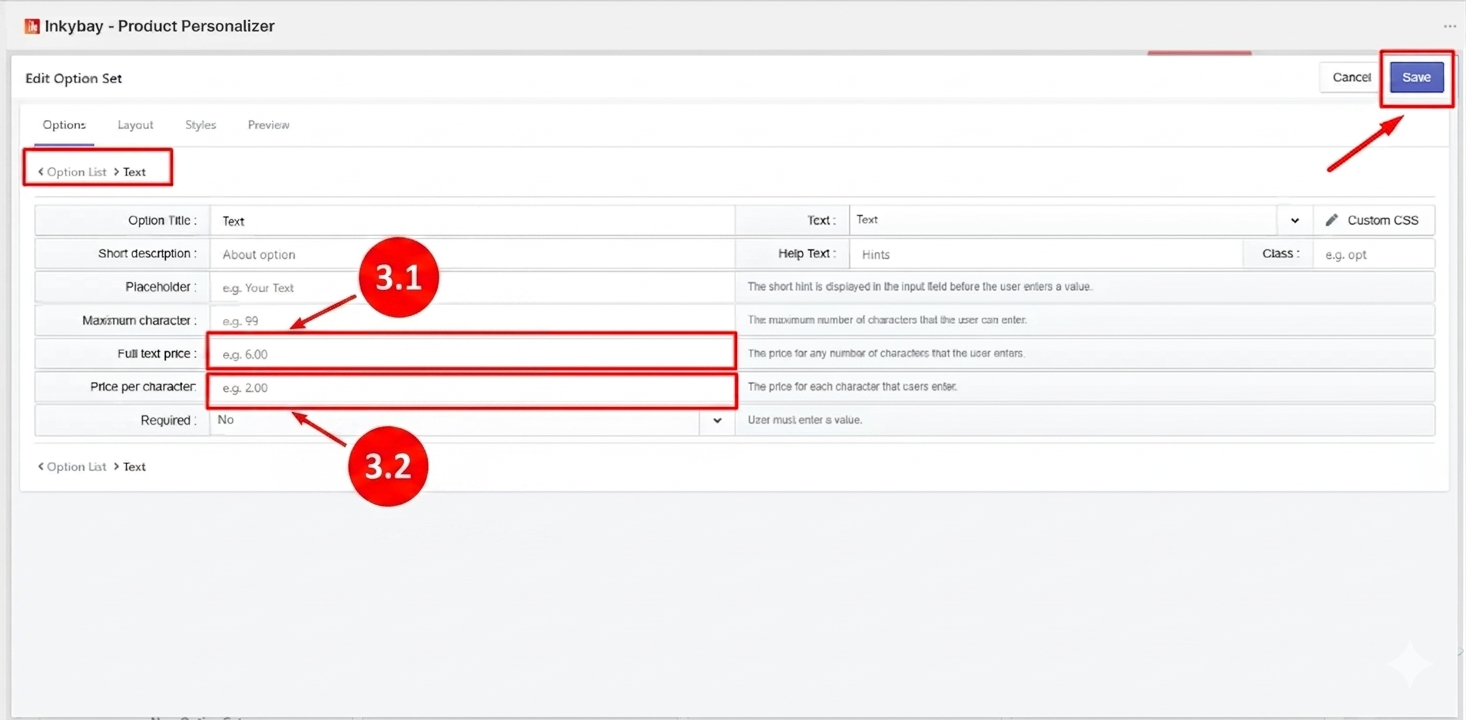
Step 3: Open the Text option.
Click the Edit button for the Text option inside your option set. You will find two price fields:
3.1 Full Text Price: The set price will be added whenever a customer fills in any text in the text field.
3.2 Price Per Character: The set price will be charged for each character the customer types in the text field.
Set the price the way you want and click the Save button.
 Set Up Price for the Long Text Option
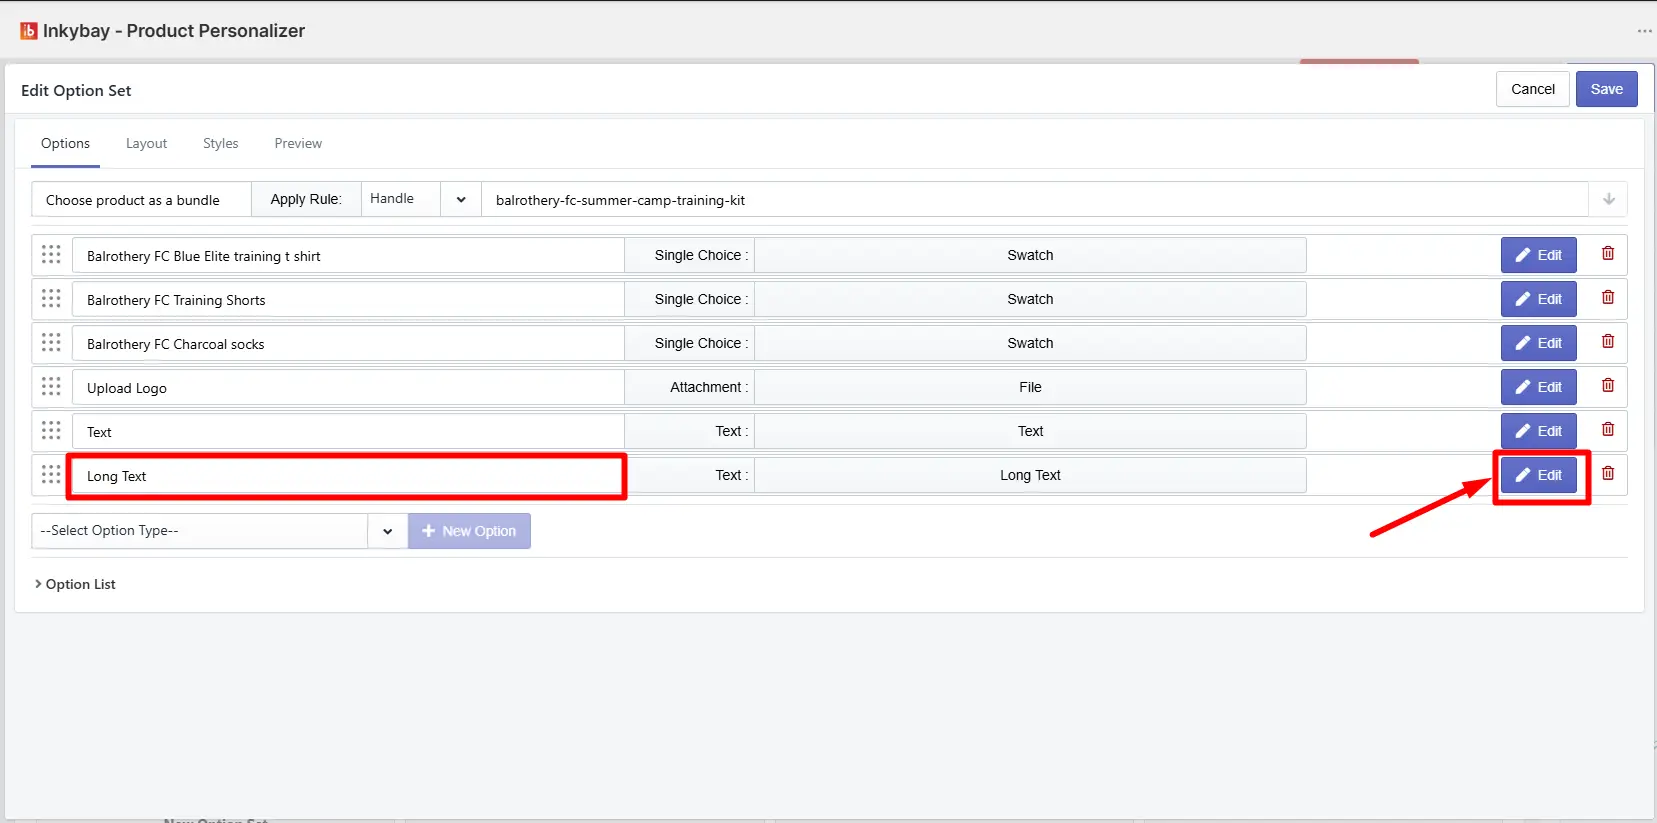
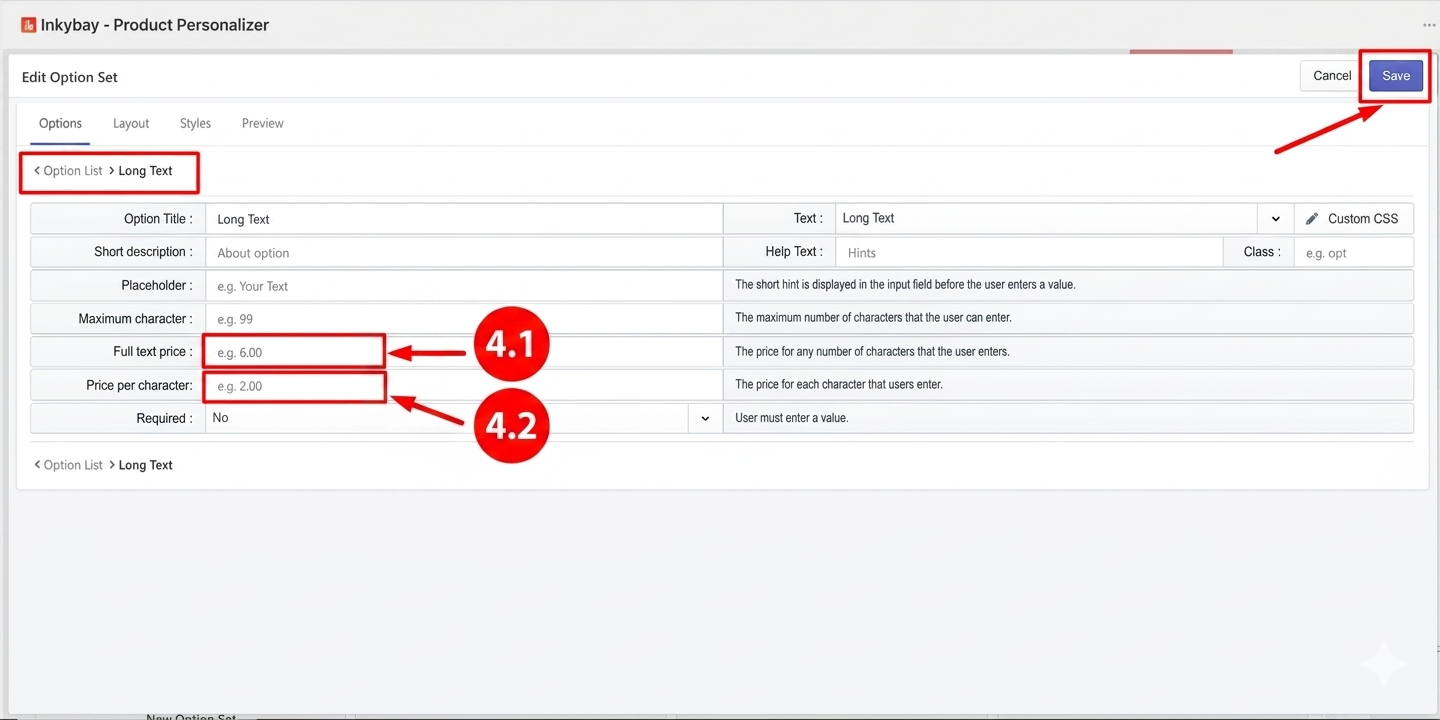
Step 4: Open the Long Text option.
Click the Edit button for the Long Text option inside your option set. Just like the Text option, you will find two price fields:
4.1 Full Text Price: The set price will be added whenever a customer fills in any text in the long text field.
4.2 Price Per Character: The set price will be charged for each character the customer types in the long text field.
Set the price the way you want and click the Save button.
Set Up Price for the Number Option
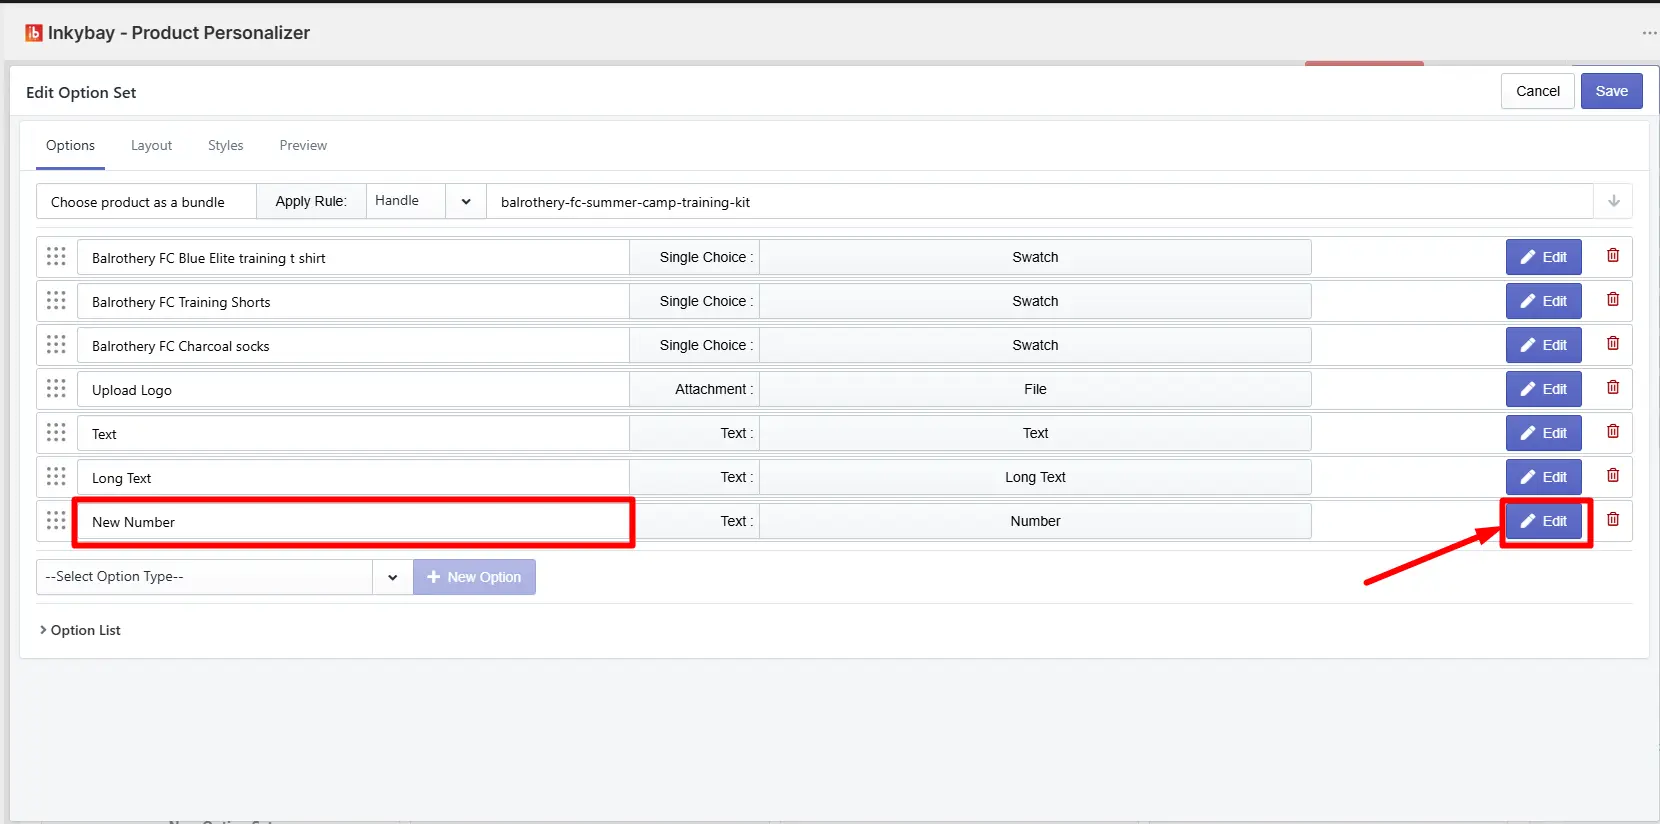
Step 5: Open the Number option.
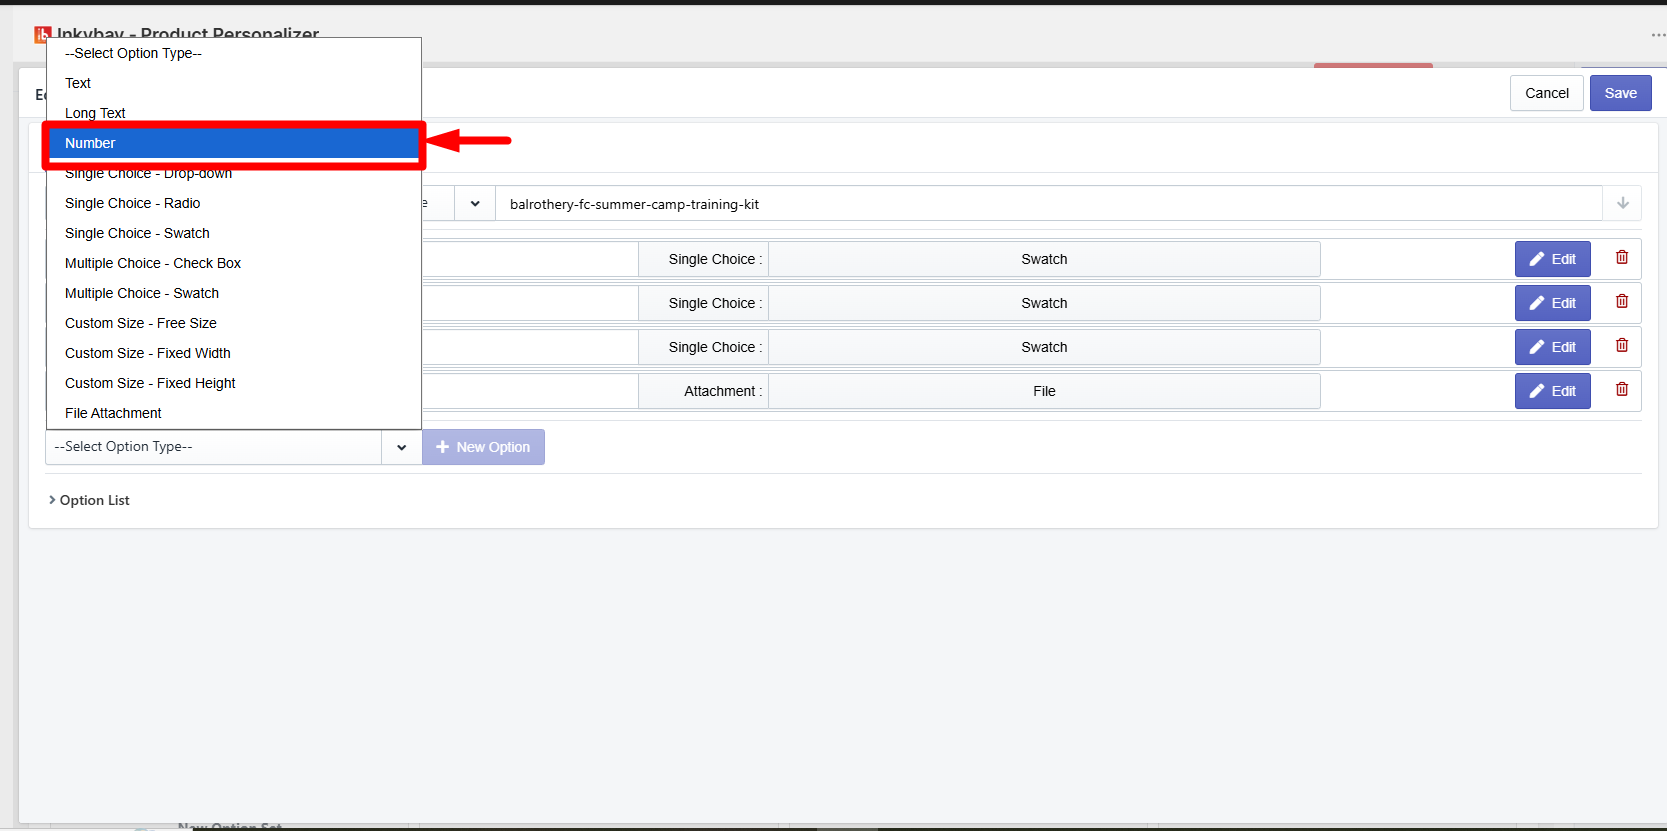
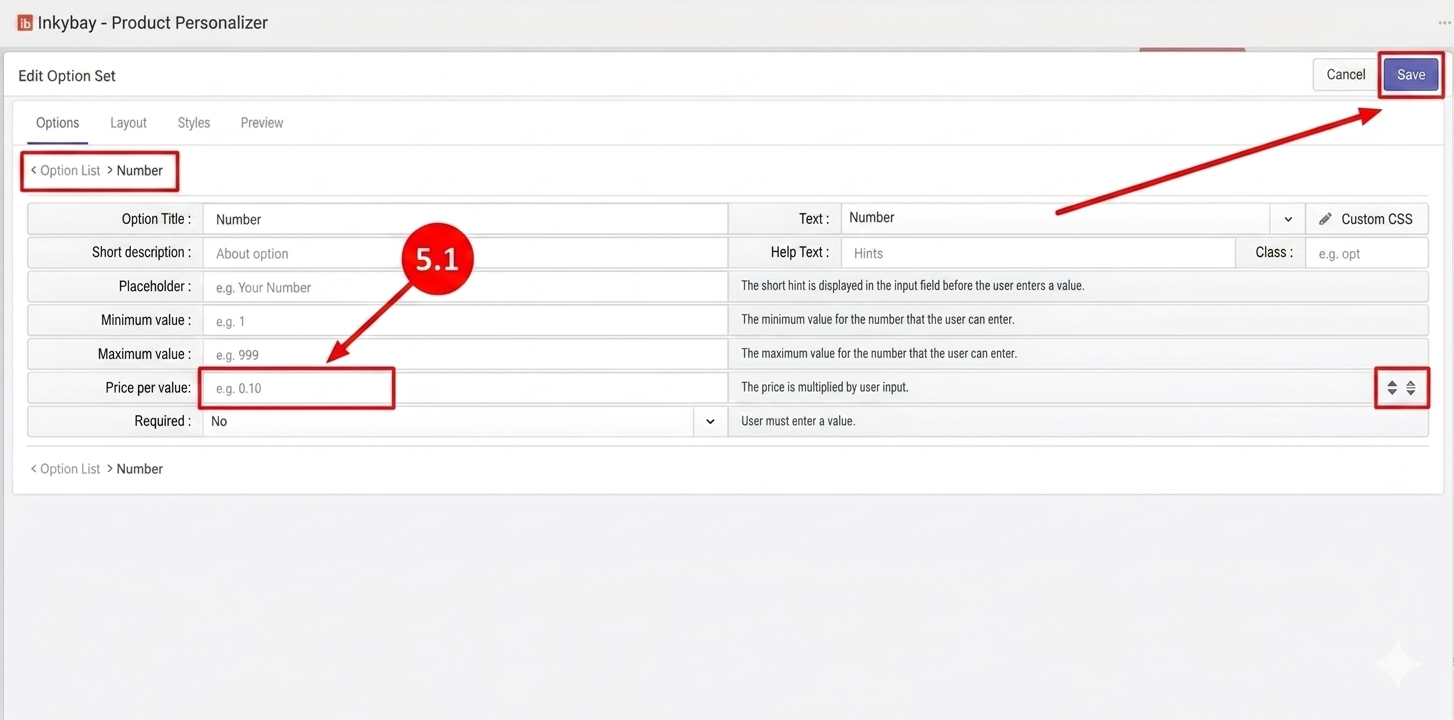
Click the Edit button for the Number option inside your option set. You will find one price field:
5.1 Price Per Value: The price you set here will be multiplied by the number value the customer enters in the number field. For example, if you set $2 and the customer enters 5, the extra charge will be $10.
Set the price and click the Save button.
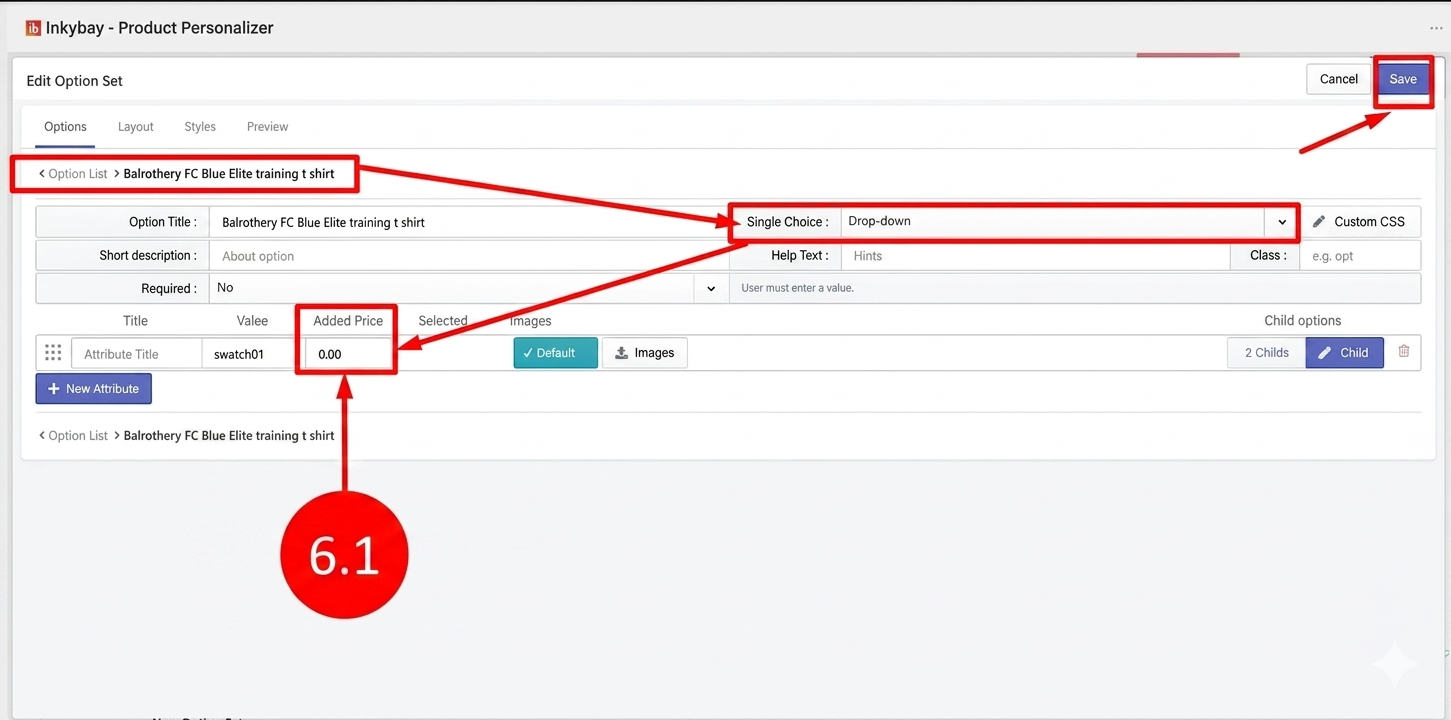
Step 6: Open the Single Choice Drop Down option.
Click the Edit button for the Single Choice Drop Down option inside your option set. You will see an Added Price column next to each available choice.
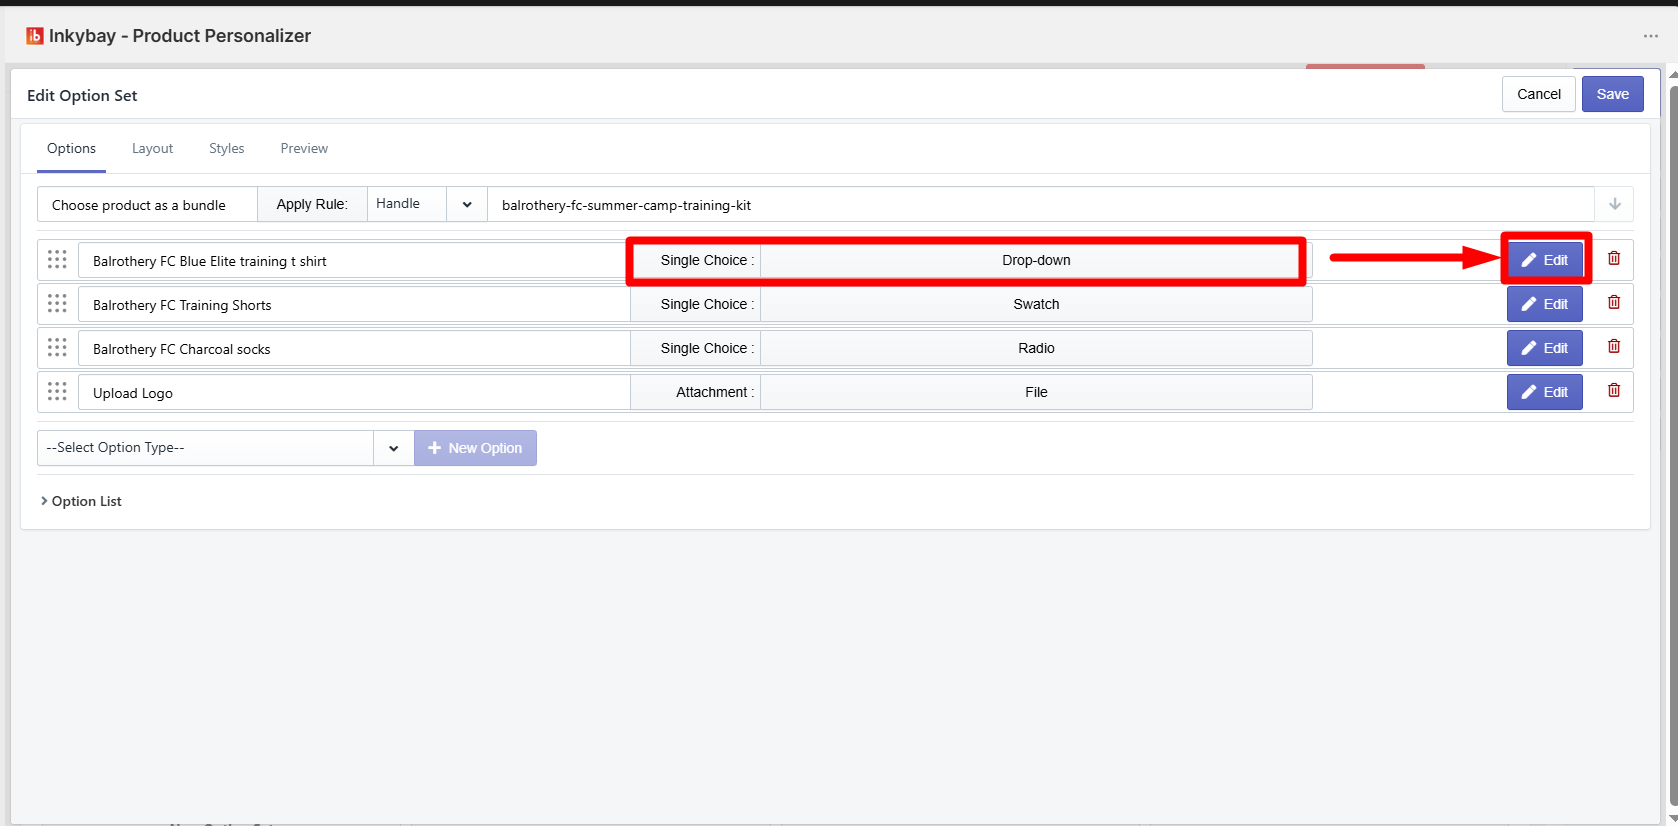
6.1 Added Price field: Enter the extra price for each choice. When a customer selects a choice,
the set price will be added to the product base price.
Set the price and click the Save button.
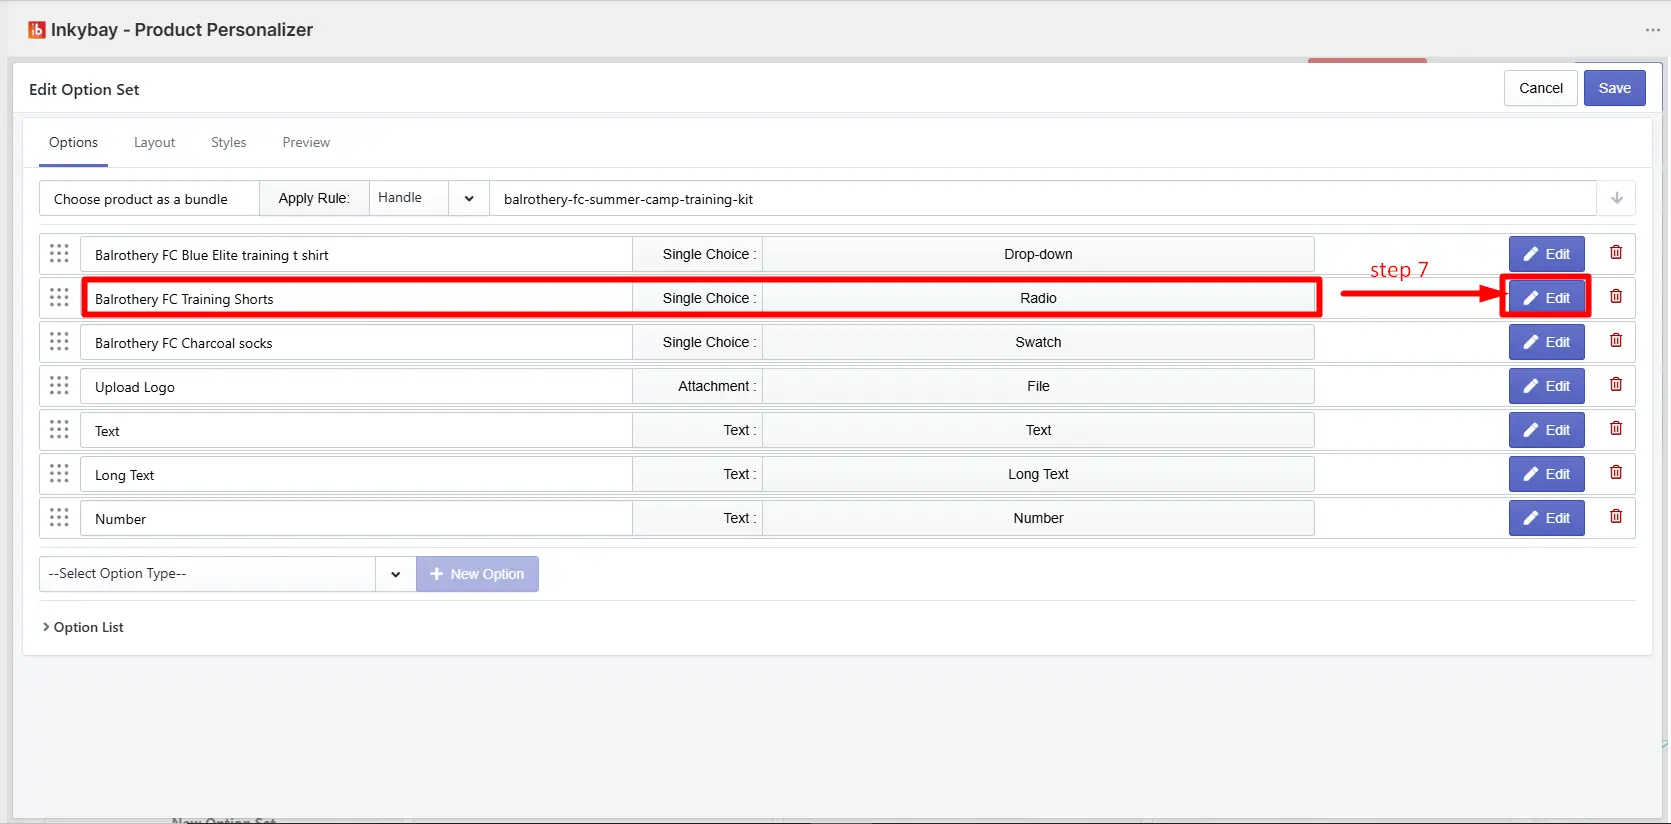
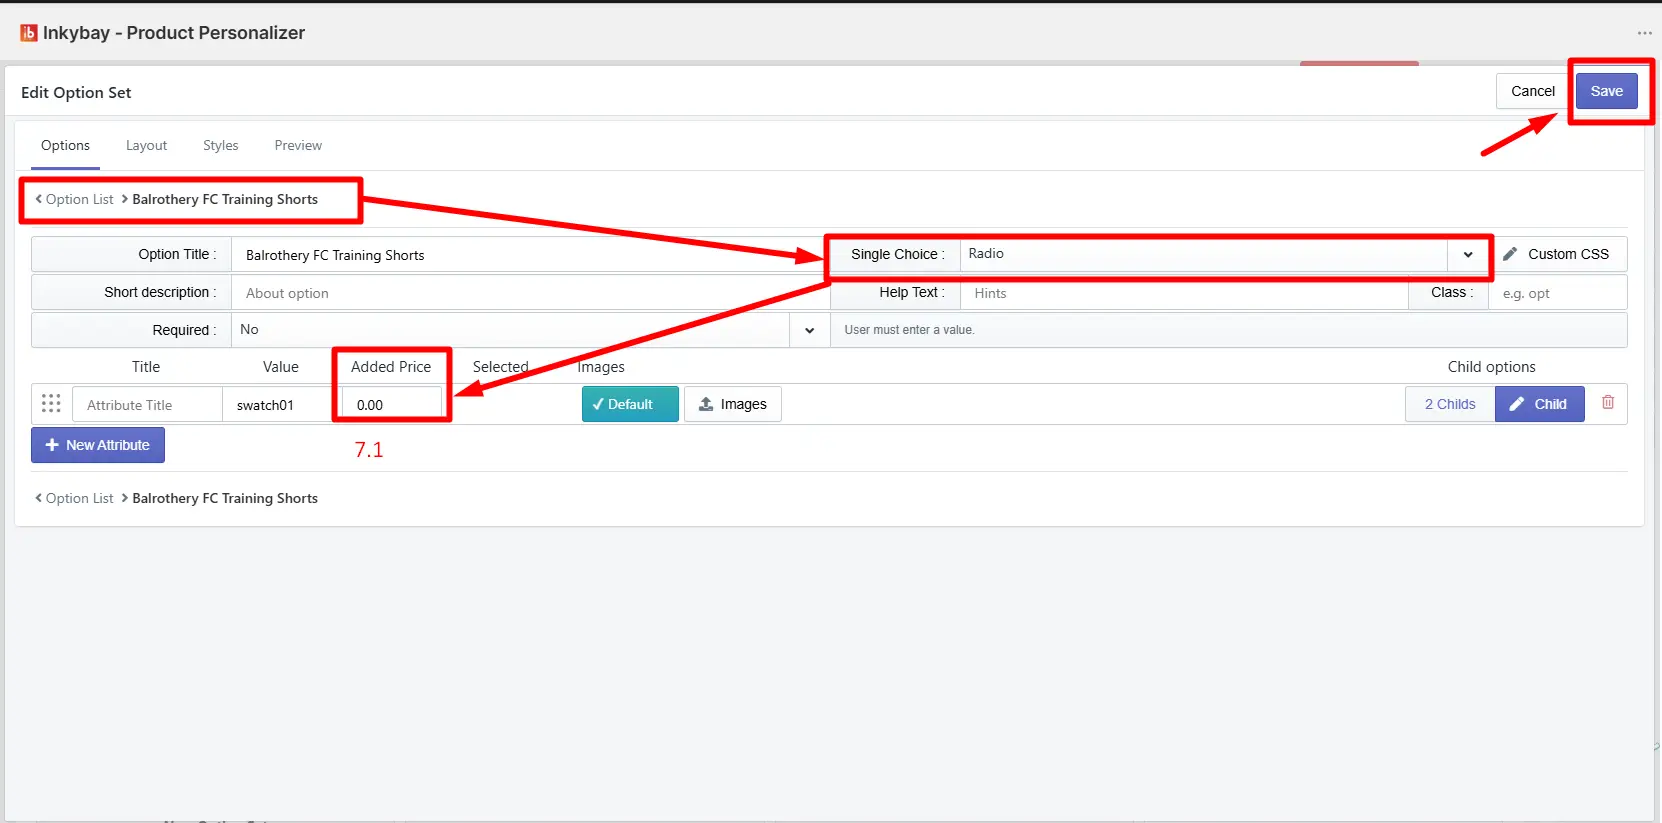
Step 7: Open the Single Choice Radio option.
Click the Edit button for the Single Choice Radio option inside your option set. You will see an Added Price column next to each available choice.
 7.1 Added Price field: Enter the extra price for each choice. When a customer selects a choice, the set price will be added to the product base price.
Set the price and click the Save button.
Set Up Price for the Single Choice Swatch Option
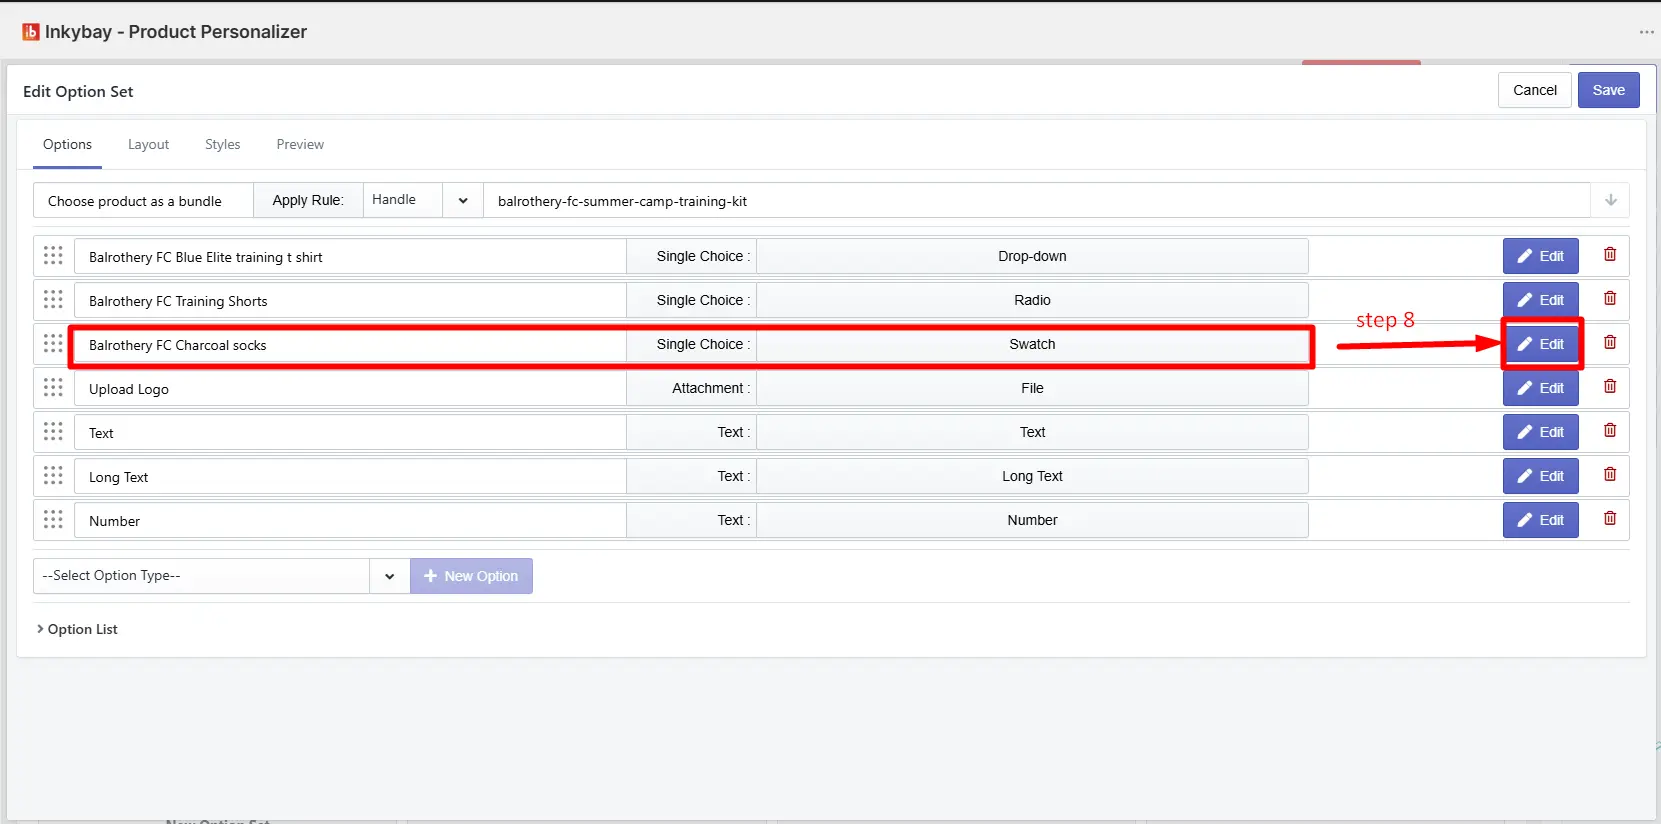
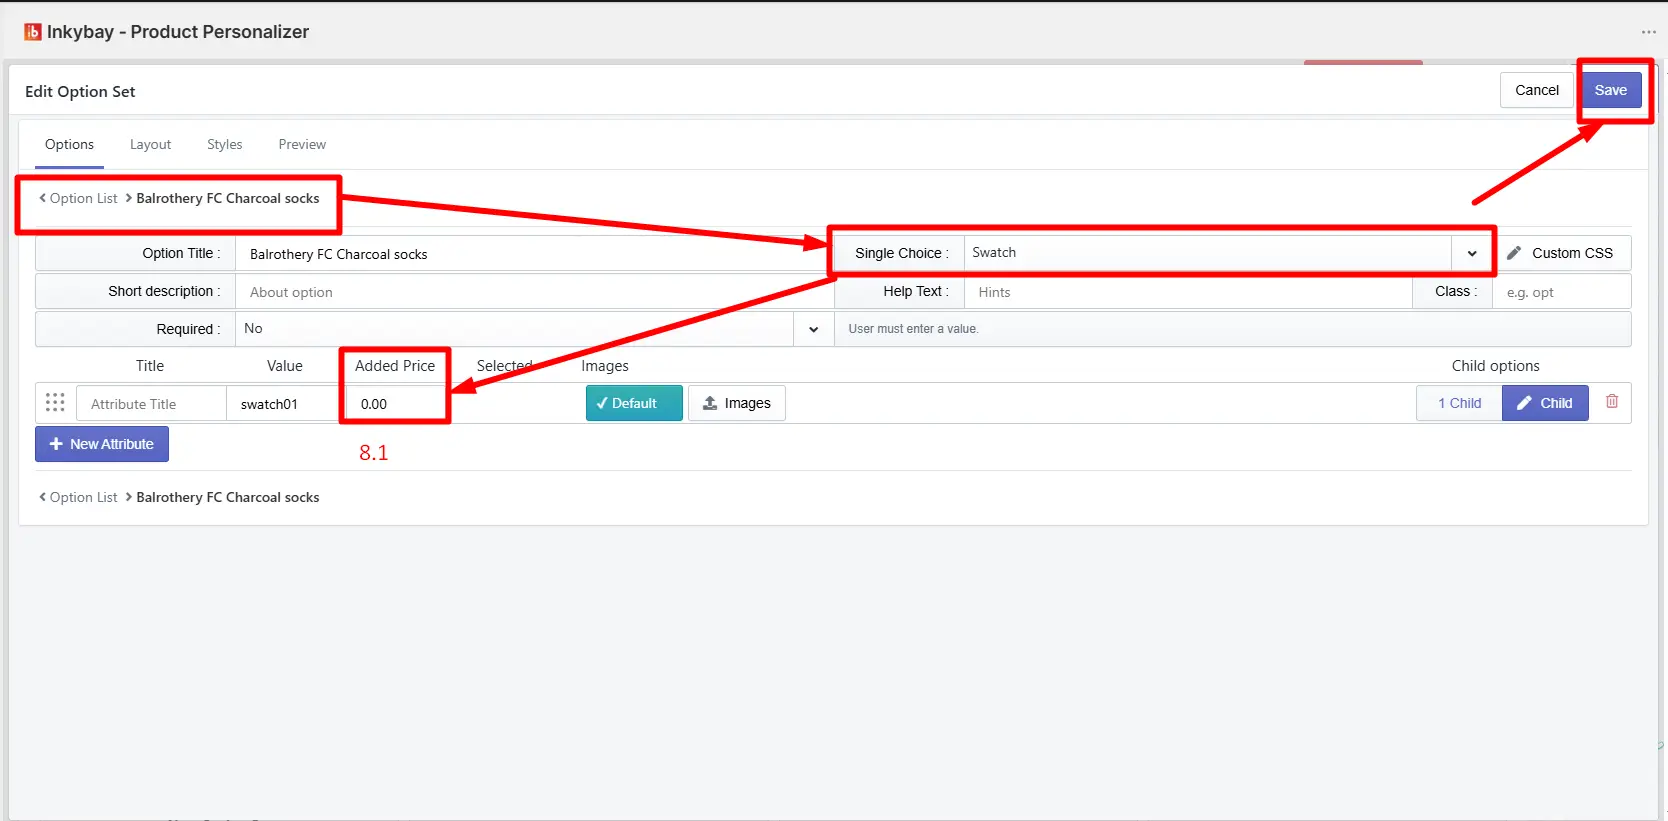
Step 8: Open the Single Choice Swatch option.
Click the Edit button for the Single Choice Swatch option inside your option set. You will see an Added Price column next to each swatch.
8.1 Added Price field: Enter the extra price for each swatch. When a customer selects a swatch, the set price will be added to the product base price.
Set the price and click the Save button.
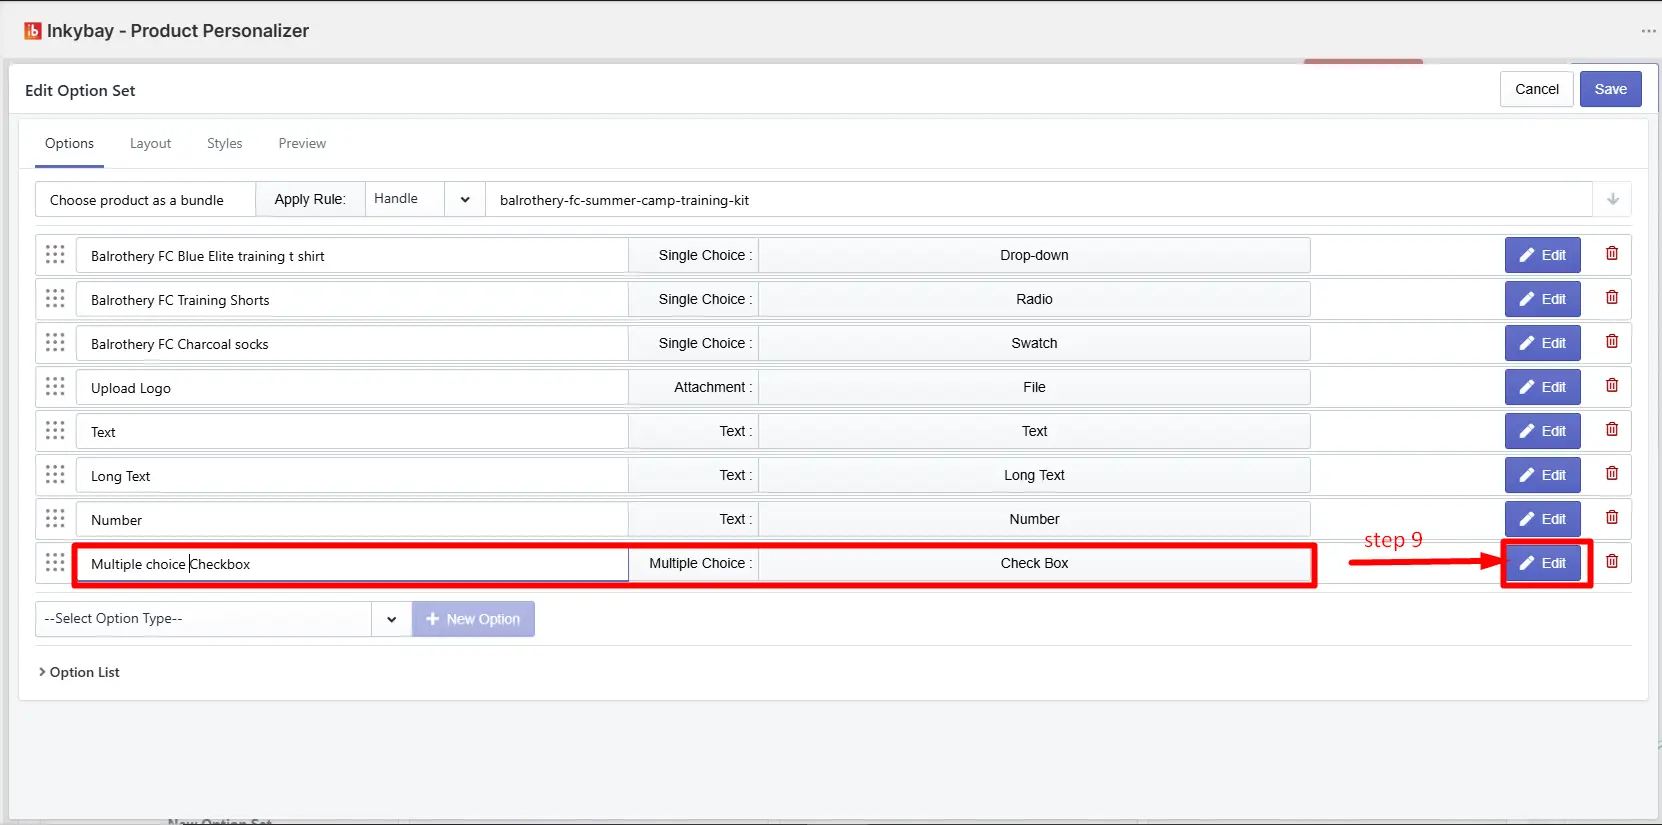
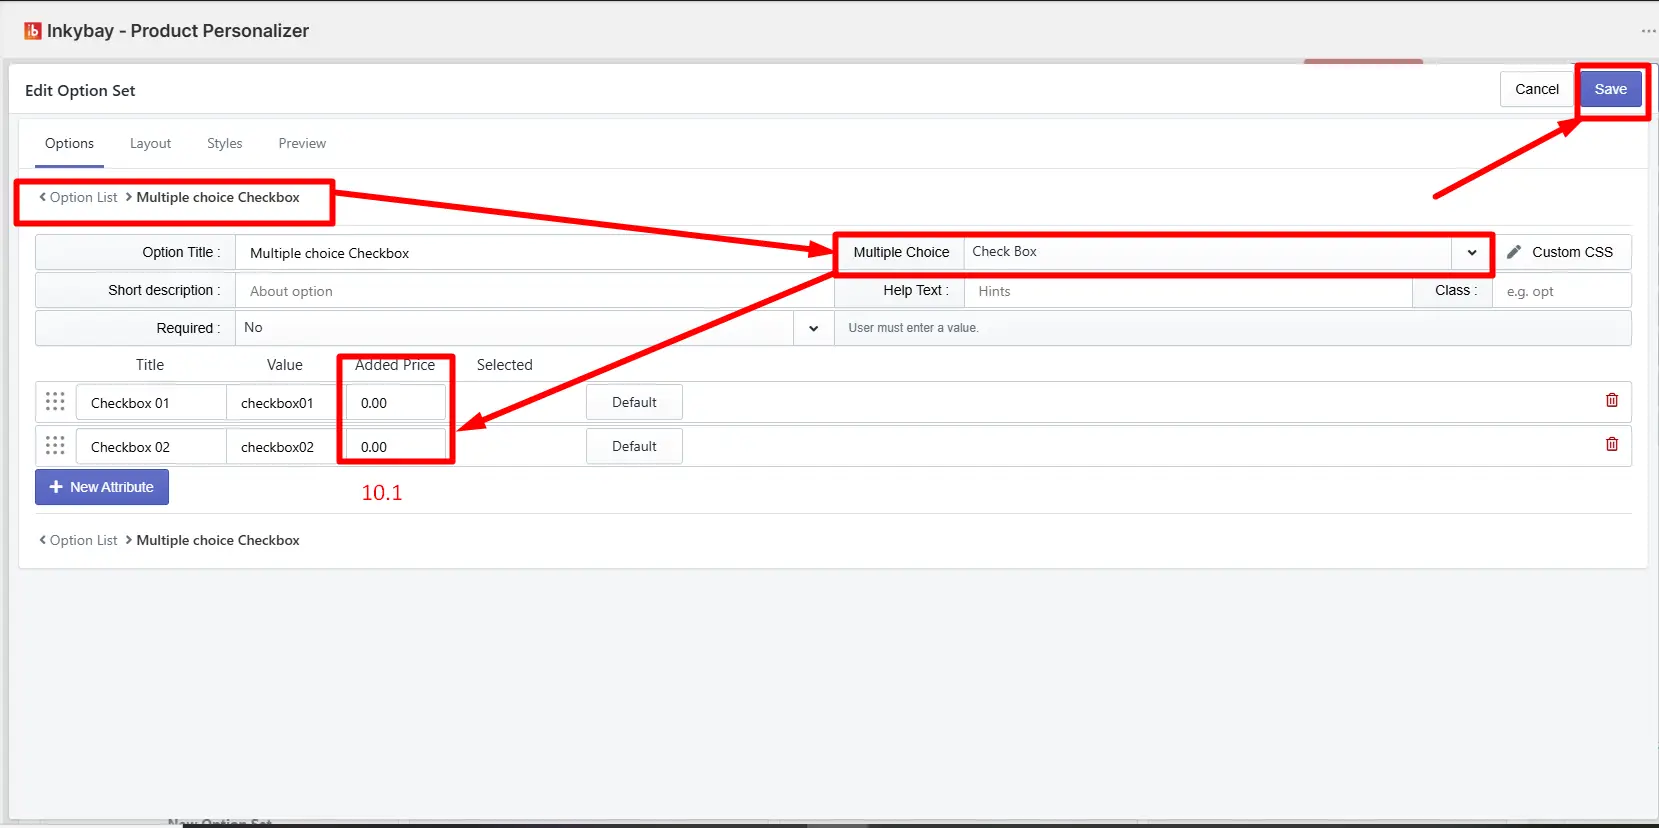
Step 9: Open the Multiple Choice Checkbox option.
Click the Edit button for the Multiple Choice Checkbox option inside your option set. You will see an Added Price column next to each available choice.
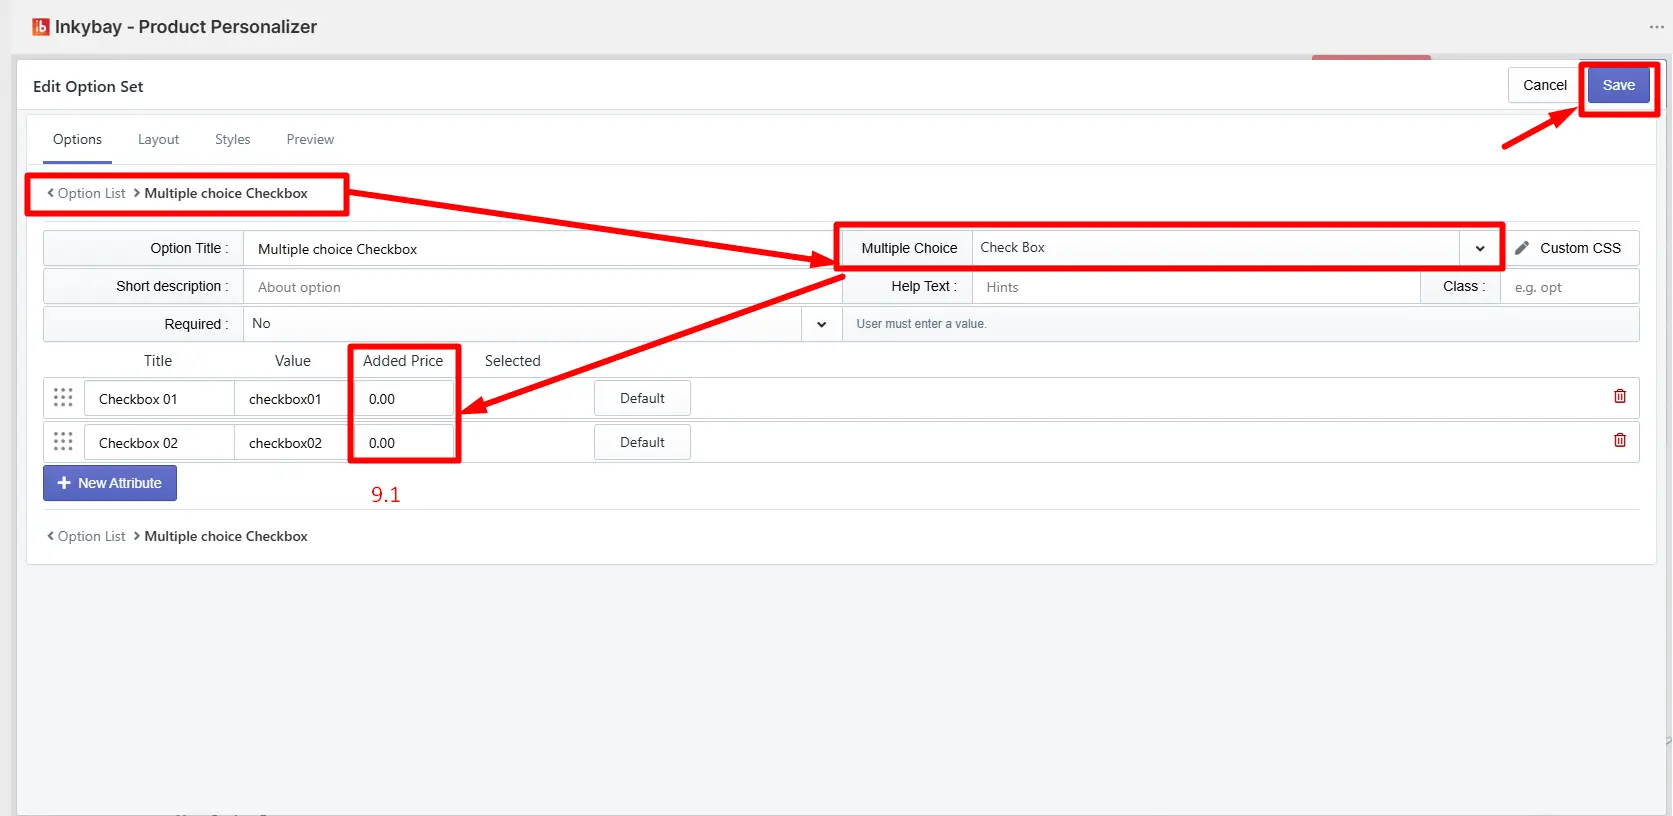
9.1 Added Price field: Enter the extra price for each choice. When a customer selects one or more choices, the set price for each selected choice will be added to the product base price.
Set the price and click the Save button.
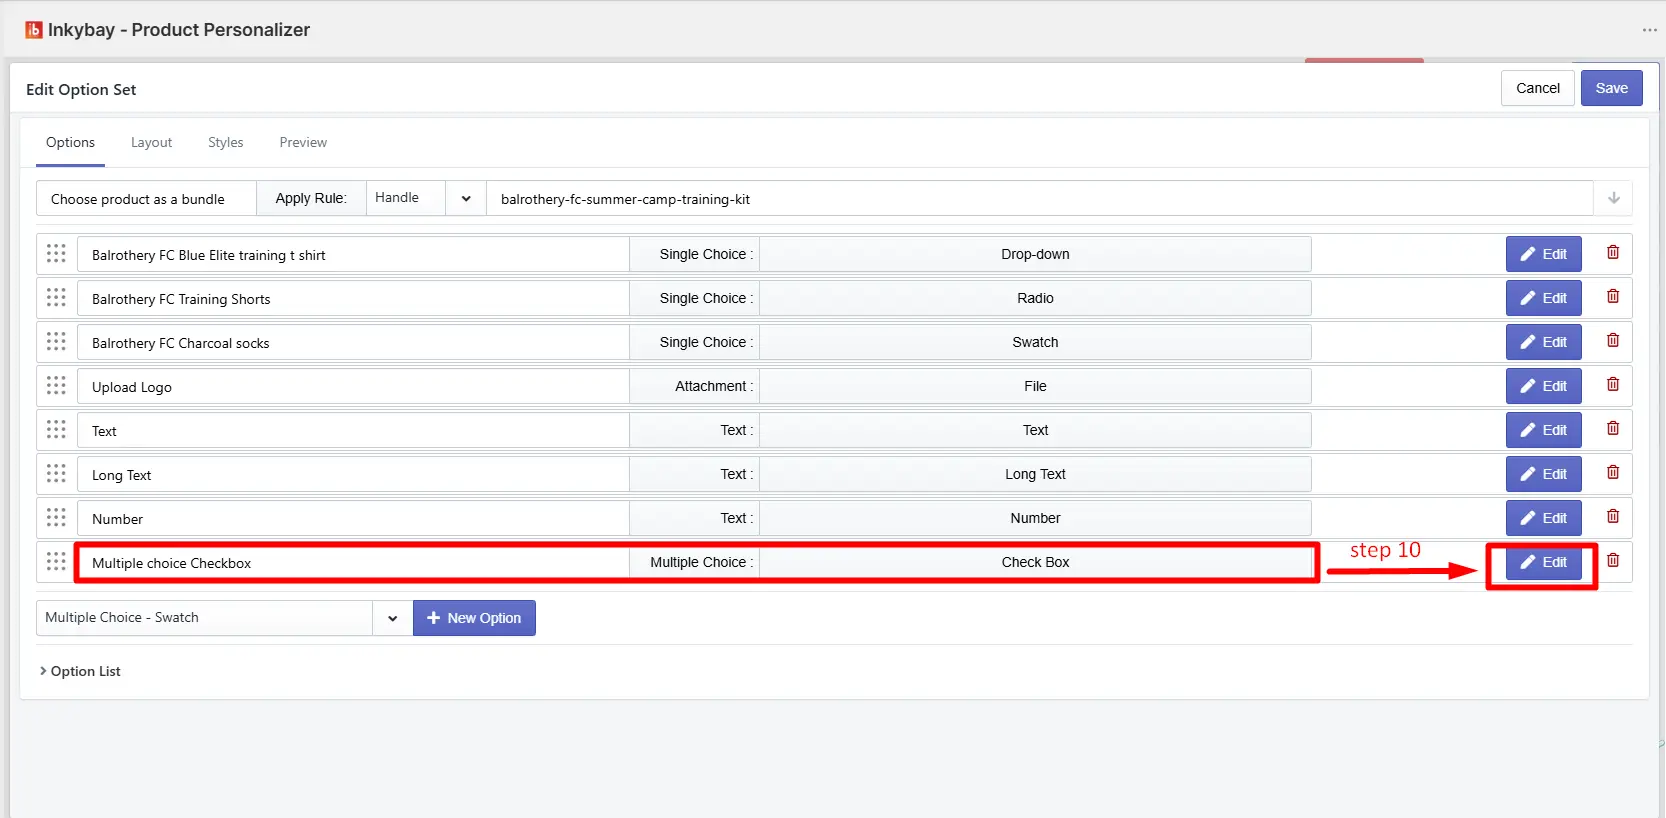
Step 10: Open the Multiple Choice Swatch option.
Click the Edit button for the Multiple Choice Swatch option inside your option set. You will see an Added Price column next to each swatch.
10.1 Added Price field: Enter the extra price for each swatch. When a customer selects one or more swatches, the set price for each selected swatch will be added to the product base price.
Set the price and click the Save button.
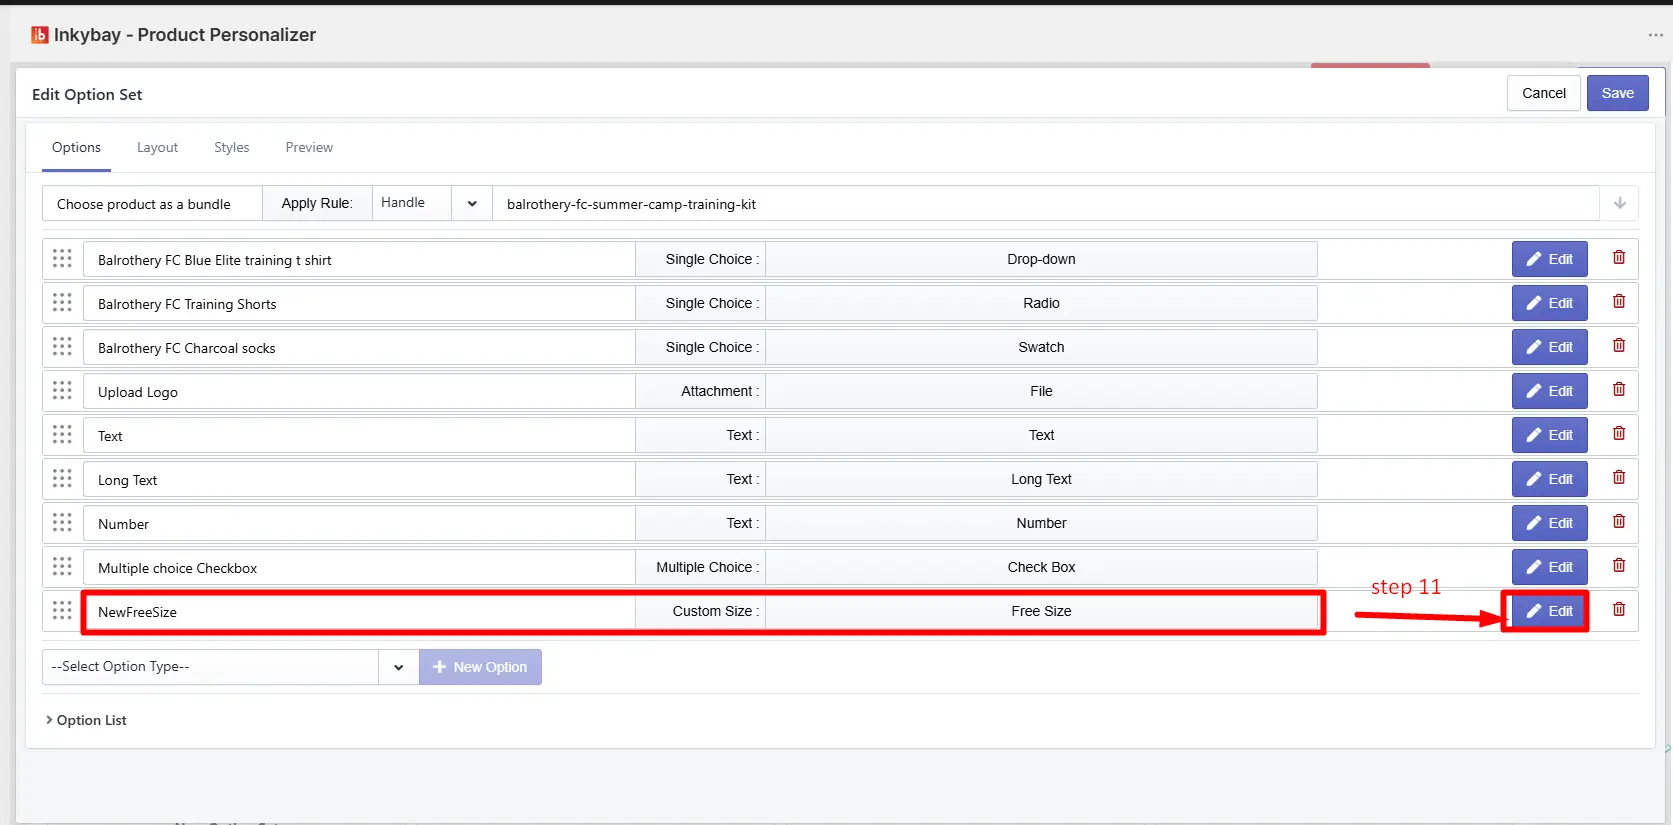
Step 11: Open the Custom Size Free Size option.
Click the Edit button for the Custom Size Free Size option inside your option set. You will find two price fields:
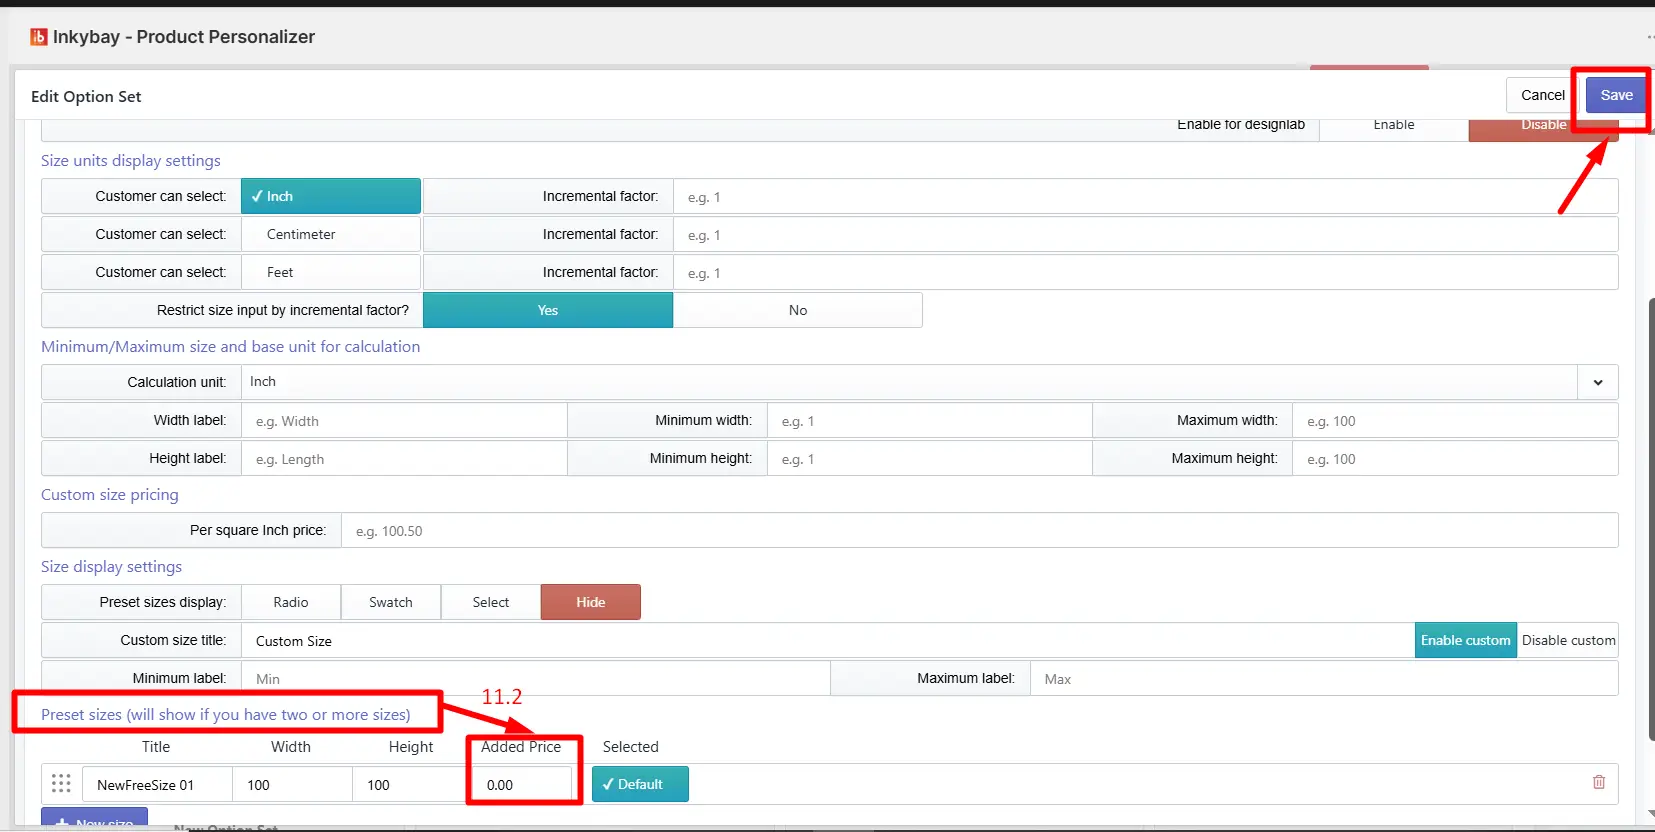
11.1 Custom Size Pricing: The set price will be added when a customer selects a custom size. The price is calculated per square inch based on the customer's input for width and height.
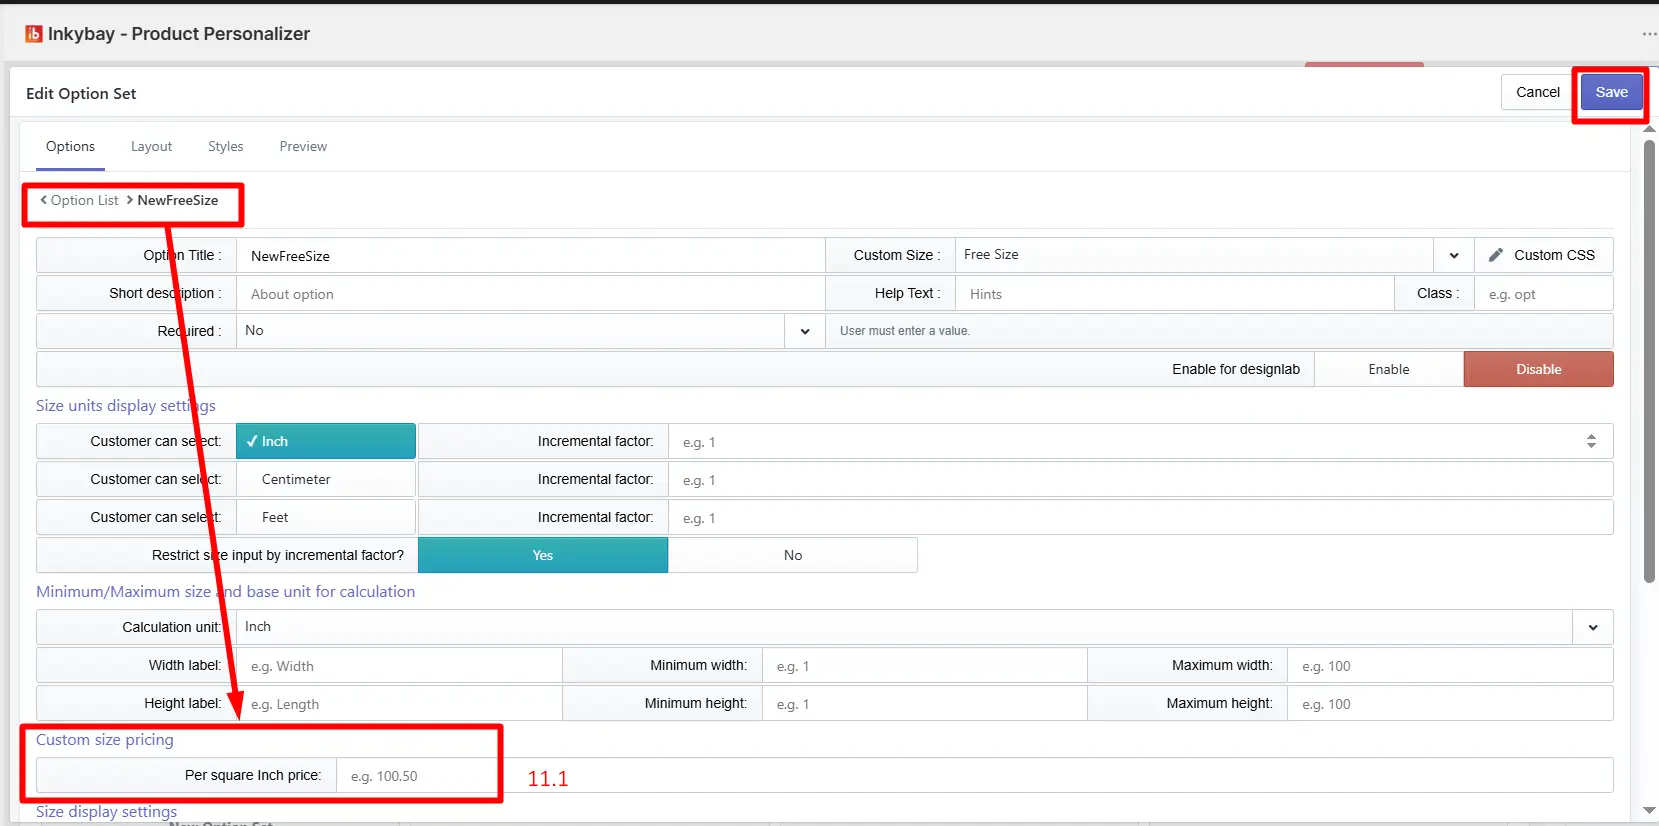
11.2 Added Price field: You can also set a fixed extra price for each custom size option you have created. When a customer selects that option, the set price will be added to the product base price.
Set the price and click the Save button.
Step 12: Open the Custom Size Fixed Width option.
Click the Edit button for the Custom Size Fixed Width option inside your option set. You will find two price fields:
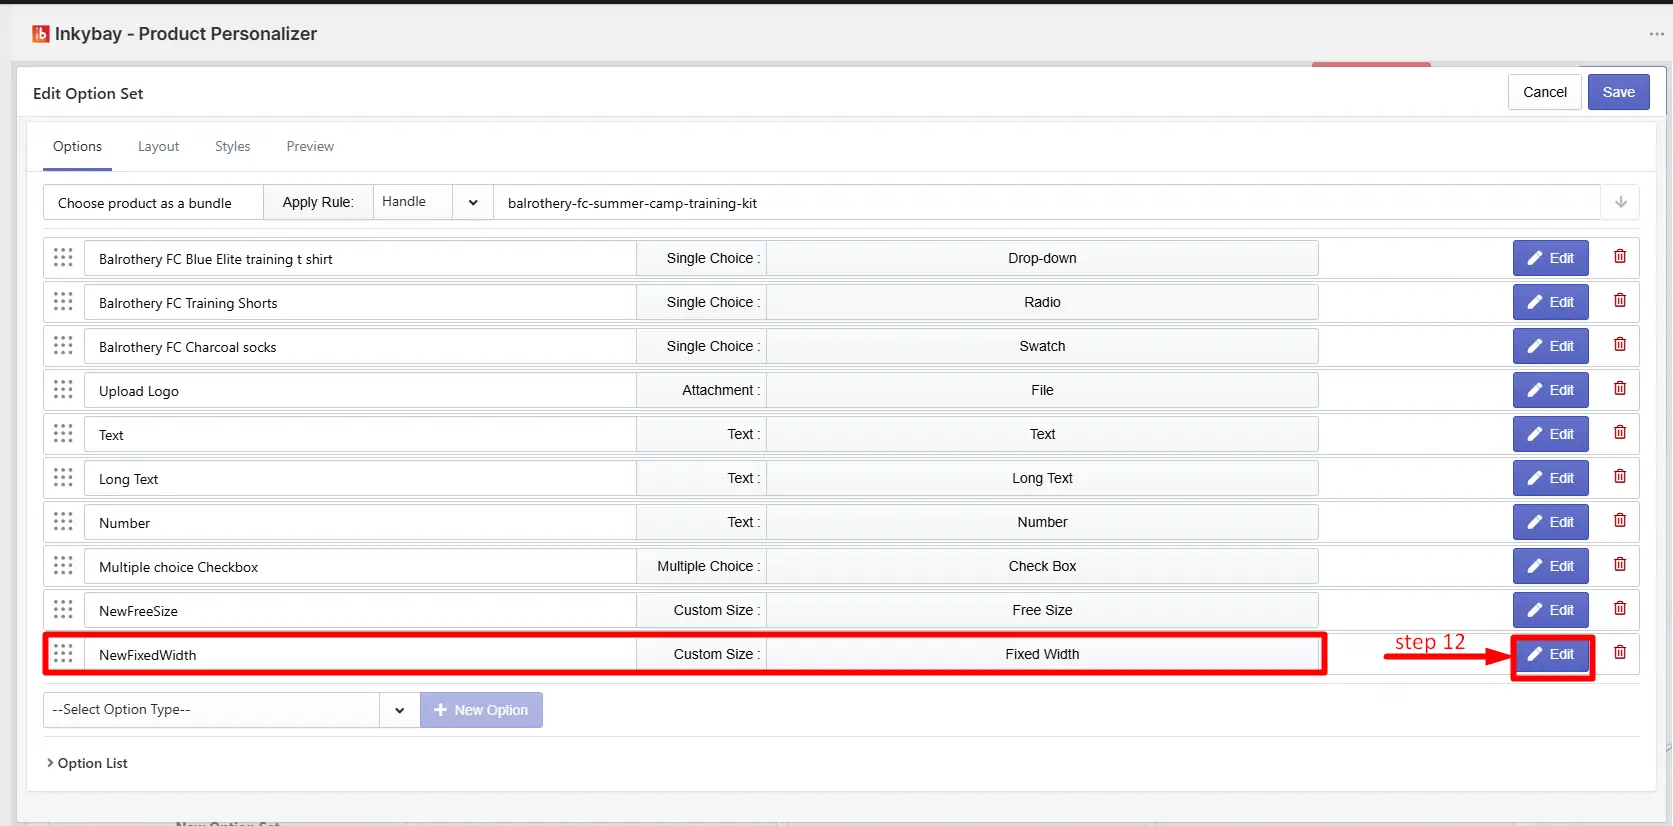 12.1 Custom Size Pricing: The set price will be added when a customer selects a custom size.
The price is calculated per square inch based on the customer's input.
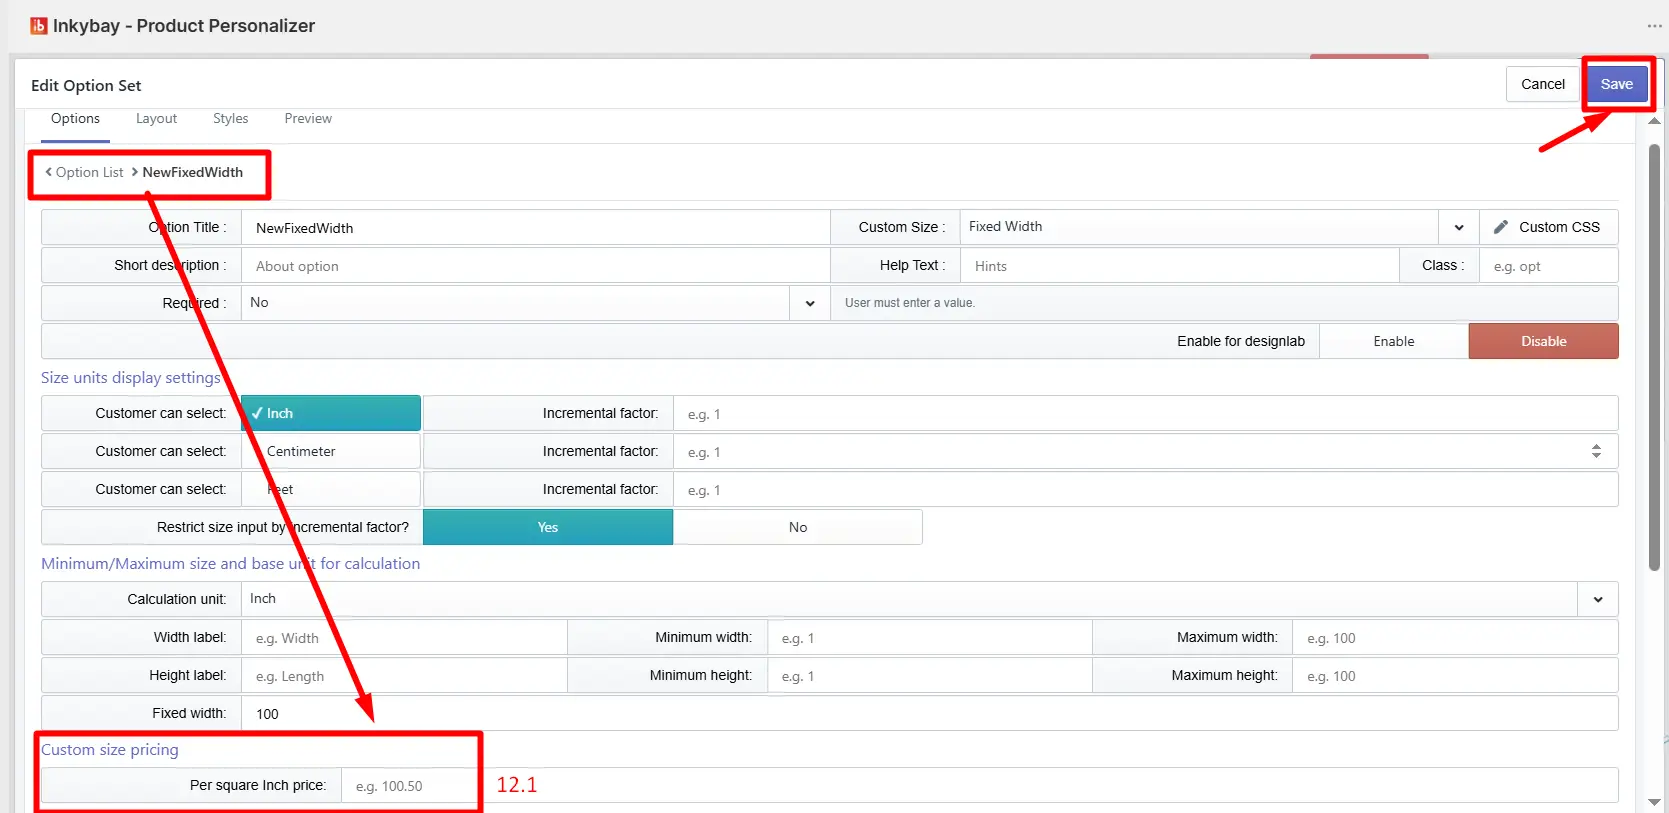
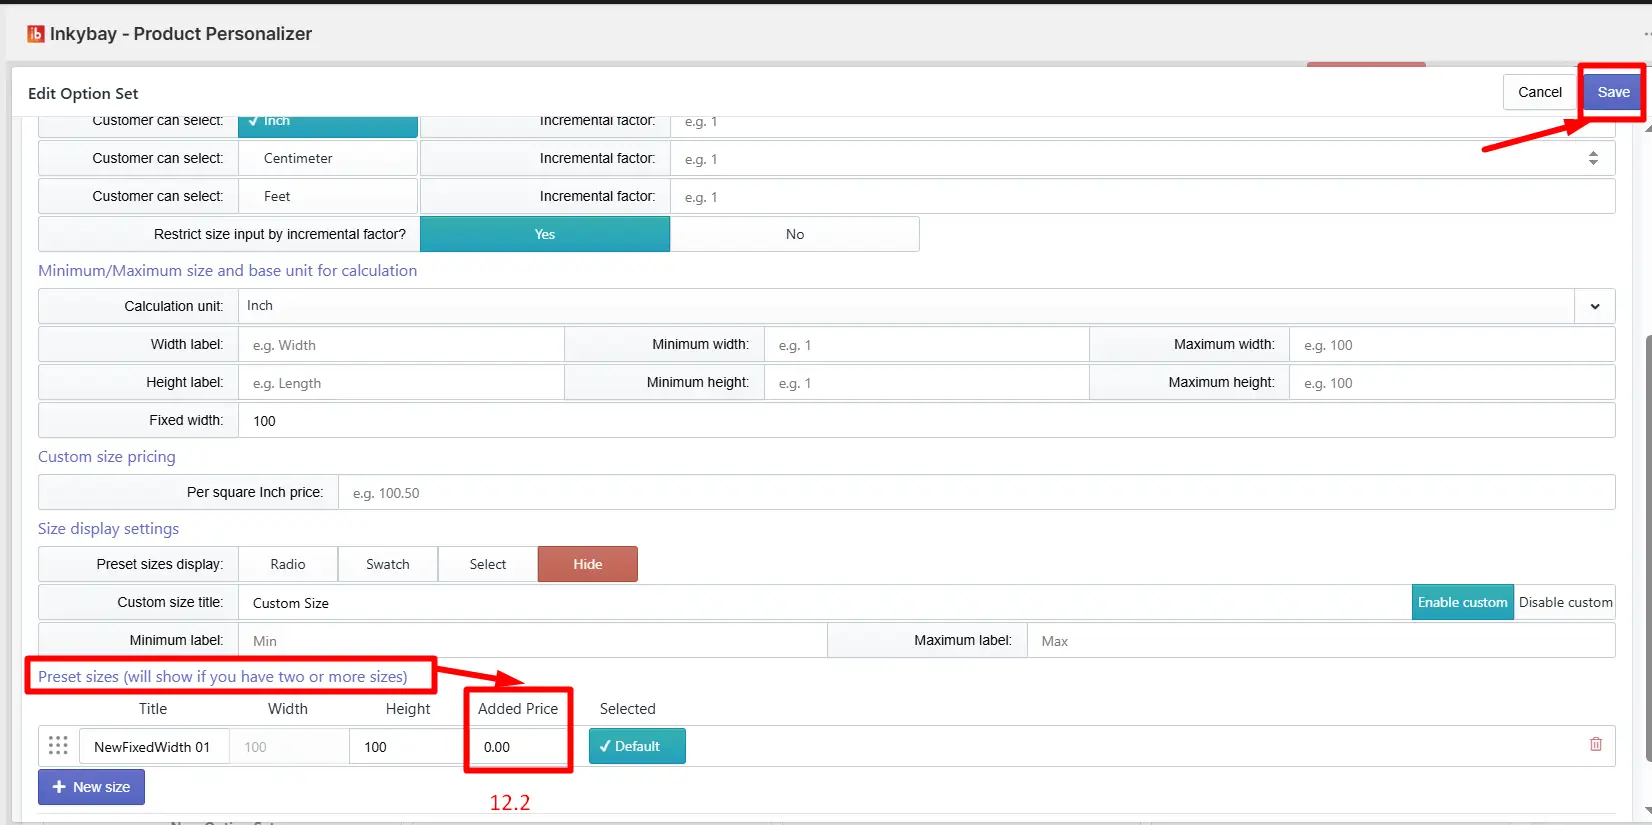
12.2 Added Price field: You can also set a fixed extra price for each custom size option you have created. When a customer selects that option, the set price will be added to the product base price.
Set the price and click the Save button.
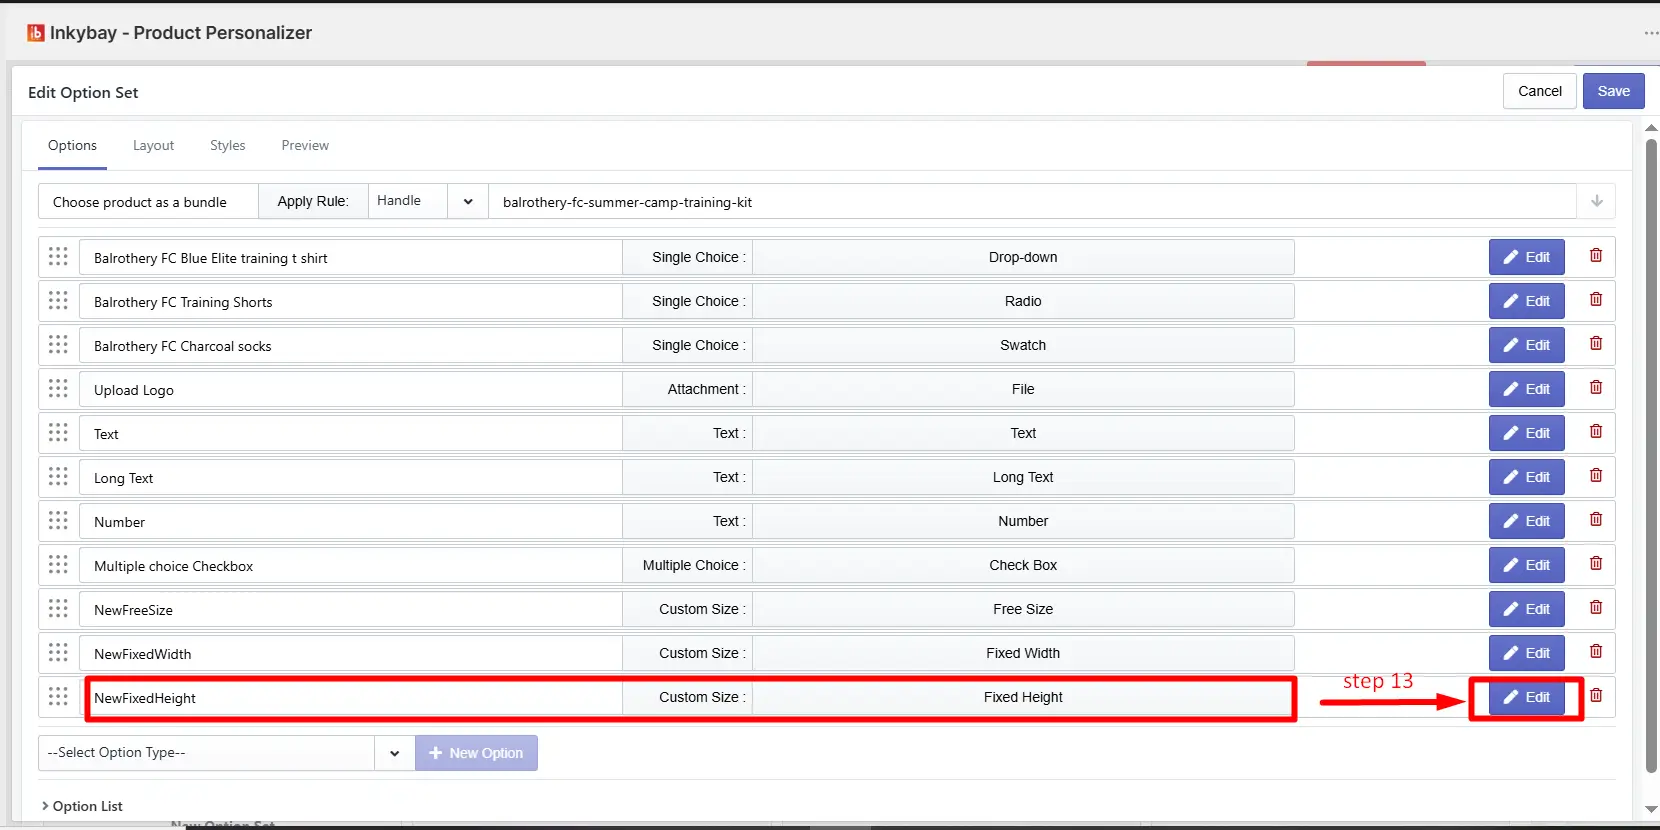
Step 13: Open the Custom Size Fixed Height option.
Click the Edit button for the Custom Size Fixed Height option inside your option set. You will find two price fields:
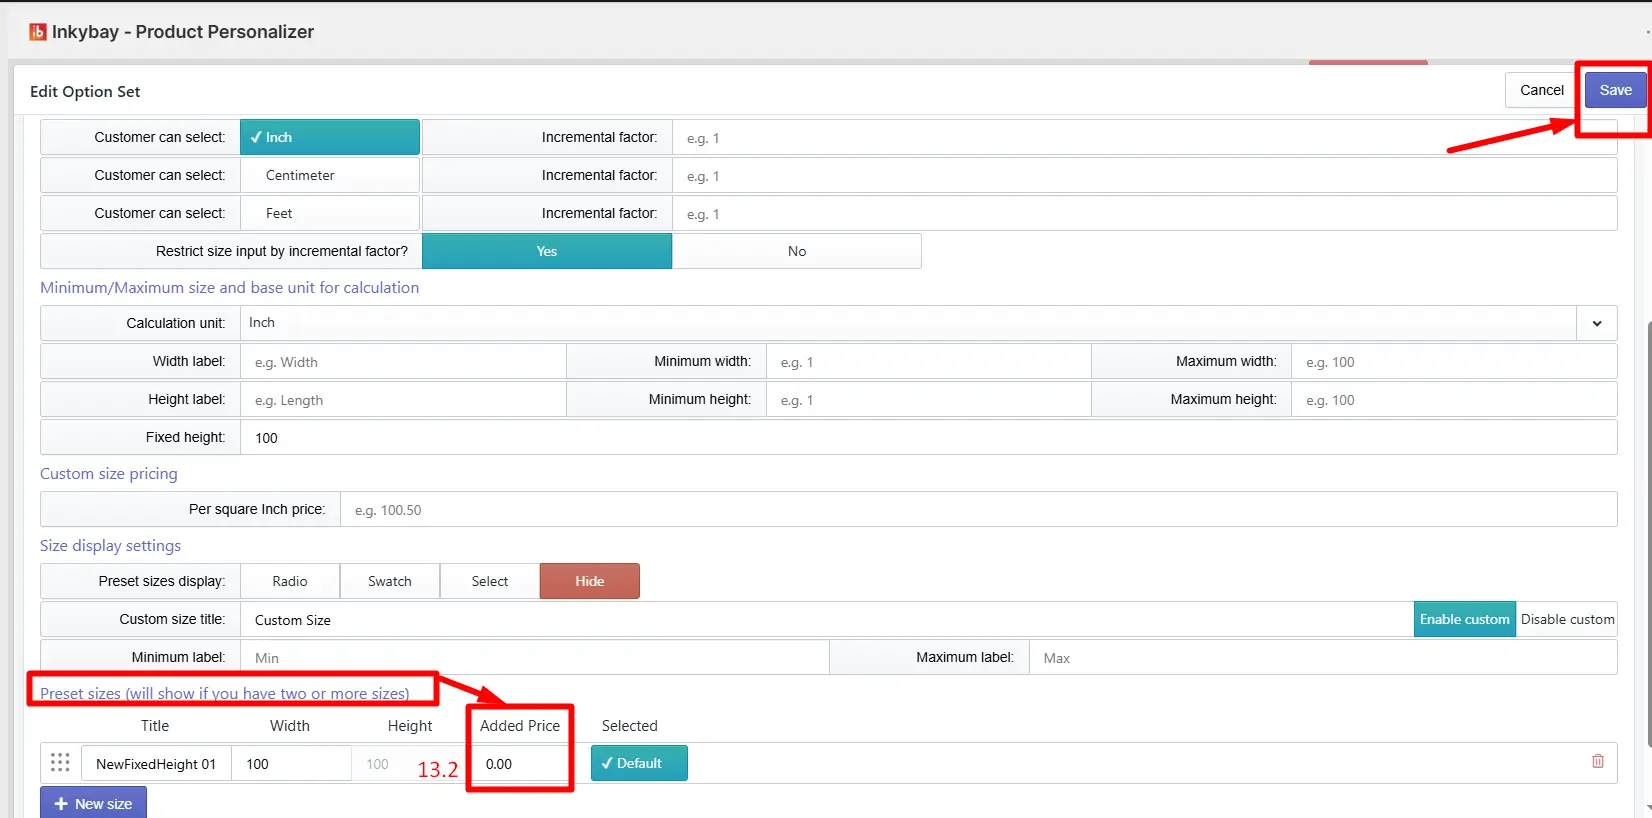
13.1 Custom Size Pricing: The set price will be added when a customer selects a custom size. The price is calculated per square inch based on the customer's input.
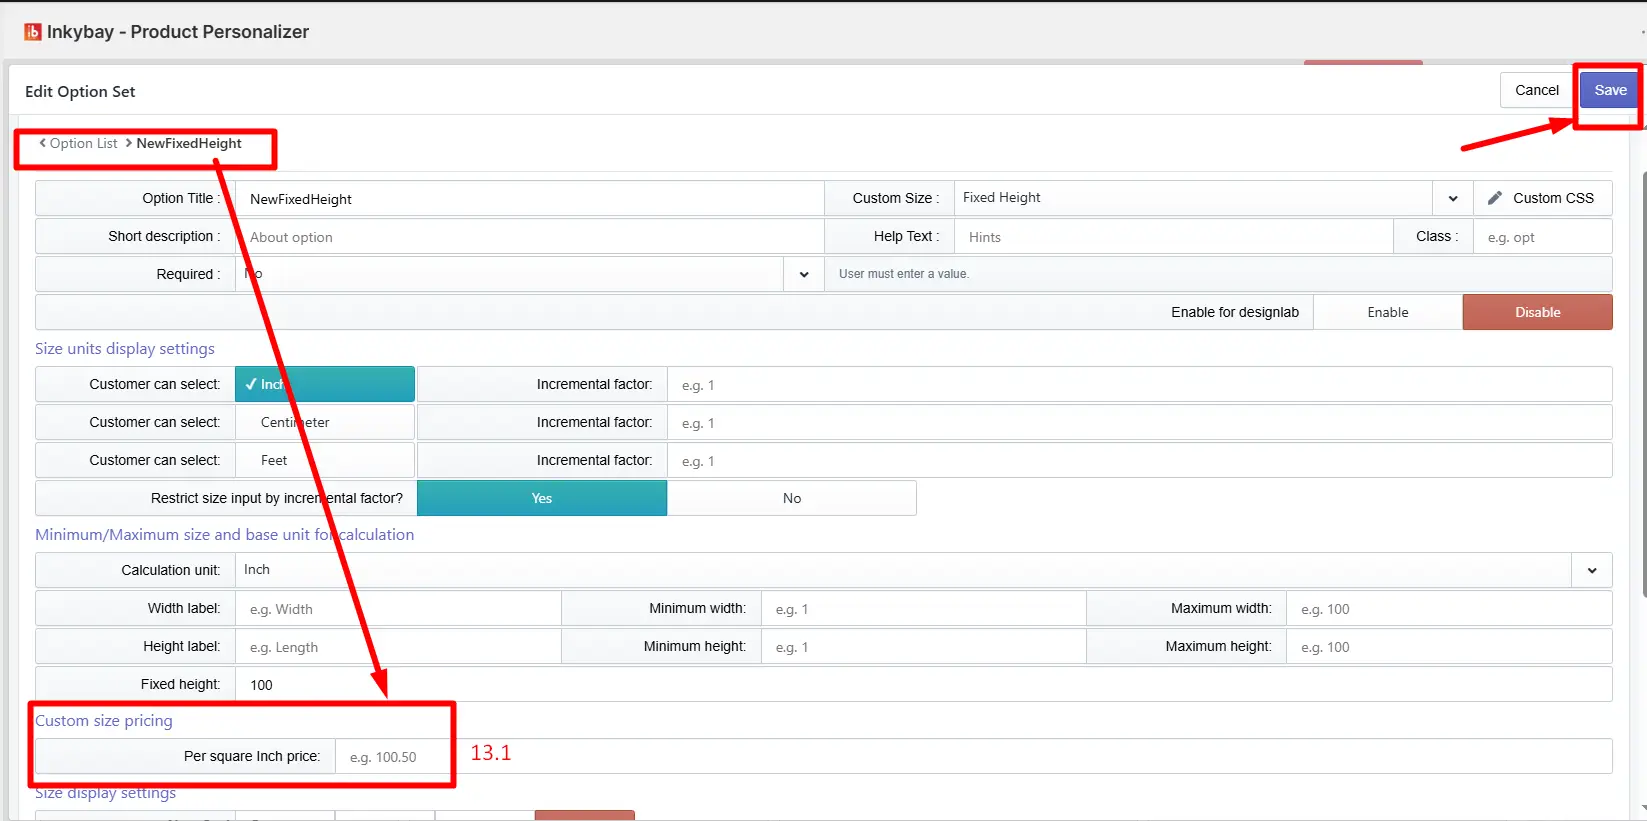
13.2 Added Price field : You can also set a fixed extra price for each custom size option you have created. When a customer selects that option, the set price will be added to the product base price.
Set the price and click the Save button.
Step 14: Open the File Attachment option.
Click the Edit button for the File Attachment option inside your option set. You will see an Attached Price column next to each attachment option.
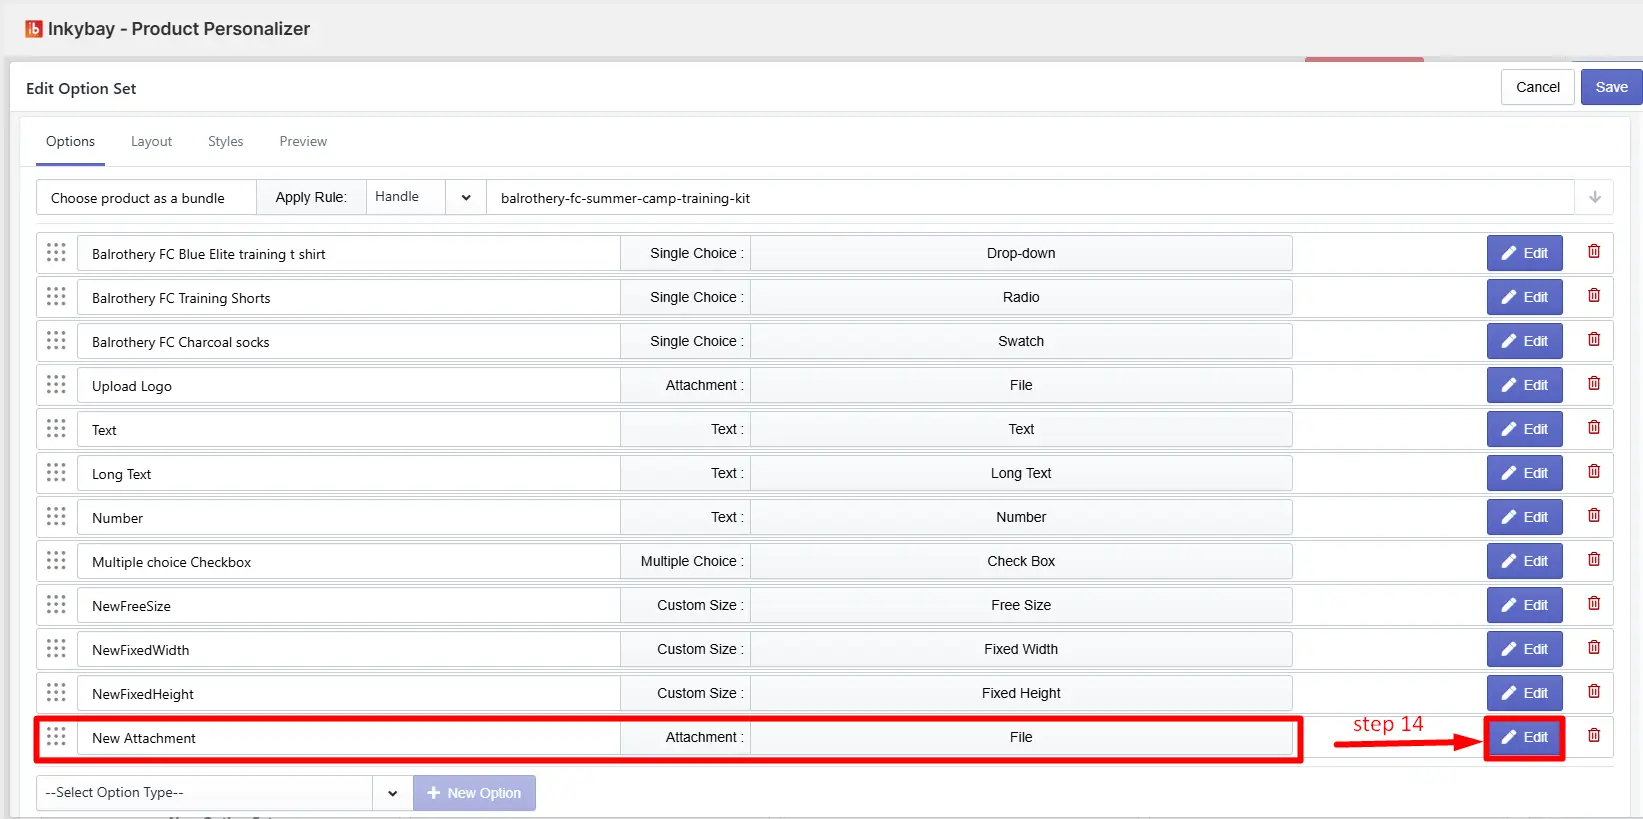
14.1 Attached Price field: Enter the extra price for the file attachment. When a customer attaches a file for this option, the set price will be added to the product base price.
Set the price and click the Save button.

🎯 Note
Each option type works differently, so make sure you set the price in the correct field for each one. You can always come back and update the prices anytime from the Product Option settings.
Still, facing difficulties or need help? Feel free to contact us. You can also reach us:
InkyBay app Live chat
Support ticket from the InkyBay app
Email to support@productsdesigner.com