Dynamic Sheet Fixed Width is a Product Options feature for custom products. This feature allows you to offer customers custom canvas sizes for fixed-width products (e.g., gang sheets, banners, etc.) with dynamic pricing. Suppose you sell 24-inch wide banners, where customers can set the height (e.g., 24x36, 24x48).
🎯 Note You don't need to create a new custom product for each size. Rather, your customers can set their canvas size or choose from a list of sizes. |
How to set the Dynamic Sheet Fixed Width
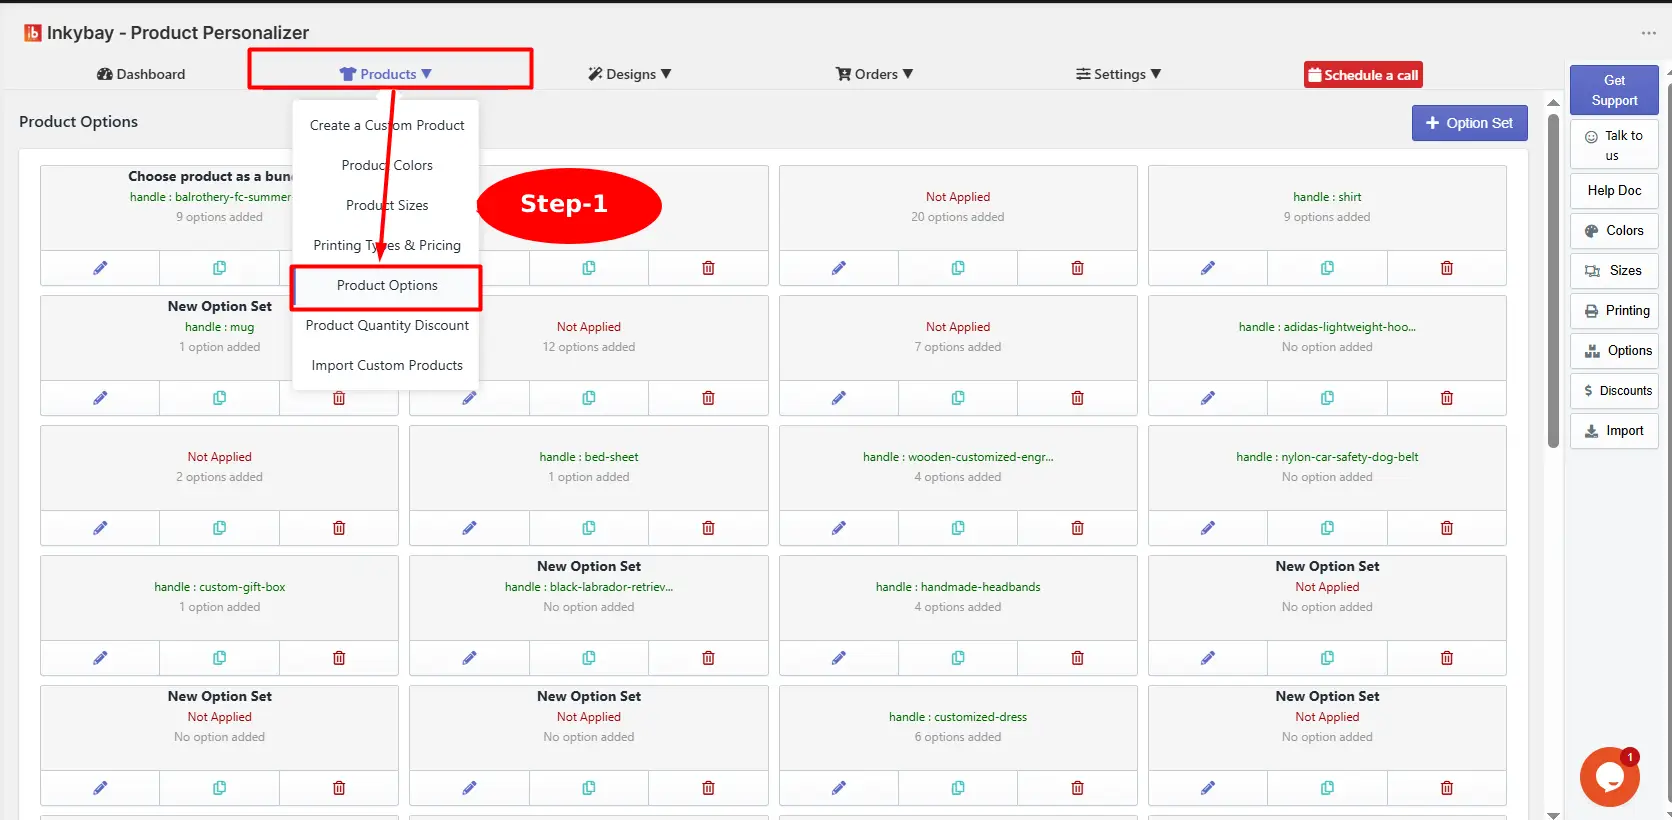
Step 1: Hover over to the Products option and select Product Options.
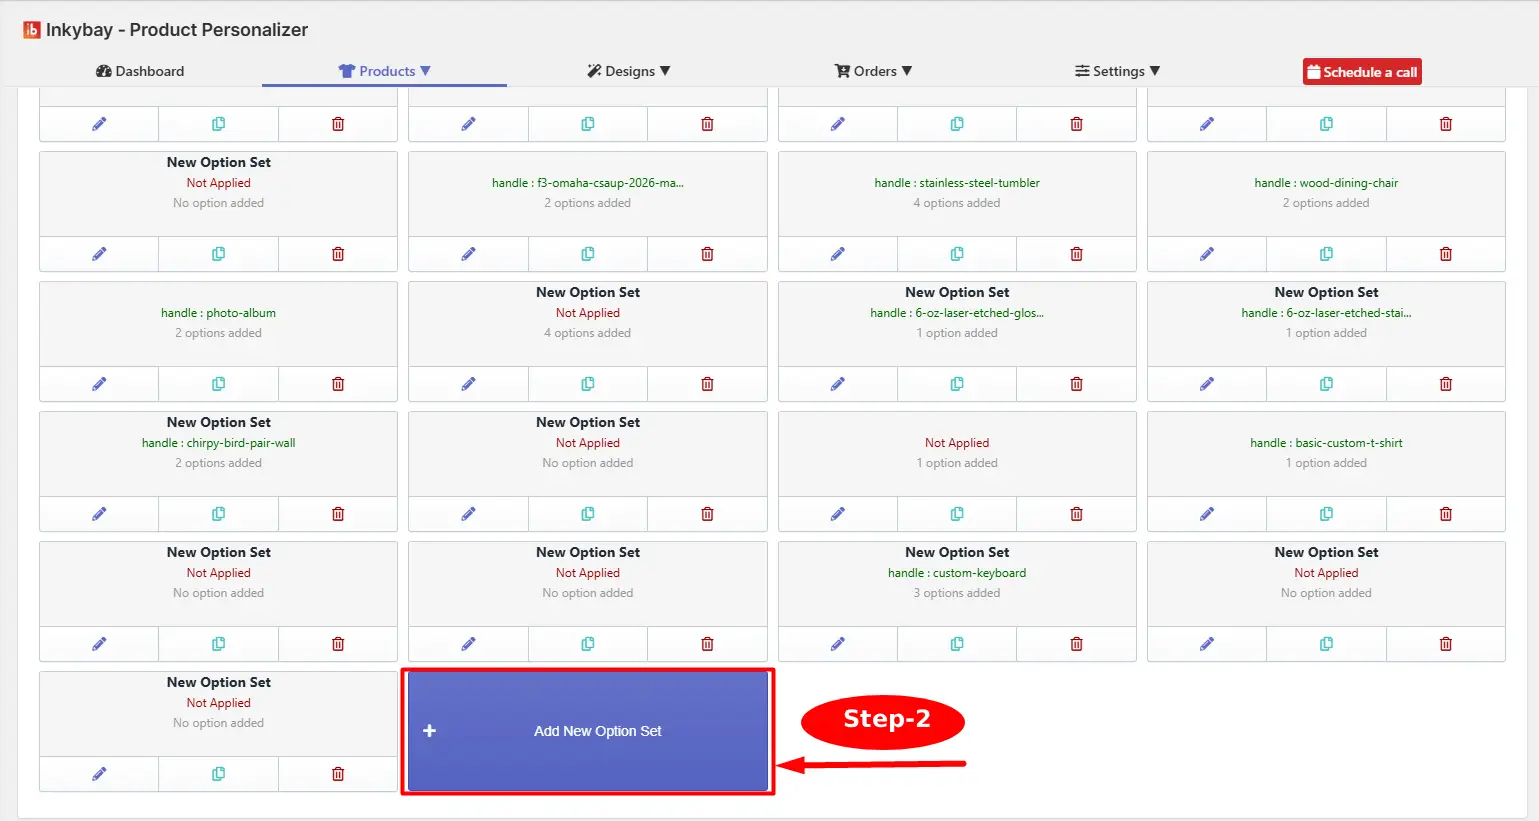
Step 2: Click + Add New Option Set to create a new option set for your product.
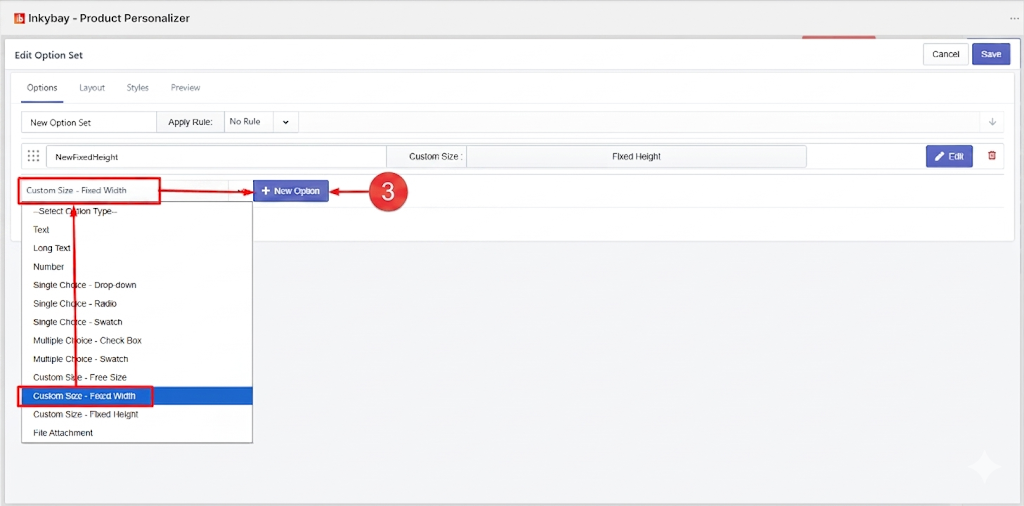
Step 3: Click the Select Option Type and choose “Custom Size – Fixed Width” from the dropdown list. Then click the + New Option button.
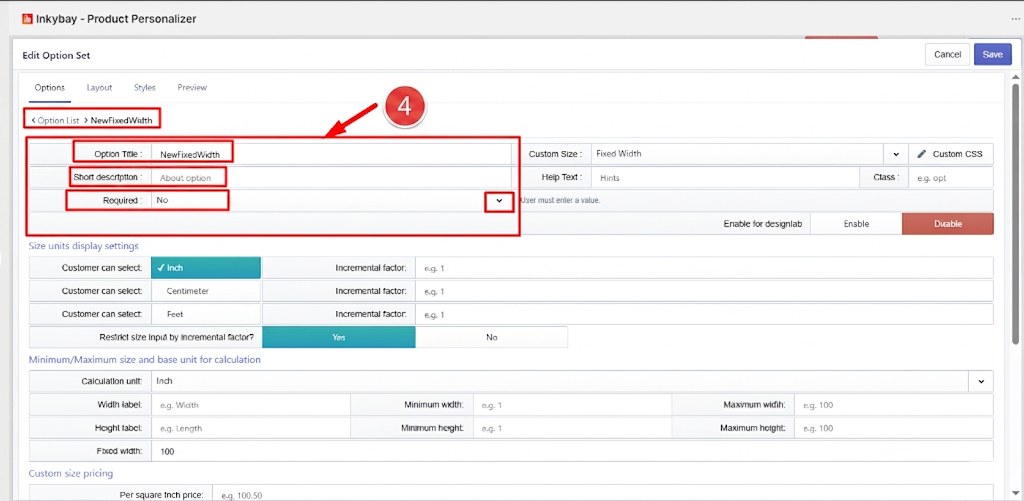
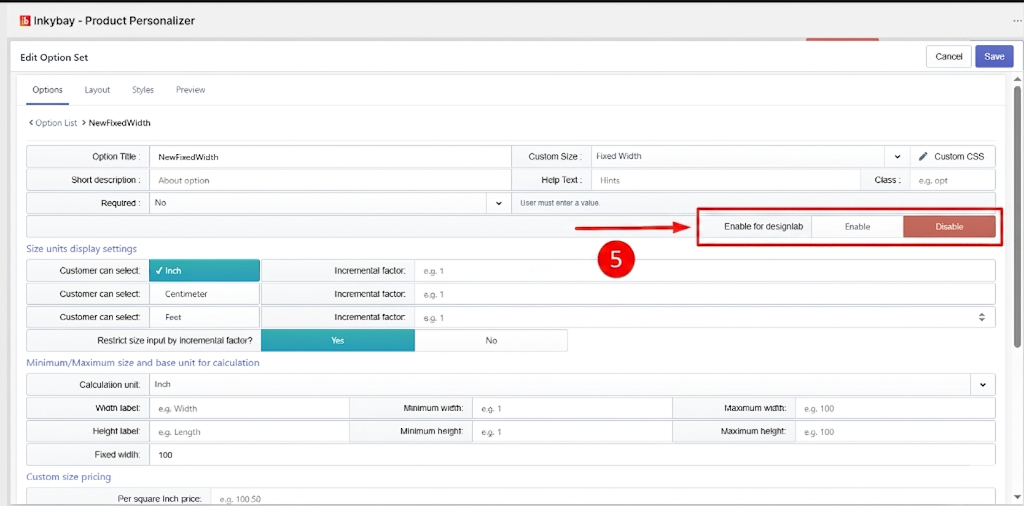
Step 4: Add the Option title, short description, and set the Required status to “yes” or “no” for the required field.
Step 5: Enable for designlab
If you want this custom size-Fixed width option to be enabled for the Design Lab, just turn on the “Enable” option, and if you don’t want this option in the designlab then select “Disable”.
If you enable the custom size-Fixed Width option for designlab you will get a white blank canvas according to the custom size or preset size that the customer selects on the product page.
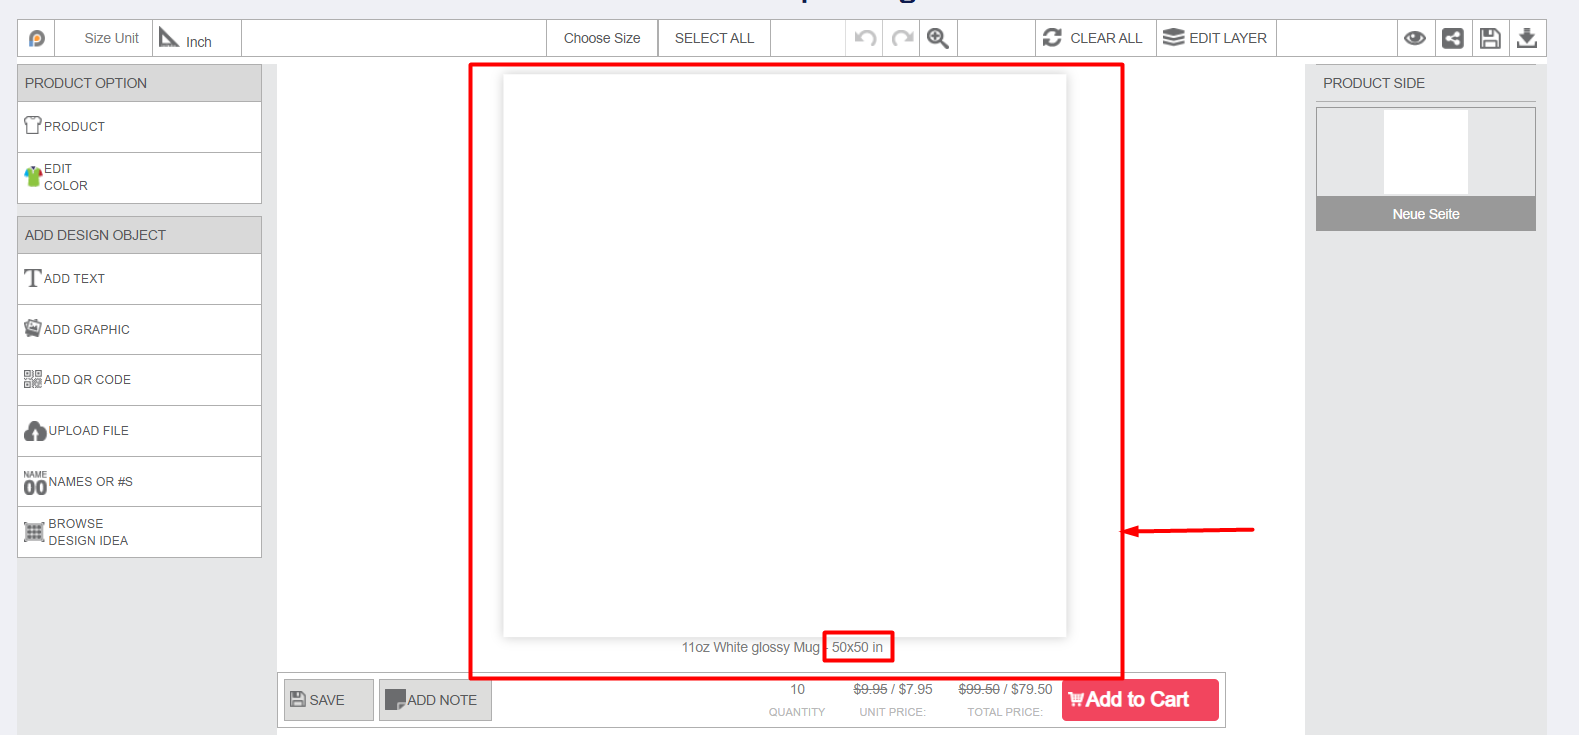
Also, you can change the selected custom size-Fixed Width inside the designlab. Blank canvas size will be changed according to the selected size.
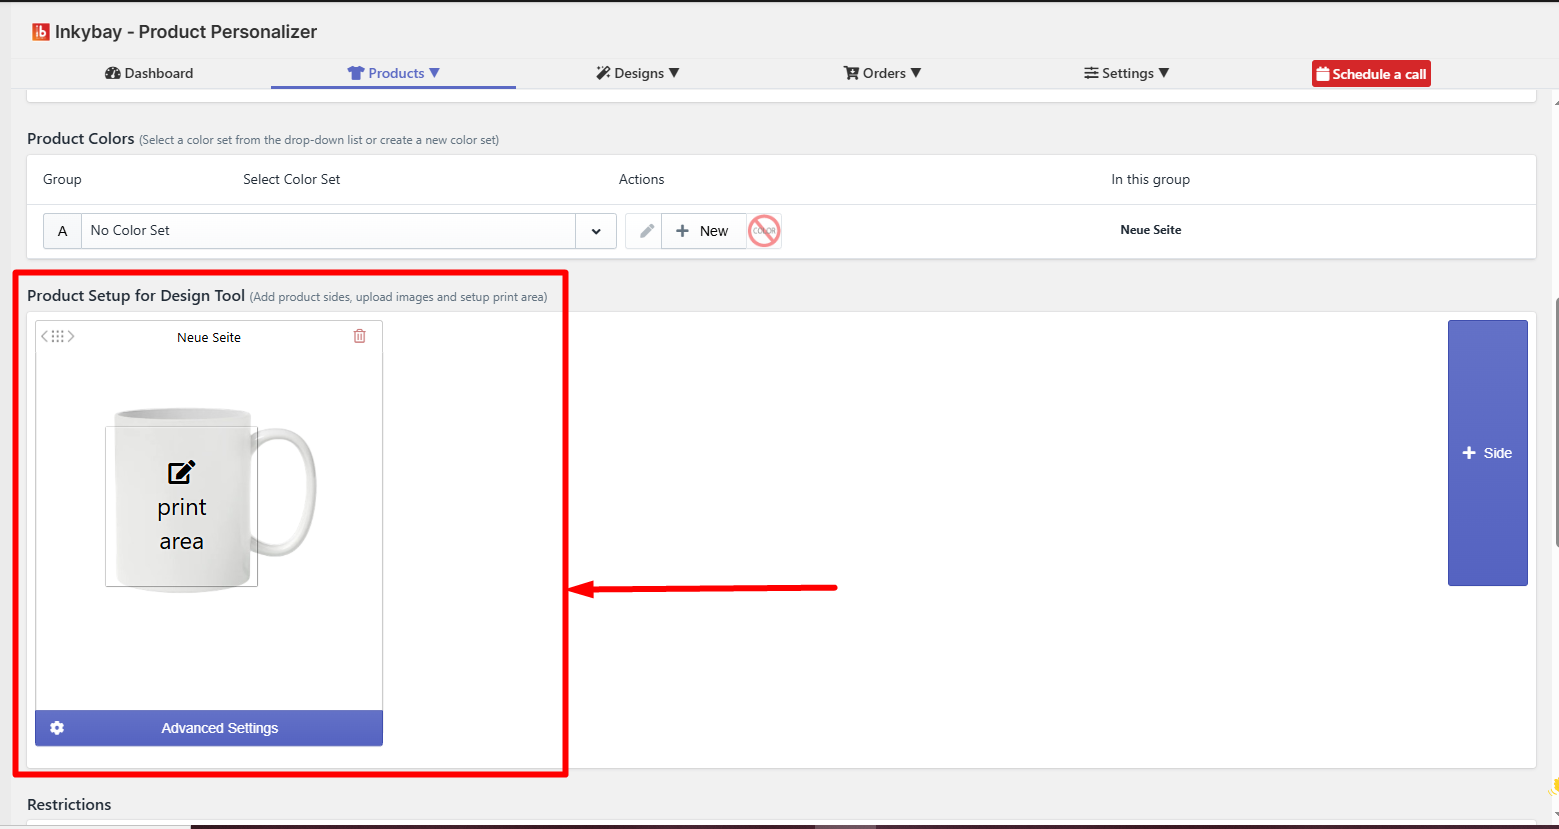
Otherwise, click the Disable button if you do not want to show the custom size-Fixed Width option on designlab. By disabling, you will be able to see the original product image that you have uploaded in the Product setup for the design tool (advanced settings).The custom size-Fixed Width option will be shown only on the product page.

By selecting the multiple size units display settings: Inch, Centimeter, and Feet, you allow customers to pick their preferred size unit directly on the product page. The size units will be displayed as a dropdown, like the image below.
Your customers can increase/decrease the canvas height. Also, you can restrict the size input by an incremental factor (e.g., integer or fractional; 2 or 3.14). Click the Yes button.
Restrict size input by an incremental factor as shown in the image below.
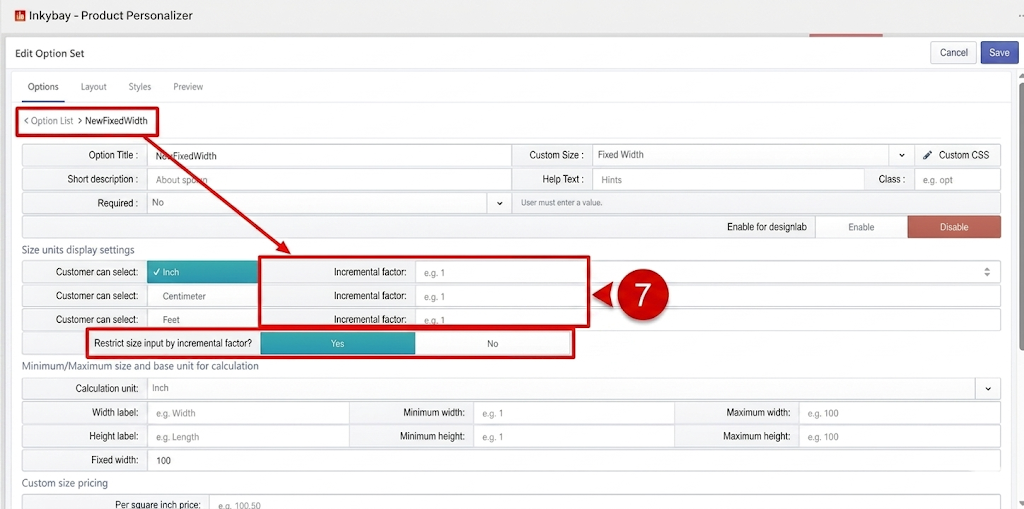
The incremental value can be chosen in either Inch, Centimeter and Feet units or for all units. Also, you can easily turn on/off the incremental option. If you turn the option “Yes”, then the value will be incremented according to the assigned incremental factor. But if you turn the option to “No”, then the incremental value restriction will not work.
You can set the Minimum & maximum measurements for the width and height of the product in three different calculation units (Inch, Centimetre, and Feet). Also, you can set the Label of the width & height that matches your product for better understanding.
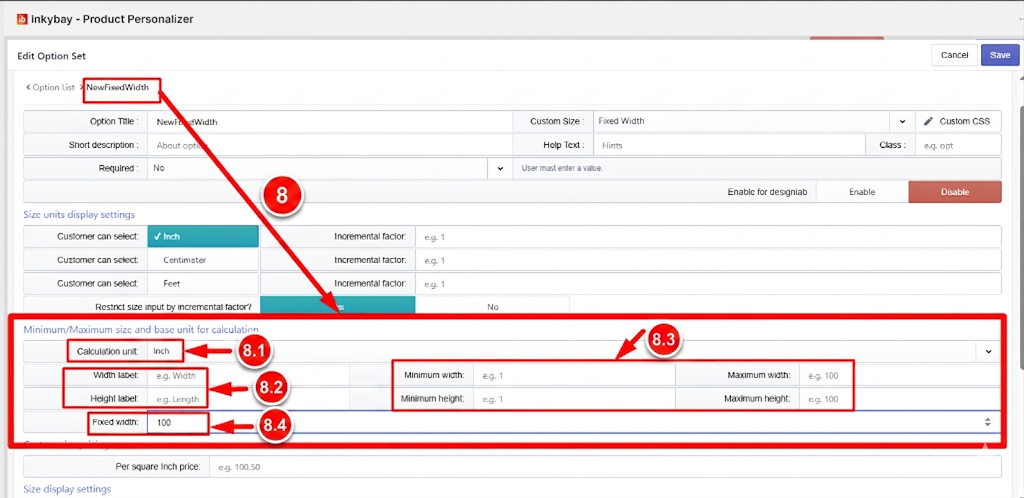
8.1 Calculation Unit: This allows you to show your customers on which scale the values of the height & width are set to the custom size box. You can set different minimum-maximum values for different units. It is helpful for both the store owner & the customer to determine the exact value they want for their product.
8.2 Width & Height Label: In the custom field section, you will see two input fields for height and width, where you can assign values to the height fields, and the width is fixed. With a label, you can give a clear indication to your customer to set the proper values for width.
8.3 Minimum & Maximum Width: You can set the minimum & maximum values for the width. It helps the customers to choose sizes of any value within the store owner’s preferred range. And they can’t exceed the restriction that you’ll set.
8.4 Fixed Width: Here you can set the fixed value for width taht will be shown in the product page. And customers will not be able to change this field.
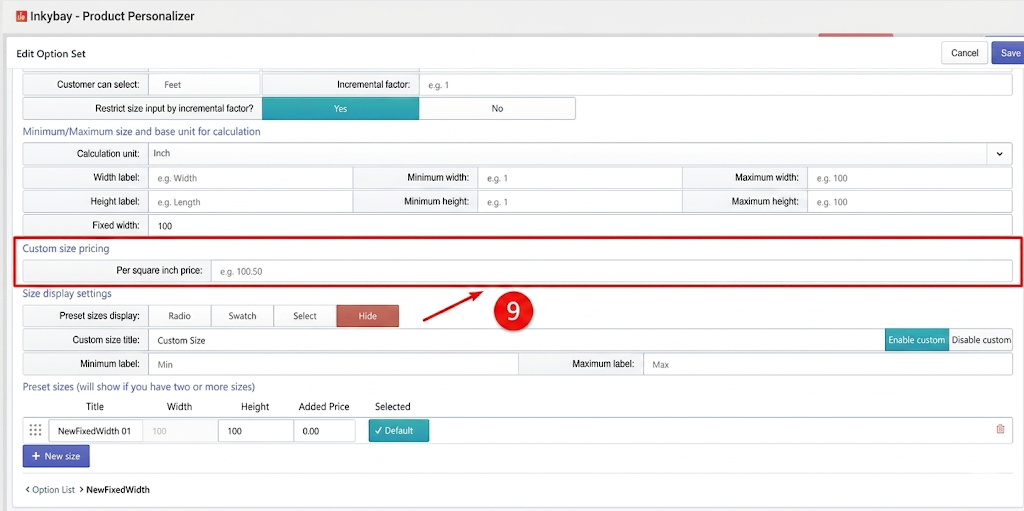
You can assign a price for “per square inch”. The set price will be added when a customer selects a custom size. The price is calculated per square inch based on the customer's input for width and height.
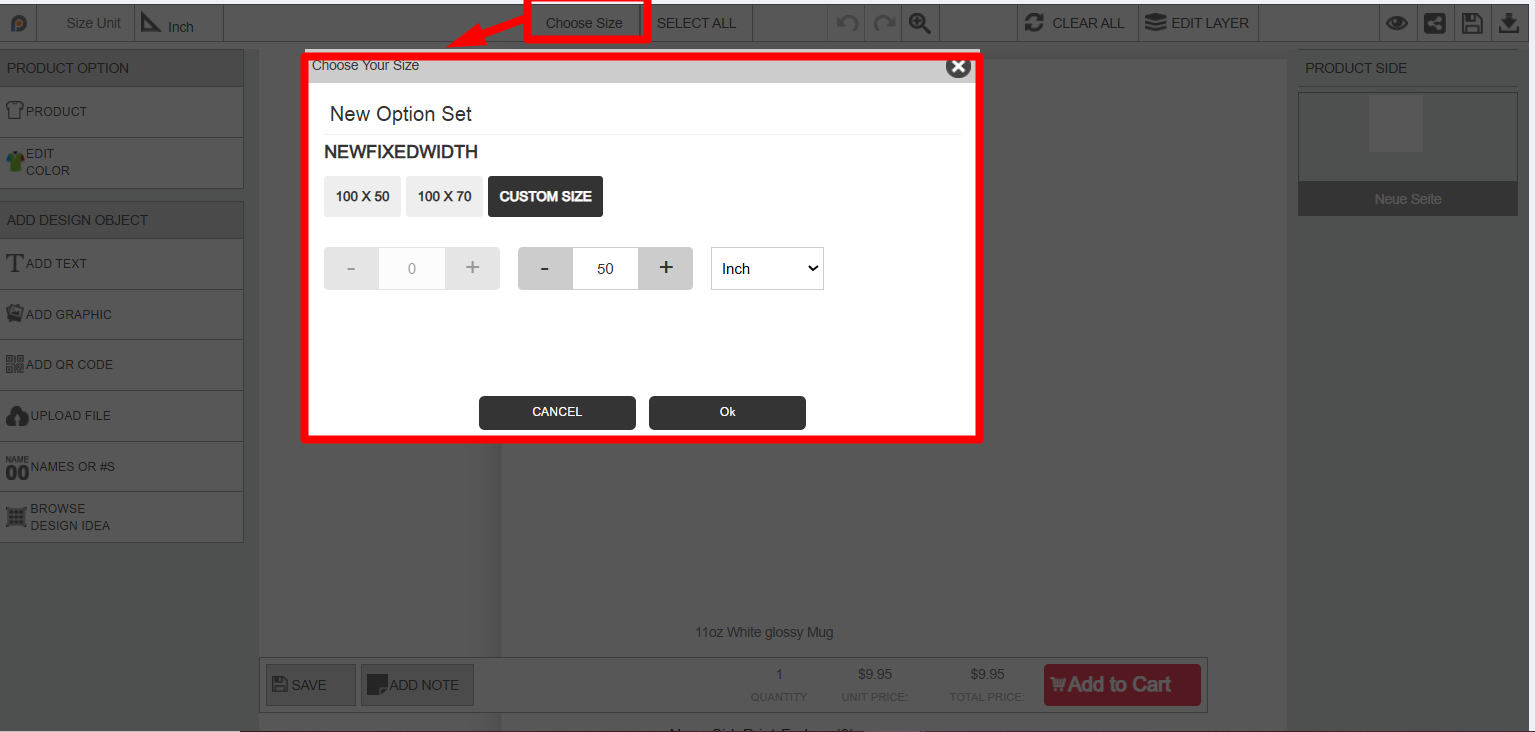
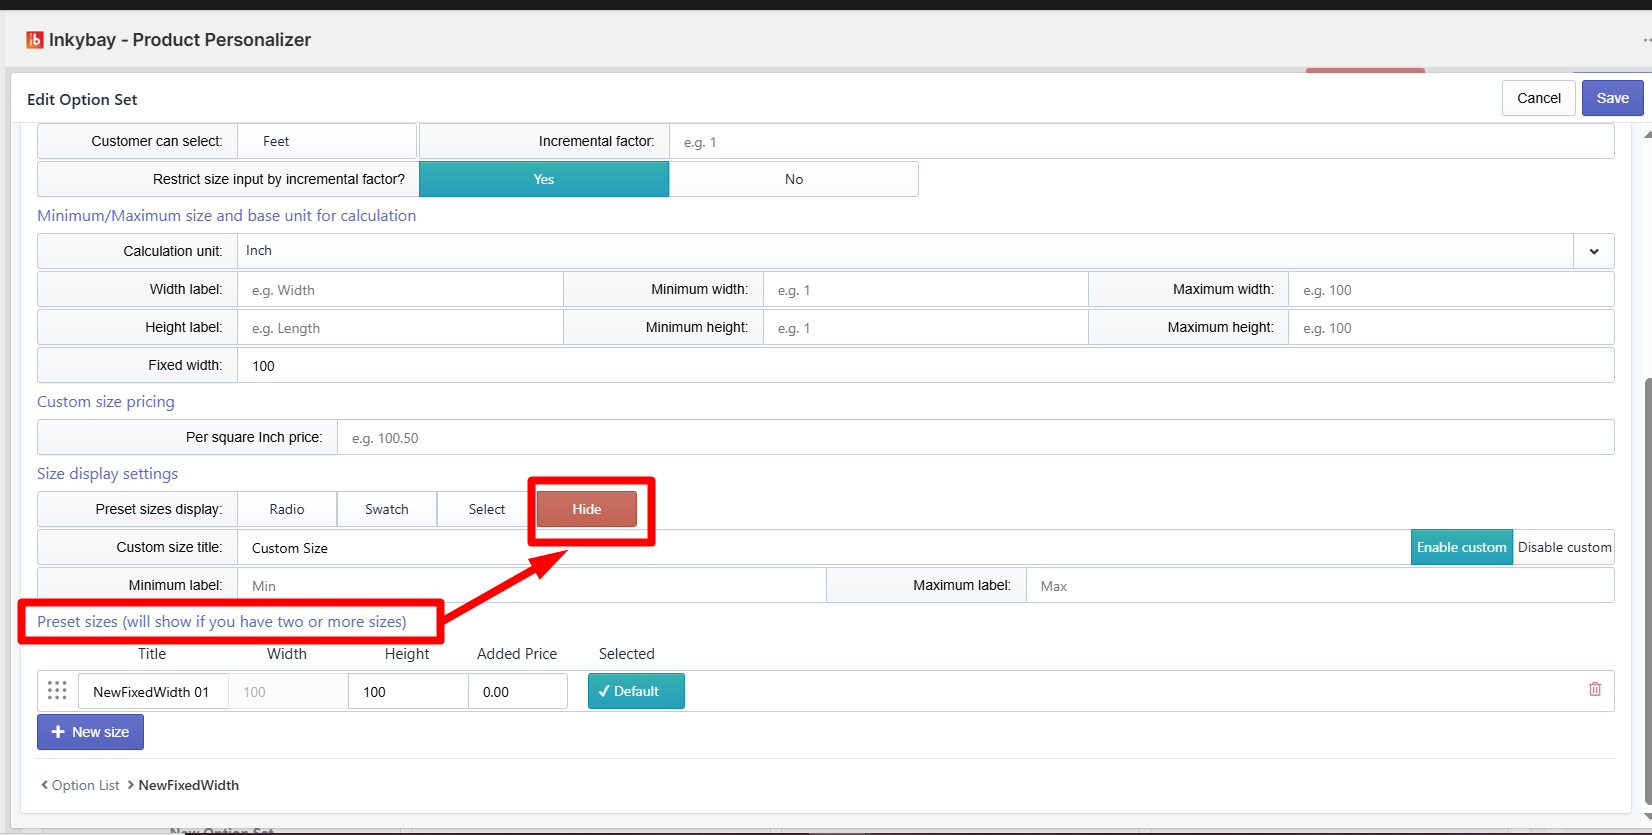
For preset size display, as you’ve noticed, there are three options: Radio, Swatch, and Select to display the Preset Sizes. If you don’t want to display, simply click the Hide button.
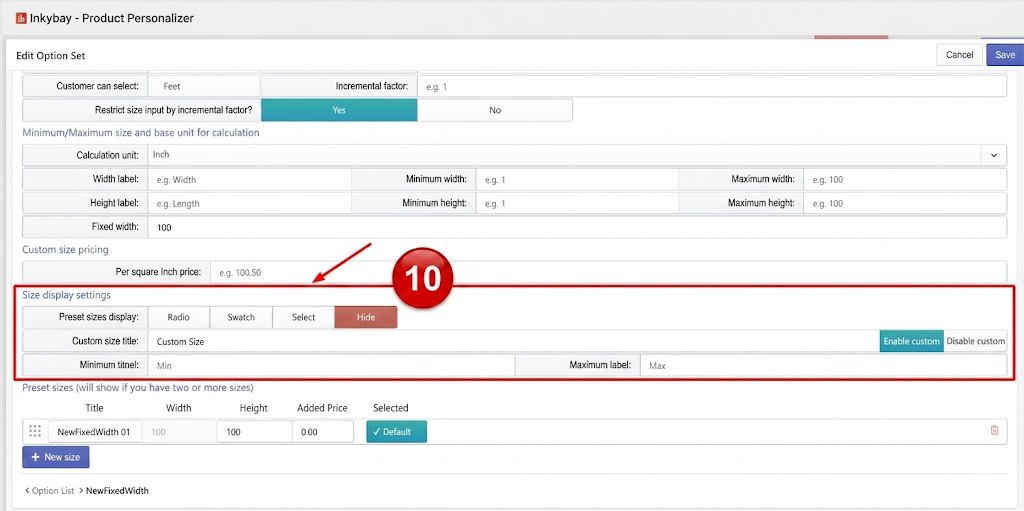
For custom size, insert your custom size Title and select Enable if you want to allow customers to enter their custom size for height on the product page. Here field of width will be fixed.
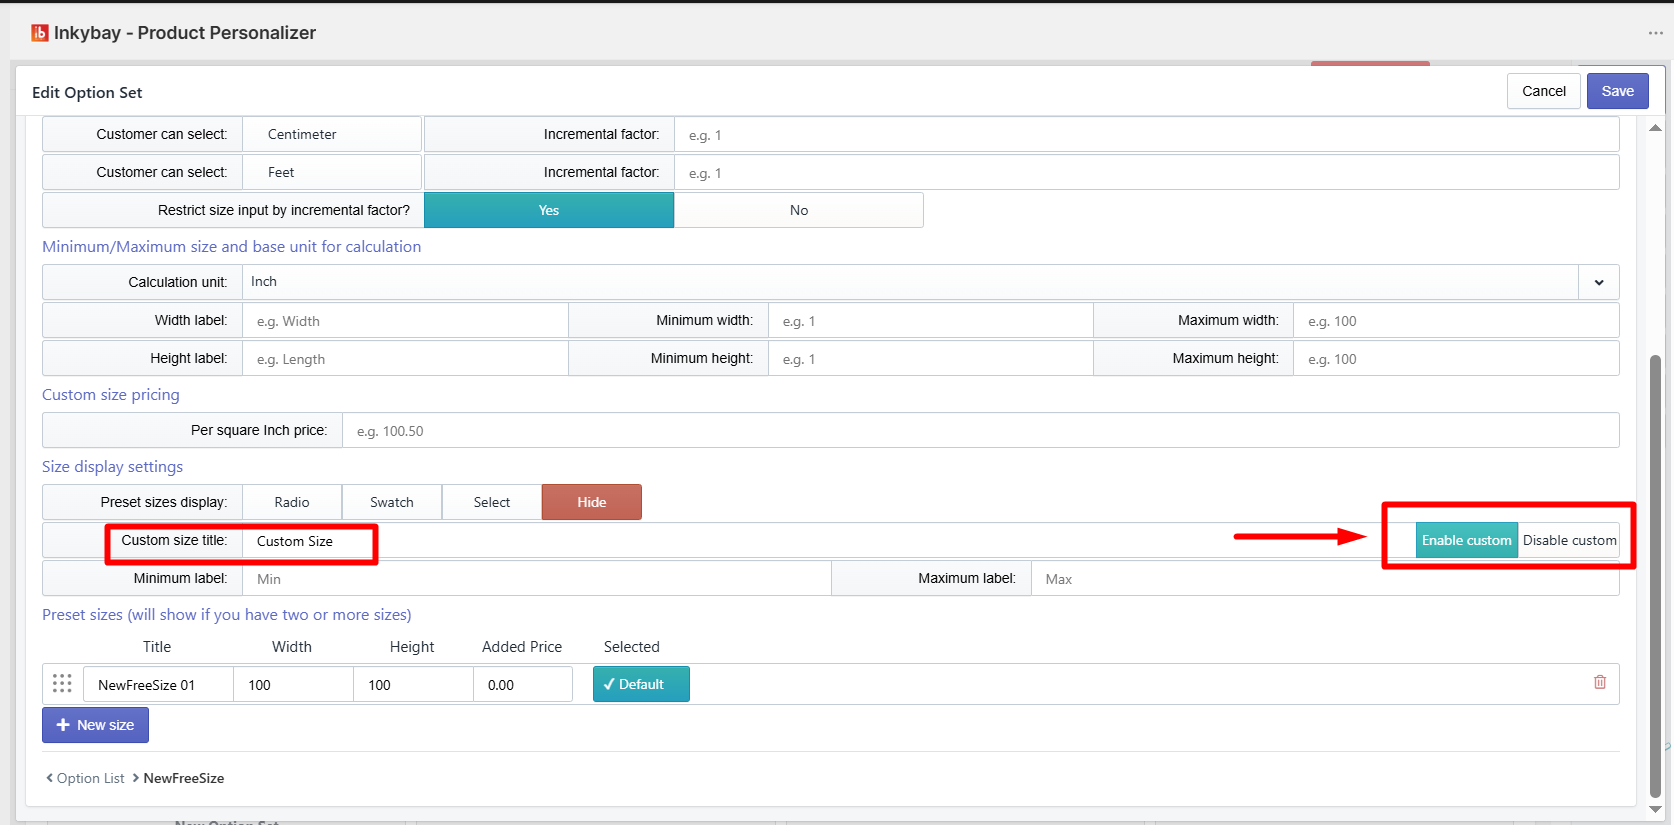
If you do not want to show the custom size option on the product page, you can disable the option by clicking on the disable button.
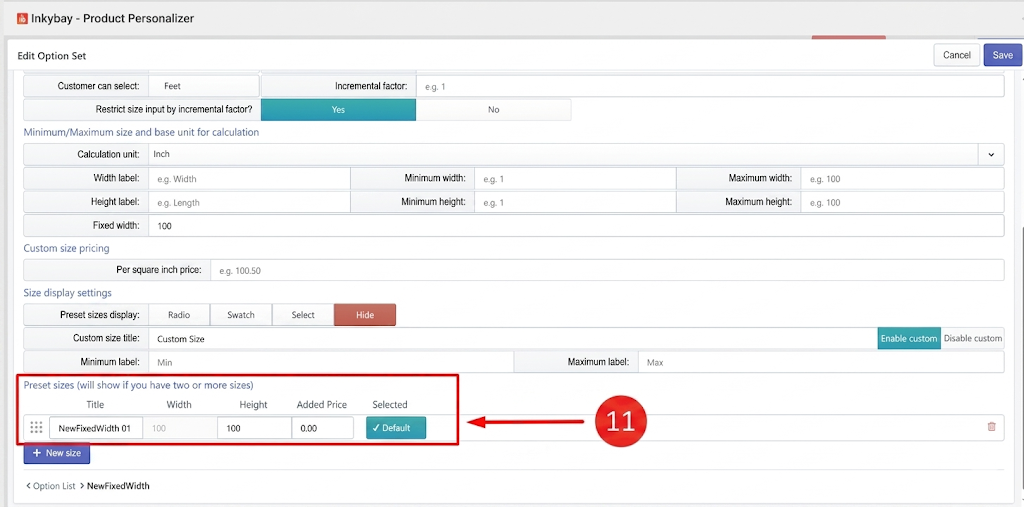
To show two or more size values, click on the + New size button and then enter the title, & height values, and price. Here, the width will be fixed according to the value you set in fixed width field shown above in step 8(8.4)
If you do not want to offer any preset sizes, you can easily do that by hiding the option.
Feel free to contact us whenever you face any issues or need assistance. We’re available 24/7.
You can also reach us:
InkyBay app Live chat
Support ticket from the InkyBay app
Email to support@productsdesigner.com