This feature allows customers to select from pre-defined, fixed standard sheet sizes set by you, so that customers can add design to them.
You don’t need to create individual products for each size because the sizes will be generated automatically. If you want, you can add prices for each size.
Go through the following steps to create preset size options:
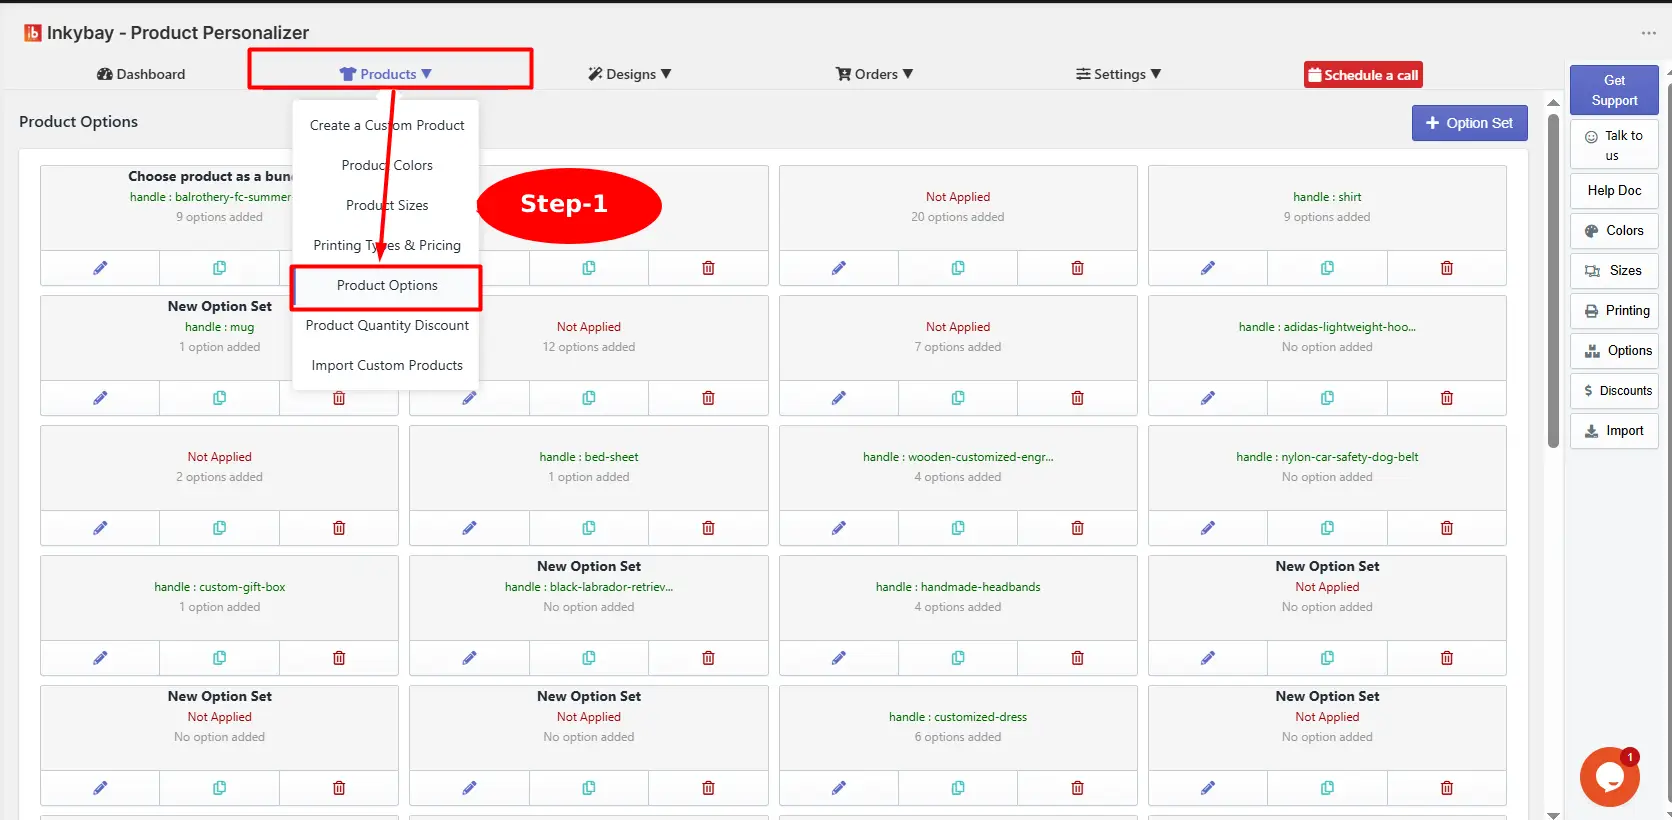
Hover over Products from the InkyBay app’s top menu and select Product Options as shown in the image below.
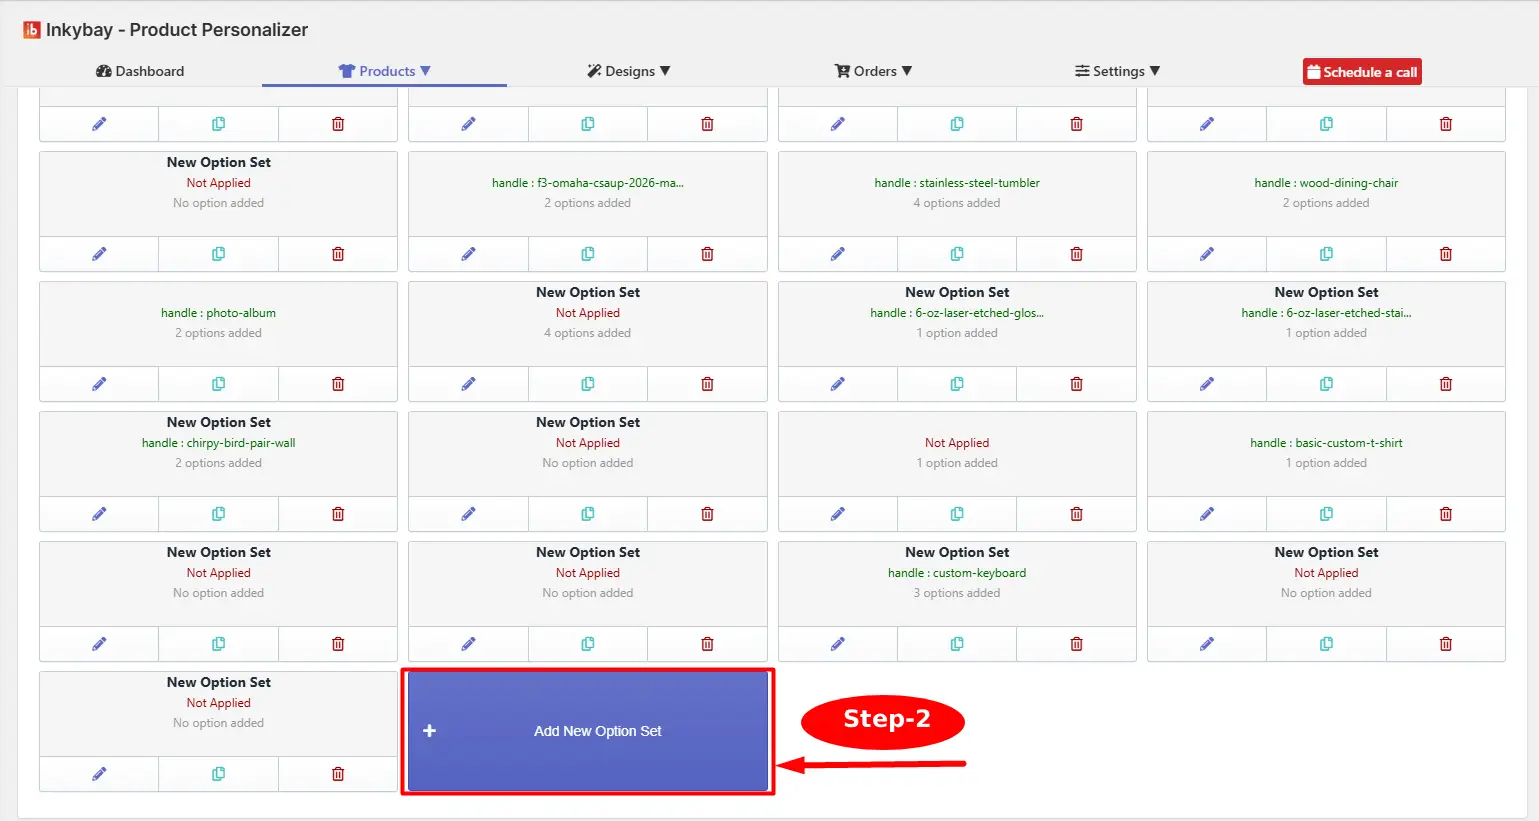
Click + Add New Option Set to create the new option size and assign it to the product.
Insert the option set name(e.g., Choose product as a bundle) and then set the Apply Rule value to any of these Type/Vendor/Tag/Handle.
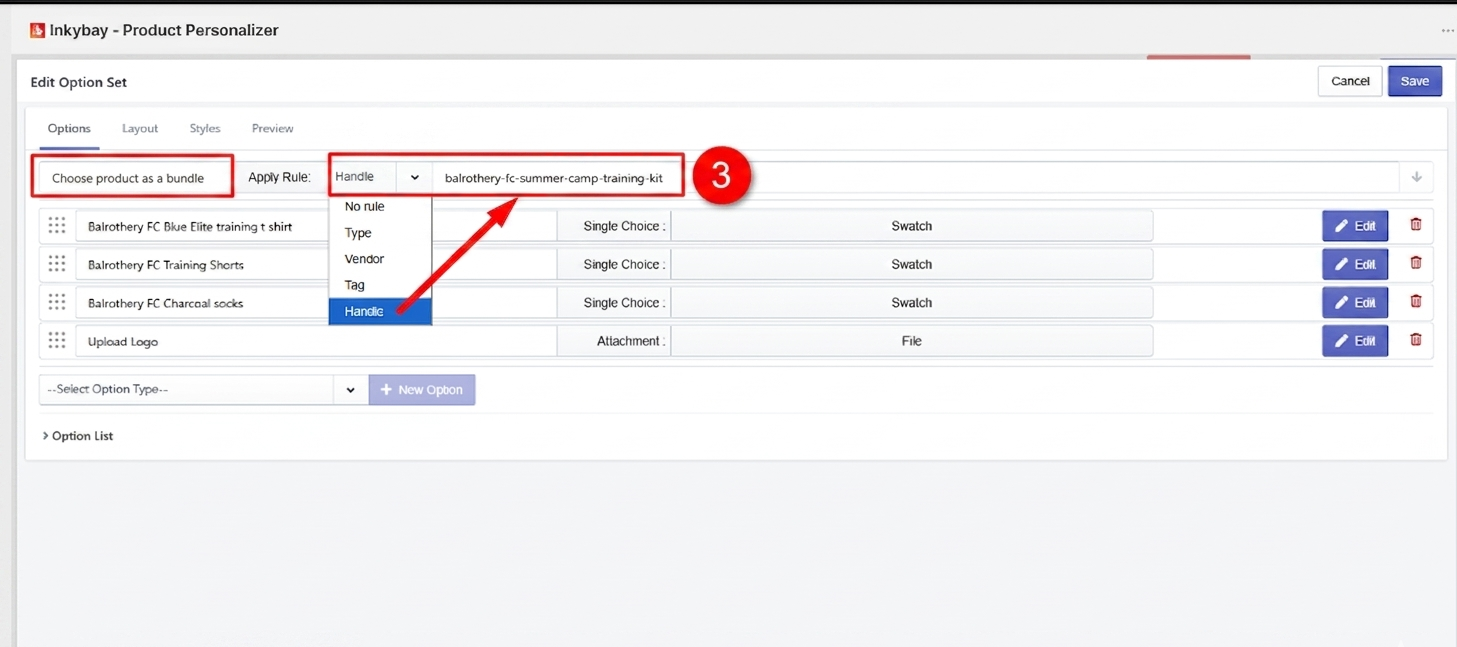
🎯Note To get the product handle, go to the product page of that product and copy everything after “product,” like this- |
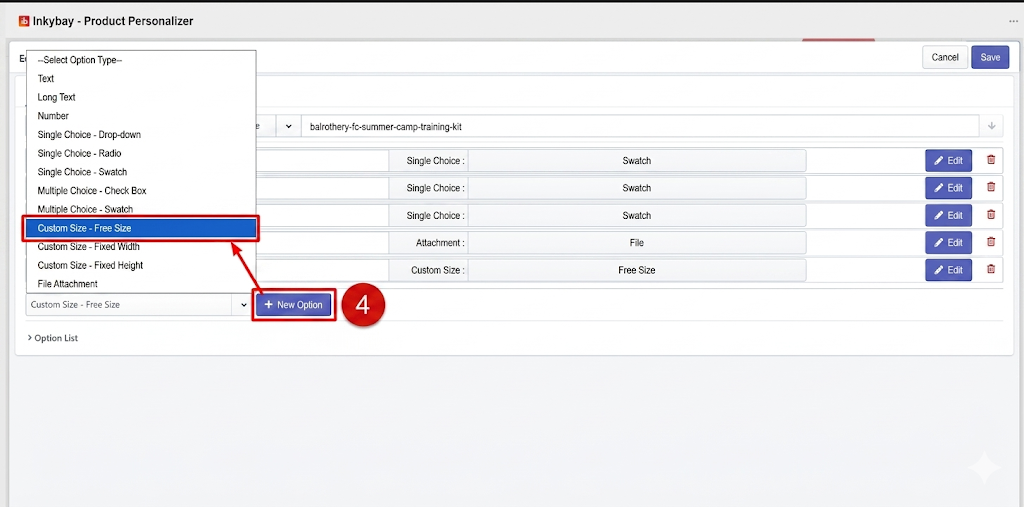
Click the Select Option Type to select the Custom Size – Free Size option. And then click the + New option button.
Set the option title, then you can enable or disable it for the designlab.
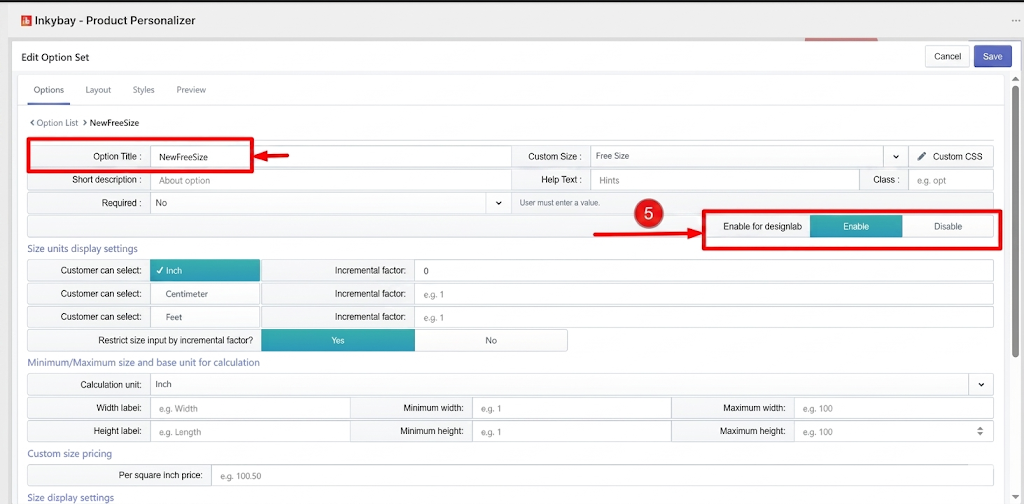
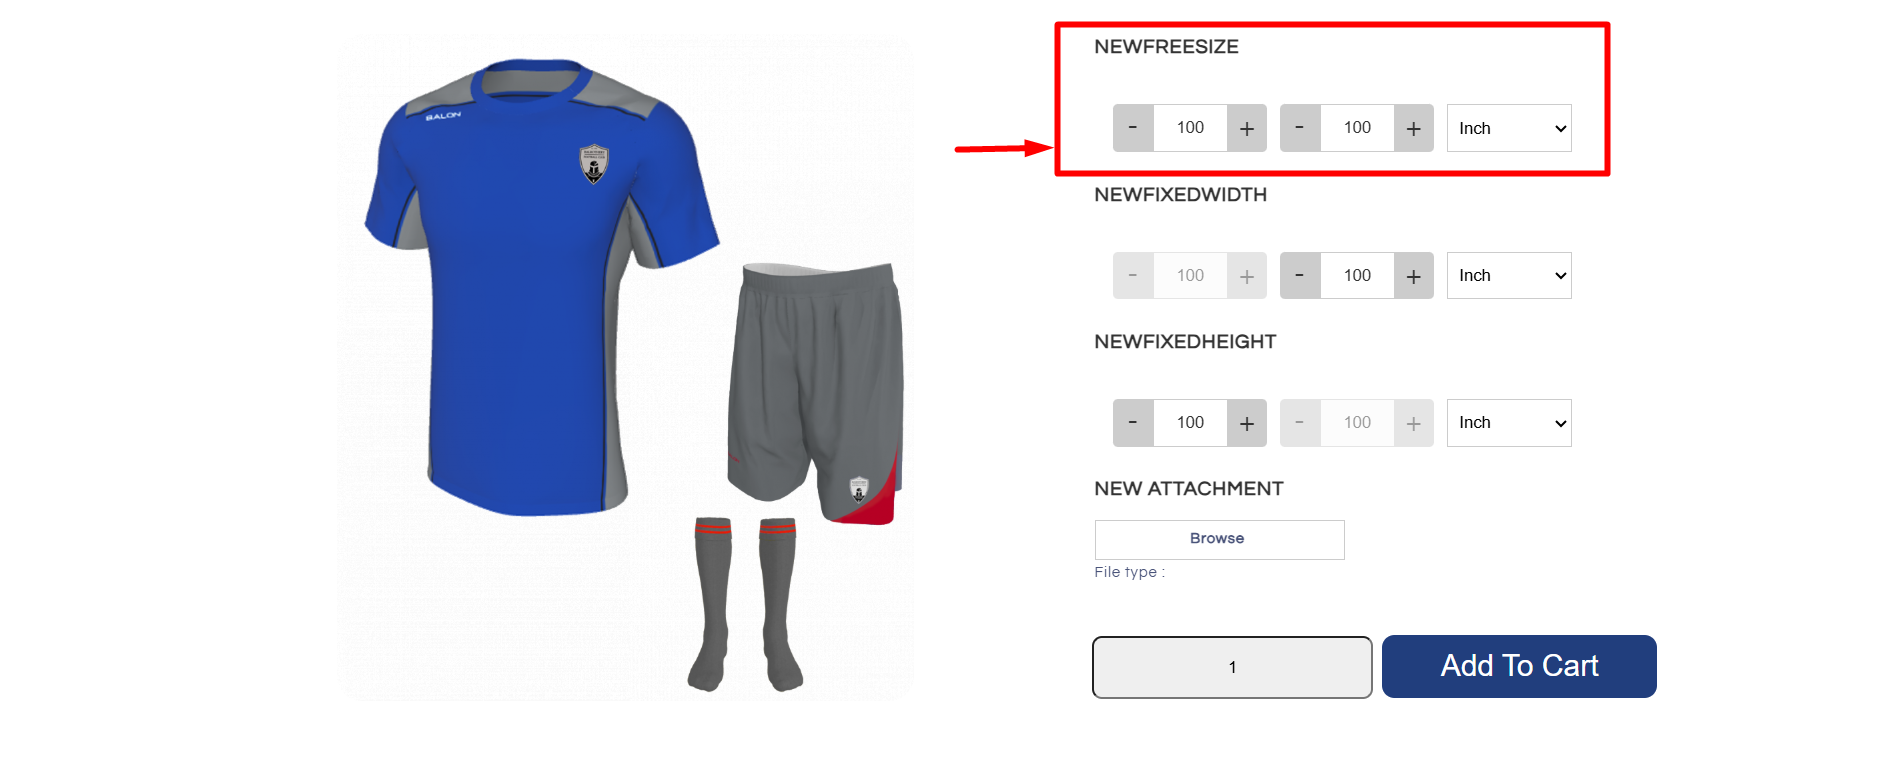
If you enable the custom free size option for designlab you will get a white blank canvas according to the custom size or preset size that the customer selects on the product page.
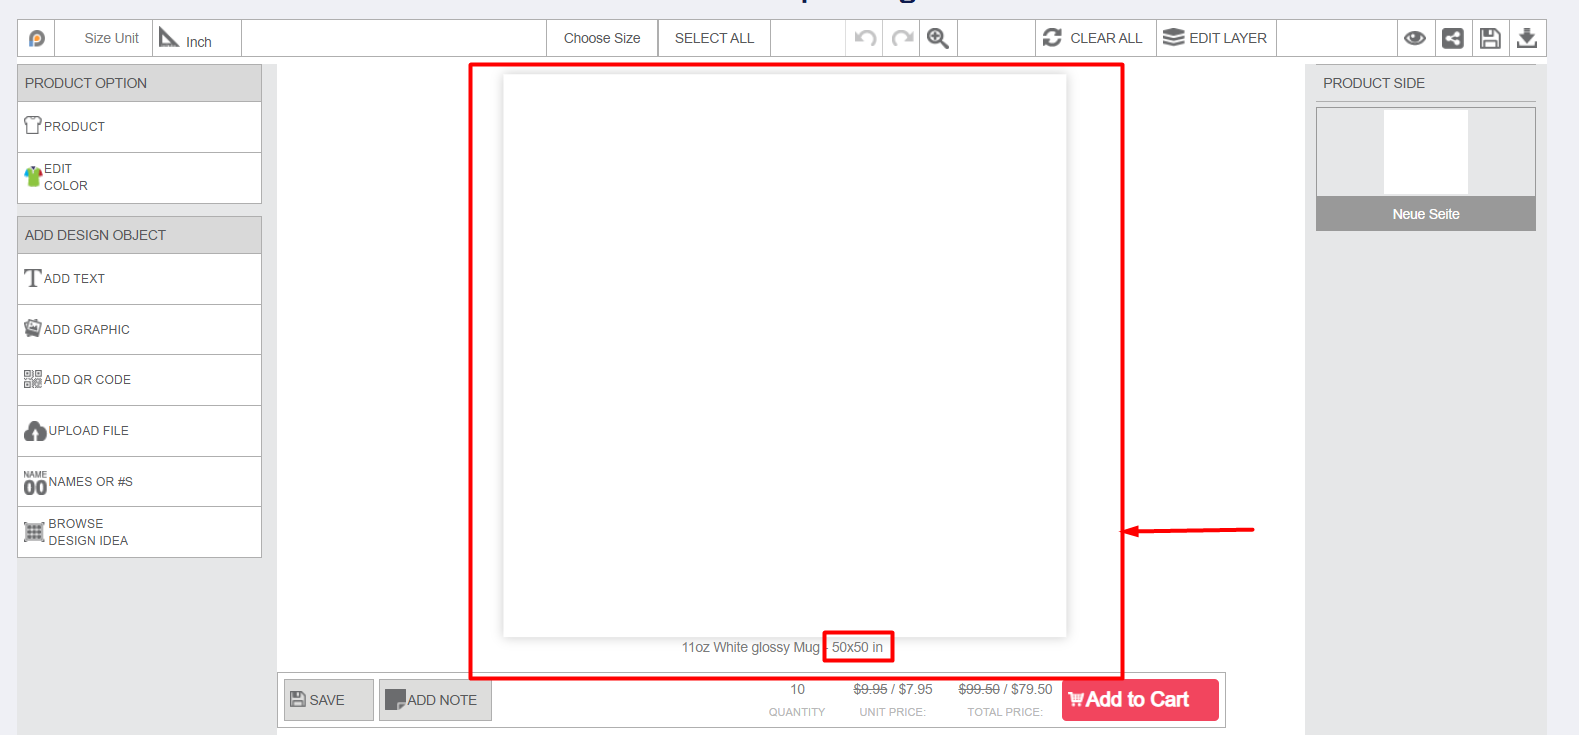
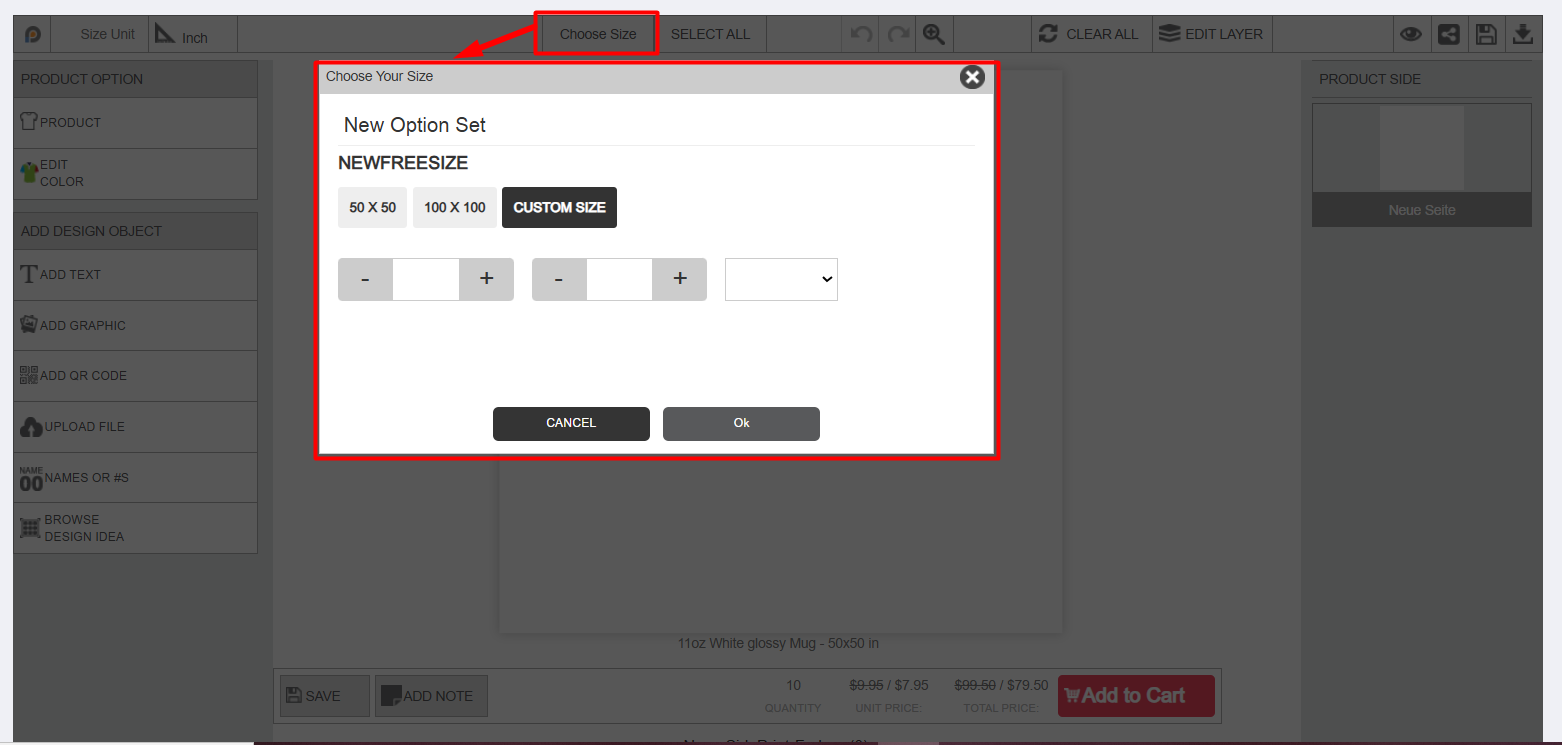
Also, you can change the selected custom size/preset size inside the designlab. Blank canvas size will be changed according to the selected size.
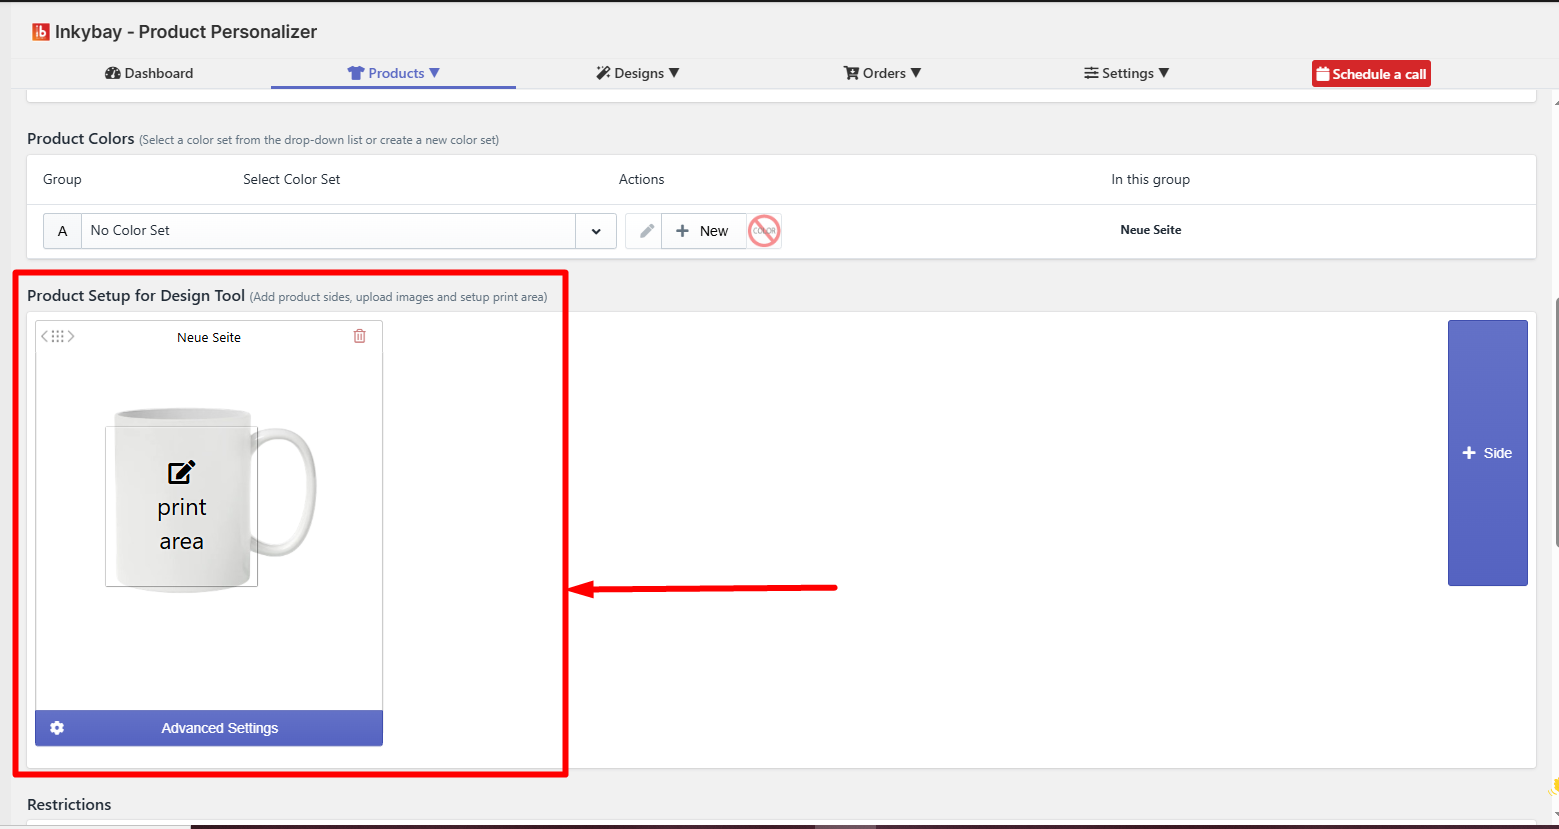
Otherwise, click the Disable button if you do not want to show the custom free size option on designlab. By disabling, you will be able to see the original product image that you have uploaded in the Product setup for the design tool (advanced settings). Custom size/preset size option will be shown only on the product page.
It will help your customer to choose their preferred Size Unit on the product page. You can set up the Size Unit Display settings as Multiple Choice in the admin panel.
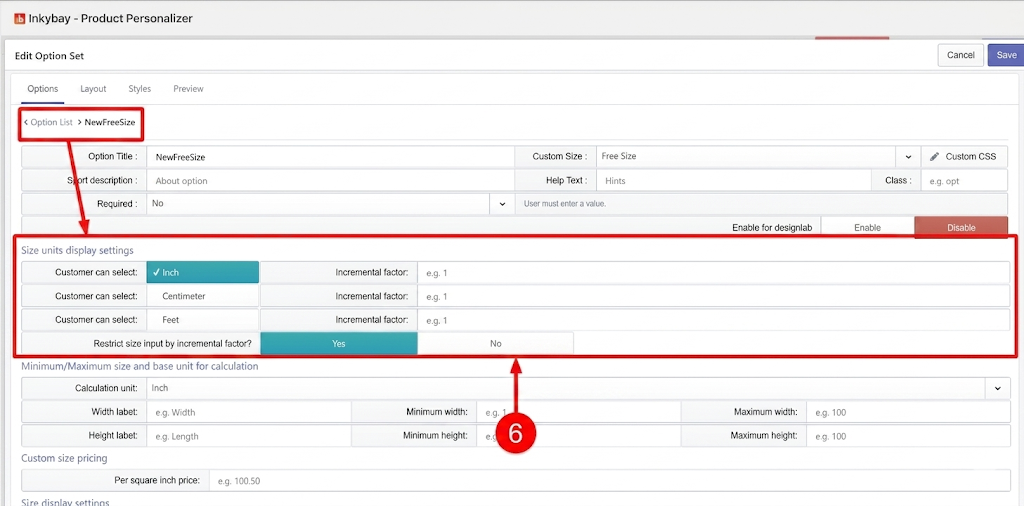
Inch: This will help your customer to choose the Size Unit as Inch
Centimeter: This will help your customer to choose the Size Unit as centimeters
Feet: This will help your customer to choose the Size Unit as feet
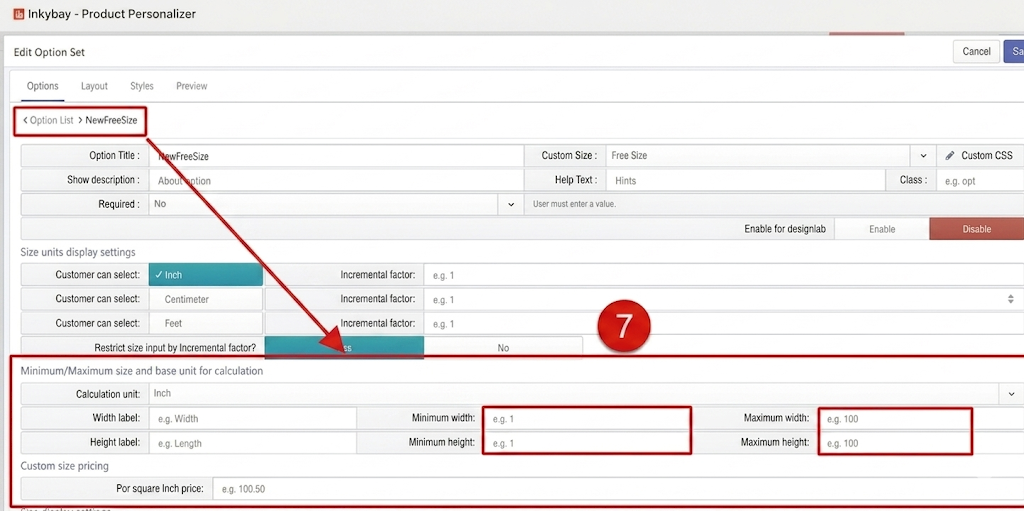
Step 7: You can also apply the Minimum / Maximum Height & Width limit, or skip this part.
Step 8: Scroll down and from the Size display settings option, choose radio, swatch, or select to display preset sizes.
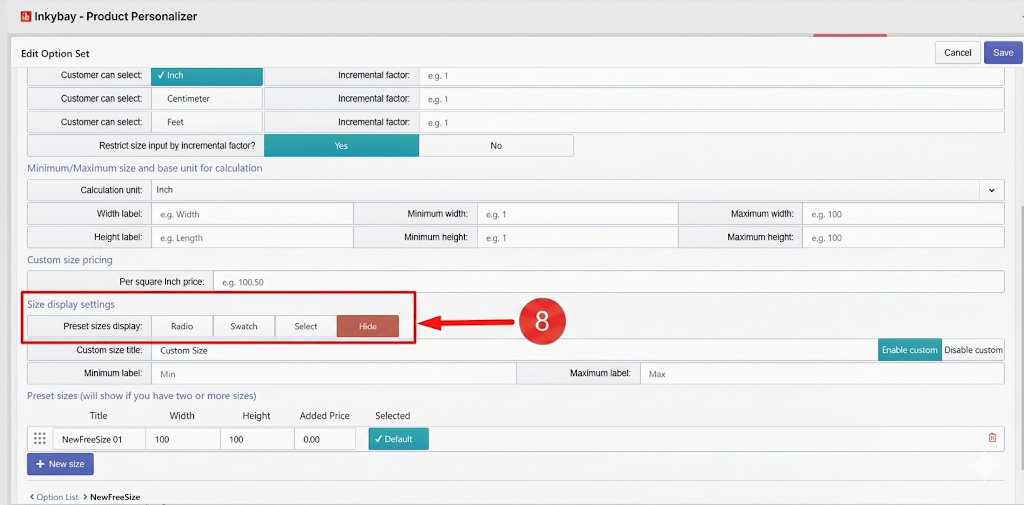
Step 9: To show two or more size values, click on the + New size button and then enter the title, width & height values, and price.

Step 10: Click the Save button as shown in the image below.
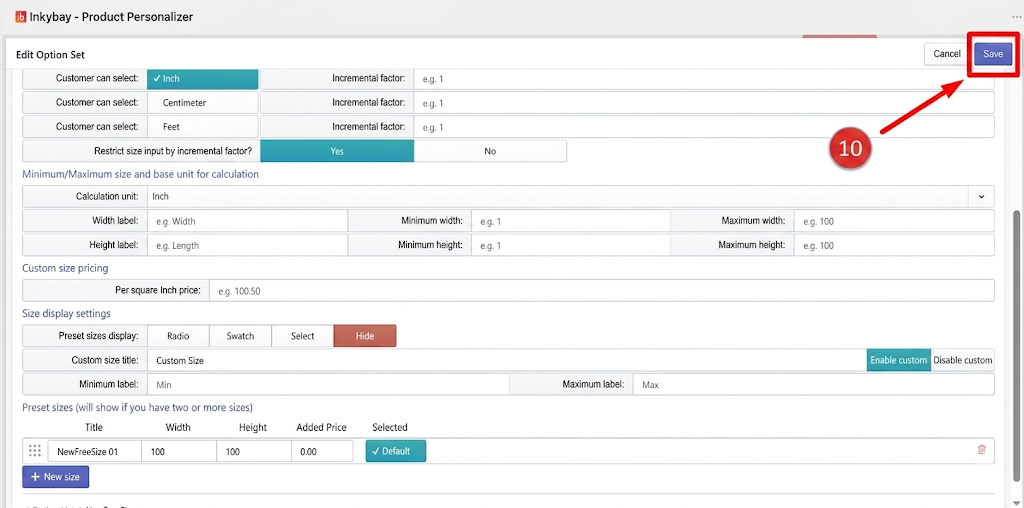
If you want to have a custom size field option so that customers can also enter their own preferred size, then keep Enable custom. Otherwise, click the Disable Custom button.
For custom size, insert your custom size Title and select Enable if you want to allow customers to enter their custom size for height and width on the product page.
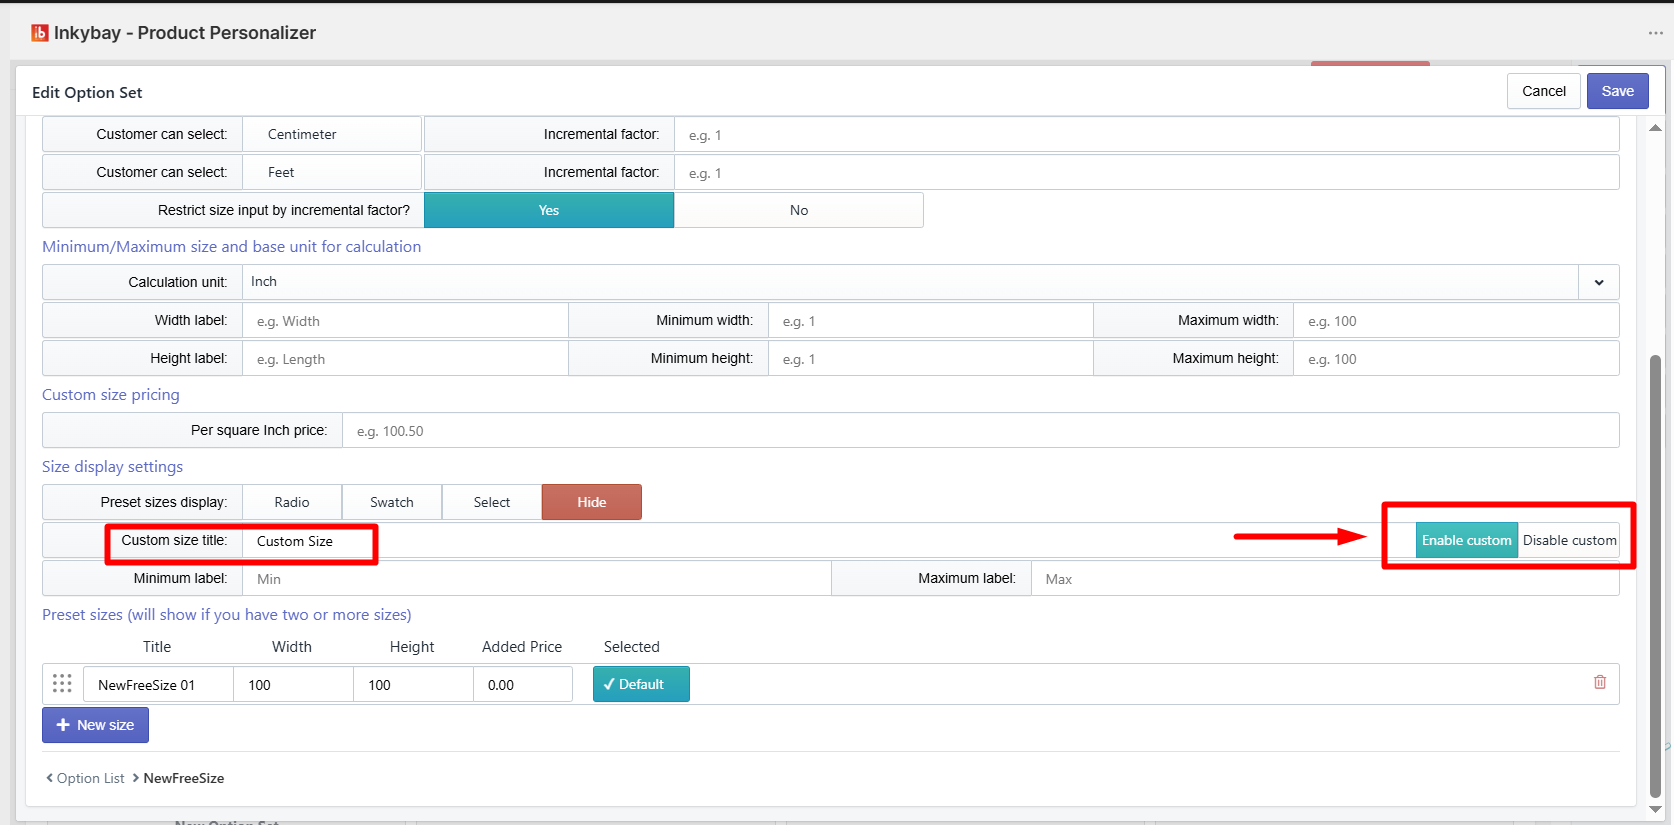
If you do not want to show the custom size option on the product page, you can disable the option by clicking on the disable button.
Feel free to contact us whenever you face any issues or need assistance. We’re available 24/7. You can also reach us:
InkyBay app Live chat
Support ticket from the InkyBay app
Email to support@productsdesigner.com
