This feature allows your customers to input custom dimensions (height & width) for their DTF sheets. It calculates prices dynamically based on the exact area.
Unlike preset sizes, the Dynamic Sheet Free Size option gives customers complete flexibility. And if you allow that product for DesignLab, then a product image will be generated for the entered size.
Step 1: Access to Product Options.
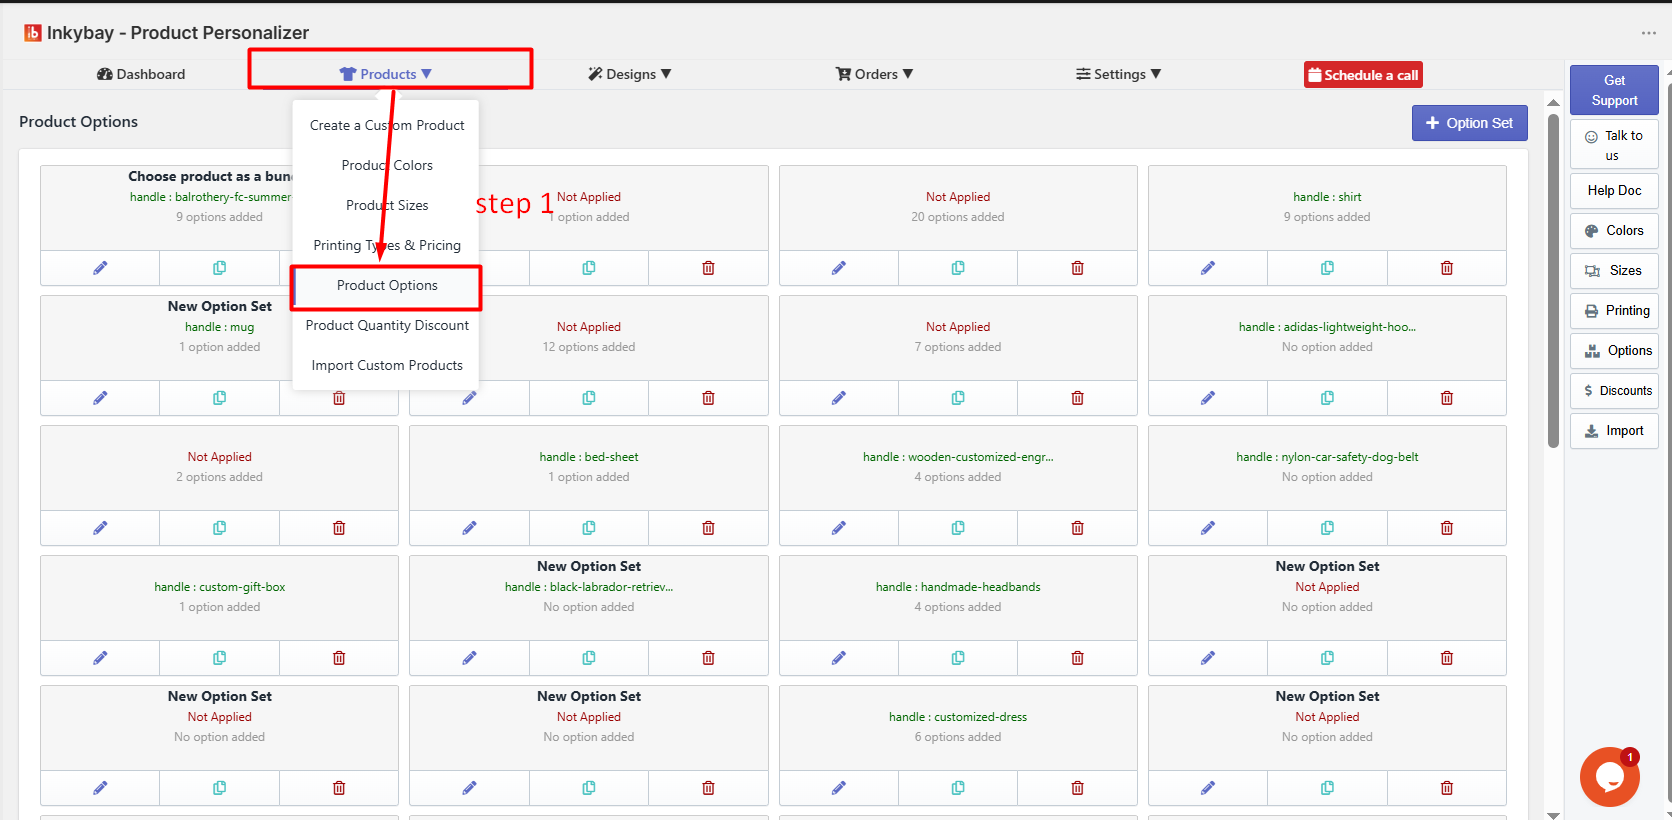
Hover over Products from the InkyBay app’s top menu and select Product Options as the image shown below.
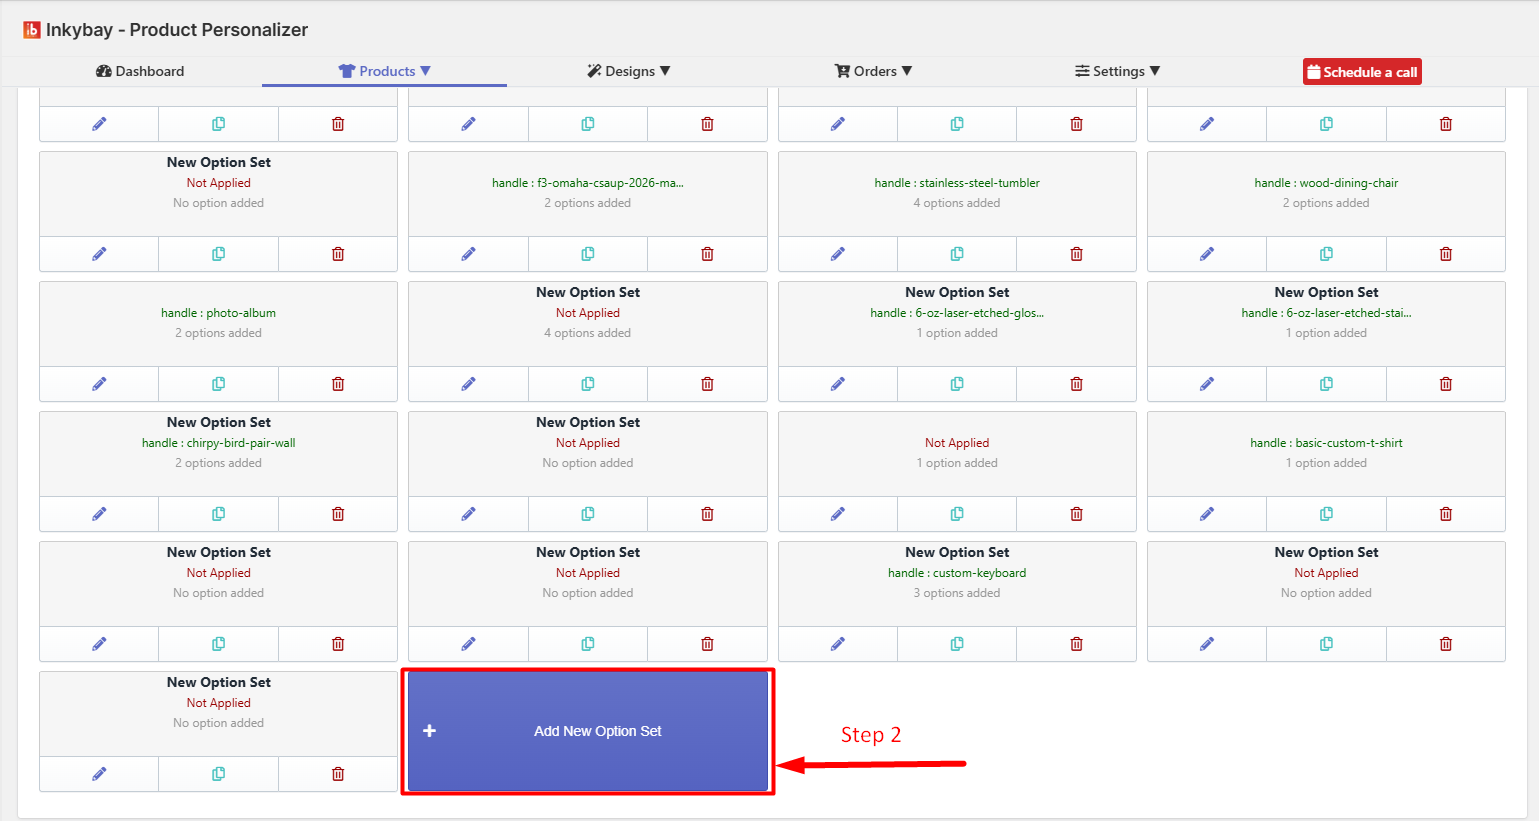
Step 2: Navigate to your product option set.
Click + Add New Option Set to create the new option size and assign to the product.
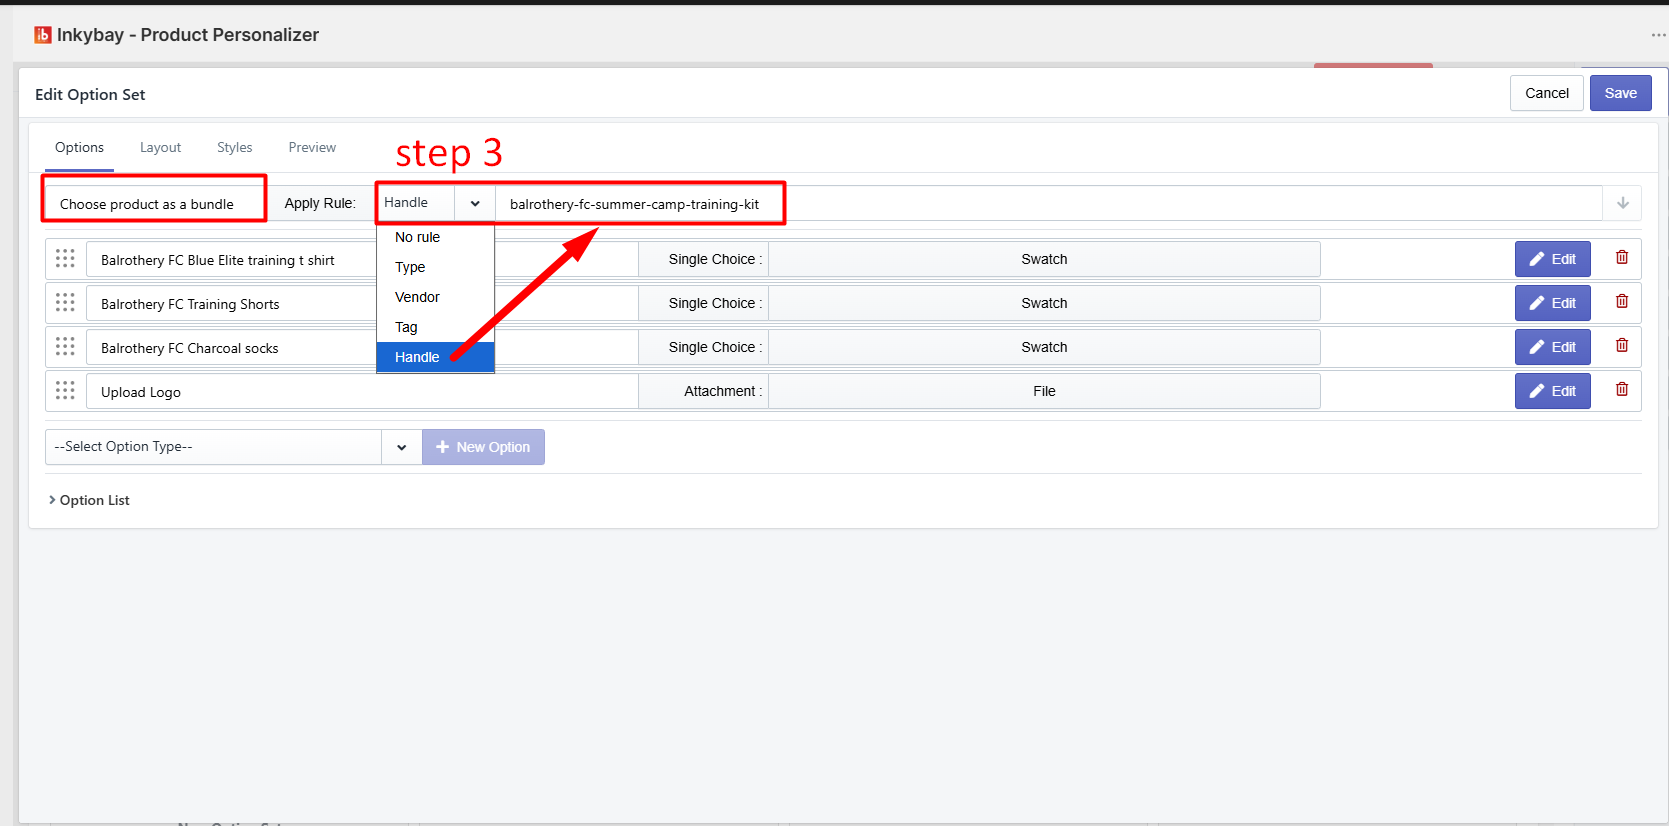
Step 3: Insert the product set name and then set the Apply Rule value to Handle.
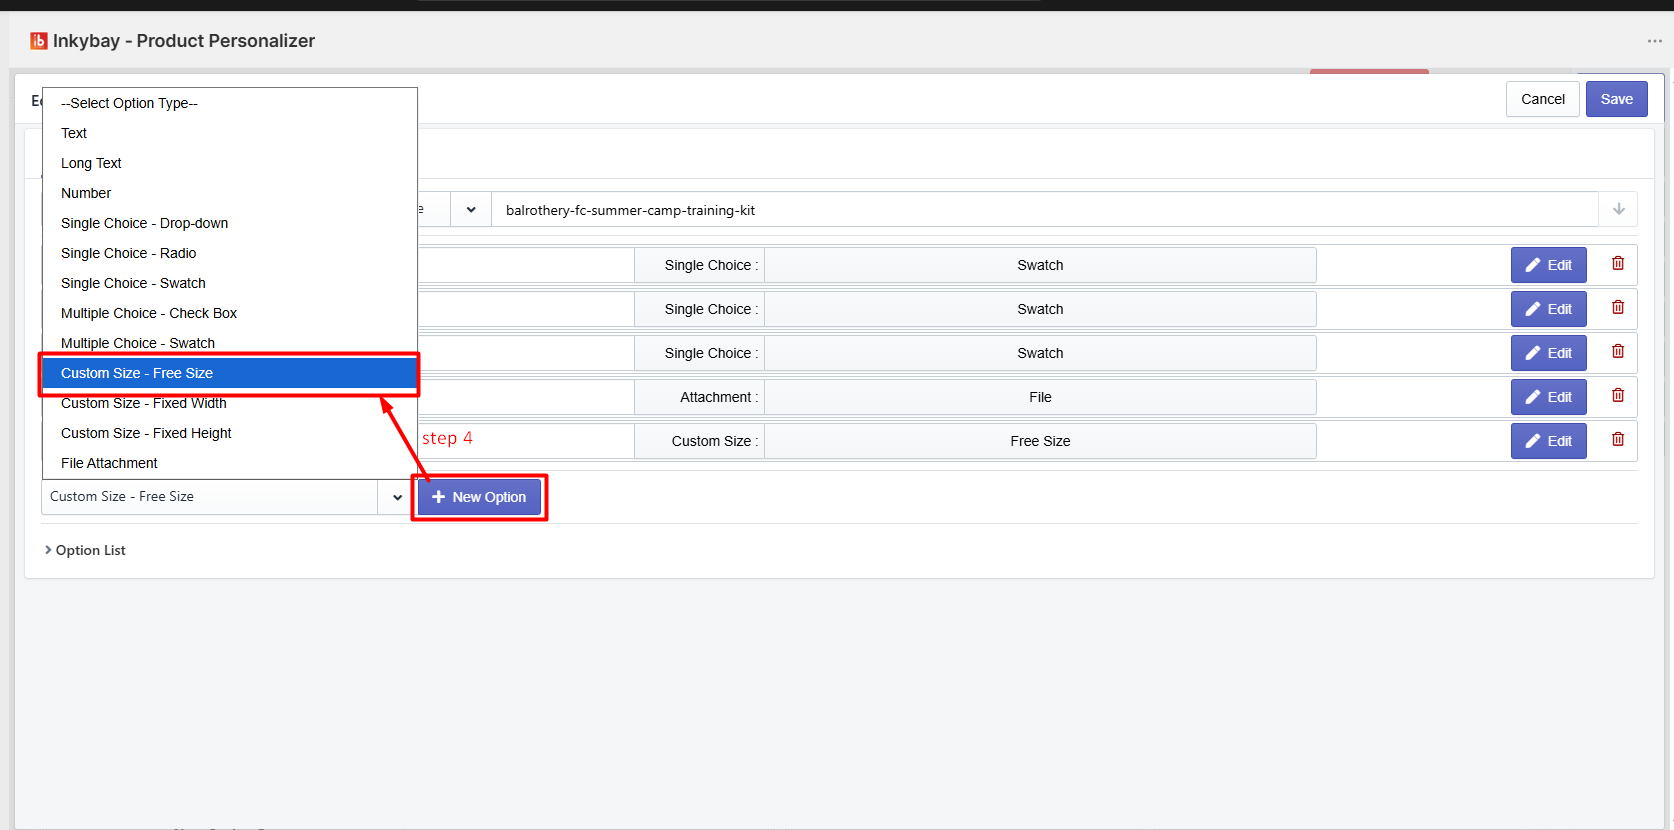
Step 4: Click the Select Option Type to select the Custom Size – Free Size option. And then click the + New option button.
Step 5: Insert your option Title and select Enable if you want your customers to see the same size in the design lab.
If you want this custom size option to be enabled for the Design Lab, just turn on the Enable option. Otherwise, click the Disable button.
It will help your customer to choose their preferred Size Unit on the product page. You can set up the Size Unit Display settings as Multiple Choice in the admin panel.
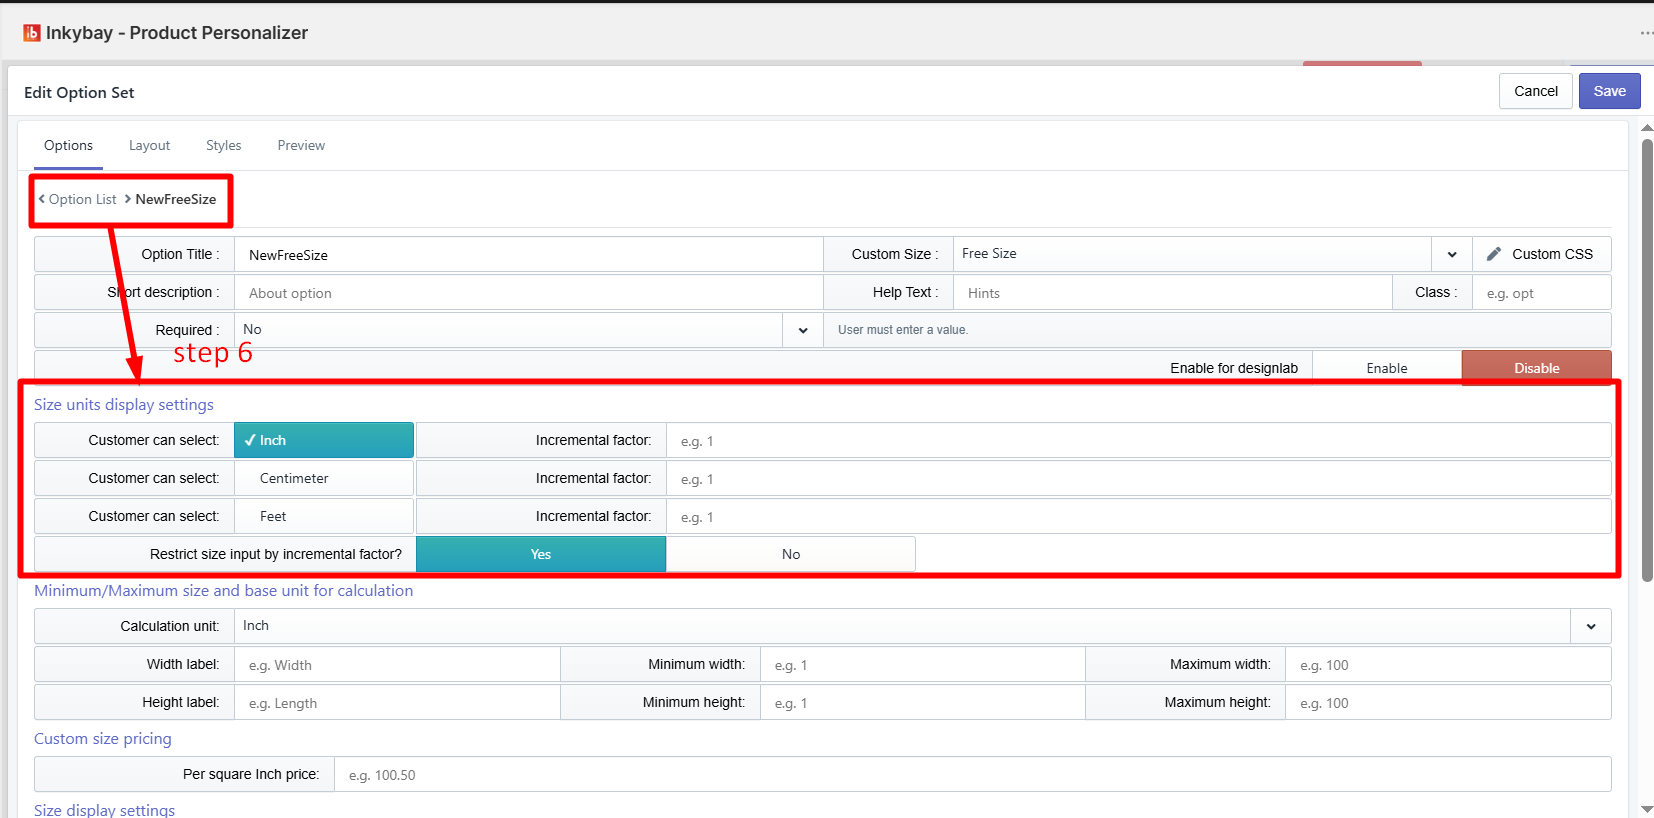
Inch: This will help your customer to choose the Size Unit as Inch
Centimeter: This will help your customer to choose the Size Unit as centimeters
Feet: This will help your customer to choose the Size Unit as Centimeter
*** The size units will be displayed in the Custom Size option in a dropdown. Your customer can choose one of the size units from the front end. ***

You can allow your customer to increase/decrease the value in an incremental factor. For this:
Set it to both a round value and a floating point value.
Select the incremental value in inches, centimeters, or Feet units.
🎯Important
If you turn the option to “Yes”, then the value will be incremented according to the assigned incremental factor.
If you turn the option to “NO”, then the incremental value restriction will not work.
If you want, you can set the Minimum & maximum measurements for the width and height of the product in three different calculation units (Inch, Centimetre, and Feet).
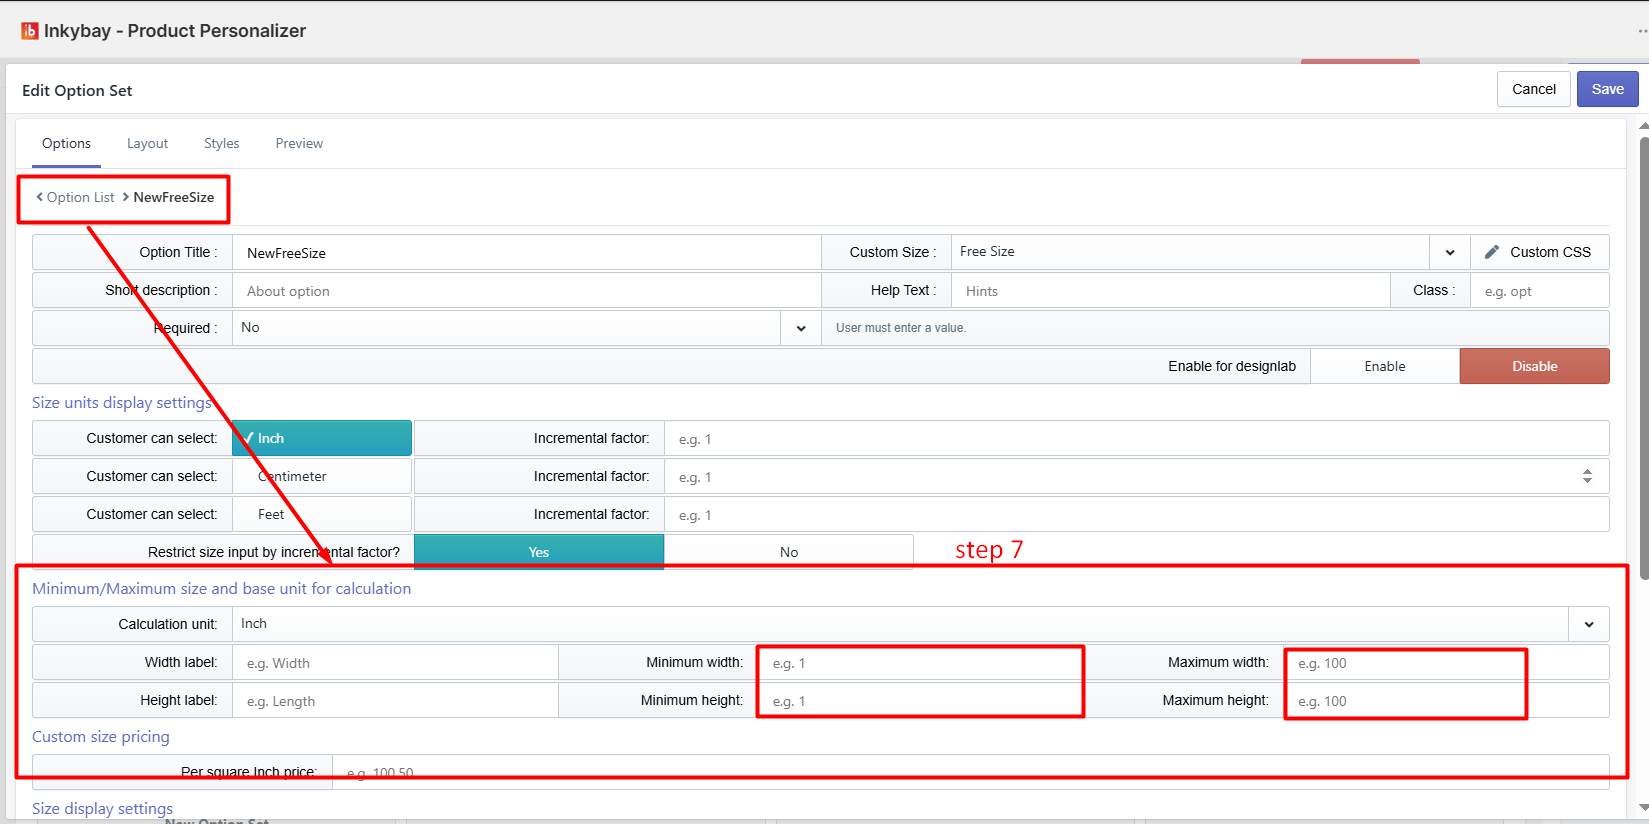
Below, we’ve discussed in detail.


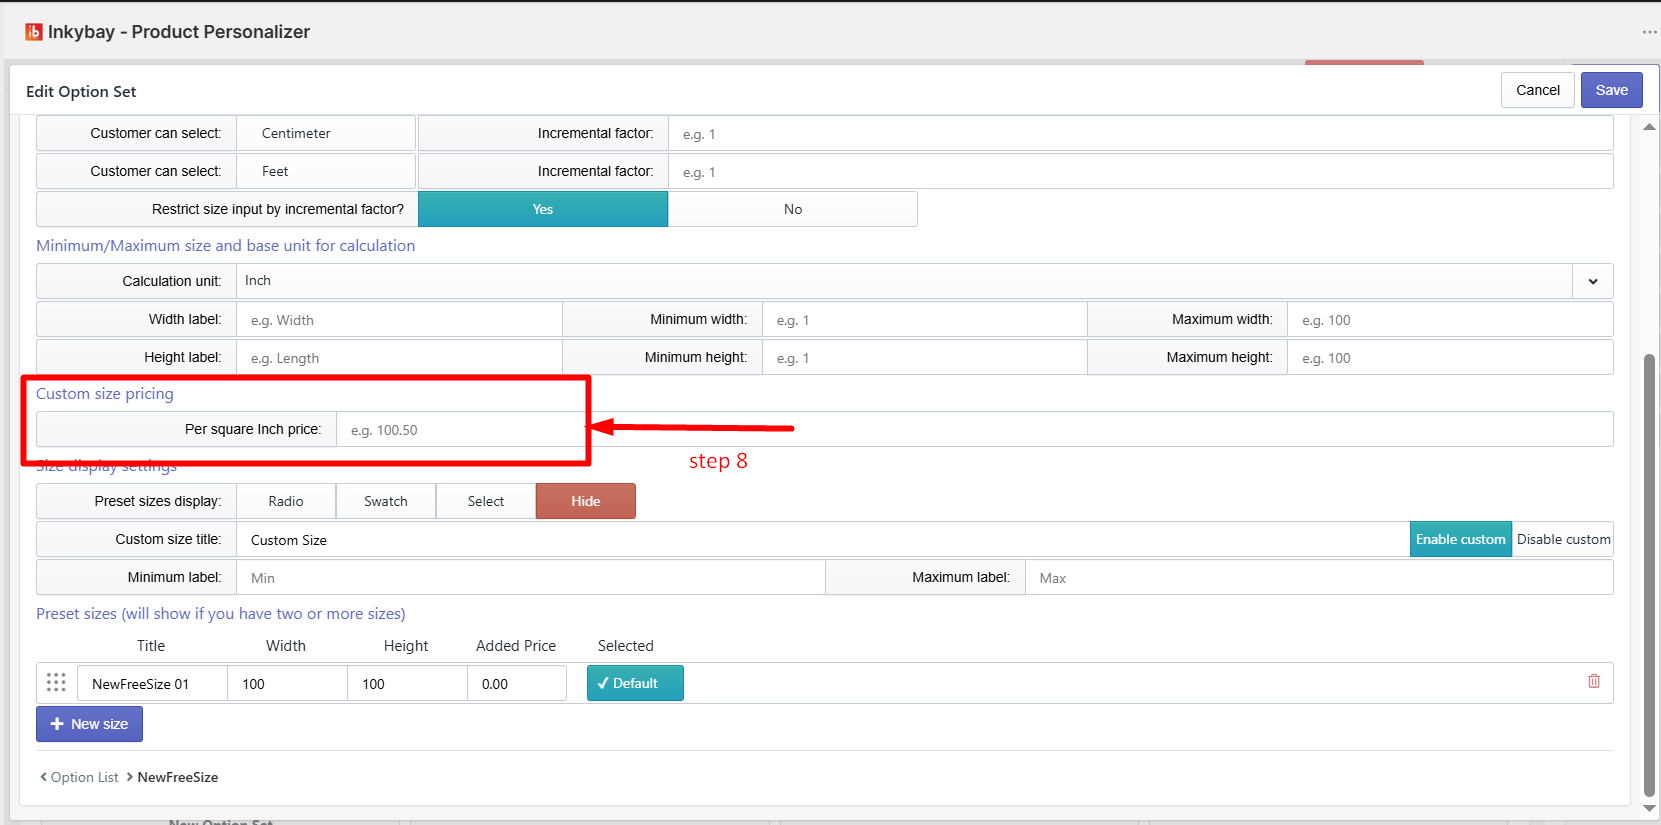
You can set a per square inch price. You can set the price for all three available units. Your assigned price will be calculated according to the entered custom size.
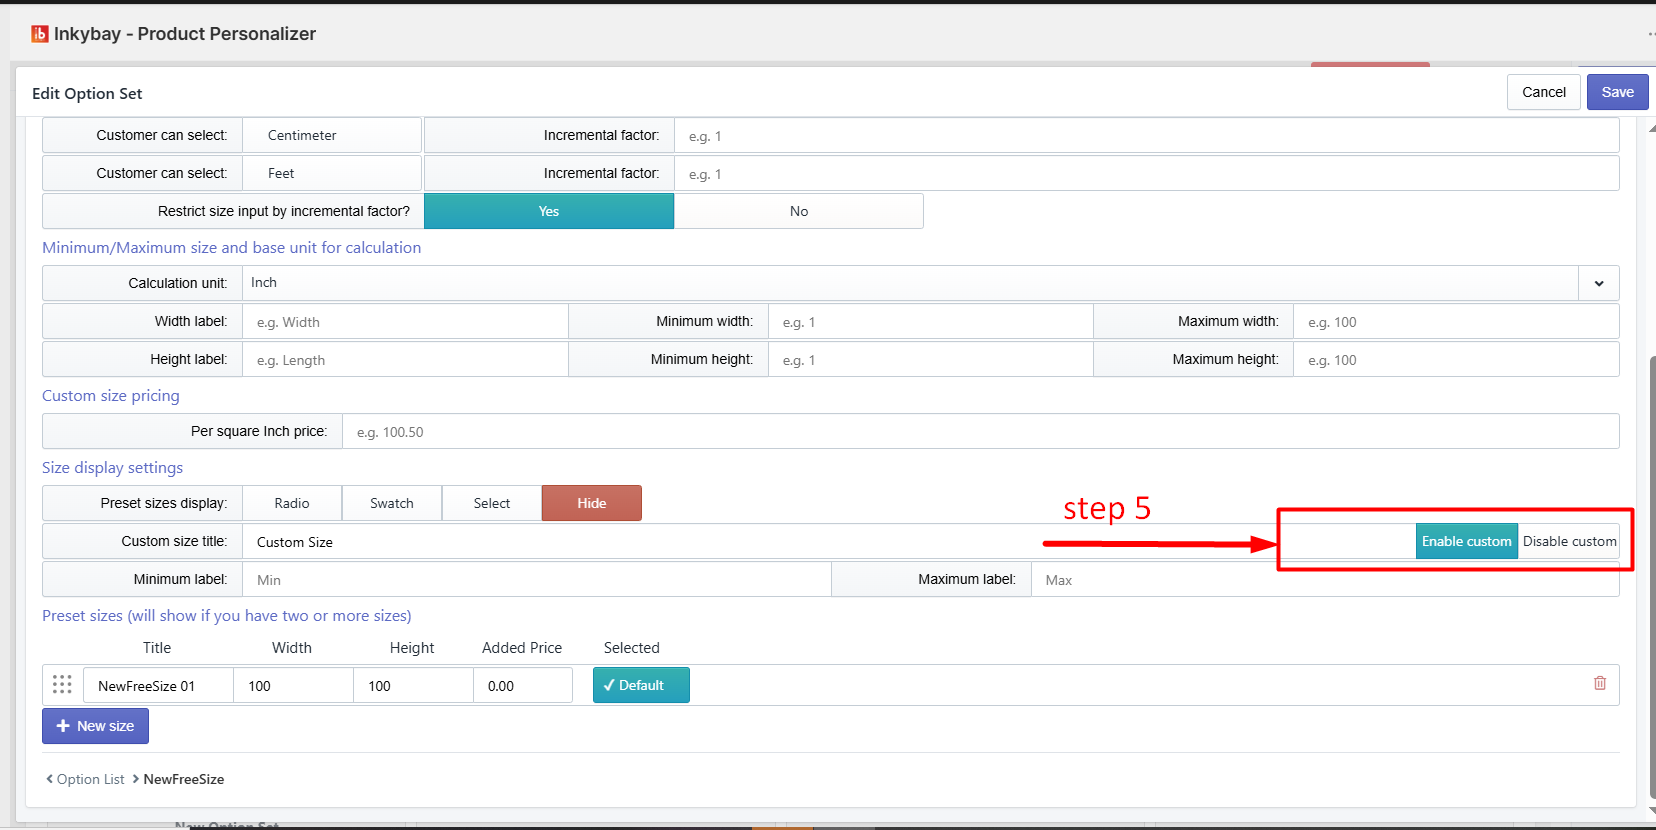
As you’ve noticed, there are three options: Radio, Swatch, and Select to display the Preset Sizes. If you don’t want to display, simply click the Hide button.
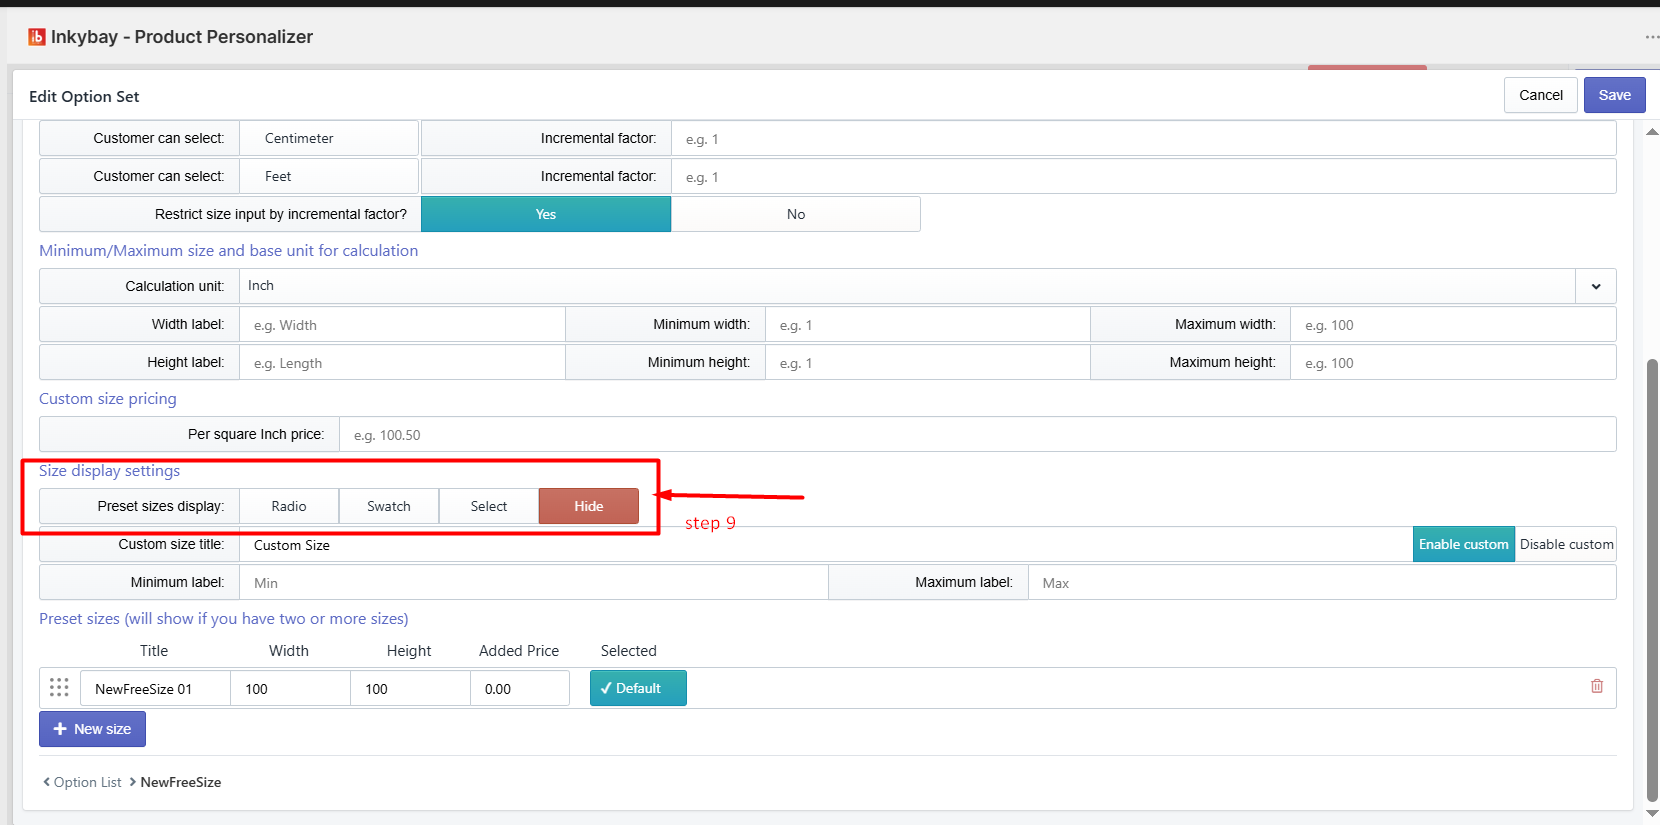
If you want, you can create a Custom Size to allow customers to choose the height & width. Add a title for that custom size as shown in the image below

📝Note
Show the Preset Sizes field if you have two or more product sizes. You can control it from the InkyBay admin panel.
Feel free to contact us whenever you face any issues or need assistance. We’re available 24/7. You can also reach us:
InkyBay app Live chat
Support ticket from the InkyBay app
Email to support@productsdesigner.com