Category
2 min to read
Last Update on 06 May 2026
Dynamic Sheet - Preset Size
This feature allows customers to select from pre-defined, fixed standard sheet sizes set by you, so that customers can add design to them.
You don’t need to create individual products for each size because the sizes will be generated automatically. If you want, you can add prices for each size.
How to create the preset size
There are basically two steps to create the preset size.
First, create a custom product [Important: The option applies to custom products only].
Second, create the preset size and assign it to the custom product.
Go through the following steps:
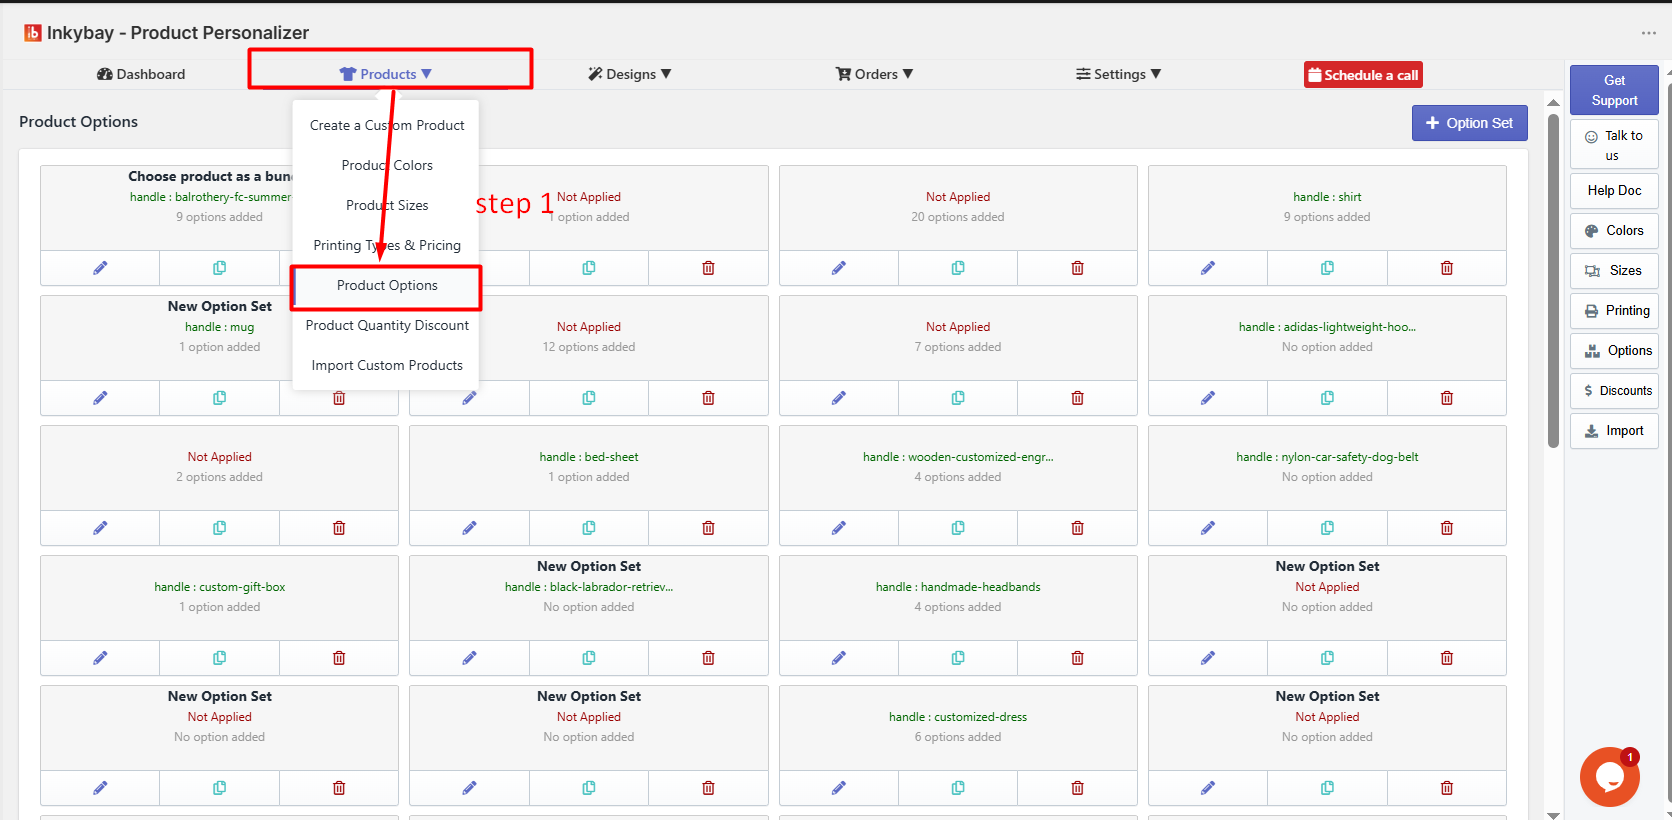
Step 1: Hover your mouse over the Products option and click Product Option.
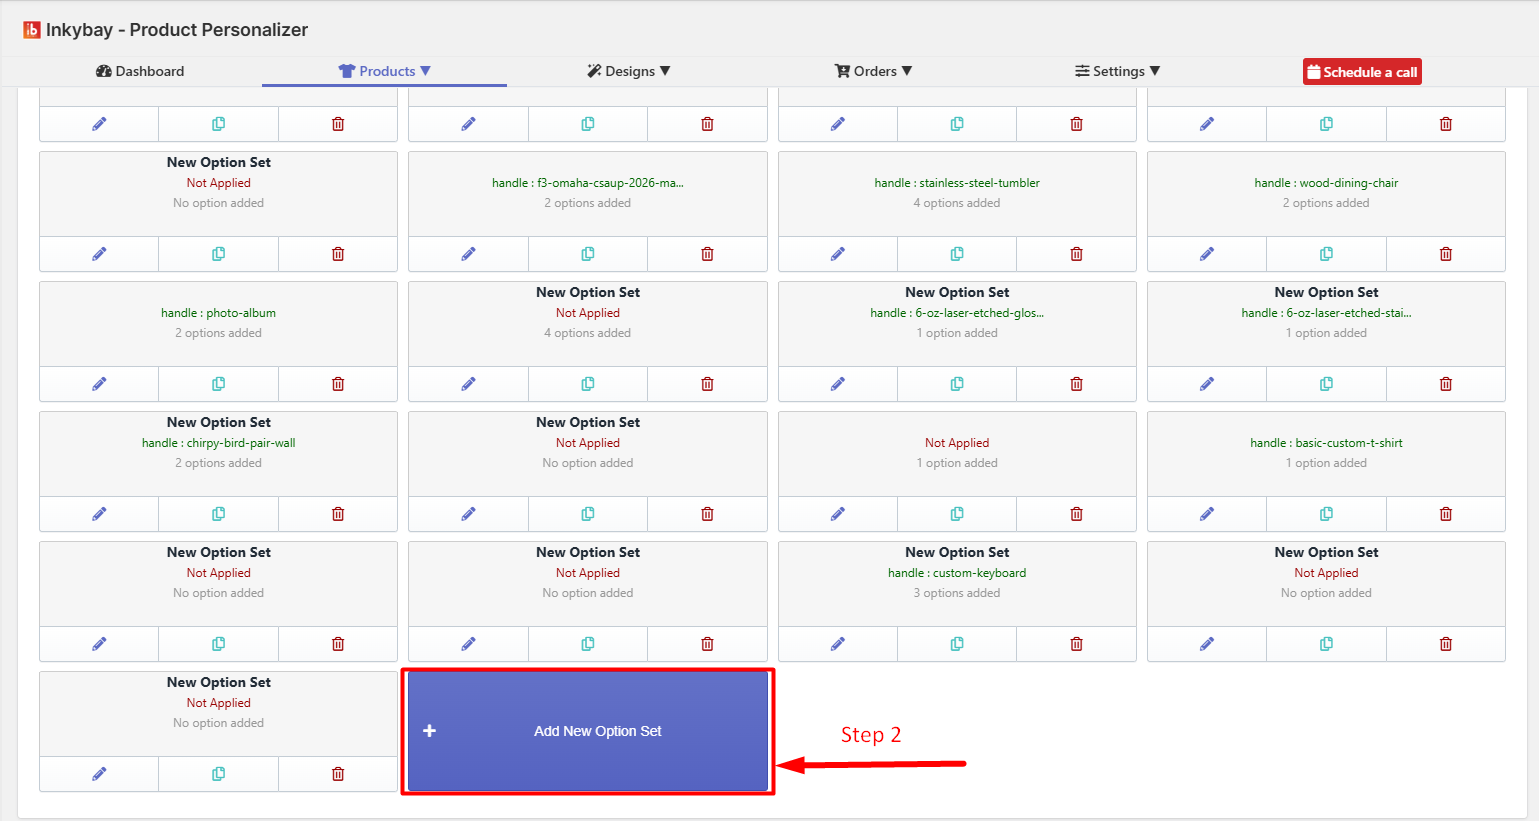
Step 2: Click on Add a New Option set.
Step 3: Insert the product set name and then set the Apply Rule value to Handle.
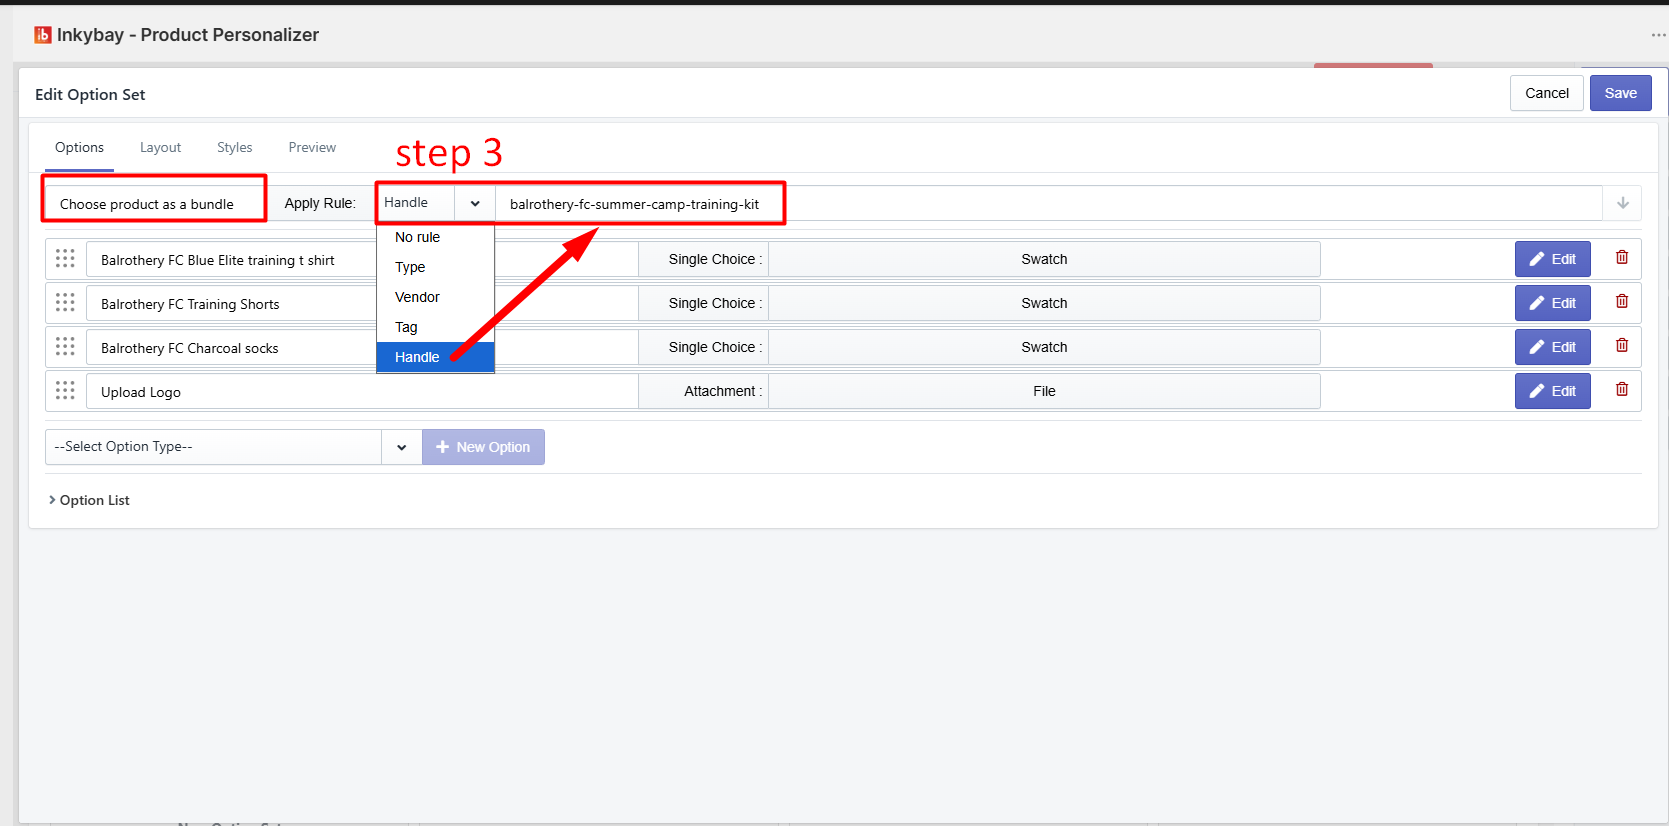
📝Note
To get the product handle, go to the product page of that product and copy everything after “product.”
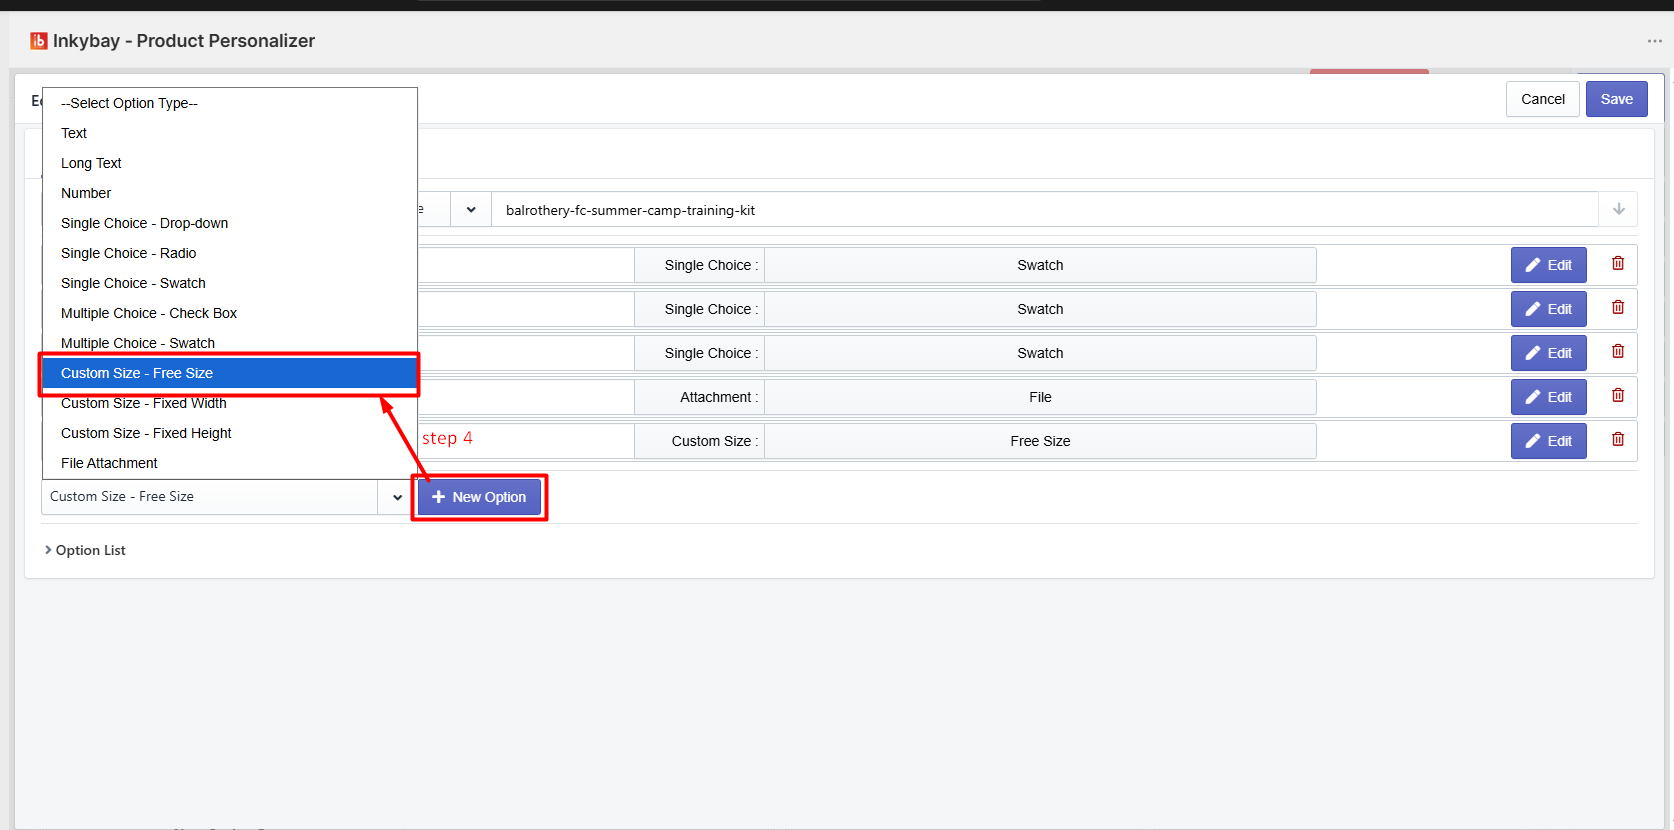
Step 4: Click the Select Option Type to select the Custom Size – Free Size option. And then click the + New option button.
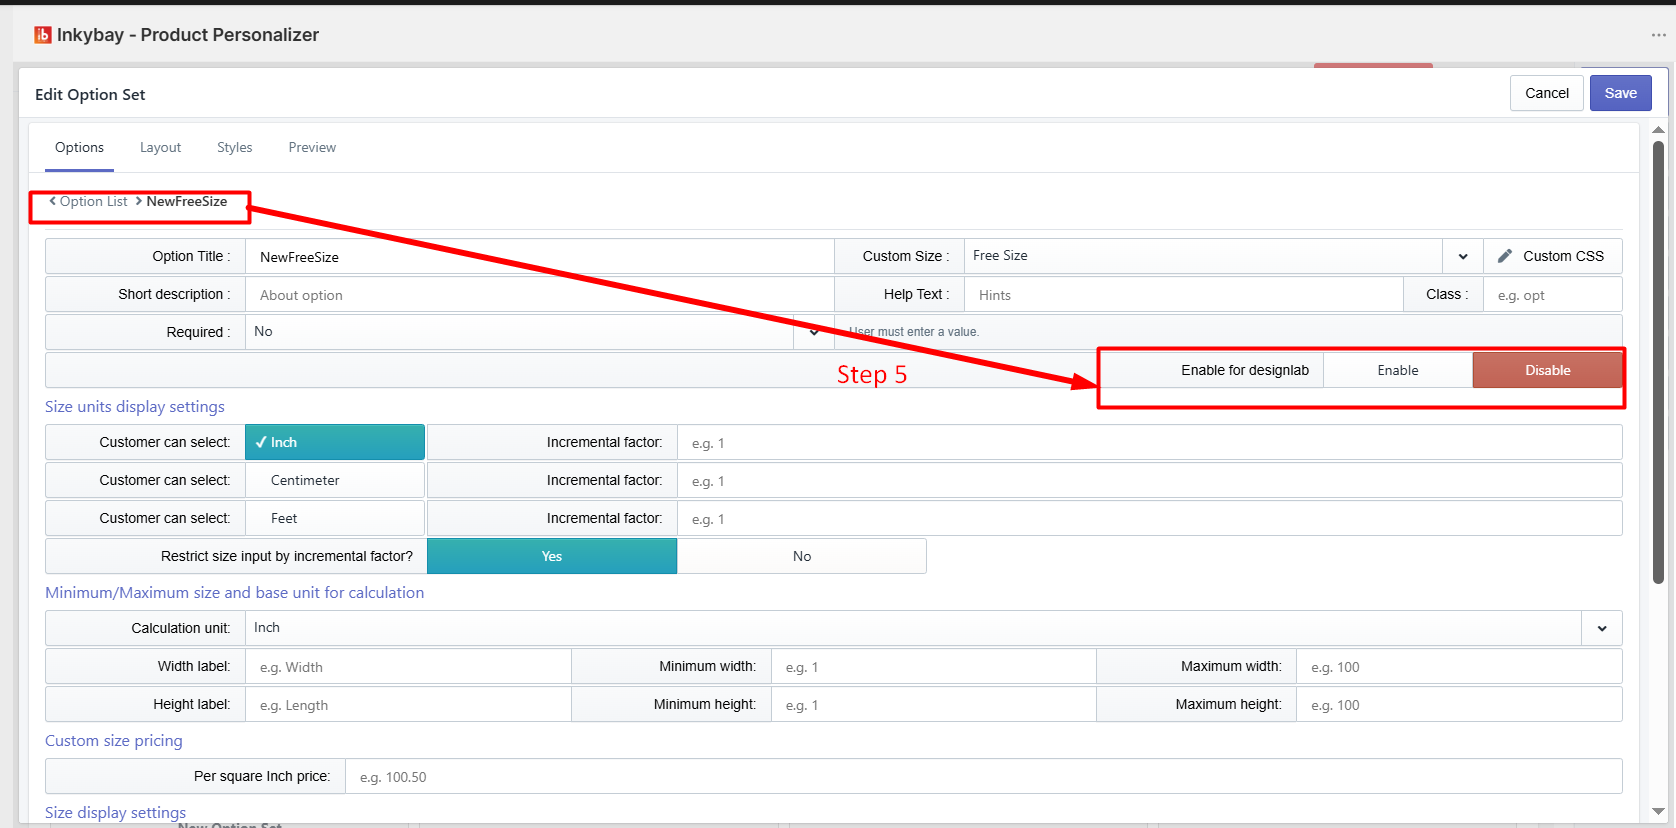
Step 5: Insert your option Title and select Enable if you want your customers to see the same size in the design lab.
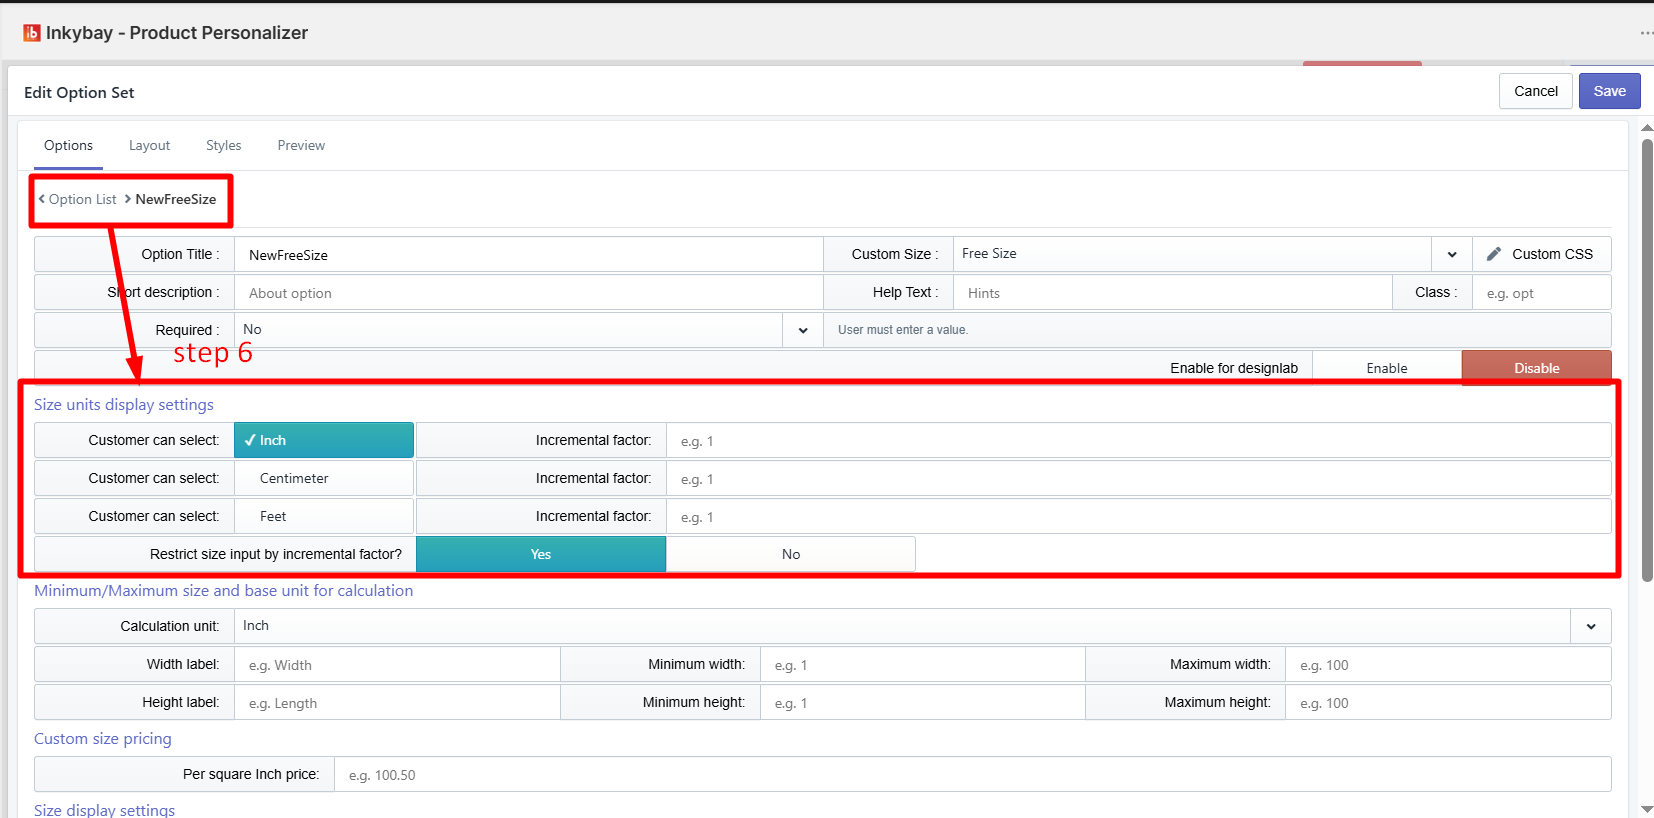
Step 6: Choose size units from “Size Unit Display Settings”. By default, it is set to Inch, you can add more.
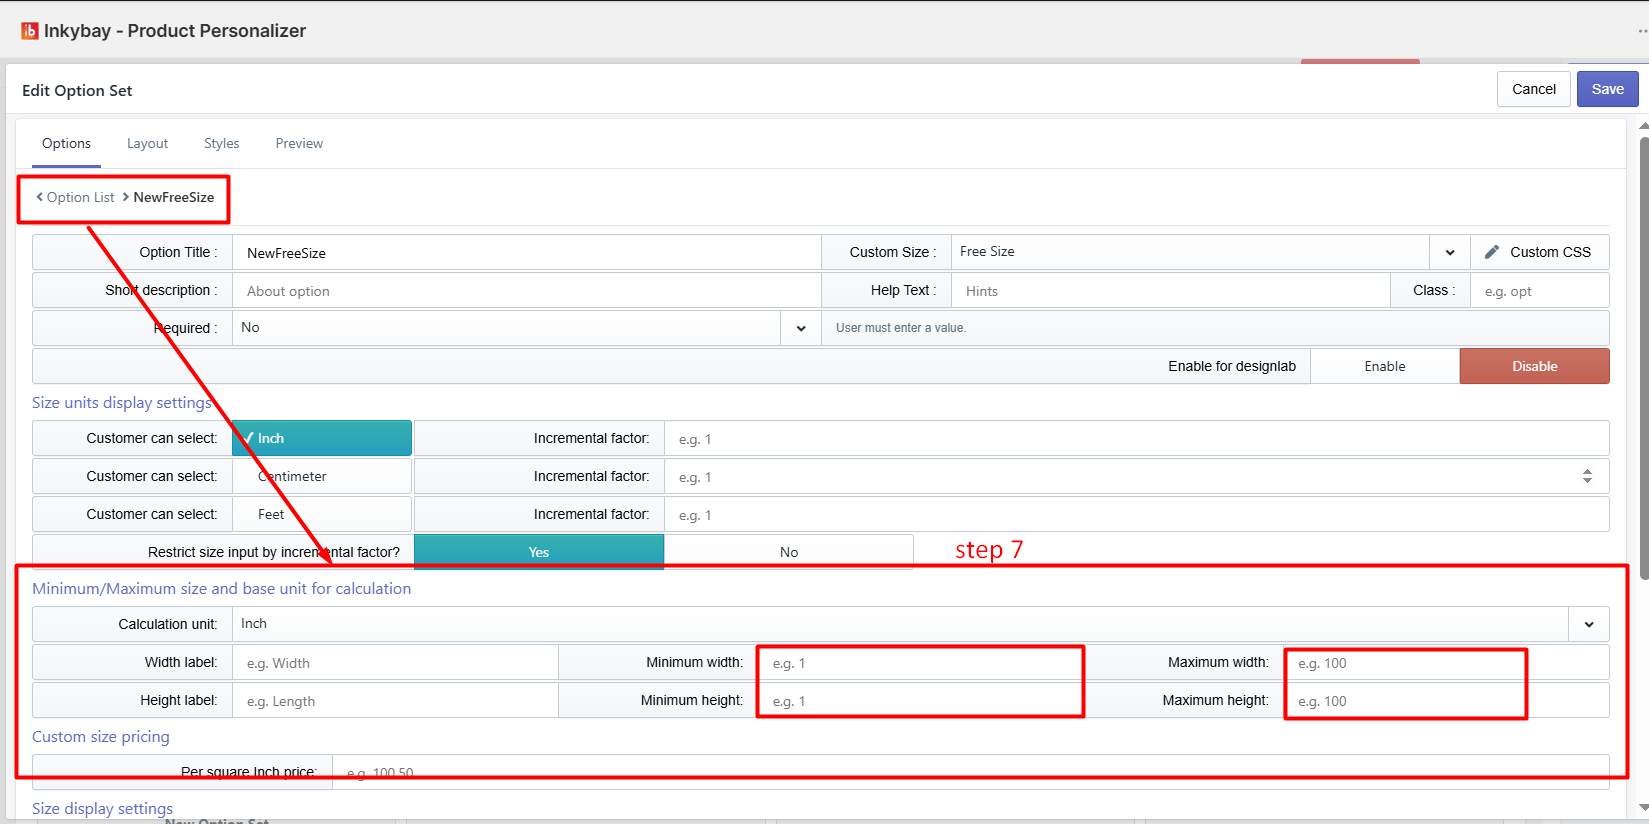
Step 7: You can also apply the Minimum / Maximum Height & Width limit, or skip this part.
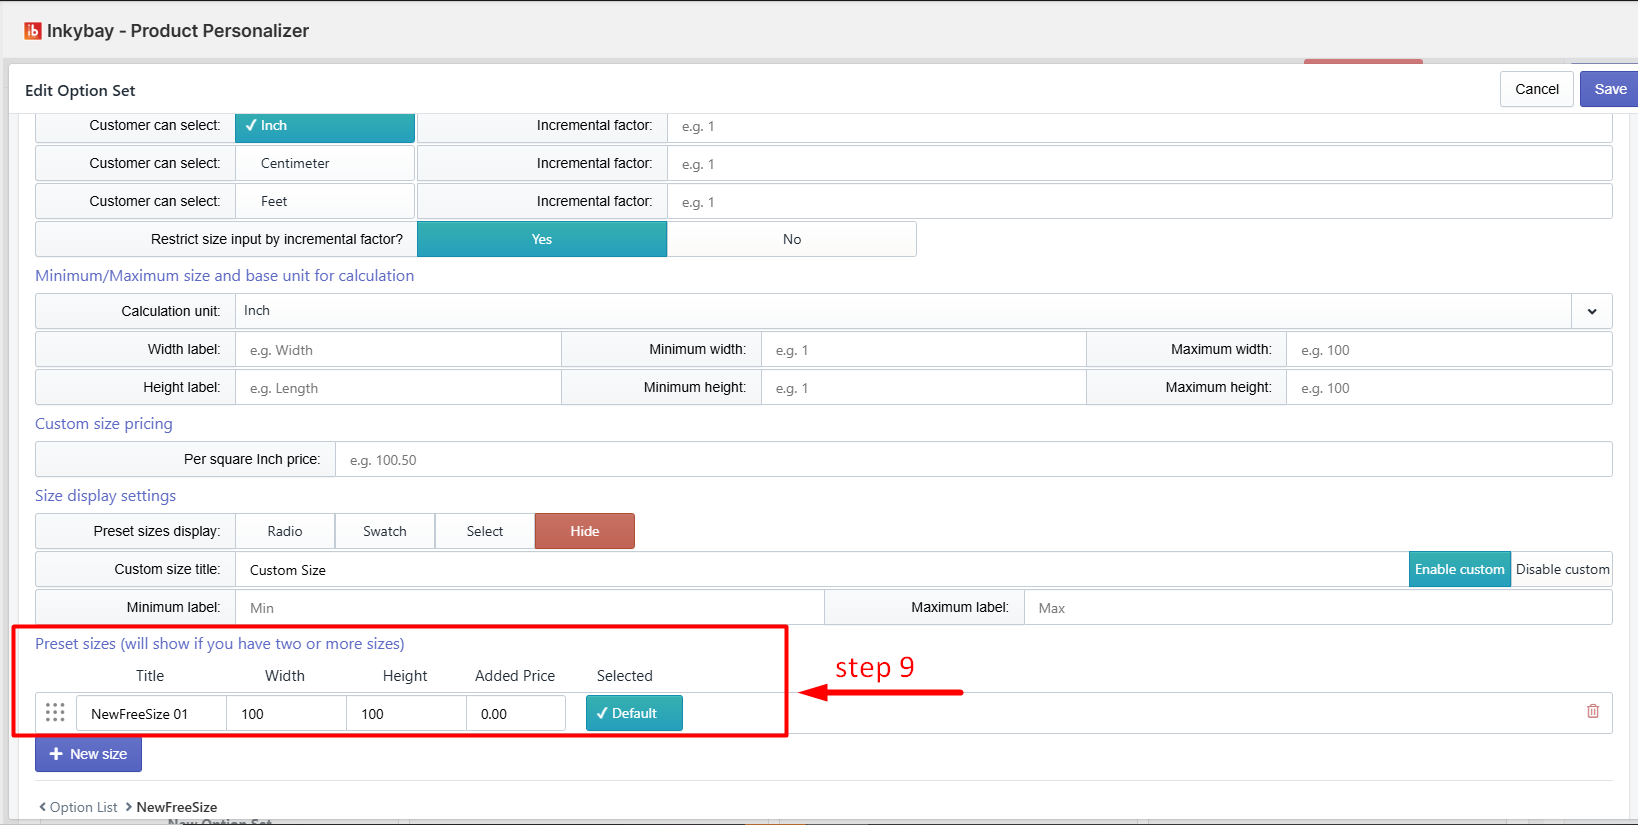
Step 8: Scroll down and from the Size display settings option, choose radio, swatch, or select to display preset sizes.
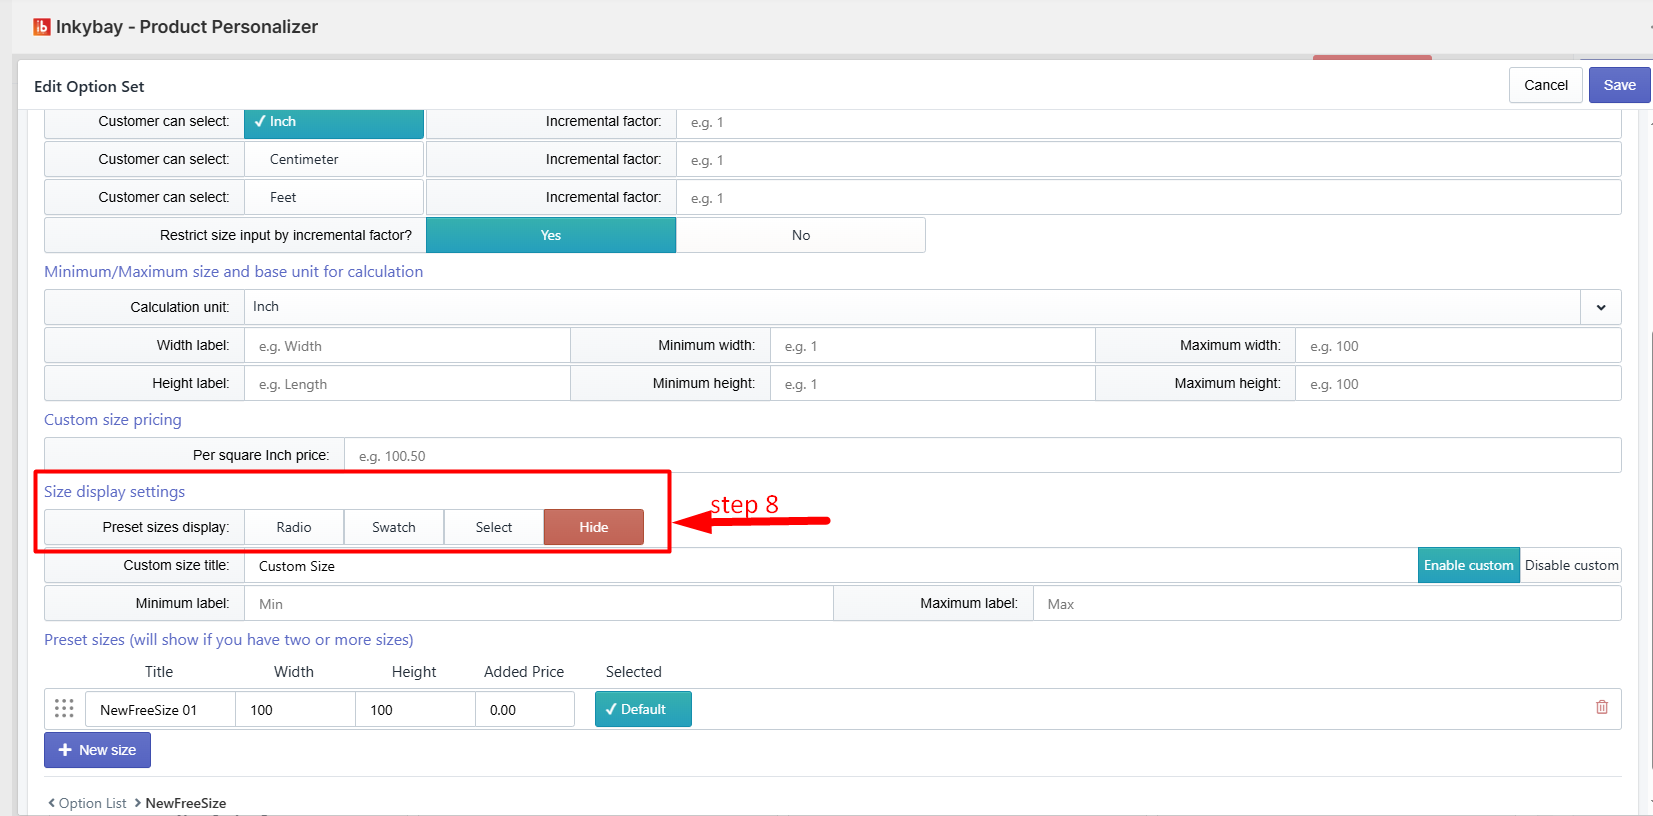
Step 9: To show two or more size values, enter the title, width & height values, and price.
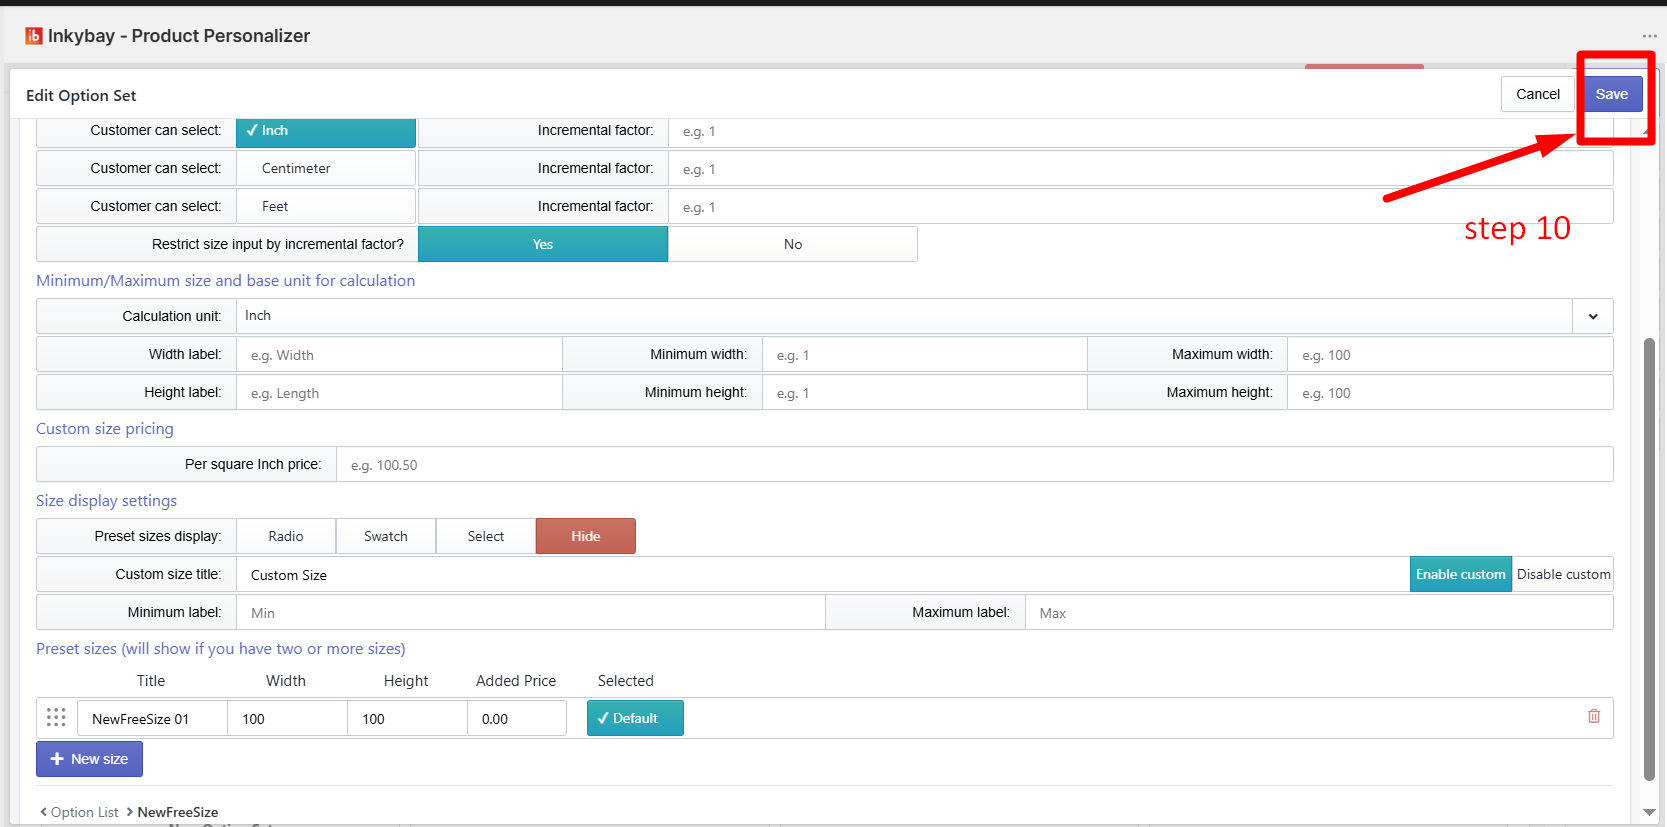
Step 10: Click the Save button as shown in the image below.
Additional settings
If you want to have a custom field so that customers can also suggest their own preferred size, then keep Enable custom. Otherwise, click the Disable Custom button.

Feel free to contact us whenever you face any issues or need assistance. We’re available 24/7. You can also reach us:
InkyBay app Live chat
Support ticket from the InkyBay app
Email to support@productsdesigner.com
Did this post help you?