The product image is the starting canvas for every customisation. It is what your customers see when they design their own version of your product.
A clear, well-prepared image helps customers understand exactly how their customisation will look in real life. Without a good base image, they may be confused or unhappy with the result.
Before uploading, you need to prepare your image correctly. The preparation depends on which upload method you are using.
You have two options. Choose the one that works best for your needs:
Use this if you want Inkybay to automatically generate color variants of your product image based on your color set.
Use this if you want to upload your own image for each color variant to give customers a more realistic preview.
Grayscale Image: Your image must be a backgroundless, transparent PNG in grayscale. This is important because our system automatically changes the product color to match your selected color variants. If your image has a background, the system will change that background color too, which will not look correct.
Your Own Custom Image (Image Instead of Color): You can use any image, with or without a background. However, keep in mind that the image size must be the same across all color variants. This ensures the print area stays in the same position for every variant.
You can use any photo editing tool to prepare your image, this could be an online editor or a software like Photoshop or GIMP.
Here is the video tutorial on how you can prepare a grayscale PNG product image
Follow these steps in your Inkybay admin dashboard:
Access your store products.
Go to your admin dashboard. Hover over the Products option, then select Create a Custom Product.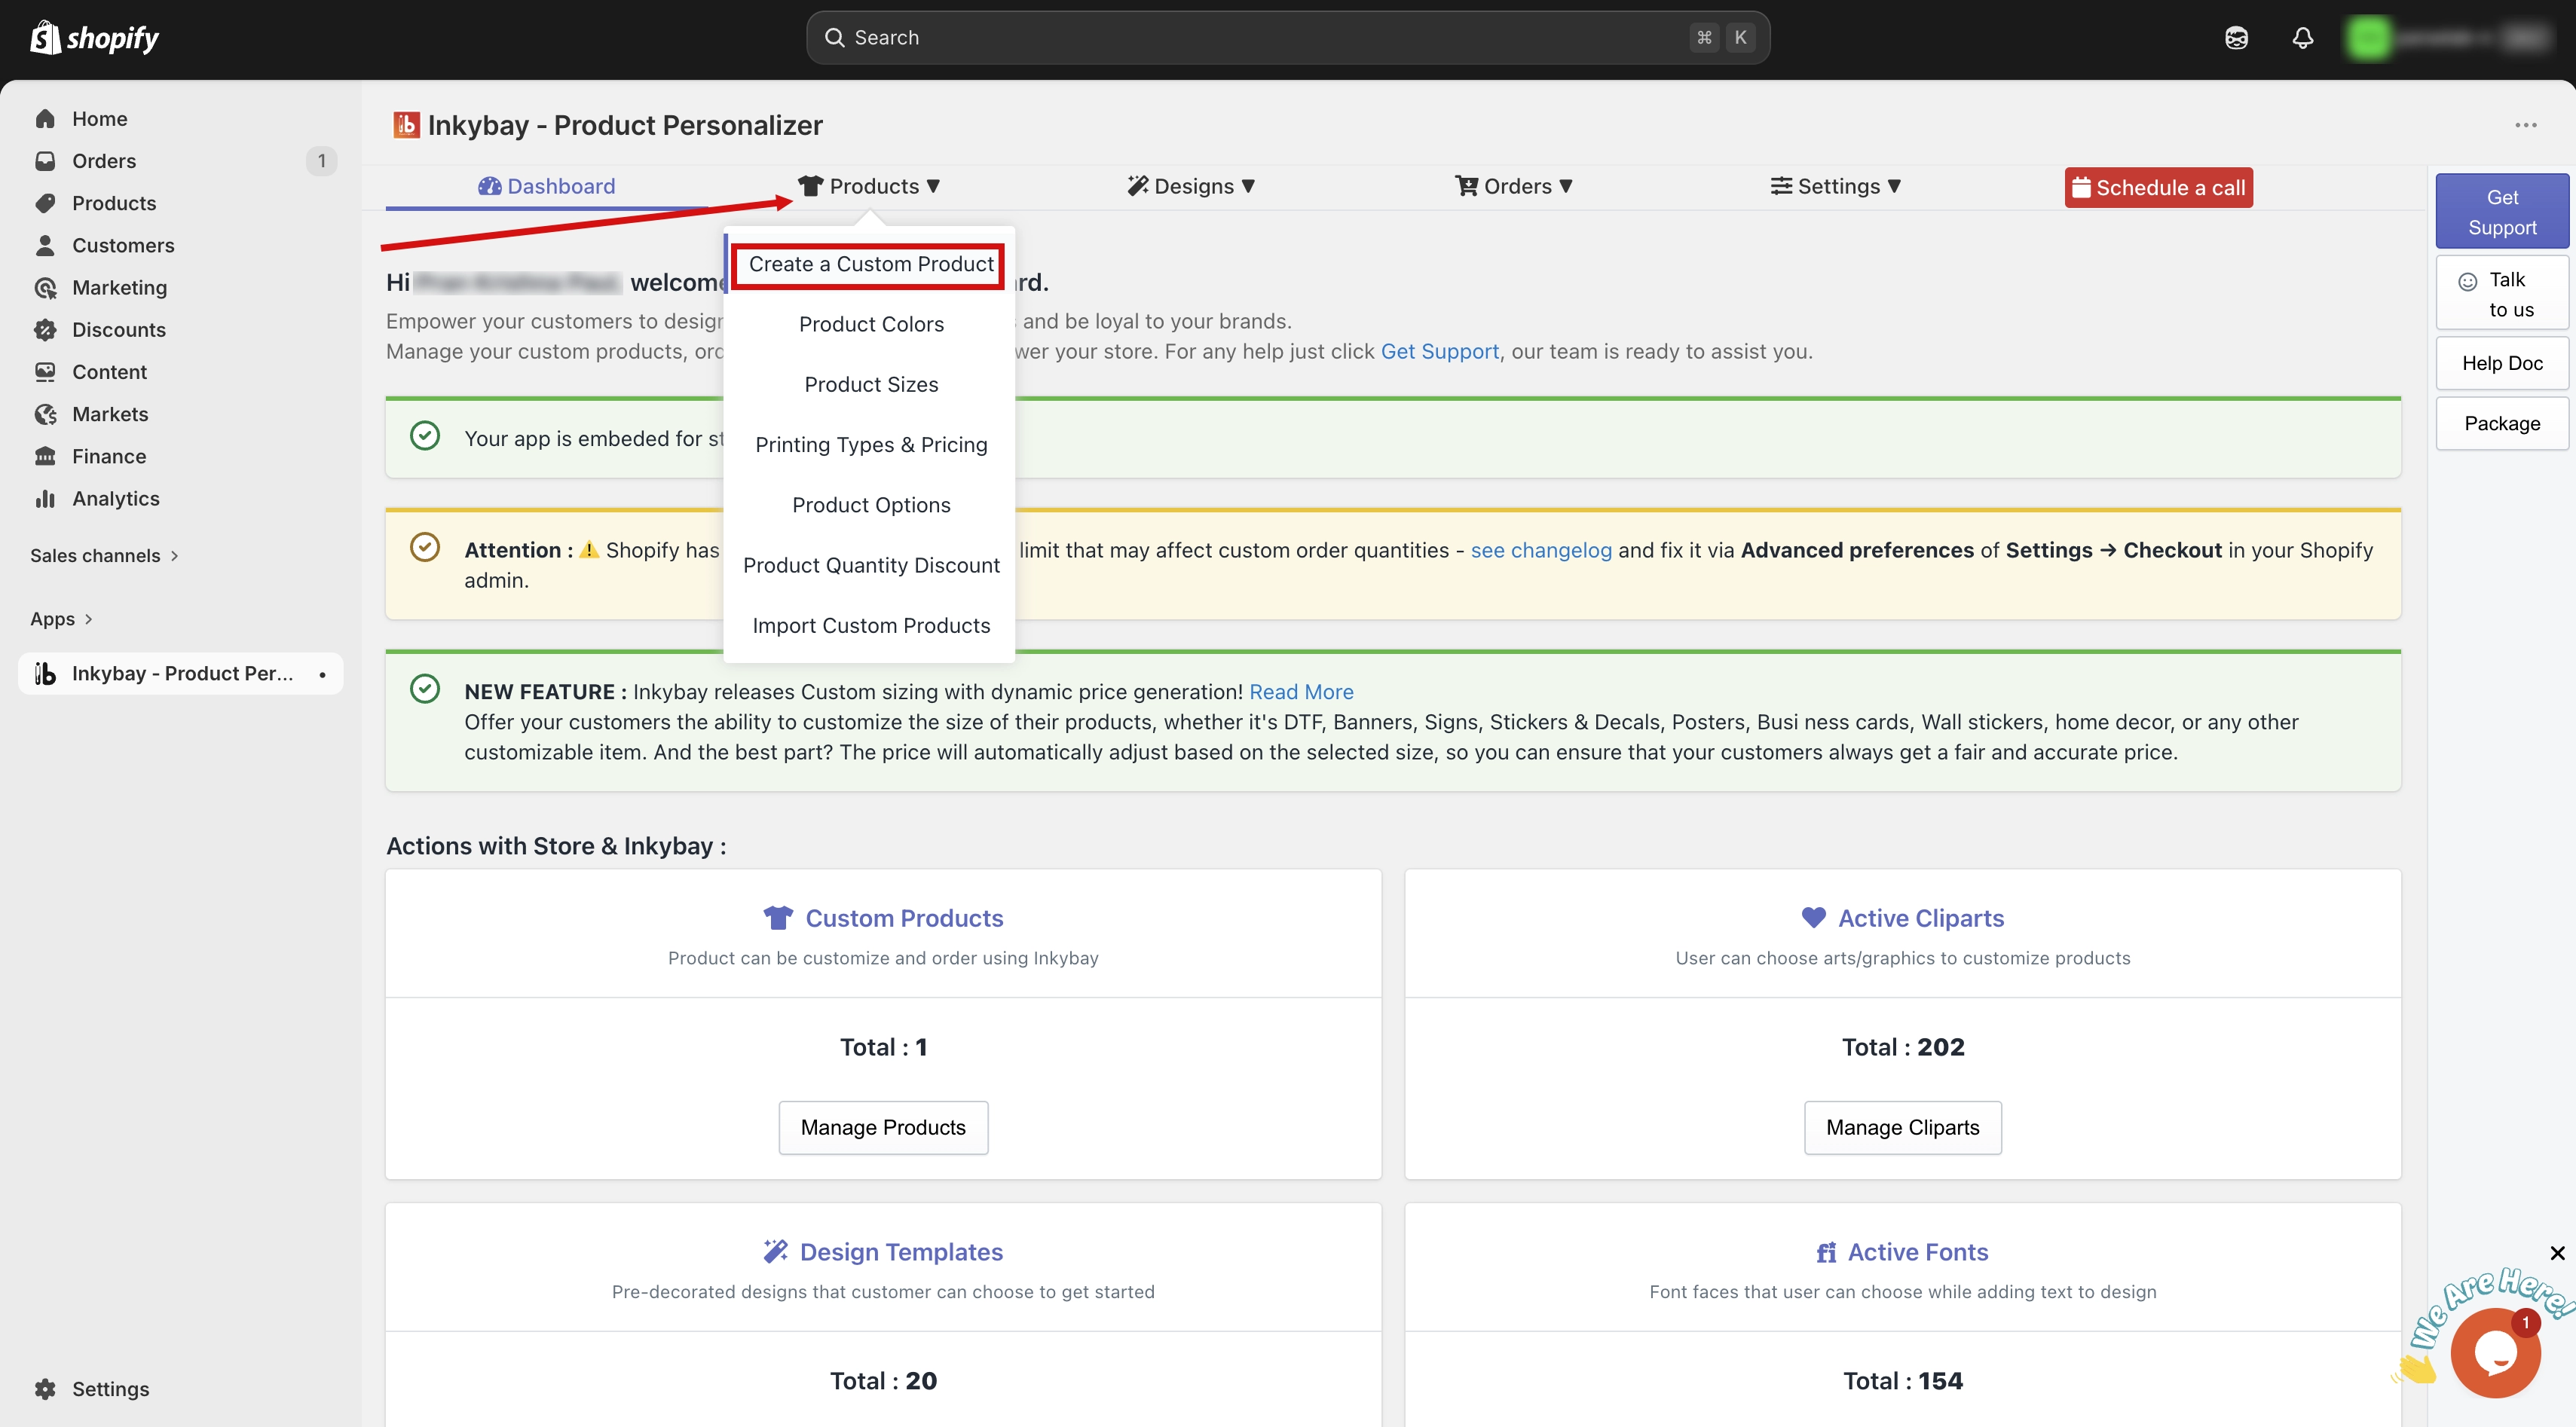
Find and edit the product.
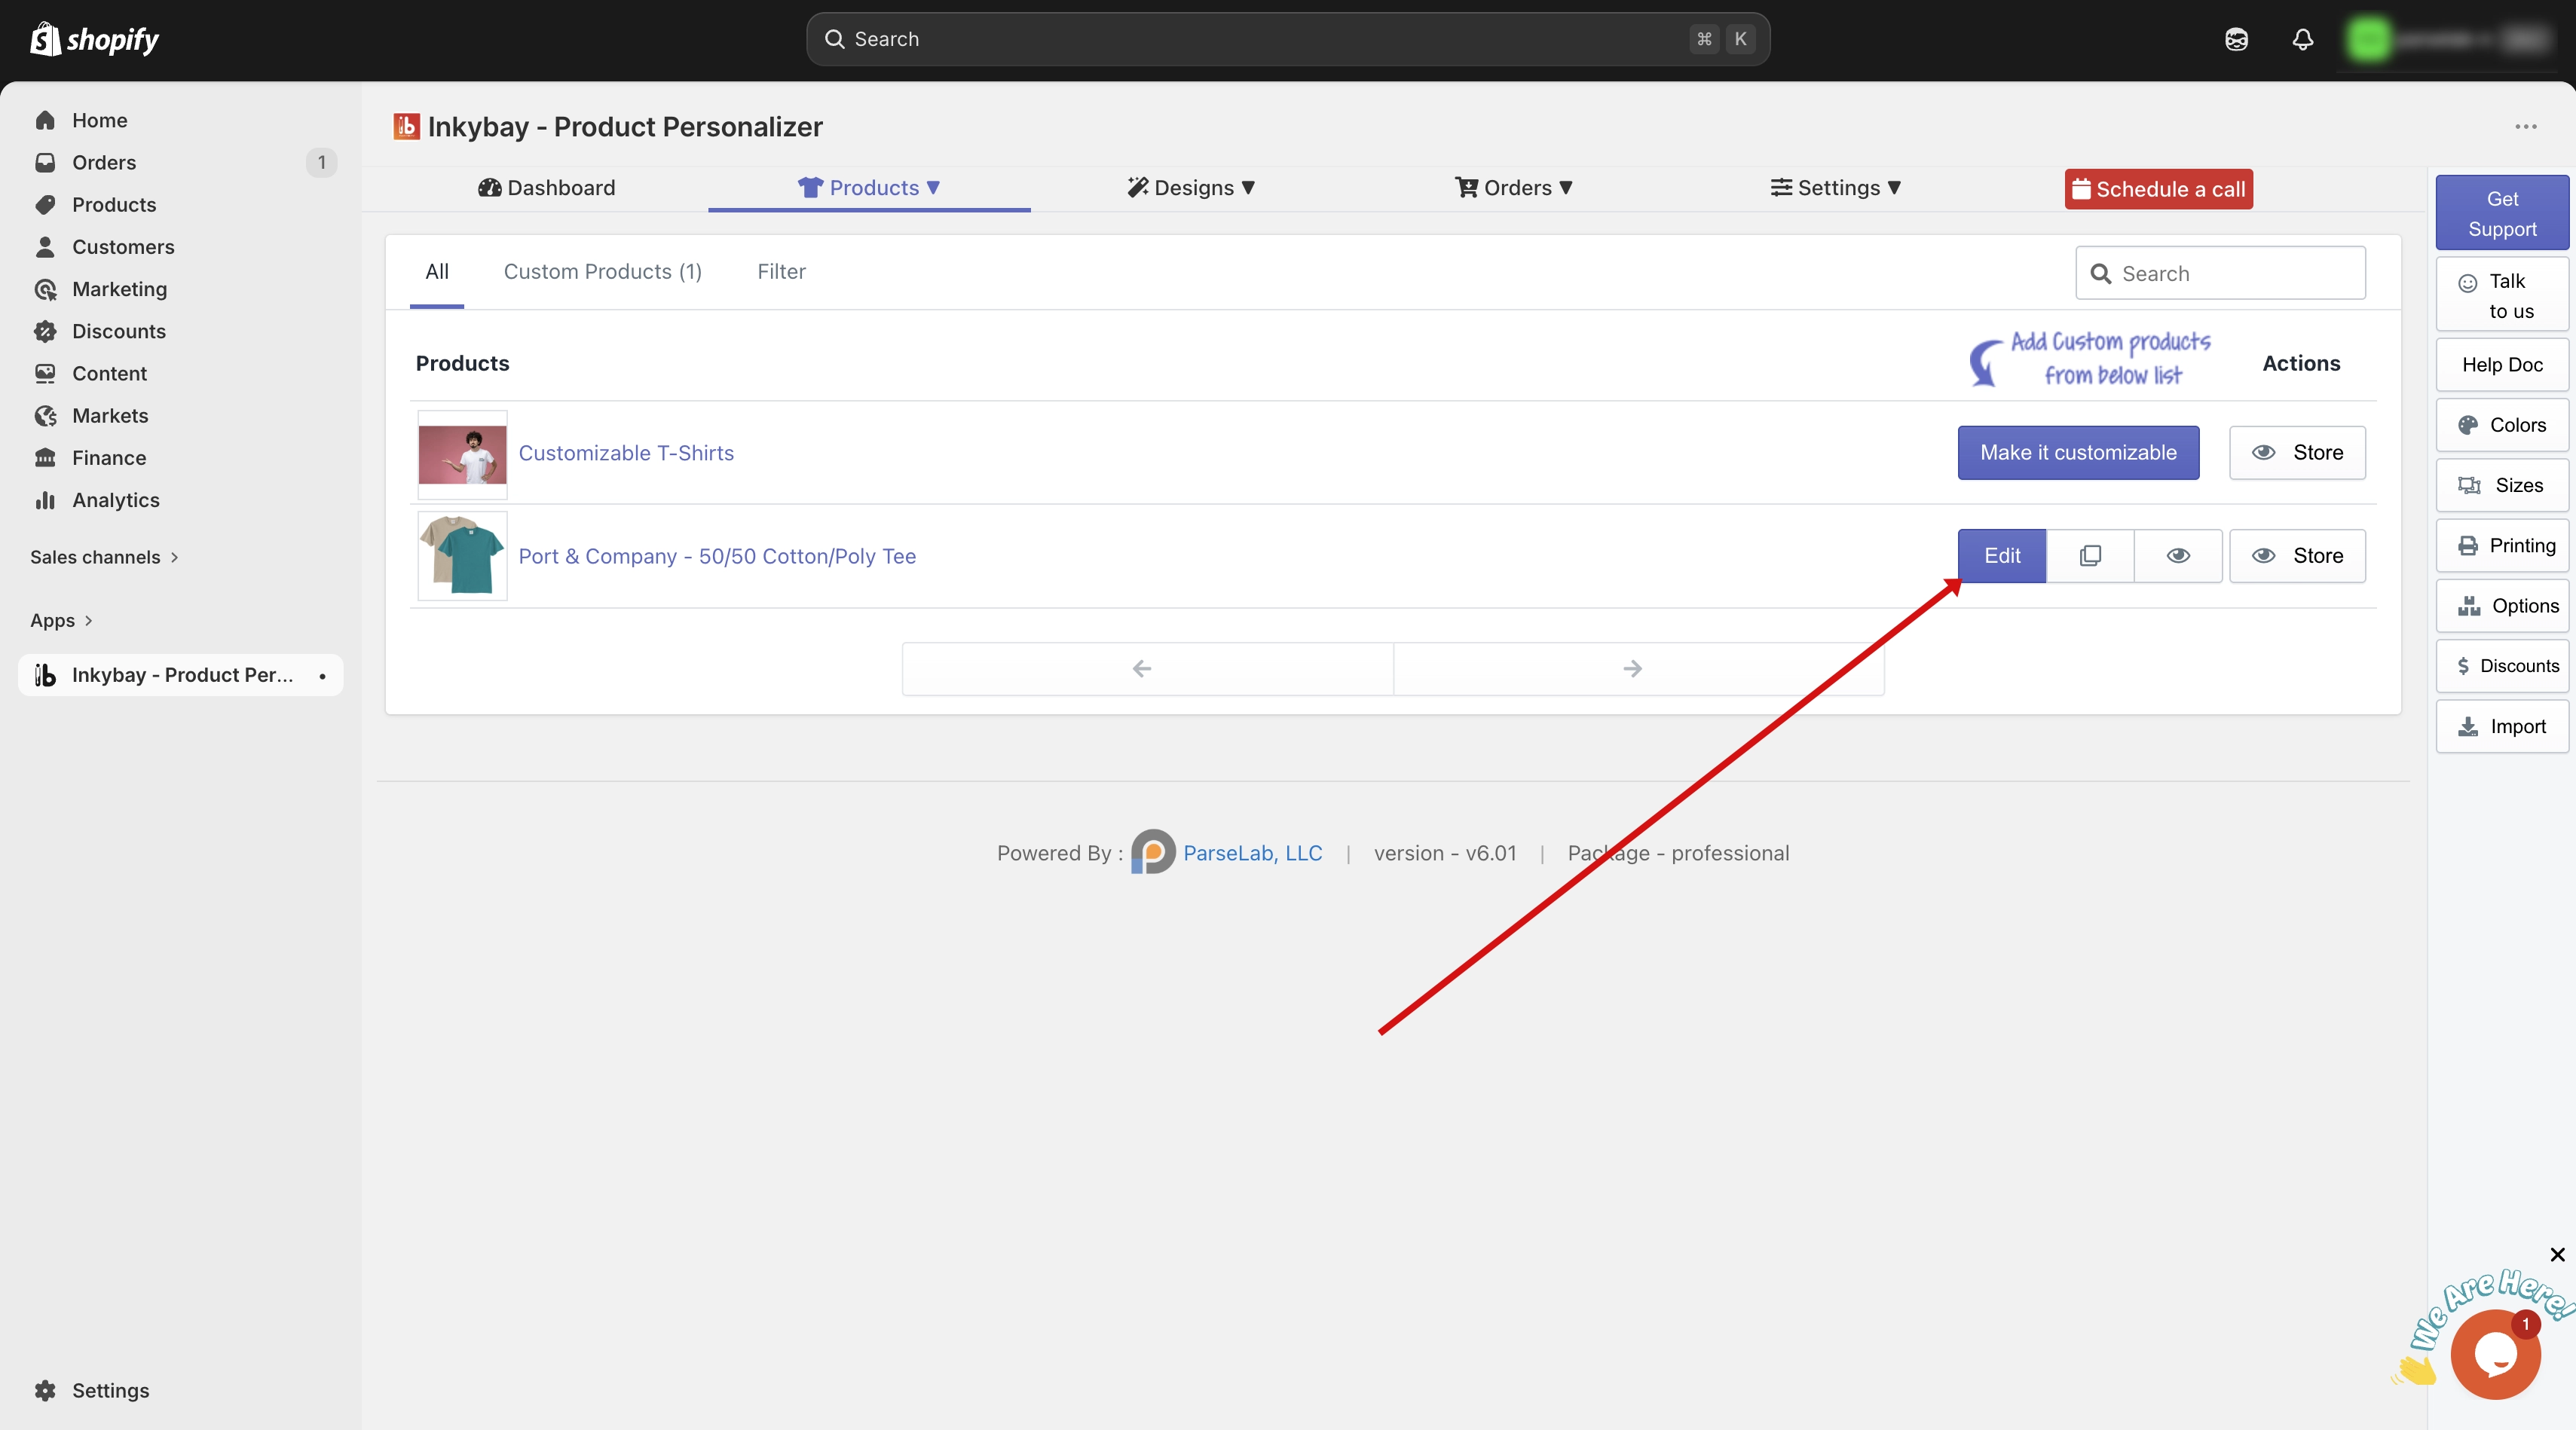
From InkyBay's Product option page, scroll to find the product you want to set color pricing for. Click the Edit button on that product.
Open Advanced Settings
Scroll down to the Product Setup for Design Tool section and click the Advanced Settings button.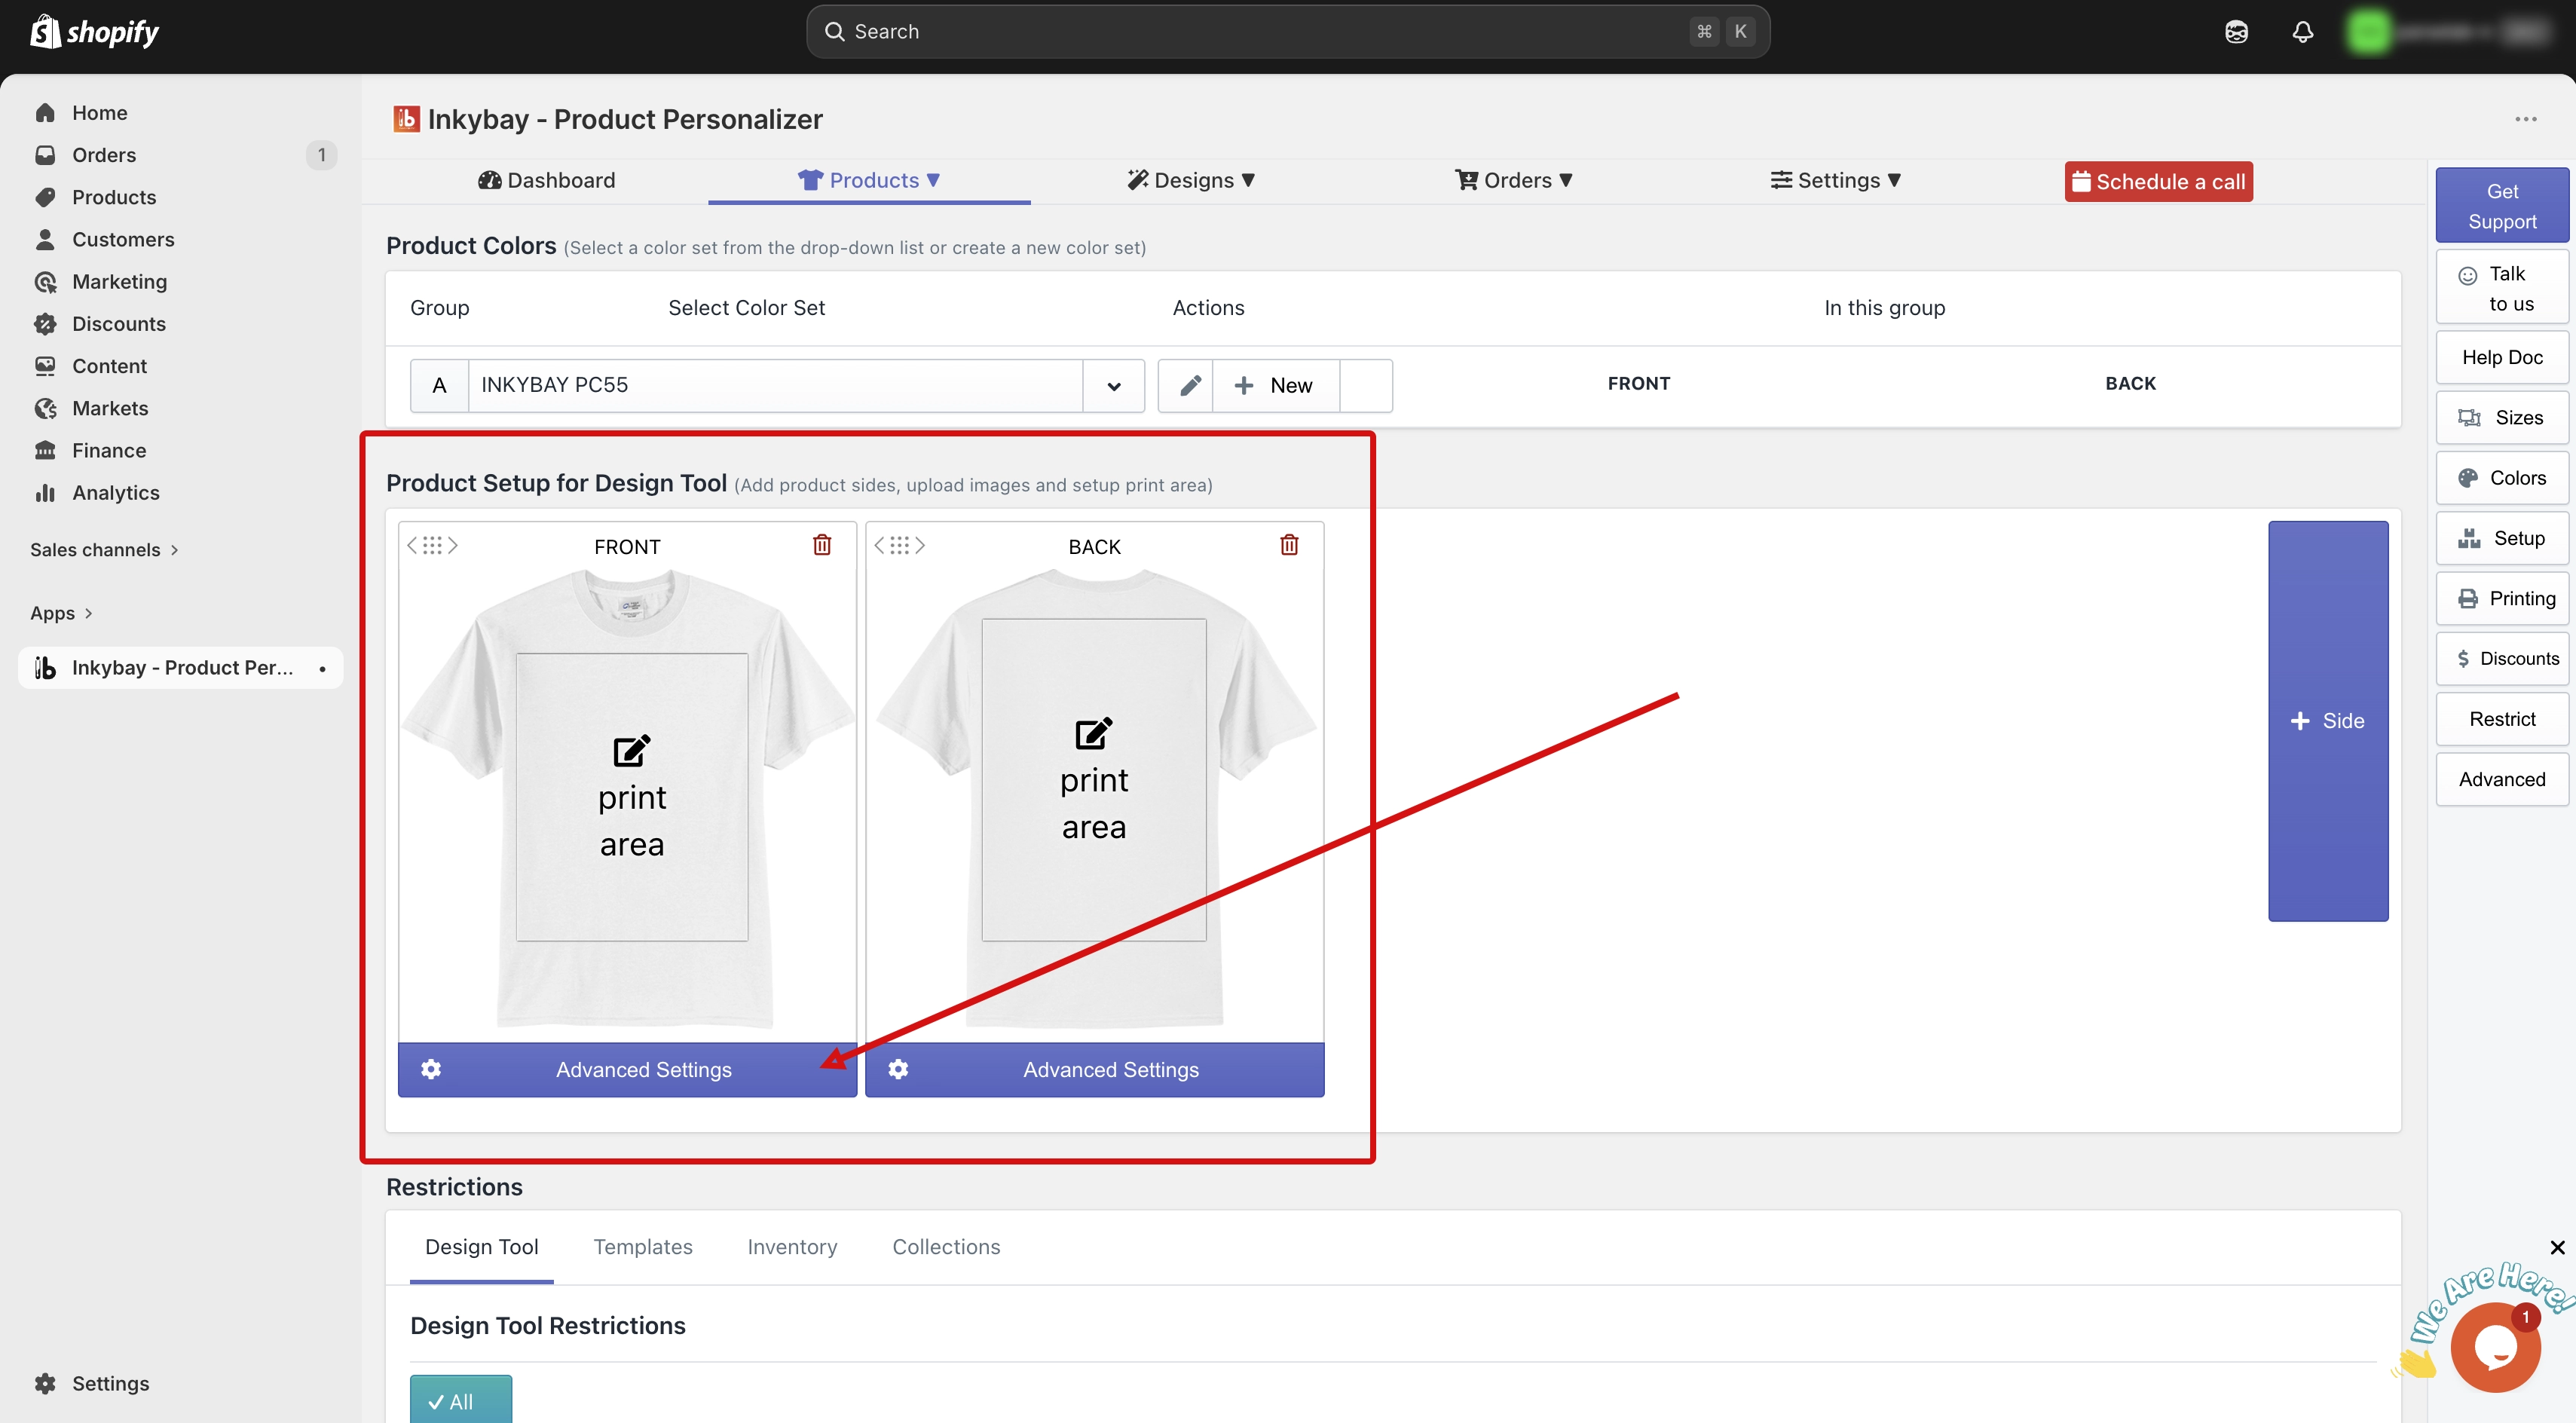
Upload Your Product Image
You will see an image upload area here. This is where you upload your product image.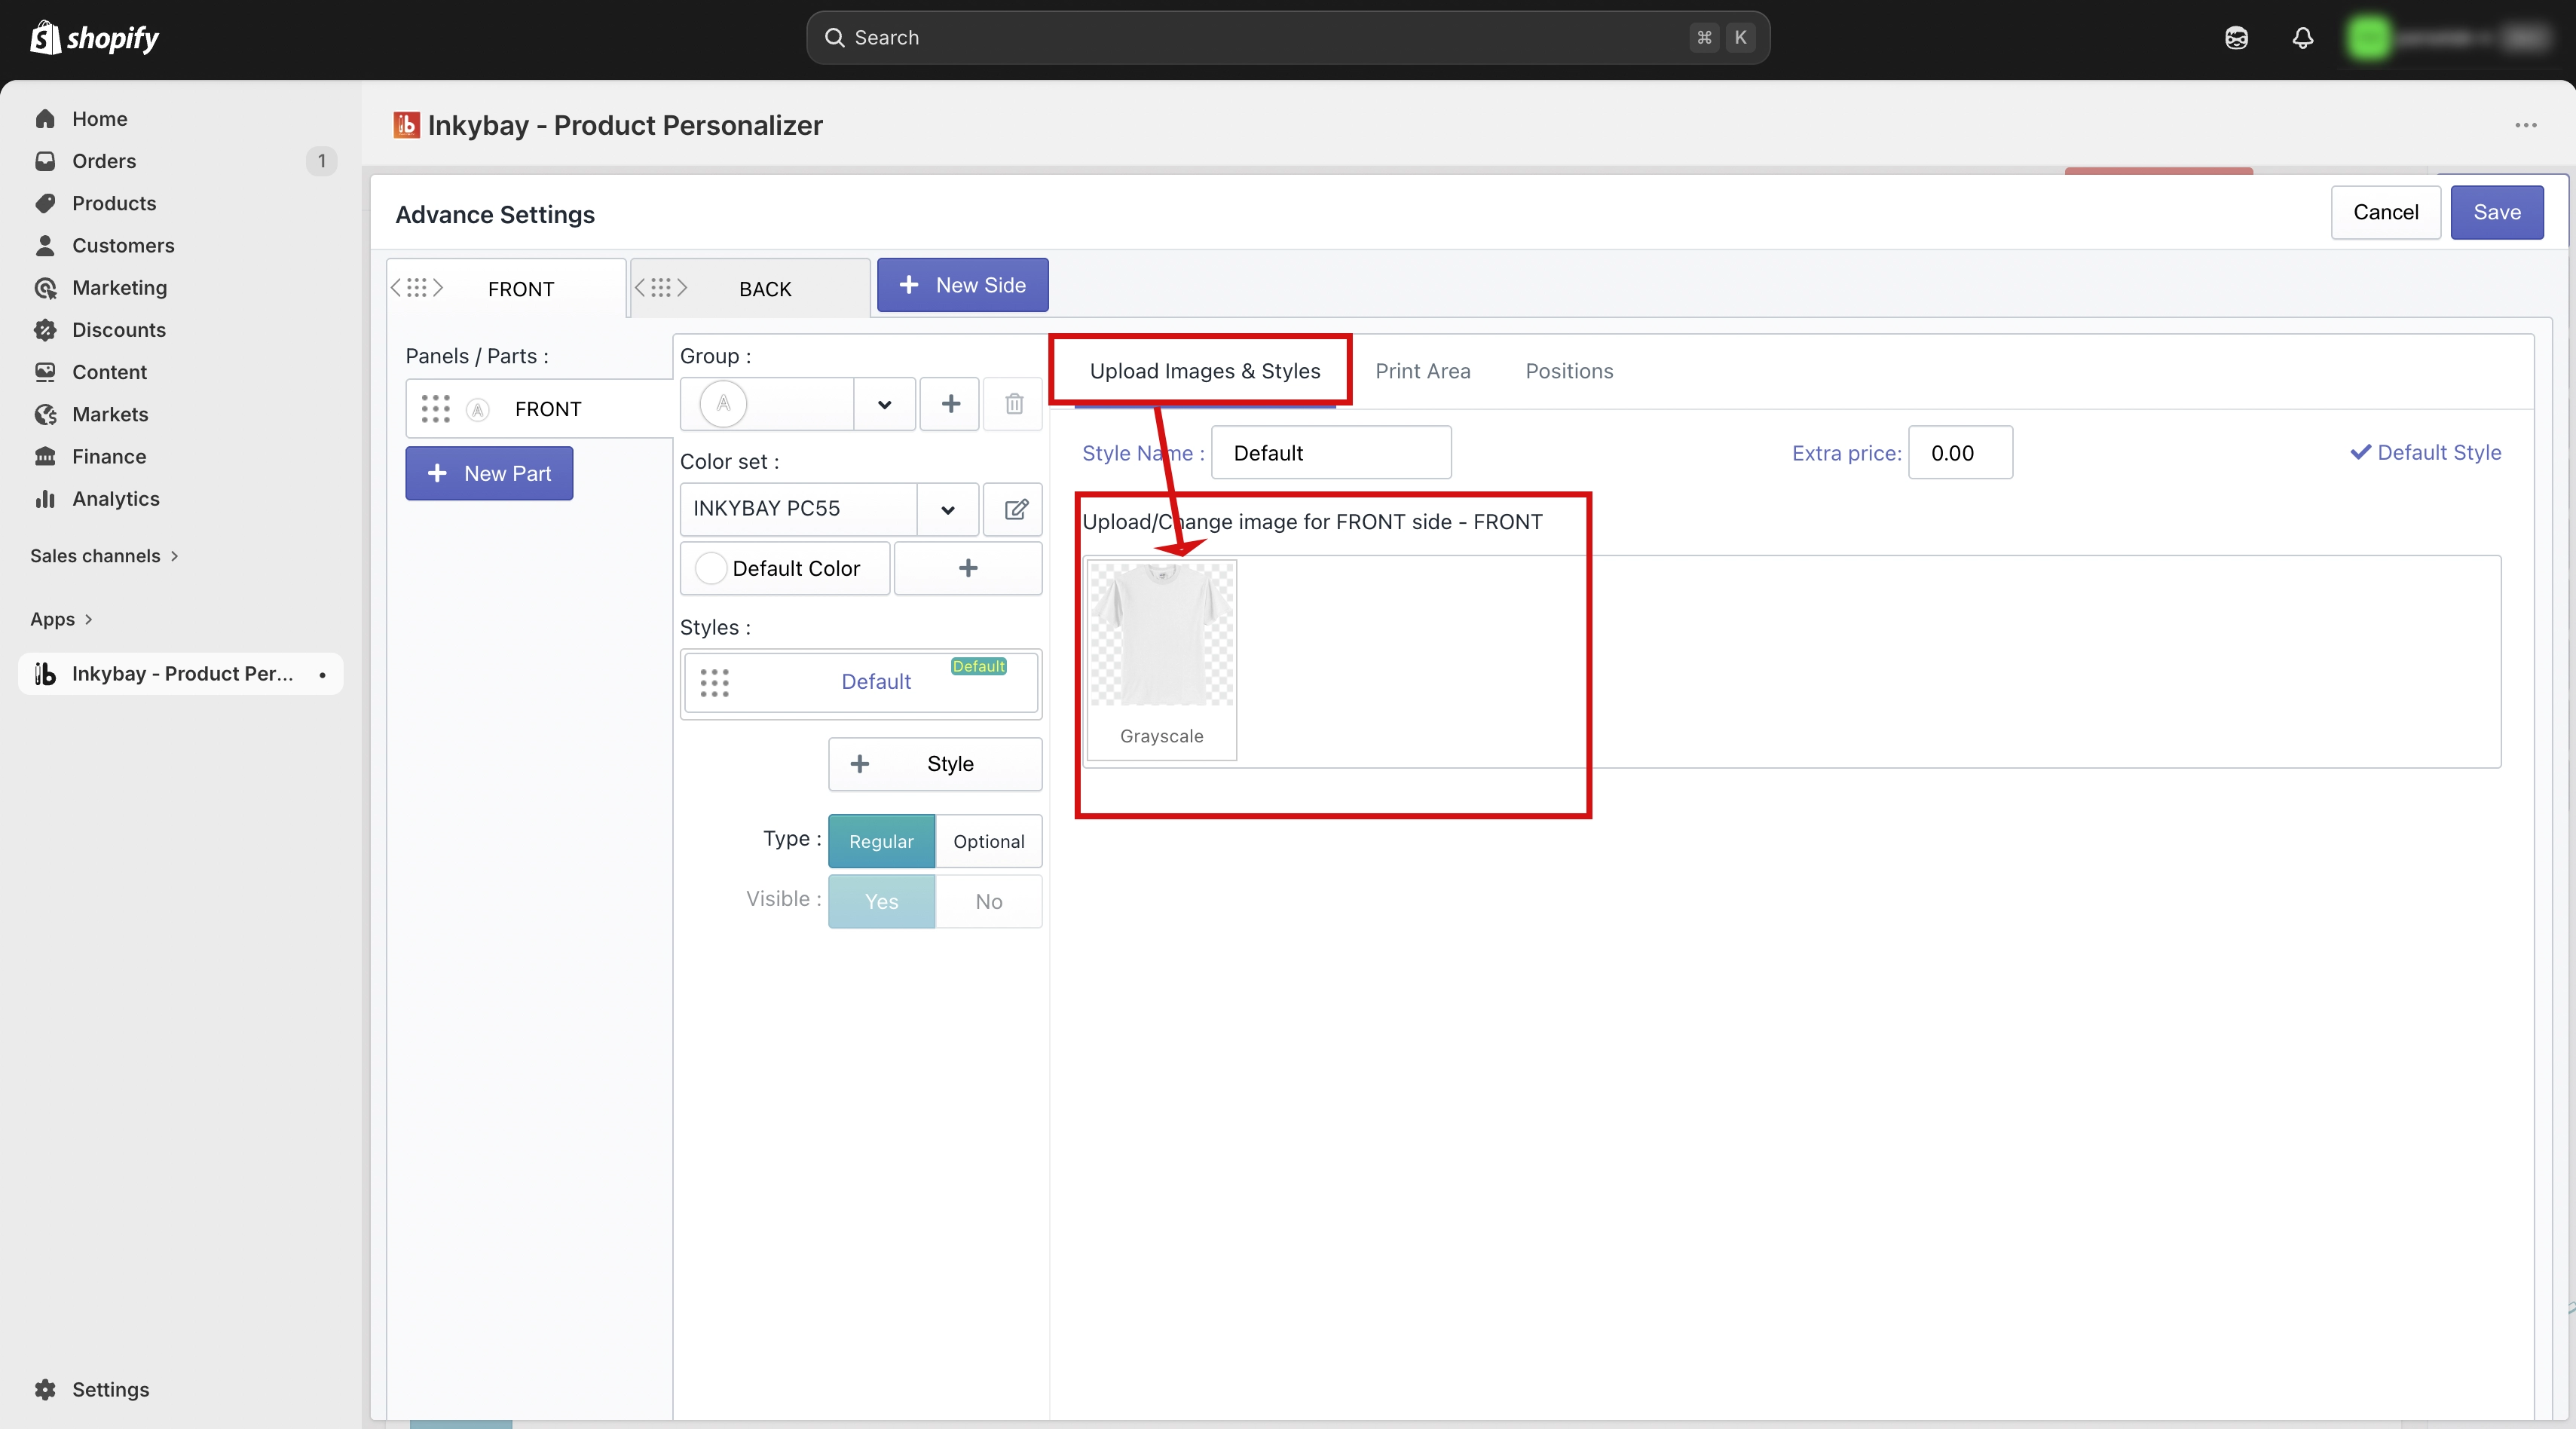
🎯Note This product image is connected to the Color Set feature. You can learn more about Color Sets in a separate guide. |
If you prefer to upload your own product image for each color variant (for a more realistic customer experience), you can do this too.
Here is how to enable it:
Find the Color Set section
On the selected side, look for the Color Set section. Here you will see the color set that is currently assigned to your product.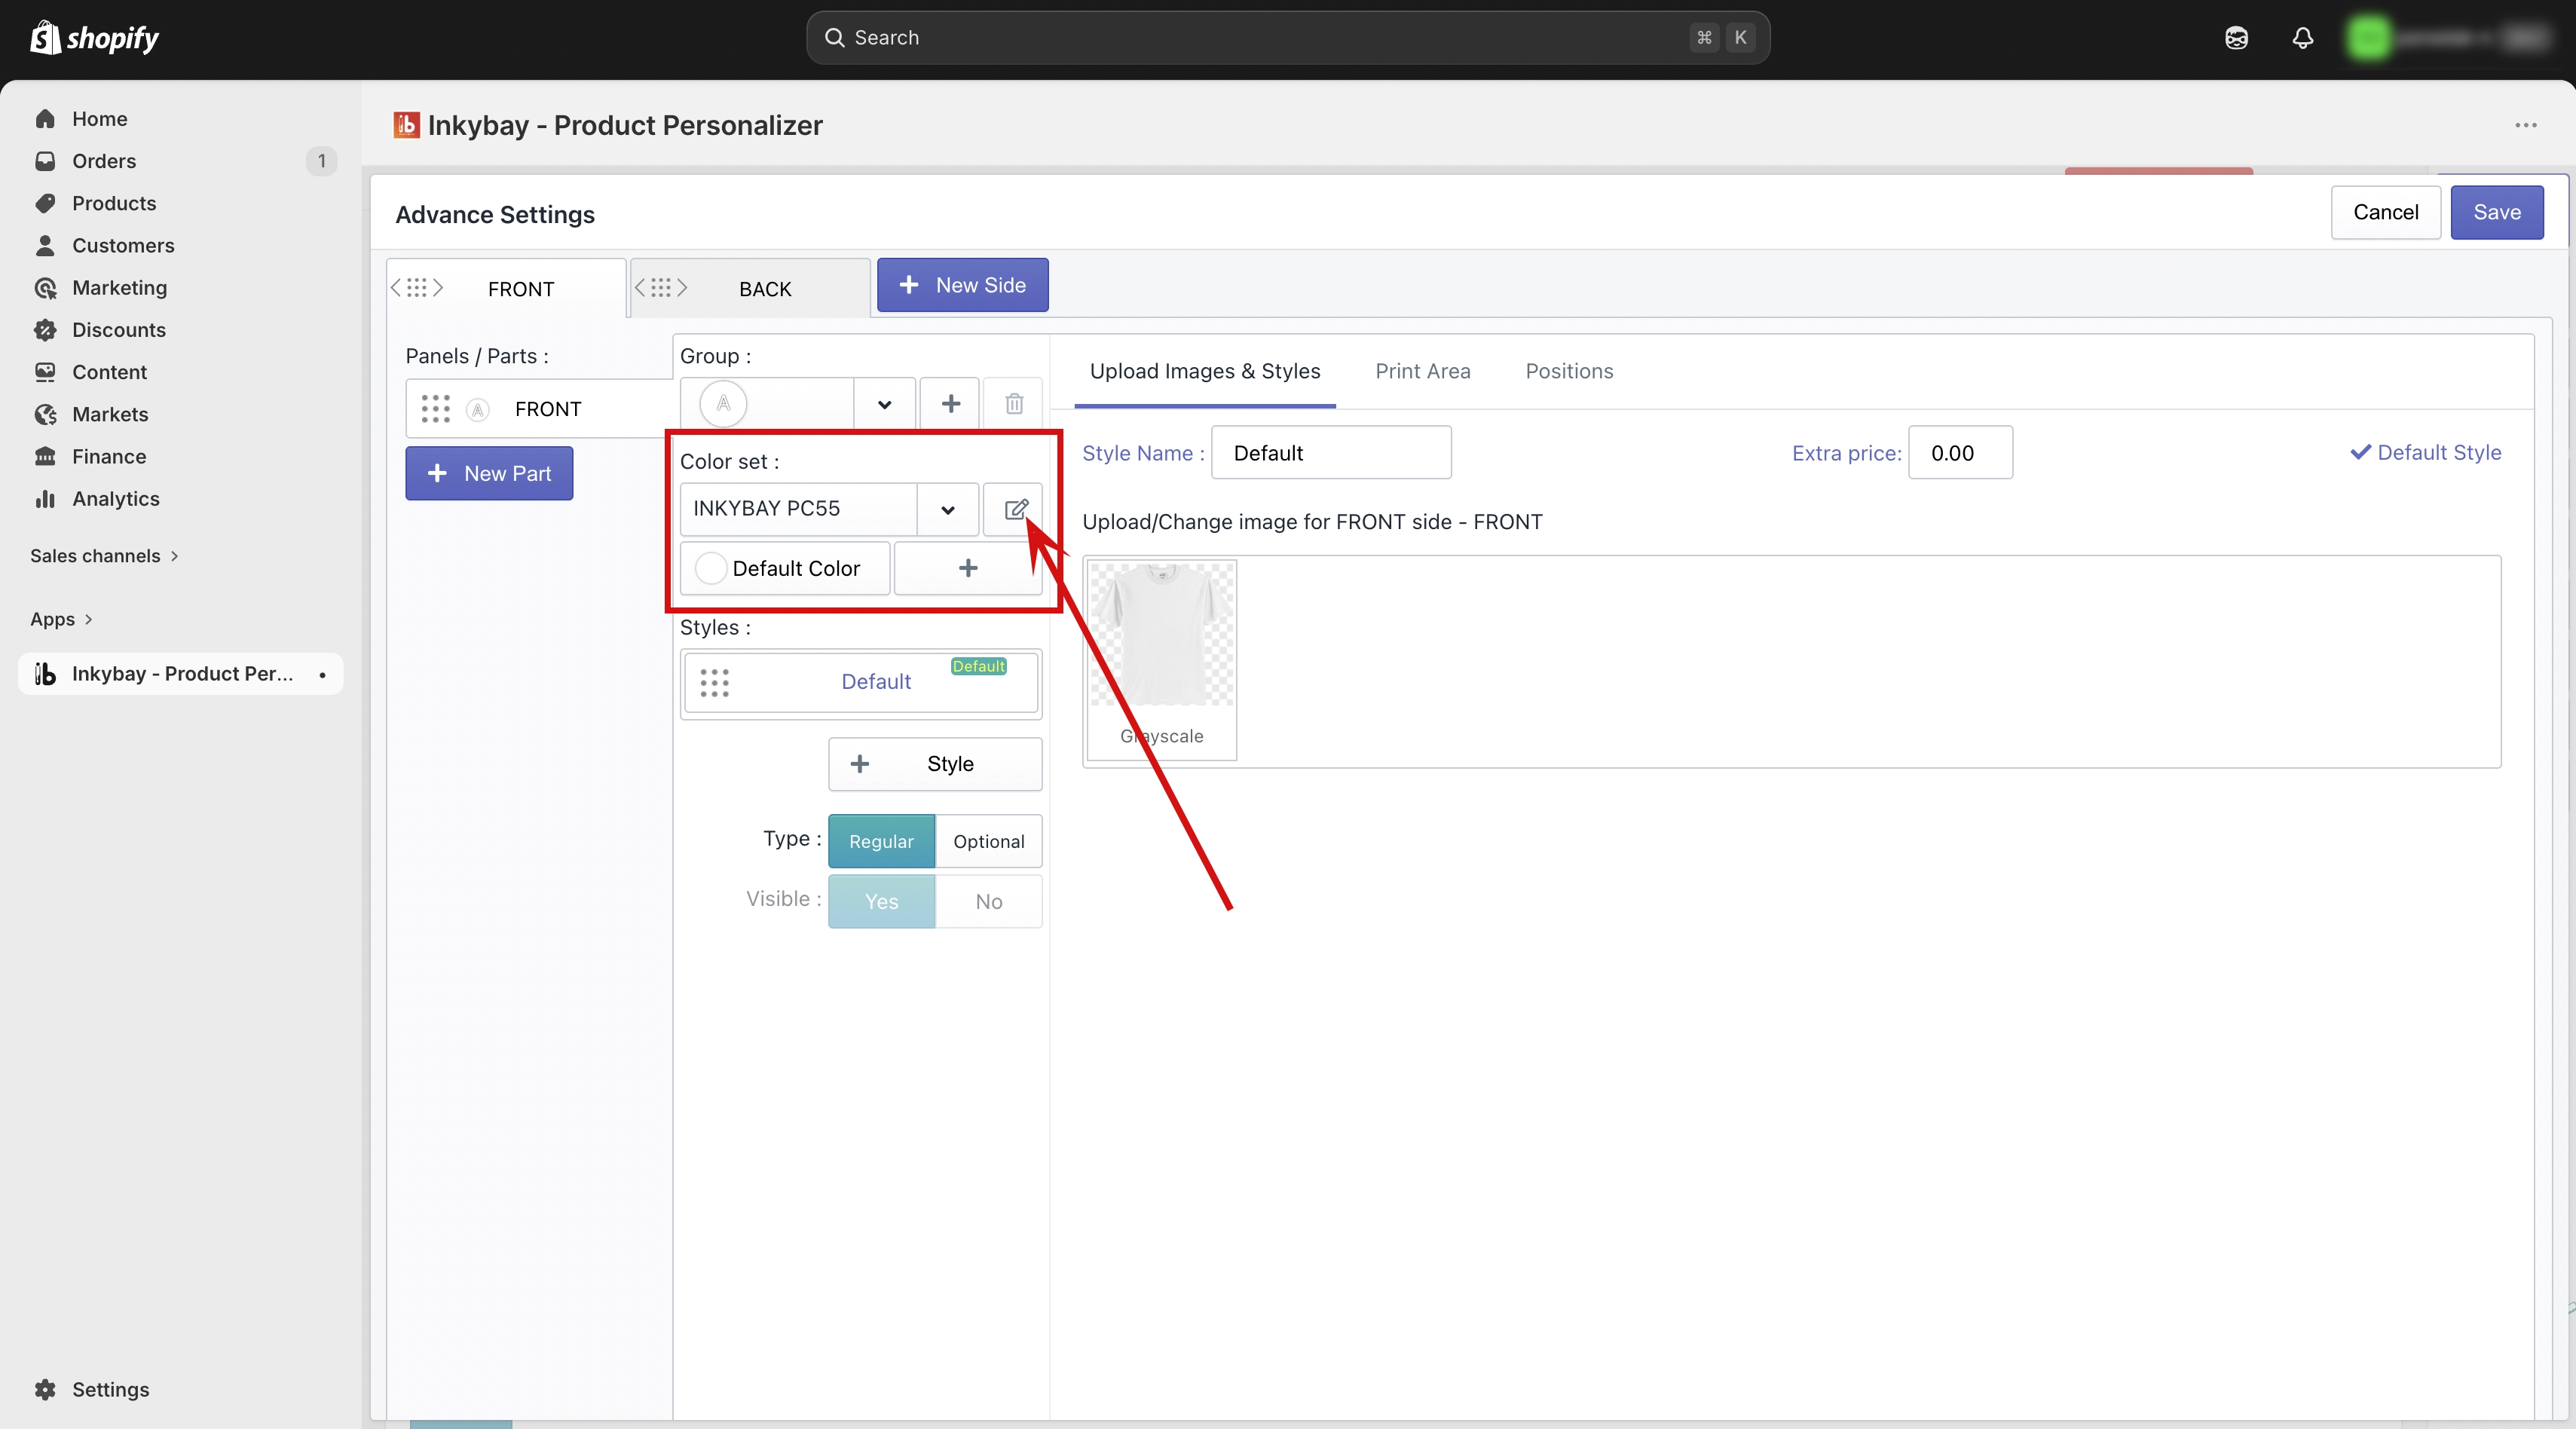
Go to Color Set Settings
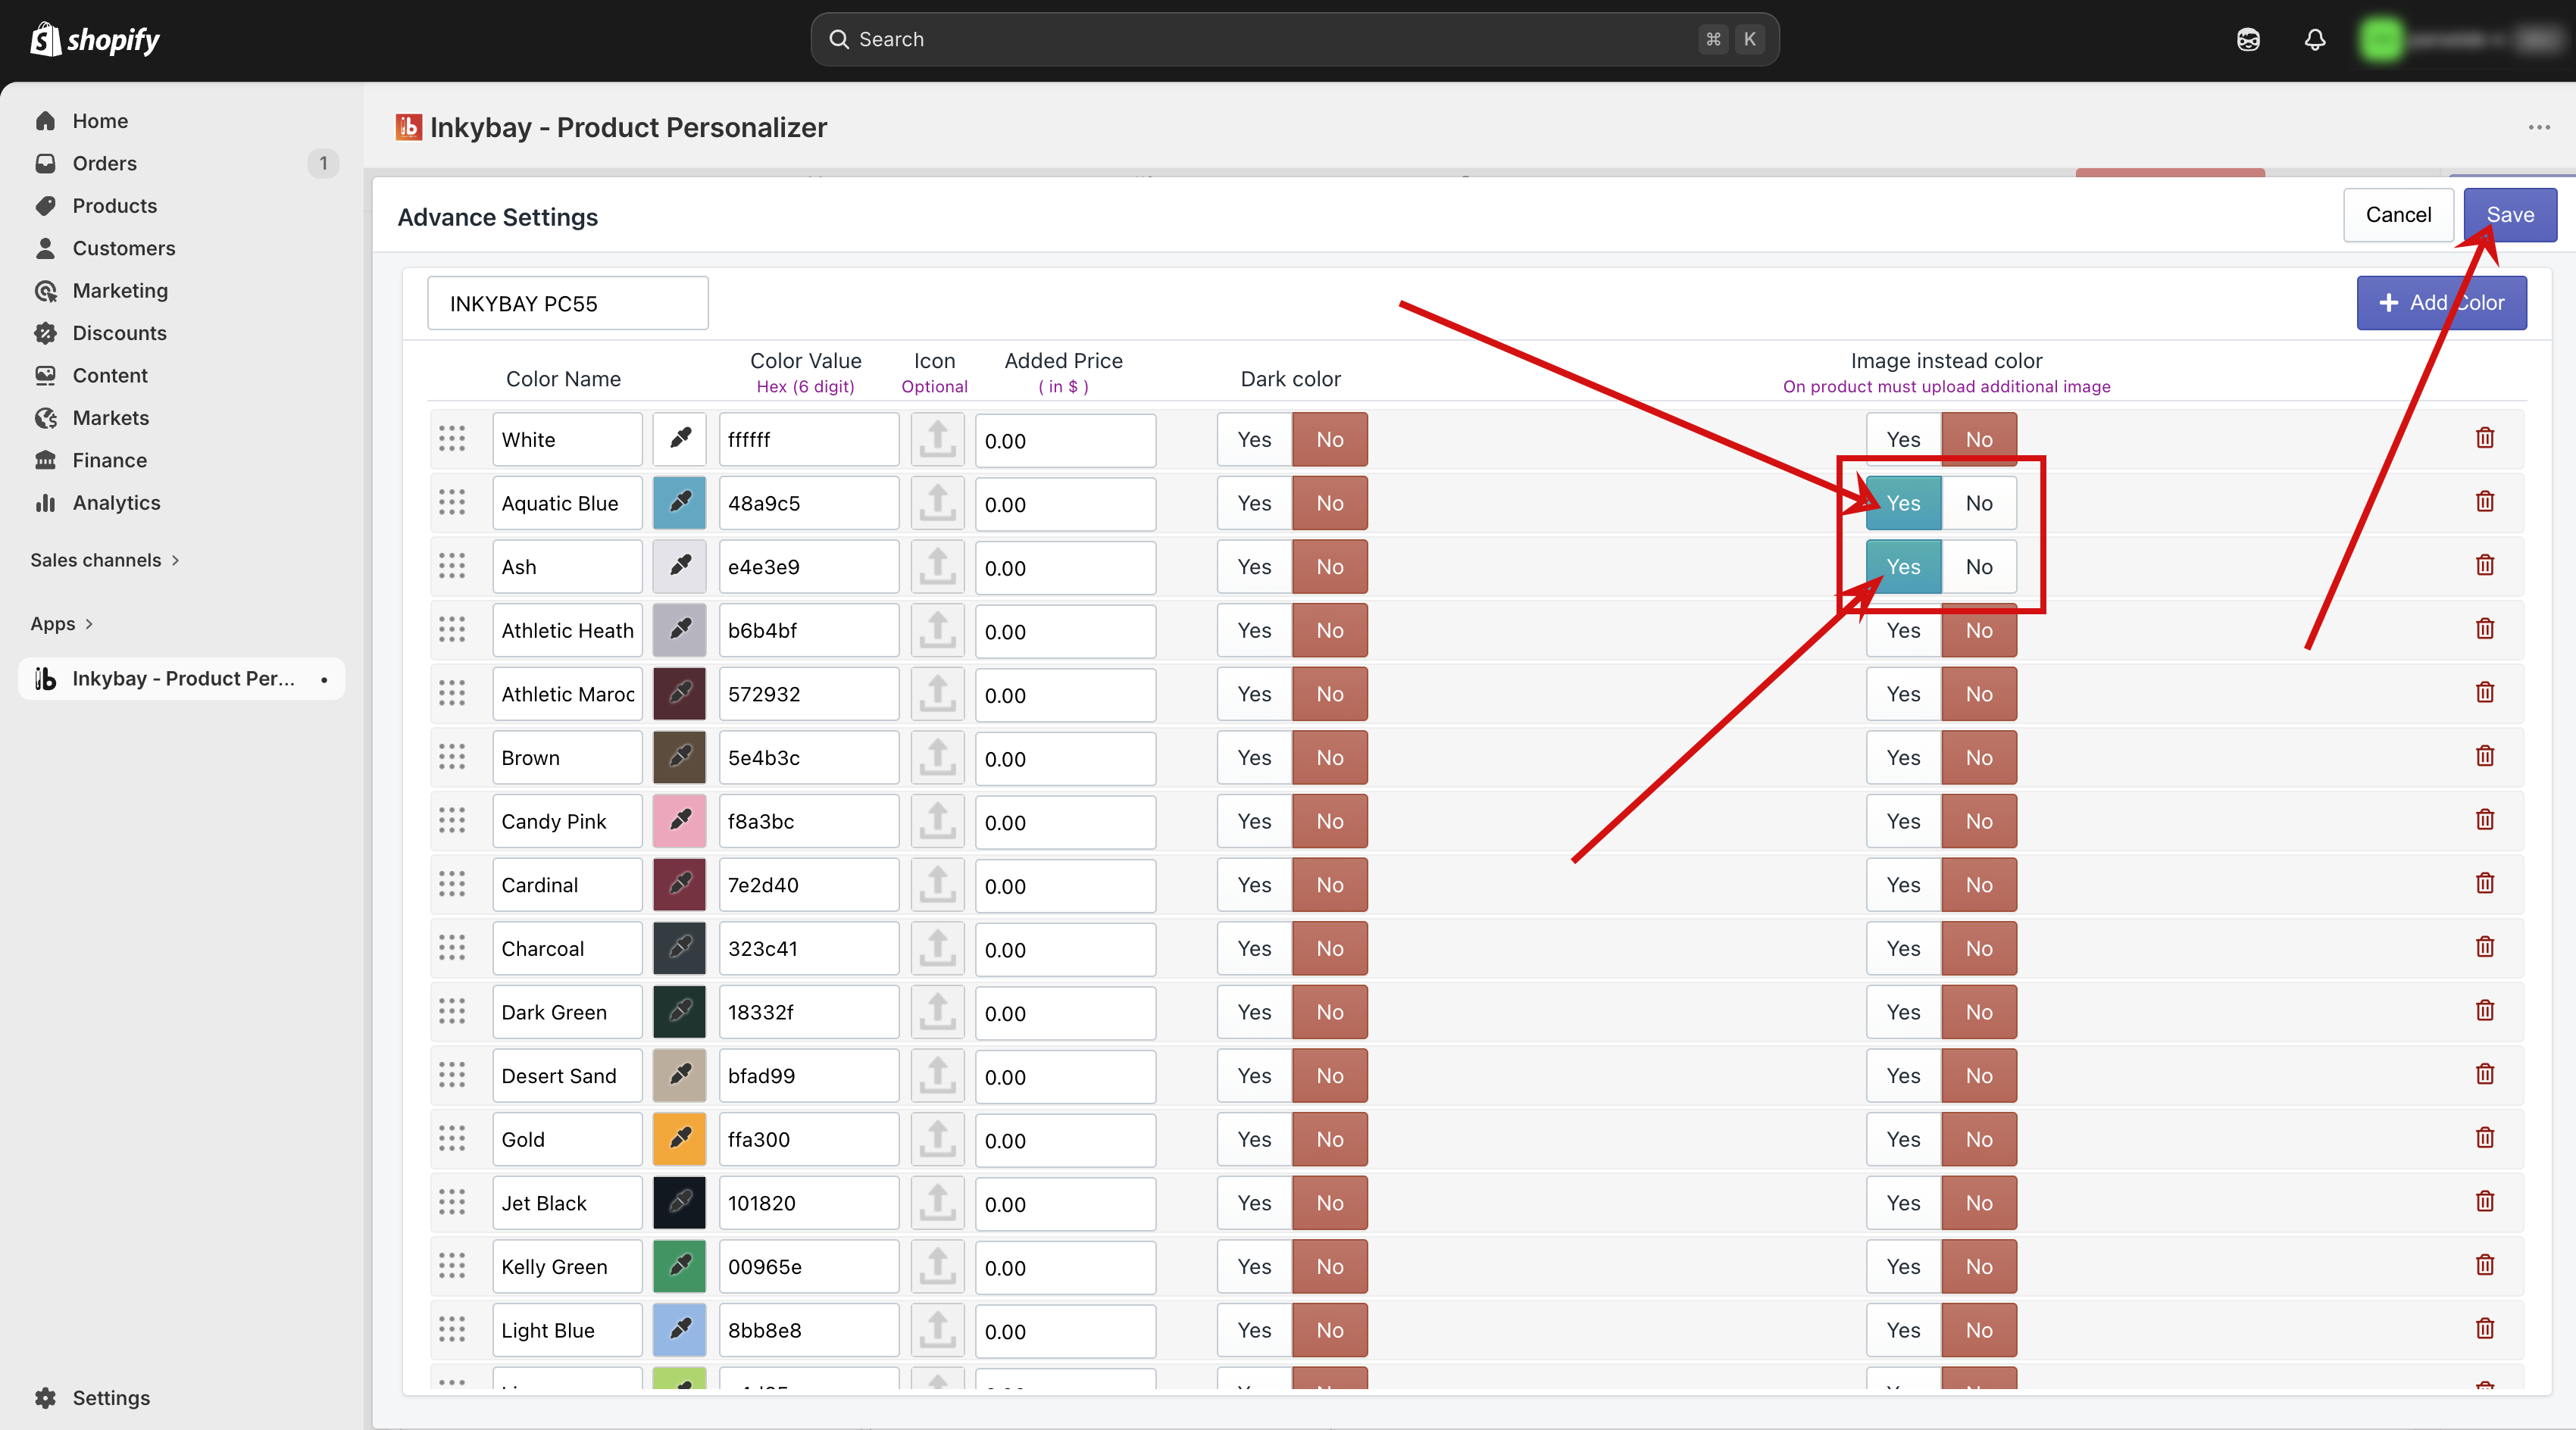
Find the option called "Use Image Instead of Color".
Turn the Image instead of color Option to YES
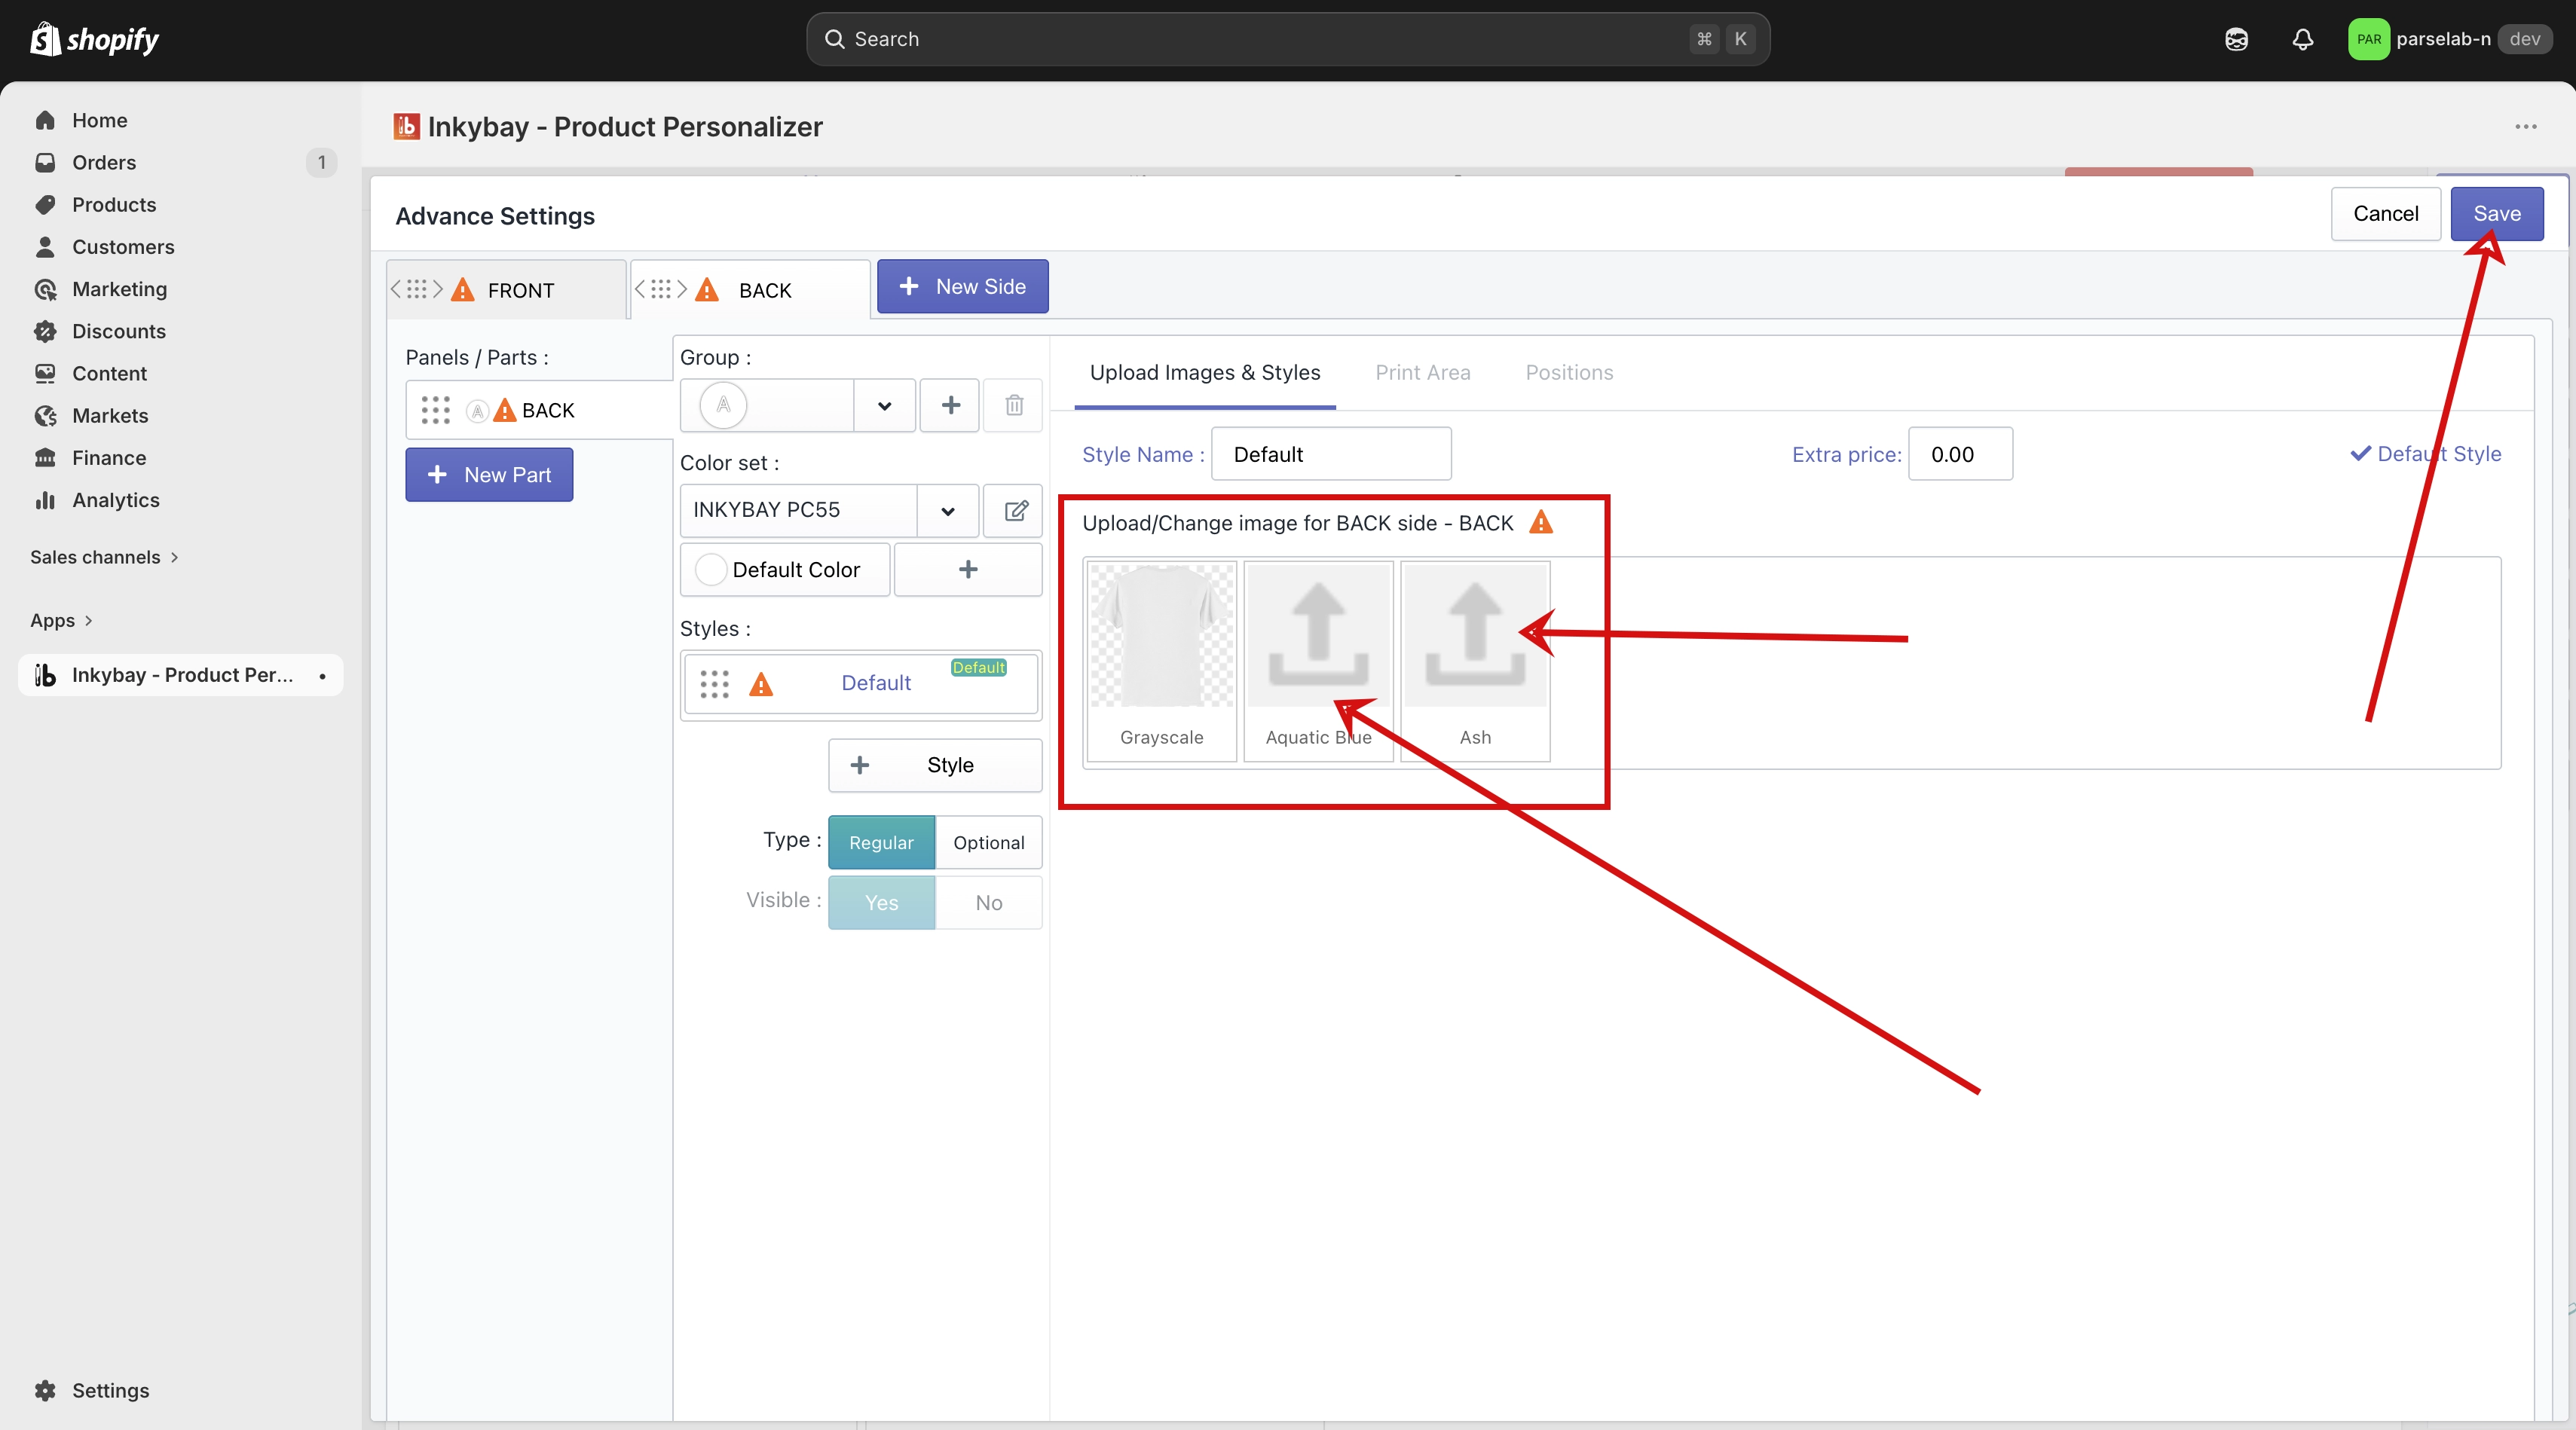
Once the Image instead of color option is enabled, and click on the save button, you will see an image upload field appear for each color variant.
Upload an Image for Each Variant
Add your own product image to each color variant. After uploading the images, click on the save button to save the changes.
🎯Note You can learn more about the Color Set feature in the Color Set guide. |
🎯IMPORTANT Note for Image Instead of the color option: Keep Image Sizes the Same. Because we offer one print area per product side, the print area must stay in the same position across all color variants. To make sure this works correctly, please upload images that are all the same size (same height and width) for every color variant. |
Here is a short review of everything covered in this guide:
•Upload your product image in Advanced Settings on the product edit page.
•Use a backgroundless grayscale PNG if you want automatic color variants.
•Use your own custom image per variant by enabling "Use Image Instead of Color" in the Color Set.
•Always upload images with the same height and width across all color variants.
Need more help? Feel free to contact us whenever you face any issues or need assistance. We’re available 24/7. You can also reach us:
InkyBay app Live chat
Support ticket from the InkyBay app
Email to support@productsdesigner.com