In Inkybay, Styles represent different visual variations of a product on each side, with each style defined by a separate product image upload. Styles help you show multiple versions of the same product (such as colors, designs, or appearances) within a single product setup.
Each style is assigned to a specific product side (e.g., Front, Back, Sleeve) and allows customers to switch between styles in the DesignLab.
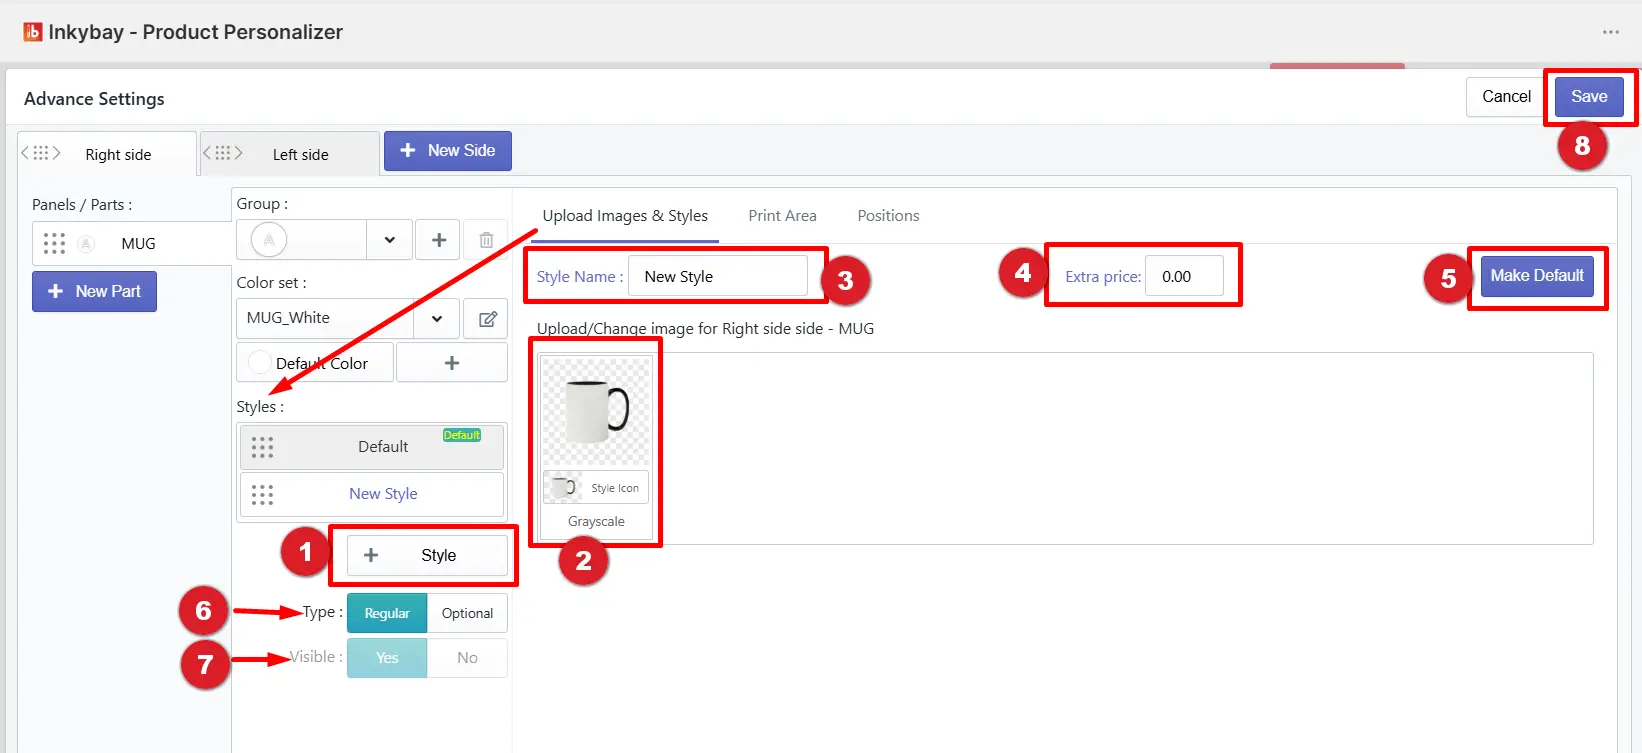
1. +Style: Click on the + Style button to add more styles of your product.
2. Upload Image: Upload an image for your added styles.
3. Style Name: You can change the style name from here.
4. Extra Price: If you want, you can add an extra price for your style. Same price will be added to all sides. When a customer adds any design, an extra price will be charged.
5. Make Default: You can make any style the default style. When you click on the " Customise It " button, the default style will load inside the designlab.
6. Type: You can make your style type "Regular or Optional". If the style type is regular, the style will be visible inside the designlab when the customer clicks on the "Change Style" button from edit color.
If the style type is optional, you will be able to change the visibility of the style to "Yes or No" inside advanced settings.
7. Visibility: Visibility controls how the style will appear inside the designlab. If the style type is regular, then the visibility will always be " Yes ", and the style will remain visible inside the designlab.
If the style type is optional, you can select the visibility. If the visibility is yes, the style will be visible as the regular style. But if the visibility is set as "No", the customer will be able to select the style, but the style will remain invisible in the designlab window.
8. Save: Click on the save button after making any changes.
Still facing difficulties or need help? Feel free to contact us. You can also reach us:
InkyBay app Live chat
Support ticket from the InkyBay app
Email to support@productsdesigner.com