Category
3 min to read
Last Update on 06 May 2026
How to Set Up Product Sizes
InkyBay's Product Size options let you offer multiple product sizes (both standard variations & custom measurements) and price them dynamically. Your customers can select from predefined size from product page as well as from the designLab.
How to manage product sizes for custom products
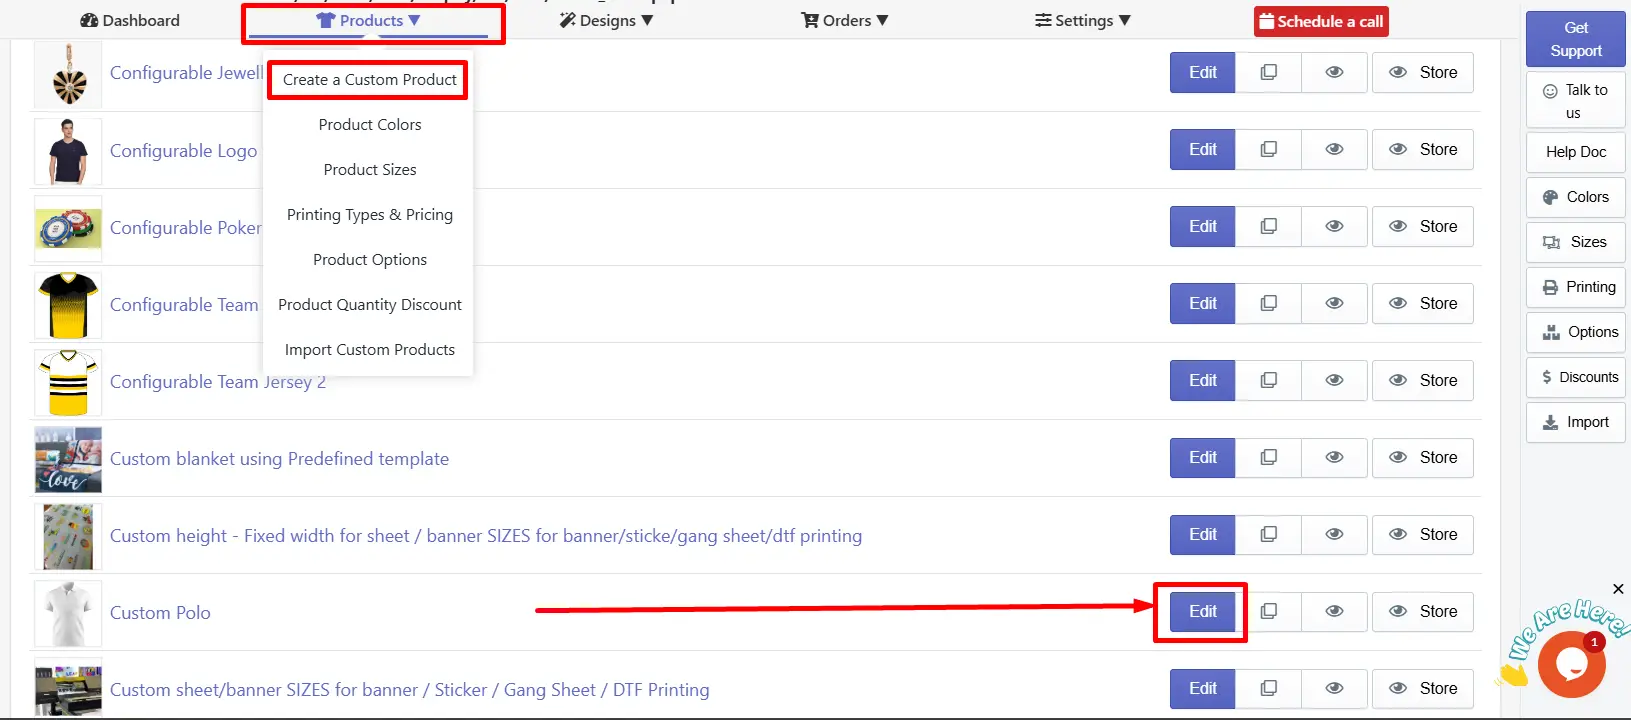
To Manage Sizes for your product, navigate to the Create a Custom Product option and click on the “Edit” button of your product.
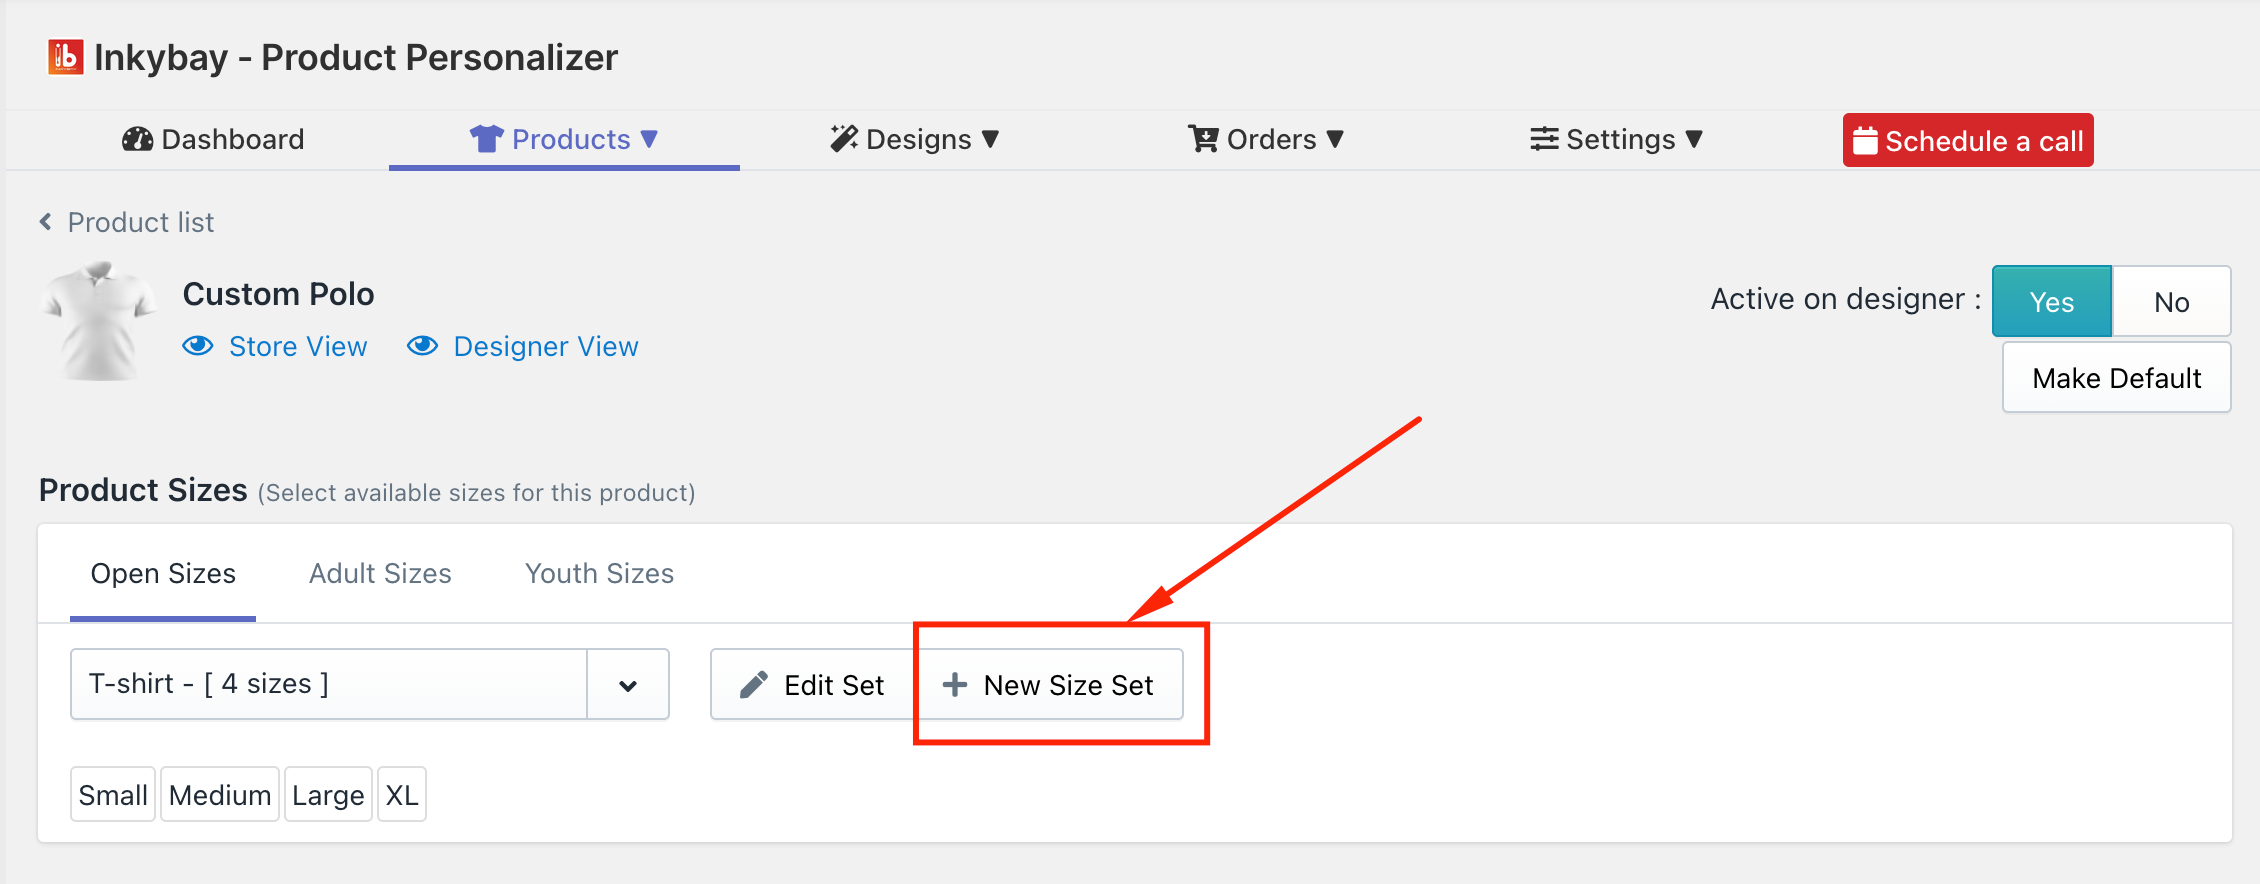
After navigating, find the Product Sizes section. Here, you can create and choose a suitable product size set for each product.

Key settings are:
(1) Size Category
You get three product size categories by default, including:
-
Open Sizes: Allows customers to enter any sizes here
-
Adult Sizes: This is the adult size category. There are some predefined sizes already set in this category. You can select from them or create a new size set
-
Youth Sizes: Dedicated, separate size categories for children’s products
(2) Available Size Set
Select available size sets by clicking the drop-down menu to activate the size set for your product.
(3) Display Size
This will show the available sizes according to the selected size set in (2).
(4) Edit Set / New Size Set
Click on Edit Set to edit any existing size set, and click on + New Size Set to create a new size set from scratch.
How to create a New Size set from Scratch
To create a New size set from scratch, follow these simple steps:
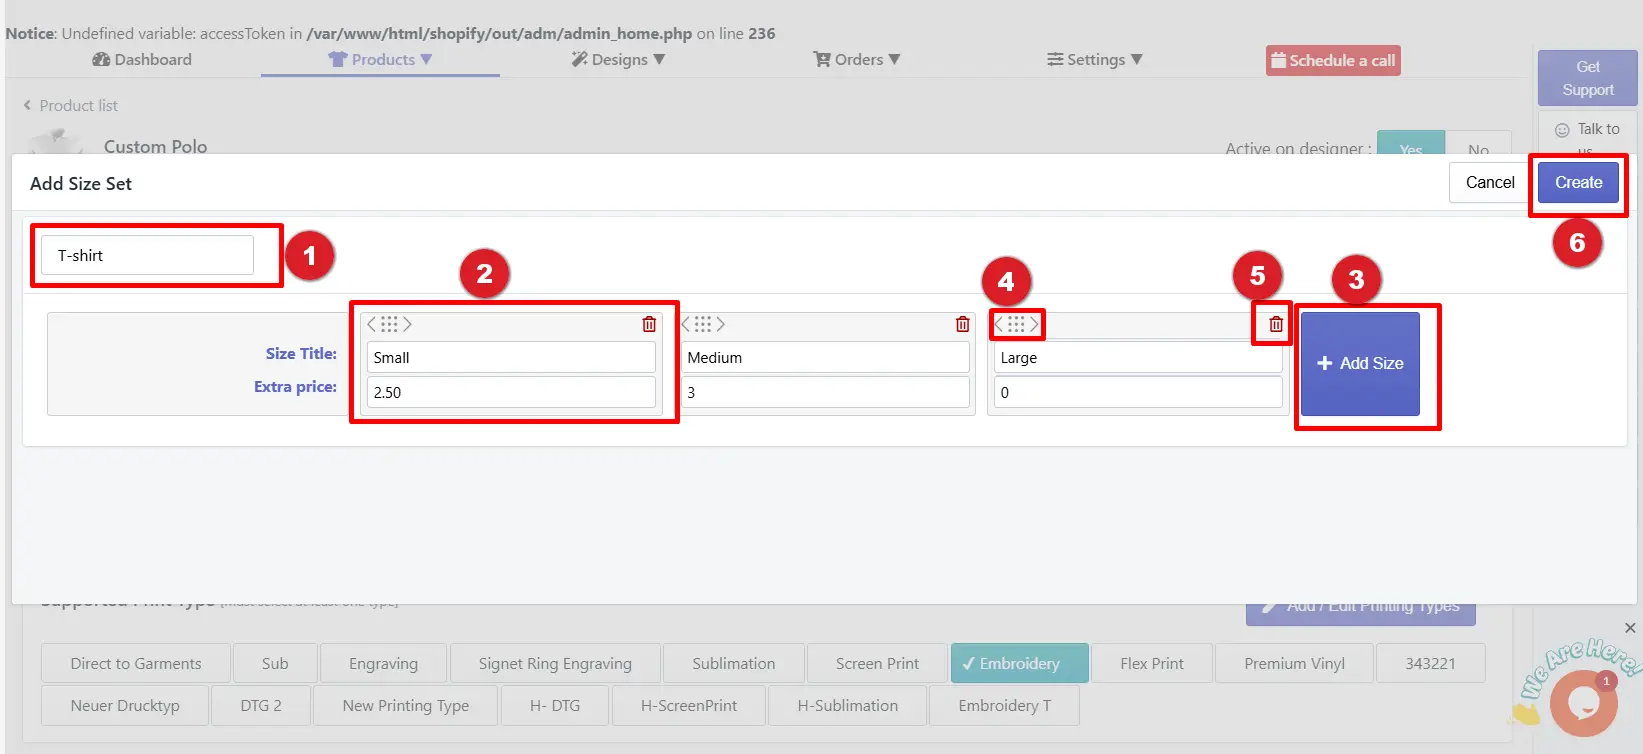
Click on the + New Size Set button under any category, then configure it according to the following settings.
(1) Size Set Name
Insert a Size Set name (for example, T-shirt as the size set name for a t-shirt product).
(2) Size Title & Extra Price
Insert the Size Title (e.g., Small, Medium, or Large) and add an extra price for a particular size, e.g., 2.50 for the small size (If any).
(3) + Add Size
Click the + Add Size button to create each additional size (e.g., expand the size range to XL, 2XL, 3XL, and so on).
(4) Reorder
If you want to reorder the sizes, click and drag the dotted icon to organize sizes according to your preferences.
(5) Delete
If you want to delete a size, you can delete that size by clicking on the red trash icon.
(6) Create
Click the Create button to save and create the new size set.
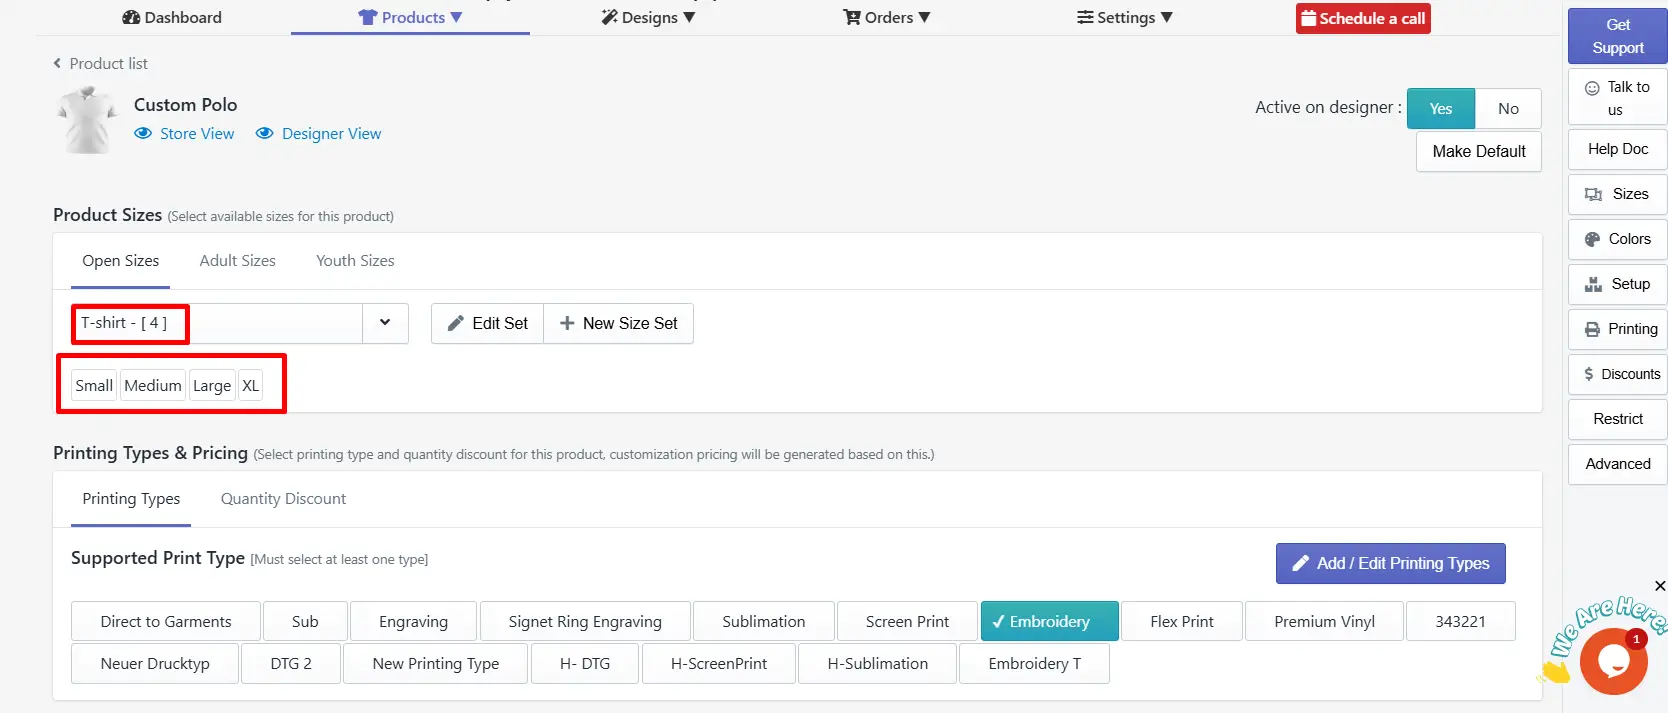
All is set! After clicking the Create button, the size set will automatically be assigned to your product. Moreover, once you create a size set, it will also be available for other products as well.
Still, facing difficulties or need help? Feel free to contact us. You can also reach us:
-
InkyBay app Live chat
-
Support ticket from the InkyBay app
-
Email to support@productsdesigner.com
Did this post help you?