InkyBay DocsInkyBay Docs
Submit a Ticket
shopify app store
  • Visit InkyBay Website
  • Privacy Policy
  • Terms of Service

© 2026 InkyBay. All rights reserved.

Powered by

ParseLab, LLC
  • category-iconGetting Started
  • category-iconProducts
  • category-iconDesigns
  • category-iconTemplates
  • category-iconConfiguration
  • category-iconPrinting
  • category-iconOrders
  • category-iconInventory Management
  • category-iconSettings
  • category-iconPackages
  • category-iconUninstallation
  • category-iconTutorials
  • category-iconFAQ
Category
  • category-iconGetting Started
  • category-iconProducts
  • category-iconDesigns
  • category-iconTemplates
  • category-iconConfiguration
  • category-iconPrinting
  • category-iconOrders
  • category-iconInventory Management
  • category-iconSettings
  • category-iconPackages
  • category-iconUninstallation
  • category-iconTutorials
  • category-iconFAQ
Configuration-icon Configuration
Create a Custom Product
2 min to read
Last Update on 06 May 2026

Set Up Dynamic Prices for Print Areas and Styles

Dynamic pricing allows you to adjust the product price automatically based on selected print areas and style options. This is useful when different areas (e.g., front, back, sleeve) or have different costs.


Step 1: First, navigate to Product and scroll down to  Product Setup for Design Tool

Step 2: Click on Advanced settings to create the dynamic prices for the print area and different styles. 

Step 3: Print Area Pricing

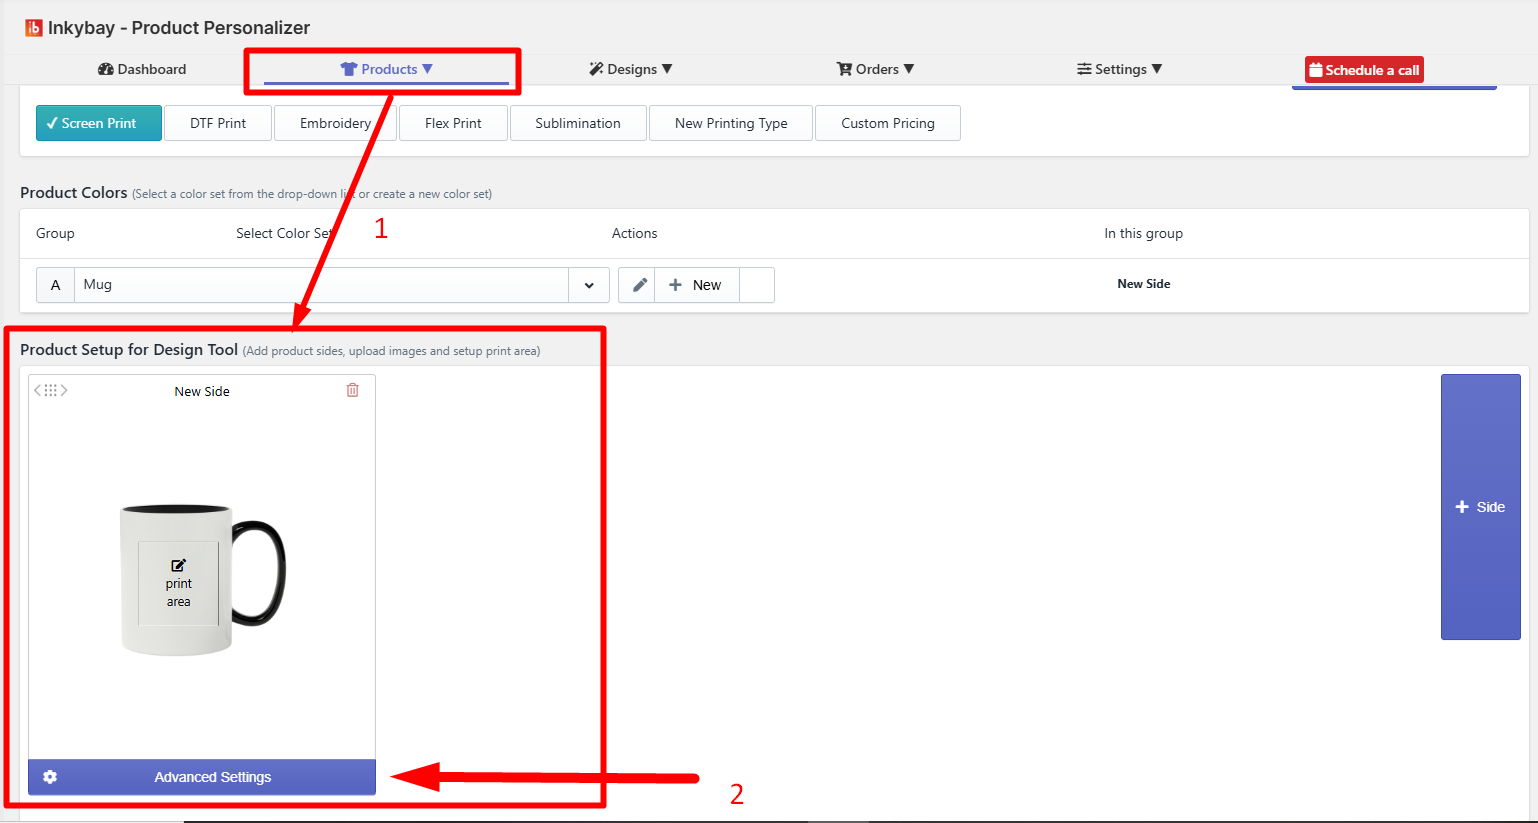
You can assign separate pricing for each print area of your product.

  • Print Area: Choose the specific area (e.g., Front, Back, Left Sleeve).

  • Extra Price: Enter the additional cost for that print area.

  • Save the changes.

Step 4: Styles with Dynamic Pricing Across Multiple Sides

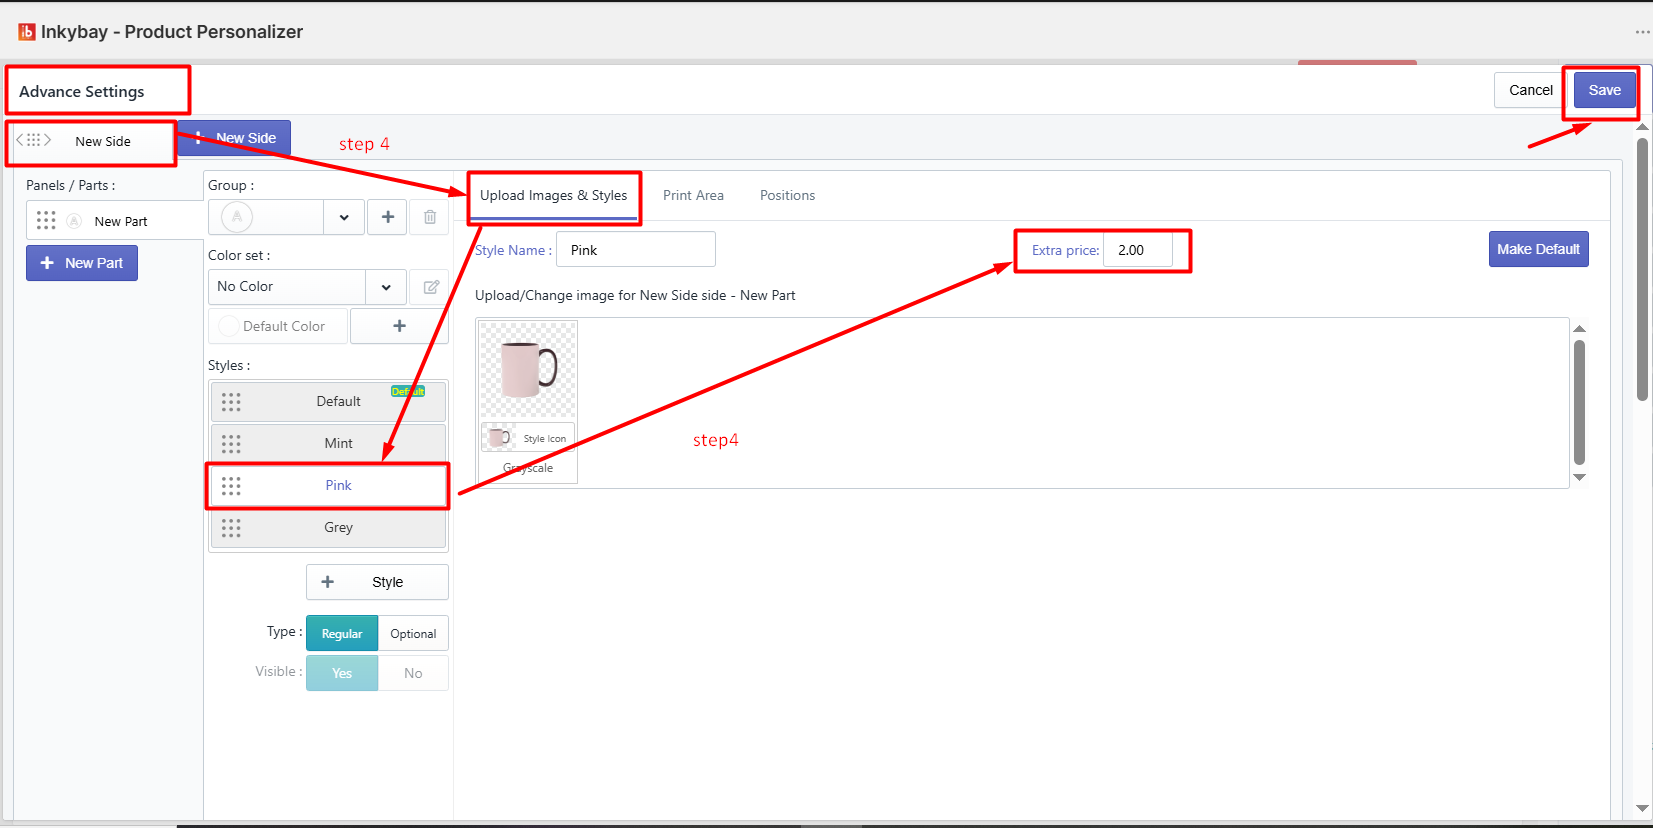
You can assign separate pricing for each side style of your product.

  • For each side from Upload images & styles, choose the specific style & add an extra price for that style (e.g., New side-mint).

  • Save the changes.

In customizable products, each print area (or side, such as Front, Back, or Sleeves) can have its own set of style options. These styles may carry different pricing depending on the side, or the same pricing across all sides, based on your product setup.

This flexibility allows you to accurately reflect real-world costs while giving customers more control over customization.


Still, facing difficulties or need help? Feel free to contact us. You can also reach us:

  • InkyBay app Live chat 

  • Support ticket from the InkyBay app

  • Email to support@productsdesigner.com


Did this post help you?
Previous article
How to Set Up a Custom Print Area
Next article

How to Set Up Product Styles

Related Articles

  • How to Create a Custom Product
  • How to Create Custom Product Images
  • How to Set Up Print, Bleed, and Mark Area
  • How to Set Up a Custom Print Area
  • How to Set Up Product Styles
  • How to Set Up Product Sizes
  • How to Add Extra Price for Sizes
  • How to Set Up Product Colors
  • How to Add Extra Price for Colors