InkyBay DocsInkyBay Docs
Submit a Ticket
shopify app store
  • Visit InkyBay Website
  • Privacy Policy
  • Terms of Service

© 2026 InkyBay. All rights reserved.

Powered by

ParseLab, LLC
  • category-iconGetting Started
  • category-iconProducts
  • category-iconDesigns
  • category-iconTemplates
  • category-iconConfiguration
  • category-iconPrinting
  • category-iconOrders
  • category-iconInventory Management
  • category-iconSettings
  • category-iconPackages
  • category-iconUninstallation
  • category-iconTutorials
  • category-iconFAQ
Category
  • category-iconGetting Started
  • category-iconProducts
  • category-iconDesigns
  • category-iconTemplates
  • category-iconConfiguration
  • category-iconPrinting
  • category-iconOrders
  • category-iconInventory Management
  • category-iconSettings
  • category-iconPackages
  • category-iconUninstallation
  • category-iconTutorials
  • category-iconFAQ
Products-icon Products
Custom Products
1 min to read
Last Update on 06 May 2026

How to Add Multiple Sides For a Product

In Inkybay, you can add and customize multiple sides of a product (such as front, back, sleeves, etc.) to give customers a complete design experience.


Follow the steps below to add multiple sides for a product:


Step 1: First, navigate to the product and scroll down to Product Setup for Design Tool to create a side for your product.

Step 2: Click the “+ Side” button on the right panel to create a new side. By default, one side will be created.

Step 3: Also you can rename the side. 

Step 4: Also, from advanced settings, you can create or edit the sides and save the changes.


Why Use Multiple Sides?

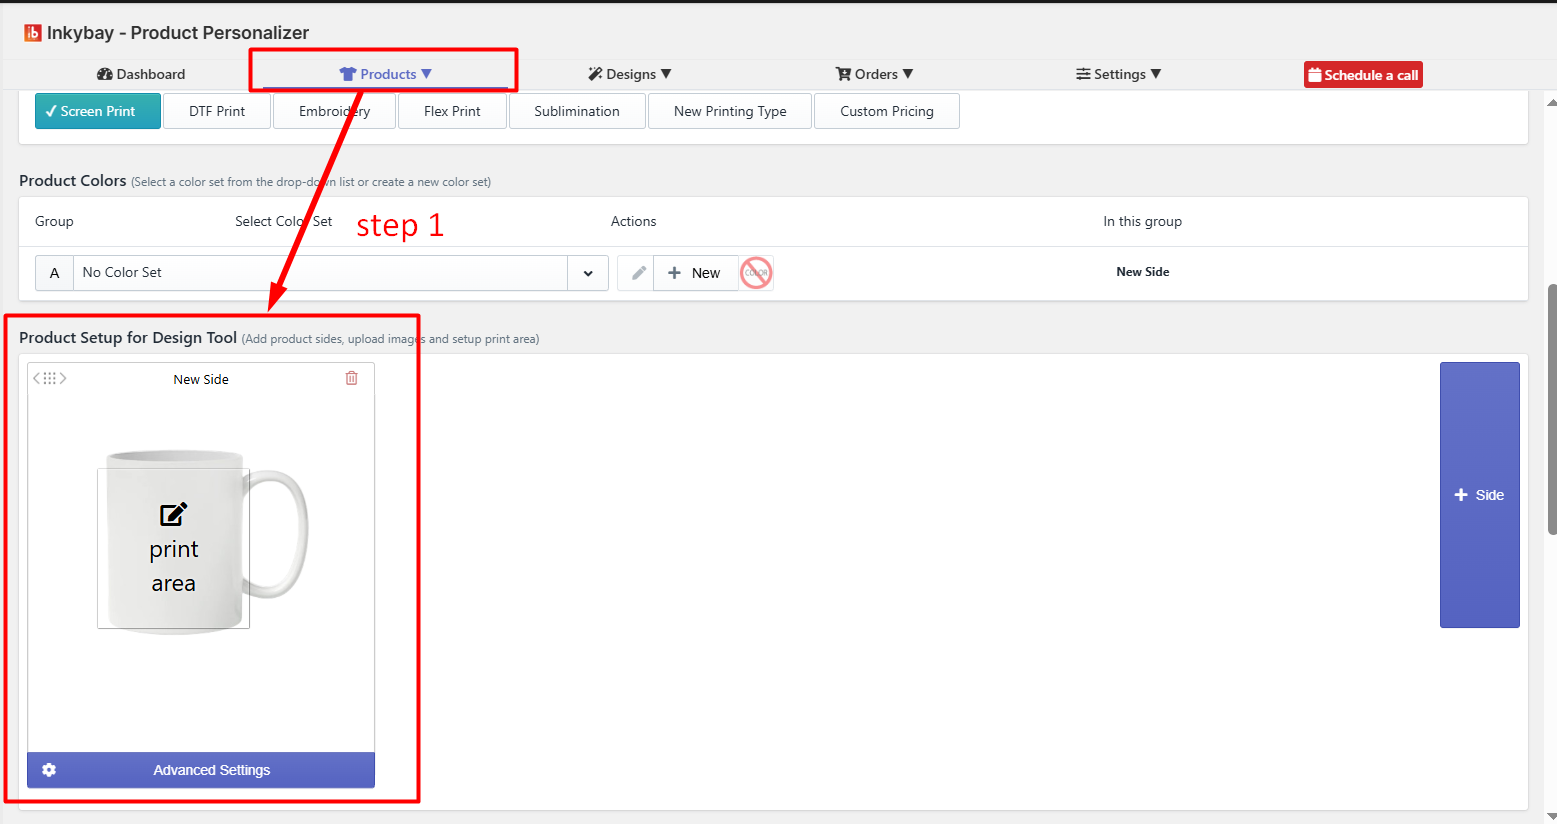
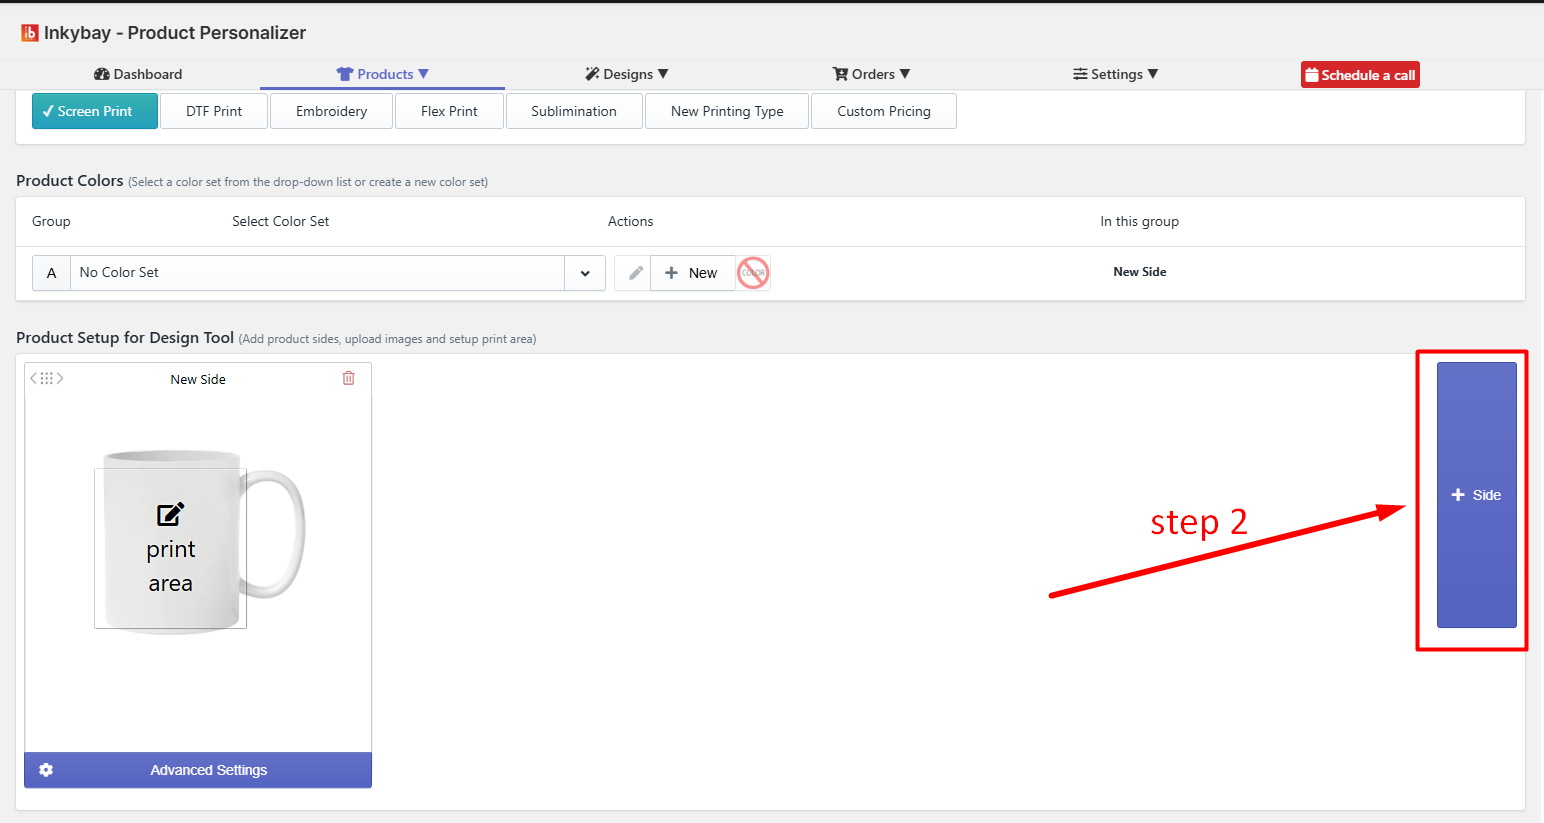
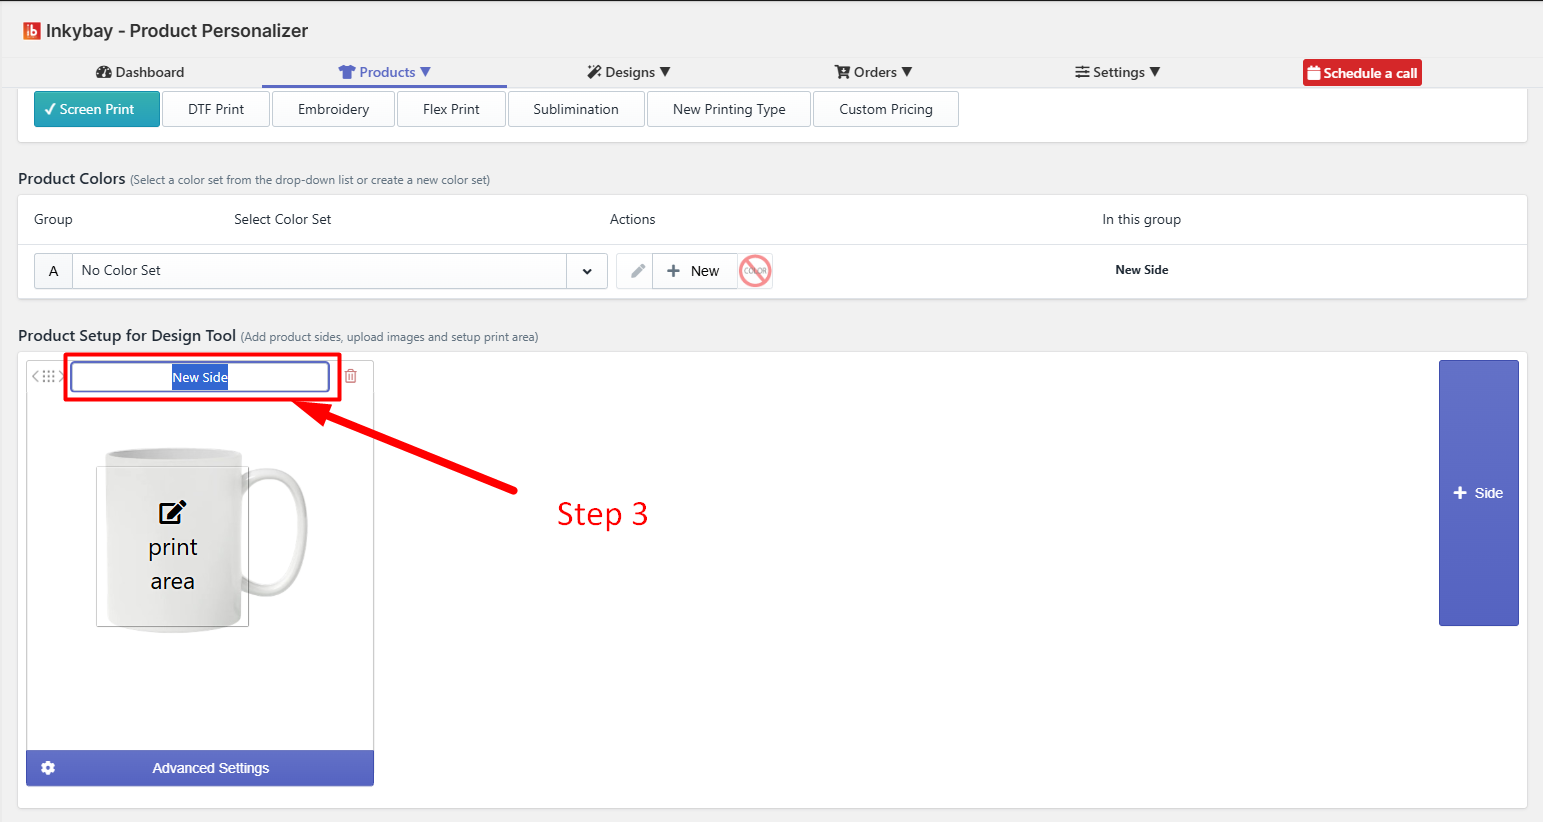
This feature is useful for products in which you want to offer customization option in multiple sides like:

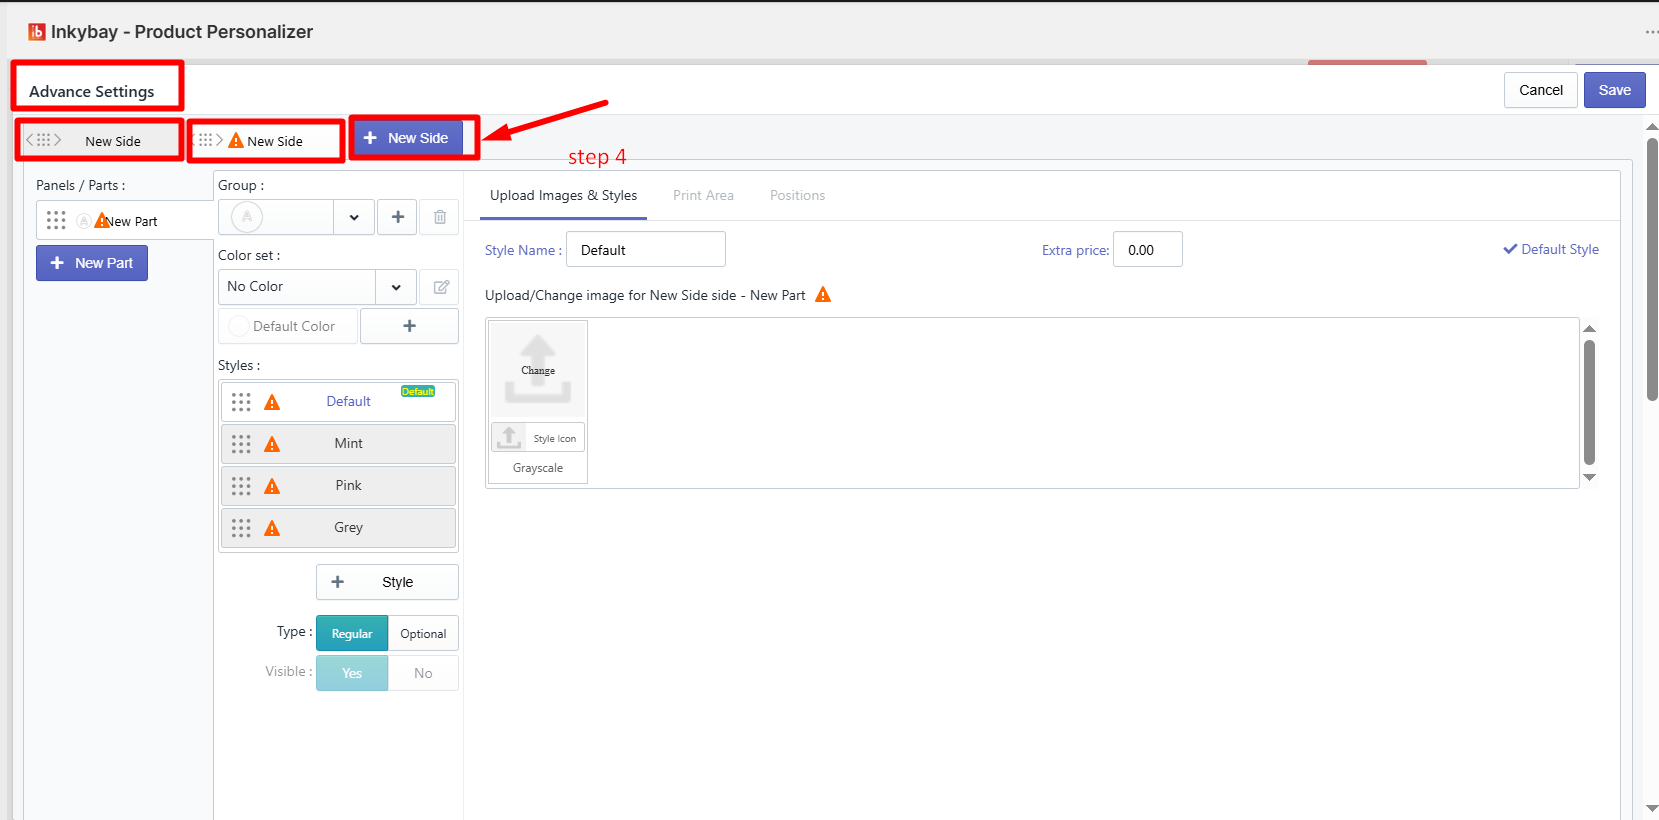
  • T-shirts (front , back, left sleeve & right sleeve printing)

  • Hoodies (front, back, sleeves)

  • Business cards (front & back)

Feel free to contact us whenever you face any issues or need assistance. You can also reach us:

  • InkyBay app Live chat 

  • Support ticket from the InkyBay app

  • Email to support@productsdesigner.com

Did this post help you?
Previous article
How to Set Up a Custom Print Area
Next article

How to Set Up Product Styles

Related Articles

  • How to Create a Custom Product
  • How to Set Up Product Sizes
  • How to Add Extra Price for Sizes
  • How to Set Up Product Colors
  • How to Add Extra Price for Colors
  • How to Create Custom Product Images
  • How to Set Up Print, Bleed, and Mark Area
  • How to Set Up a Custom Print Area
  • How to Set Up Product Styles
  • Set Up Dynamic Prices for Print Areas and Styles