Category
3 min to read
Last Update on 06 May 2026
How to Set Up Print, Bleed, and Mark Area
In InkyBay, print areas include Fixed Areas and Indication Areas (mark area).
1. Fixed Areas
Fixed areas are critical regions that define where the design can and can not go for safe printing. Square shape print area (changeable), rectangular or custom print area.
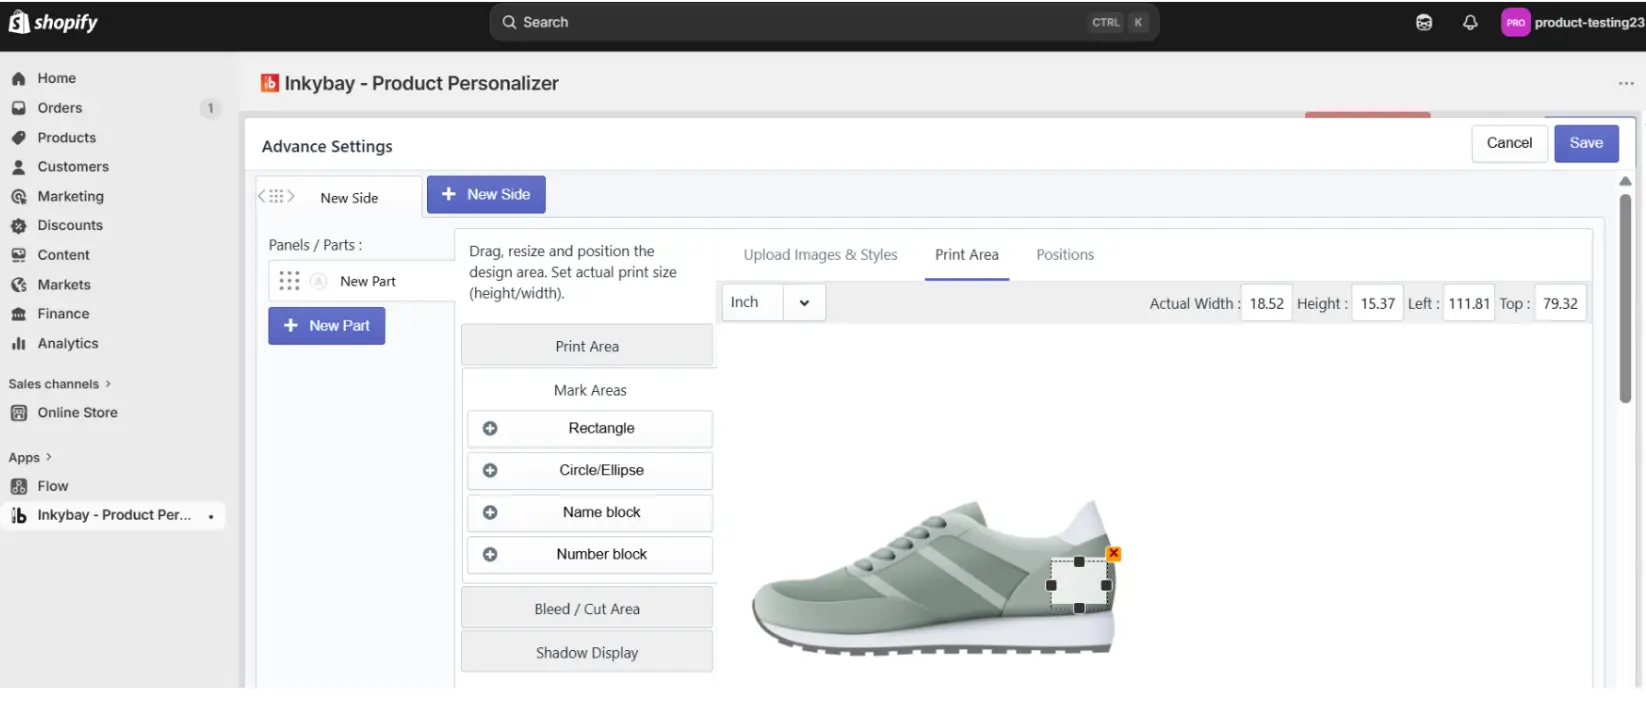
a) Print area
The Print Area feature in InkyBay allows you to define the exact region on a product where customers can place and customize their designs. This ensures accurate placement and helps maintain print quality by restricting design elements within a specific boundary.
Step 1: Open Product Advanced Settings
From your InkyBay dashboard, navigate to your desired product and enter the Advanced Settings section.
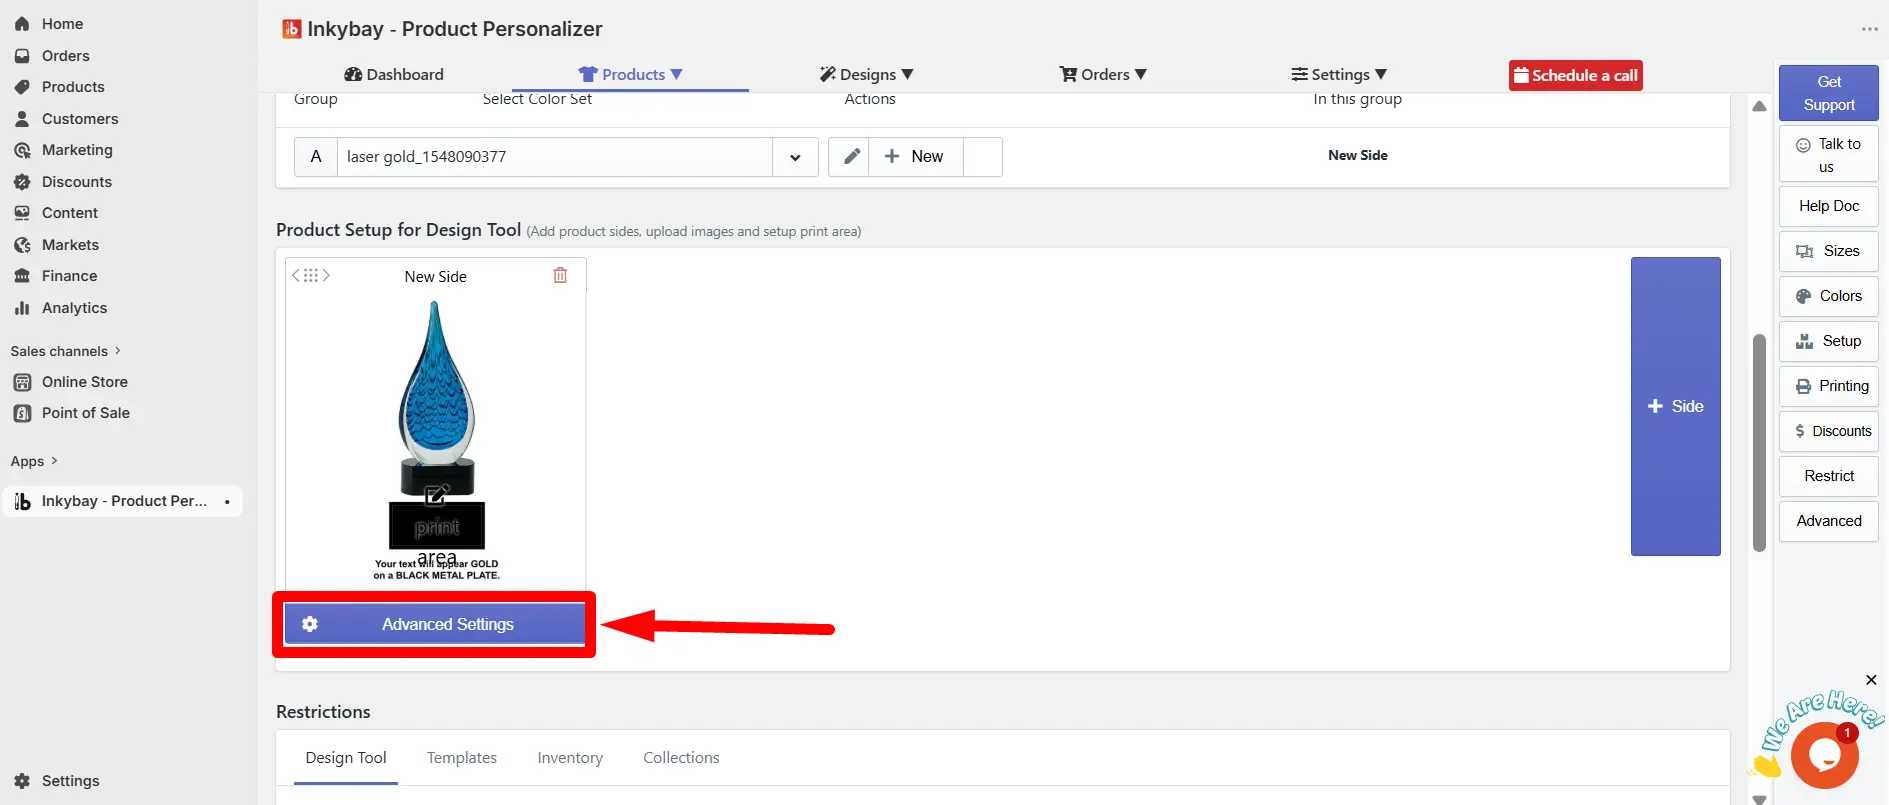
Step 2: Go to Print Area
Within the Advanced Settings, locate and select the Print Area option.
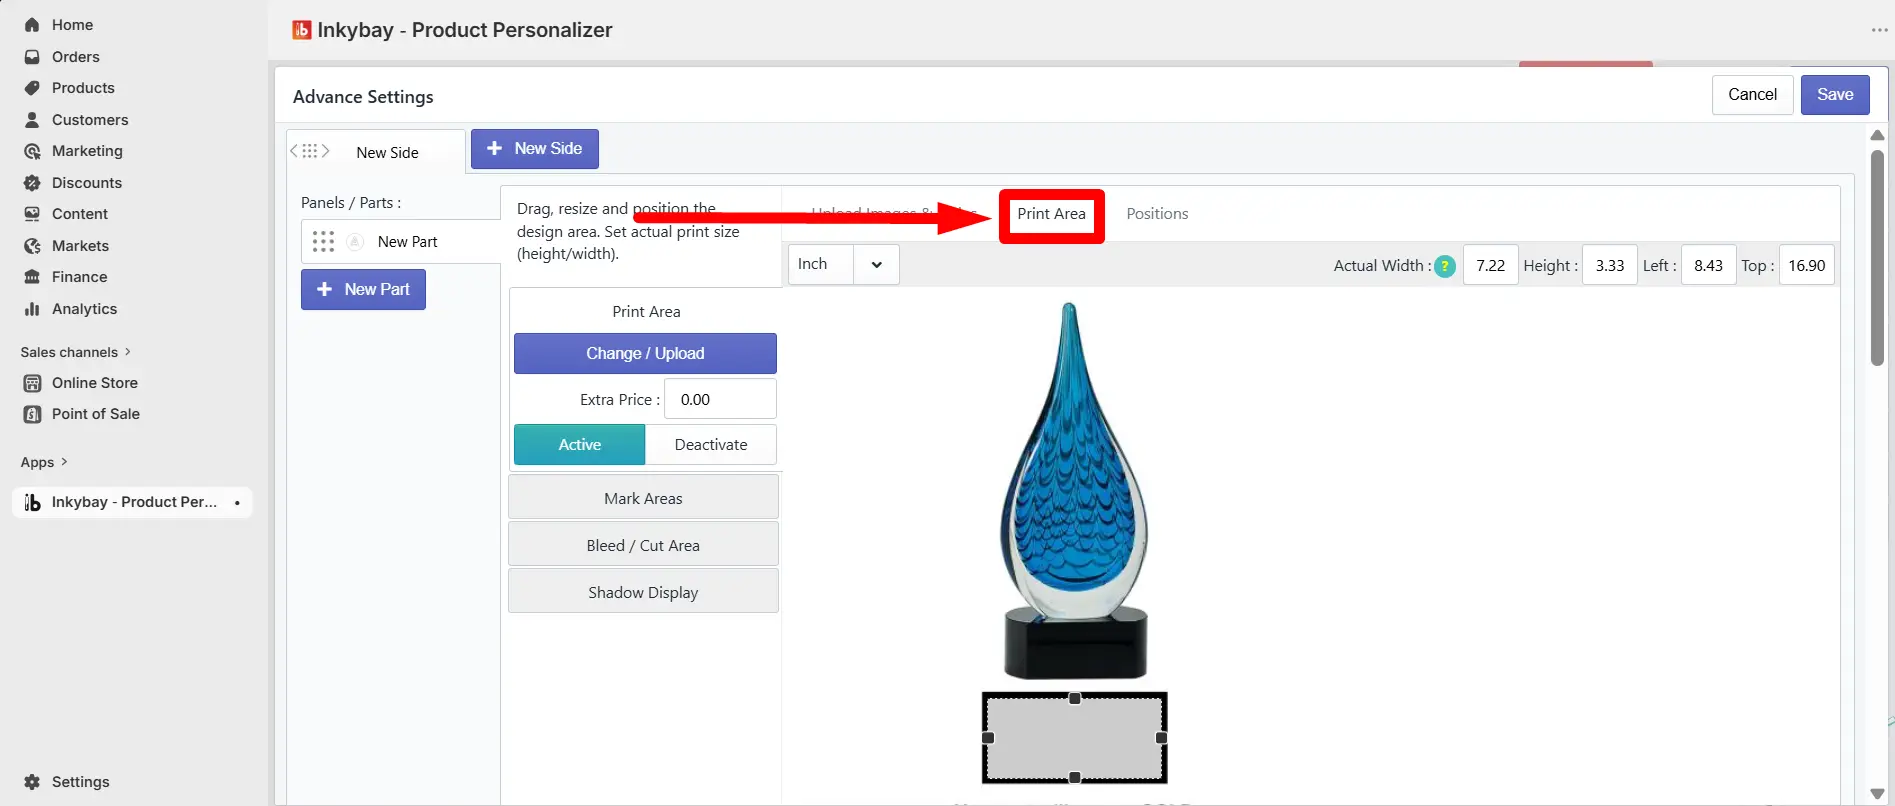
Step 3: Apply the Print Area
- Define the placement of the print area on your product image
- Adjust the size and position according to your requirements
- You can drag the print area to adjust its position, and also you can set actual width of your print area and change the height to adjust the position.
- Ensure the area aligns with where printing should occur
This will determine where customers can add and customize their designs on the product.
Step 4: Save Changes
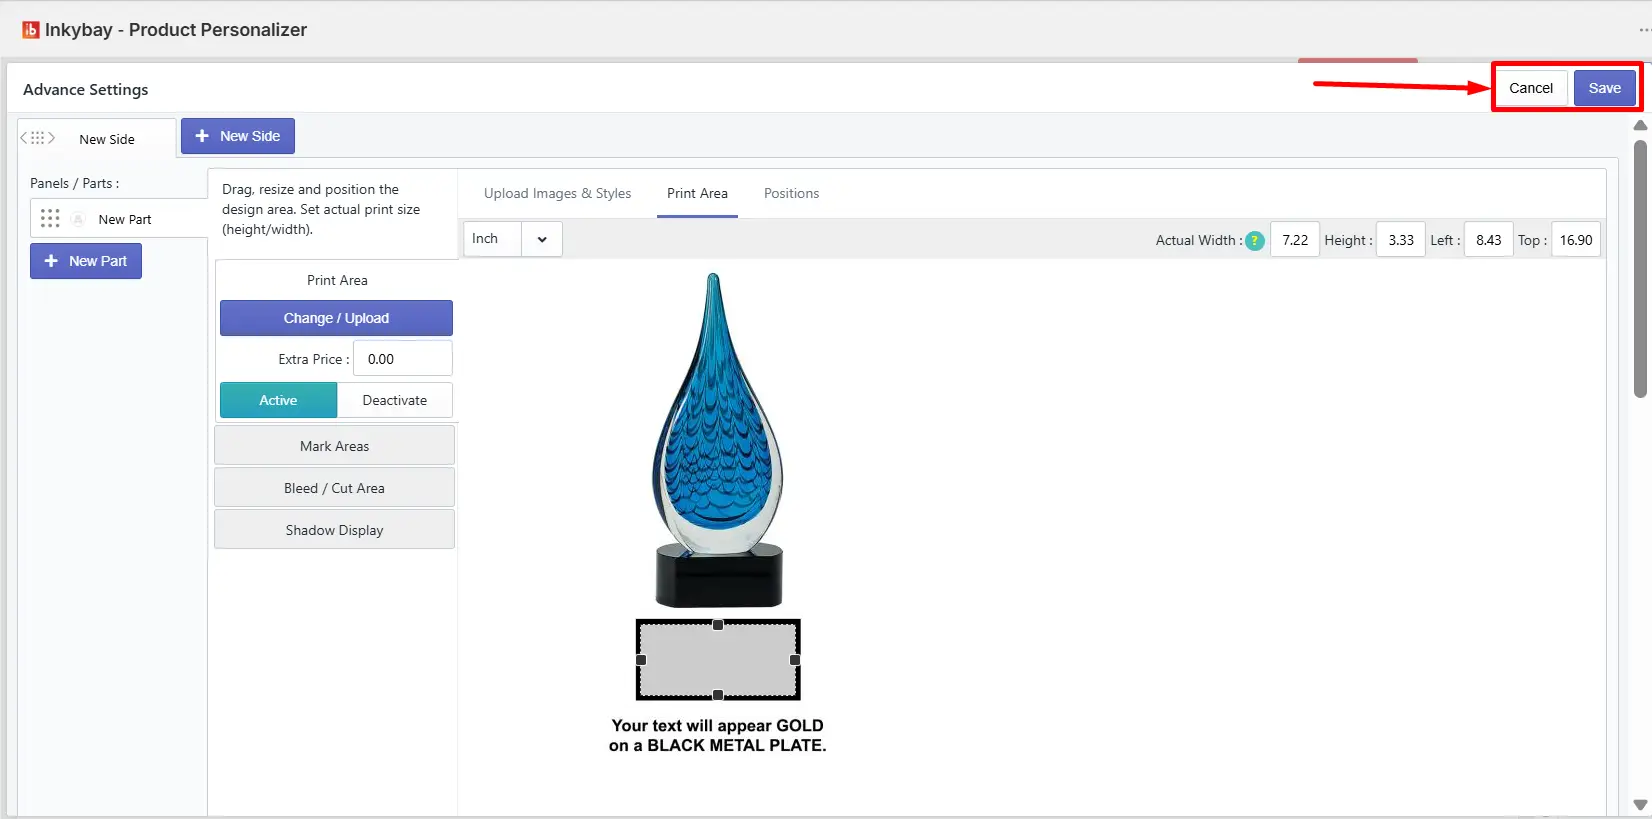
Once you have set the print area correctly, click Save to apply the changes.
2. Indication Areas(Bleed Area/Mark Area)
Indication areas guide the customer in designing without affecting printing.
a) Bleed / Cut area
You will get nkyBay’s bleed or cut area option within the Advanced Settings in the Product Customization feature.
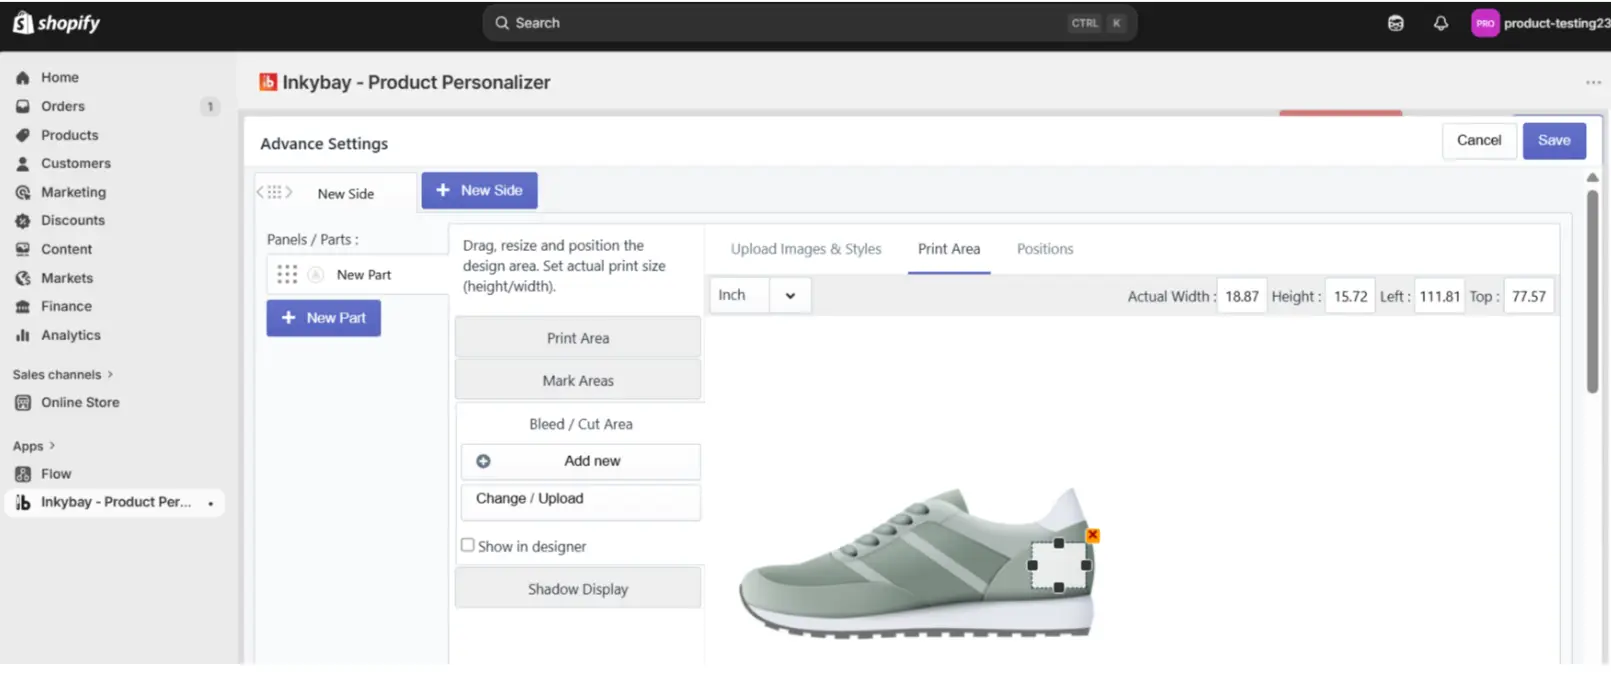
InkyBay’s bleed or cut area option allows you to define a specific and printable area on products, ensuring designs extend correctly beyond the edges for trimming. It is the extra space around the outside of your print area that will be cut off during production.
The bleed area won’t affect your design because it won’t be visible in the design lab. You’ll get it with your order file.
💡Important
|
b) Mark Area
A marked area usually helps you to mark the print area to show inside the designlab. Your customer easily understands how much space is available for adding the design.
For example, a t-shirt, mug, or bag, print area can be in different position on each product. You can mark the area where customers can add designs, text, or graphics.
💡Important
|
Still, facing difficulties or need help? Feel free to contact us. You can also reach us:
InkyBay app Live chat
Support ticket from InkyBay app
- Email to support@productsdesigner.com
Did this post help you?