Category
6 min to read
Last Update on 06 May 2026
How to Set Up Product Colors
With Inkybay, you can offer your customers unlimited color options for a single product or a live color palette. For premium colors, you can charge extra.
First of all, you have to upload a solid (background-less white color PNG format image of the product with proper shadow and lighting) image of the product in the product settings.
It will be named as grayscale in the Side settings. Your customers can choose any given color on the designer window, and Inkybay will colorize the uploaded grayscale image with that color code (color value) and preview the product in that selected color. This method works best for solid-type product colors.
You can create product colors in two ways:
-
Access to Products > Product Colors from the main navigation. Or,
-
While creating custom products, scroll down to the Product Colors section.
Create a color set for a specific product
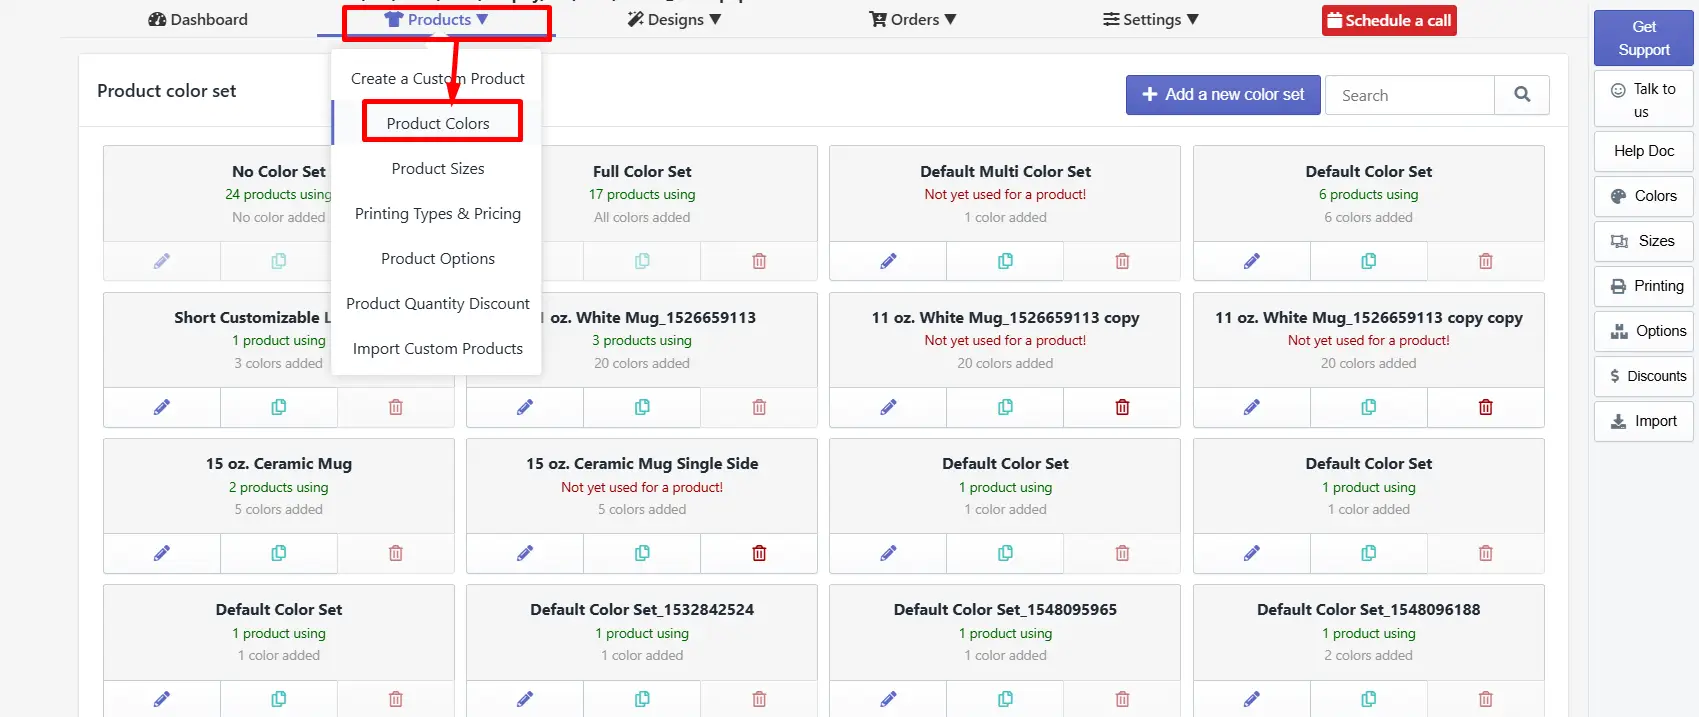
Step 1: Hover over the Products option and click Product Colors.
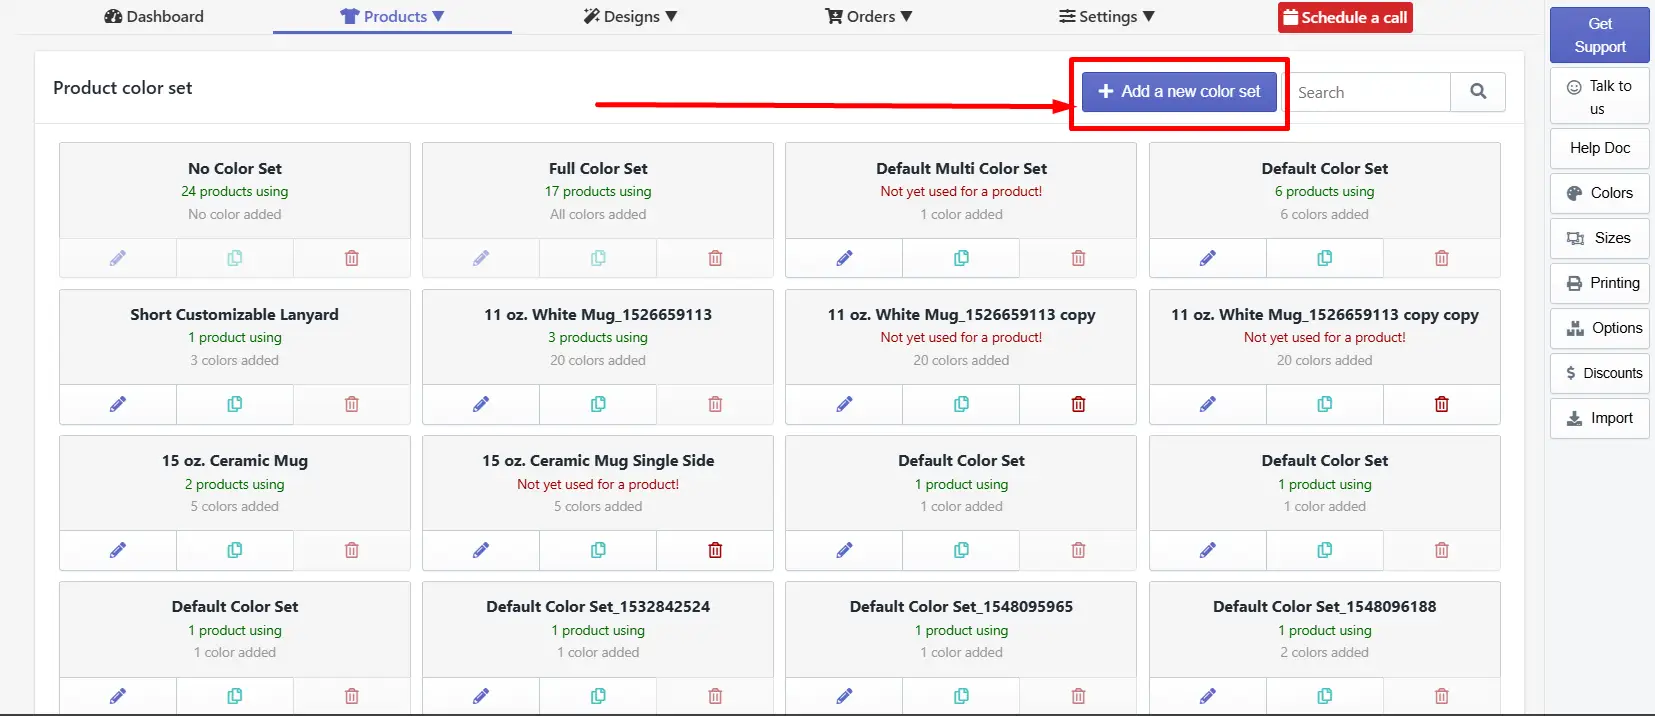
Step 2: Click the + Add New Color Set Button to create from scratch.
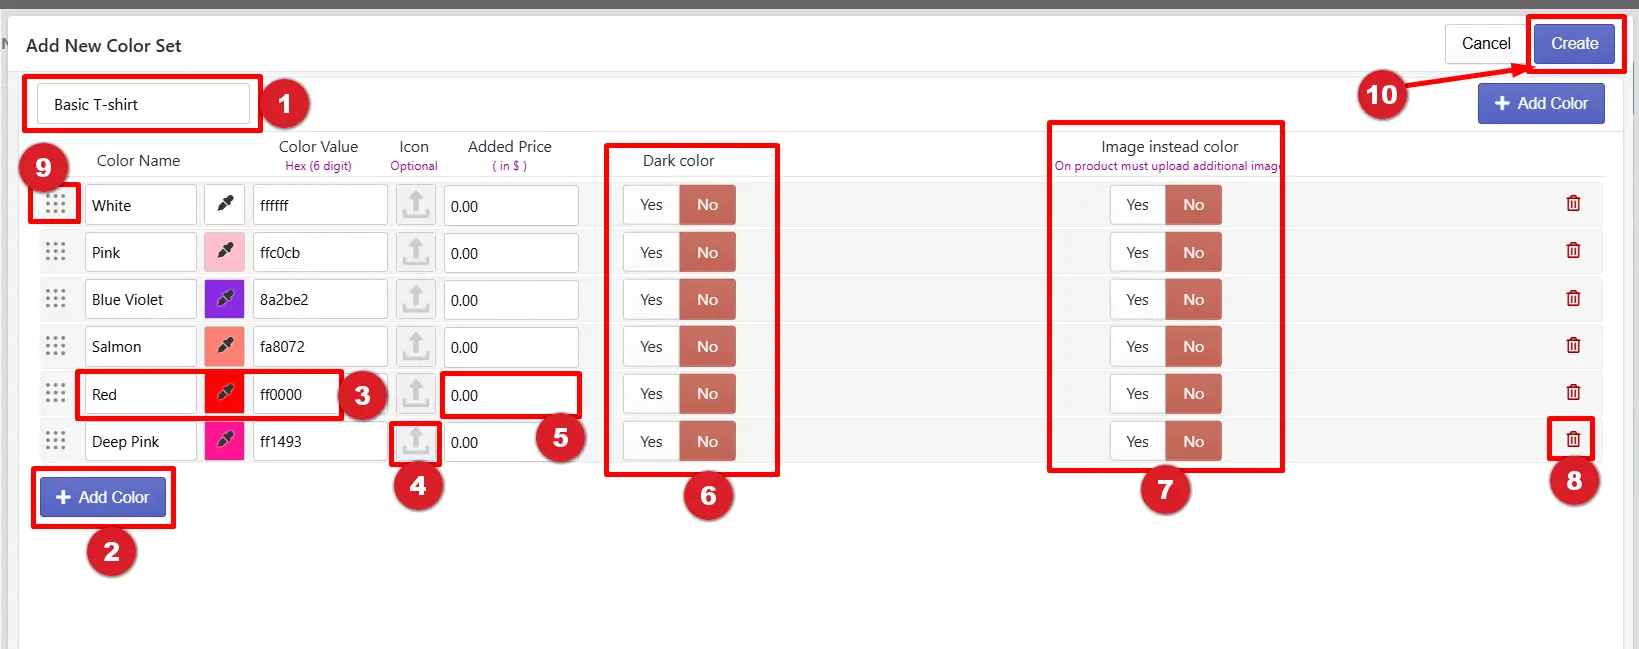
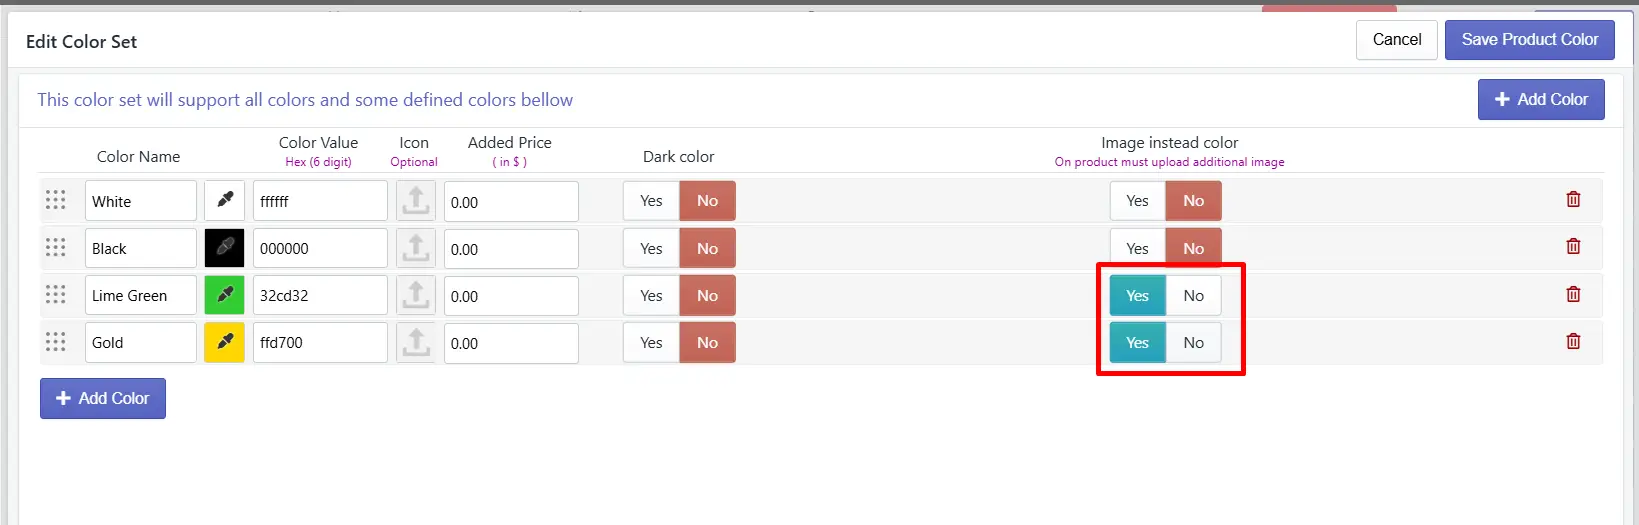
Step 3: Insert the color set name, hex code, image, and other settings to create a color set.
-
Color set name - Enter a color set name to assign to a product. These colors will appear in the design tool so customers can choose their preferred color.
-
+ Add Color - Click the button to add a new color row to the set. Repeat until all required colors have been added.
-
Color Value (hex code) - Enter a 6-digit hex code for a specific color. If you don't have any hex code, click the color picker icon to select from the color palette. [Note: Don't include the "#" symbol in the color value.]
|
💡Important
|
-
Icon - To change the display of the color, you can add a custom icon here. This icon will appear on the product page and inside the designlab.
-
Added Price - Enter an additional charge for a premium or specific color. [Important: This price is added on top of the base product price when a customer selects this color.]
-
Dark Color - Select Yes if this color should be printed as a dark color, or No for a light color.
|
💡Important Set custom pricing for light and dark product colors under Printing Type. |
-
Image Instead of Color - If you have a full-color image of the product, select Yes. For this, you must import a separate product image of that color in product settings.
-
Trash icon - Click the trash icon in the color row you want to remove permanently from the color set.
-
Reorder - Click and drag the dotted grid handle of any color row to reorder it within the list. Colors appear in the design tool in the exact order shown here.
-
Create - Click the Create button to save all changes to this color set.
Step 4: Assign the color set to a specific custom product.
For this, access to the Products > Create a Custom product. Click on the edit button to access the product setup page. Scroll down to the Product Colors section and select the color set. Preview the color set from the designer view.
Create a color group for a custom multi-panel product
Step 1: Access the Create a Custom Product Option page and scroll down to Product Colors.
Here, you'll see several settings:
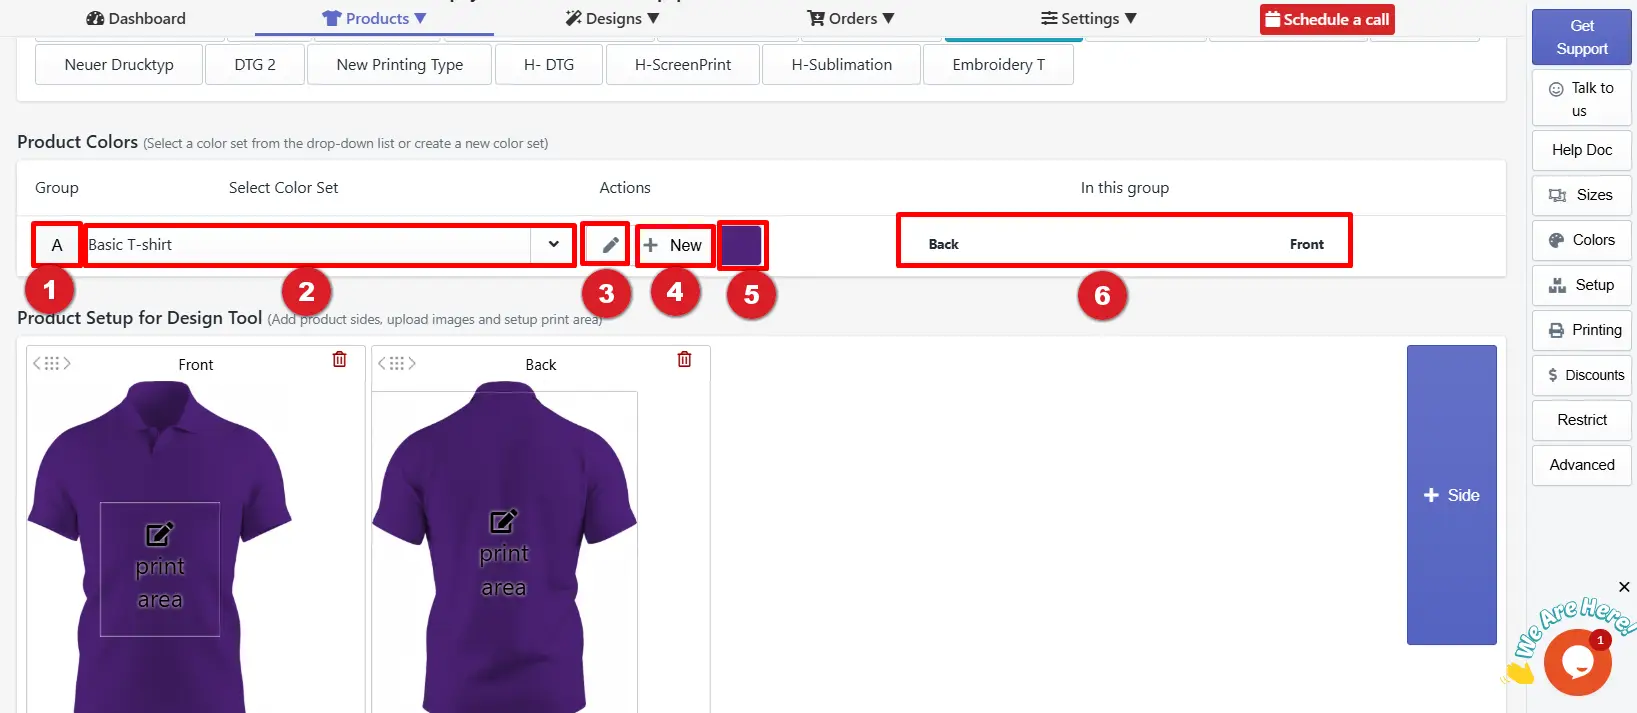
-
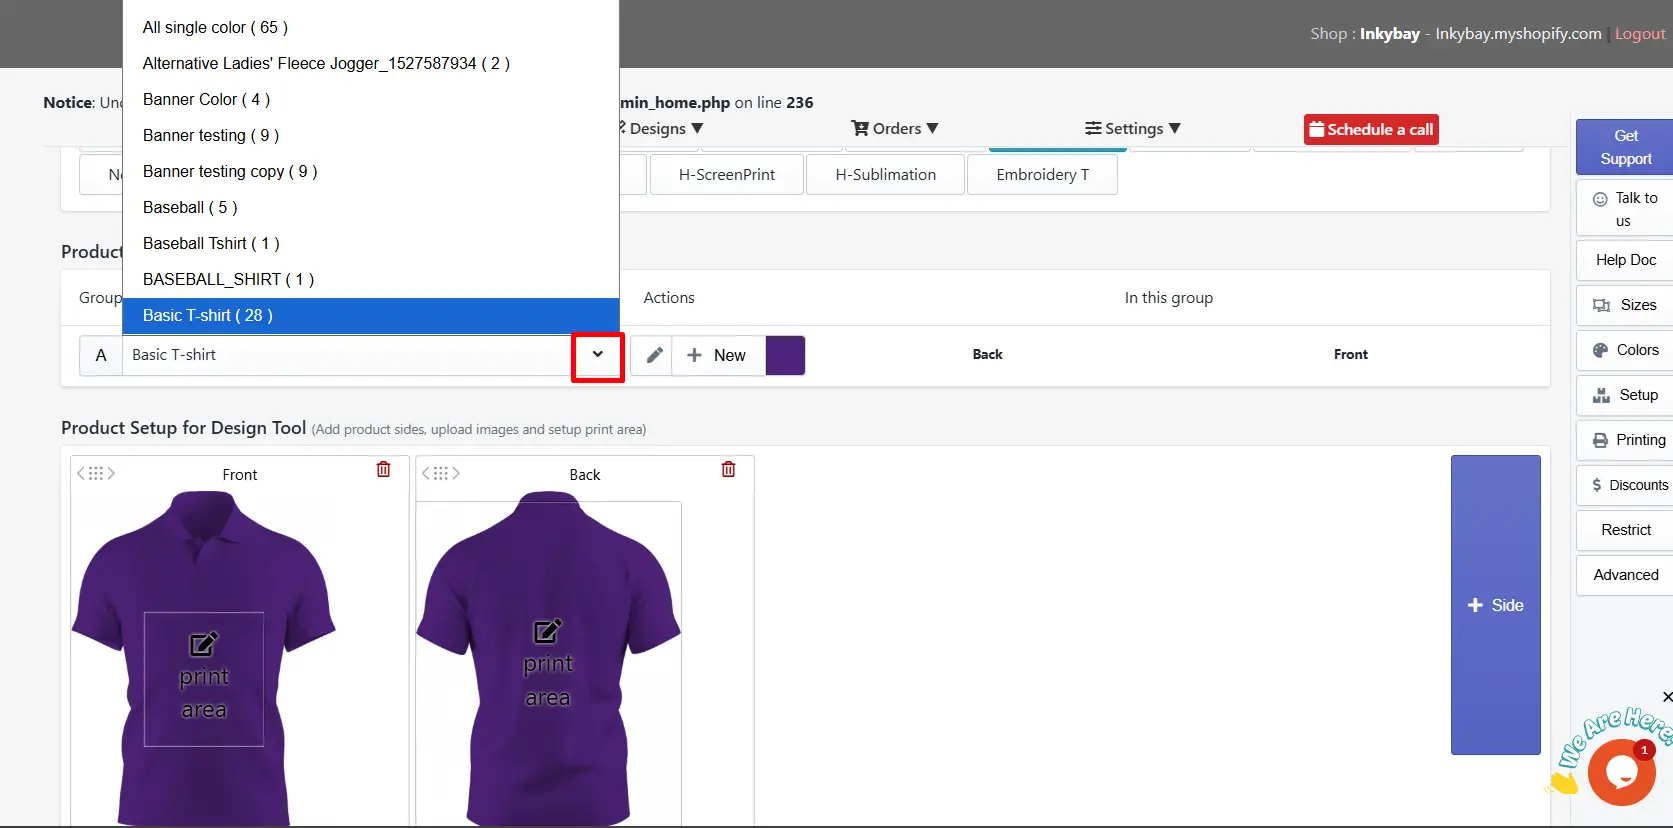
Group - The group name (e.g., A) represents specific, customizable color sets for different parts. Each group corresponds to one side or panel of the product. If the product has multiple sides, each side appears as a separate row with its own group label.
-
Select Color Set- The selected color set's name appears here; click the dropdown icon to select the preferred color set from the available list.

This list gets updated as you create new color sets. Initially, you will find these in the list:
a. No color set: If they don’t want to allow any additional colors for the product or for a specific part/panel, select this.
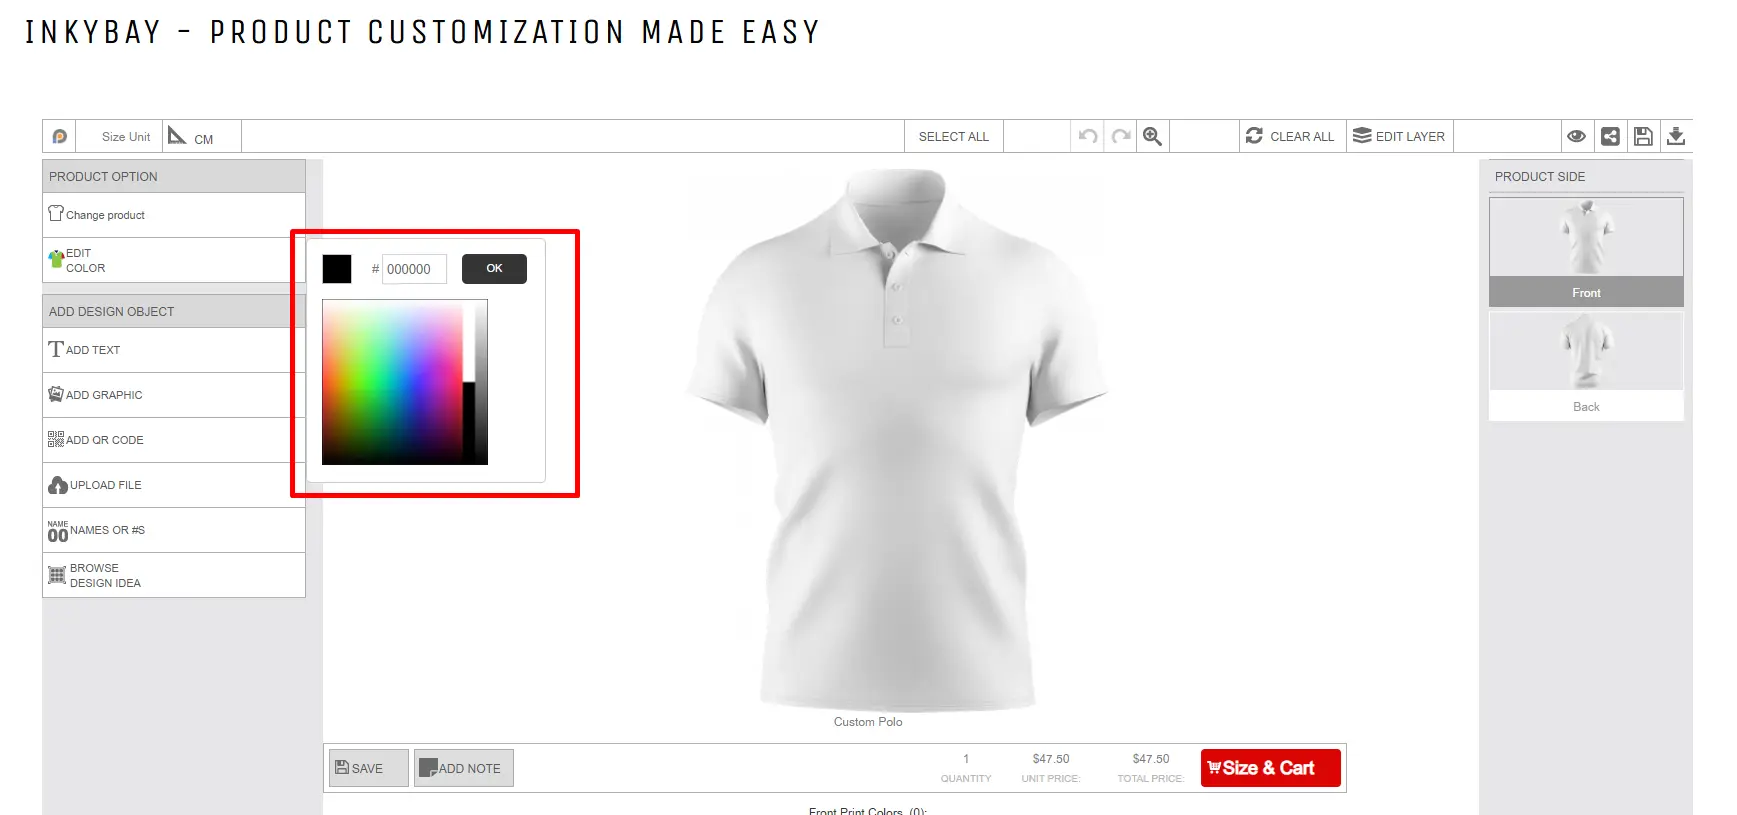
b. Full/All Colors: Select this to display a color palette and let the customer choose any custom colors. See the demo image here:
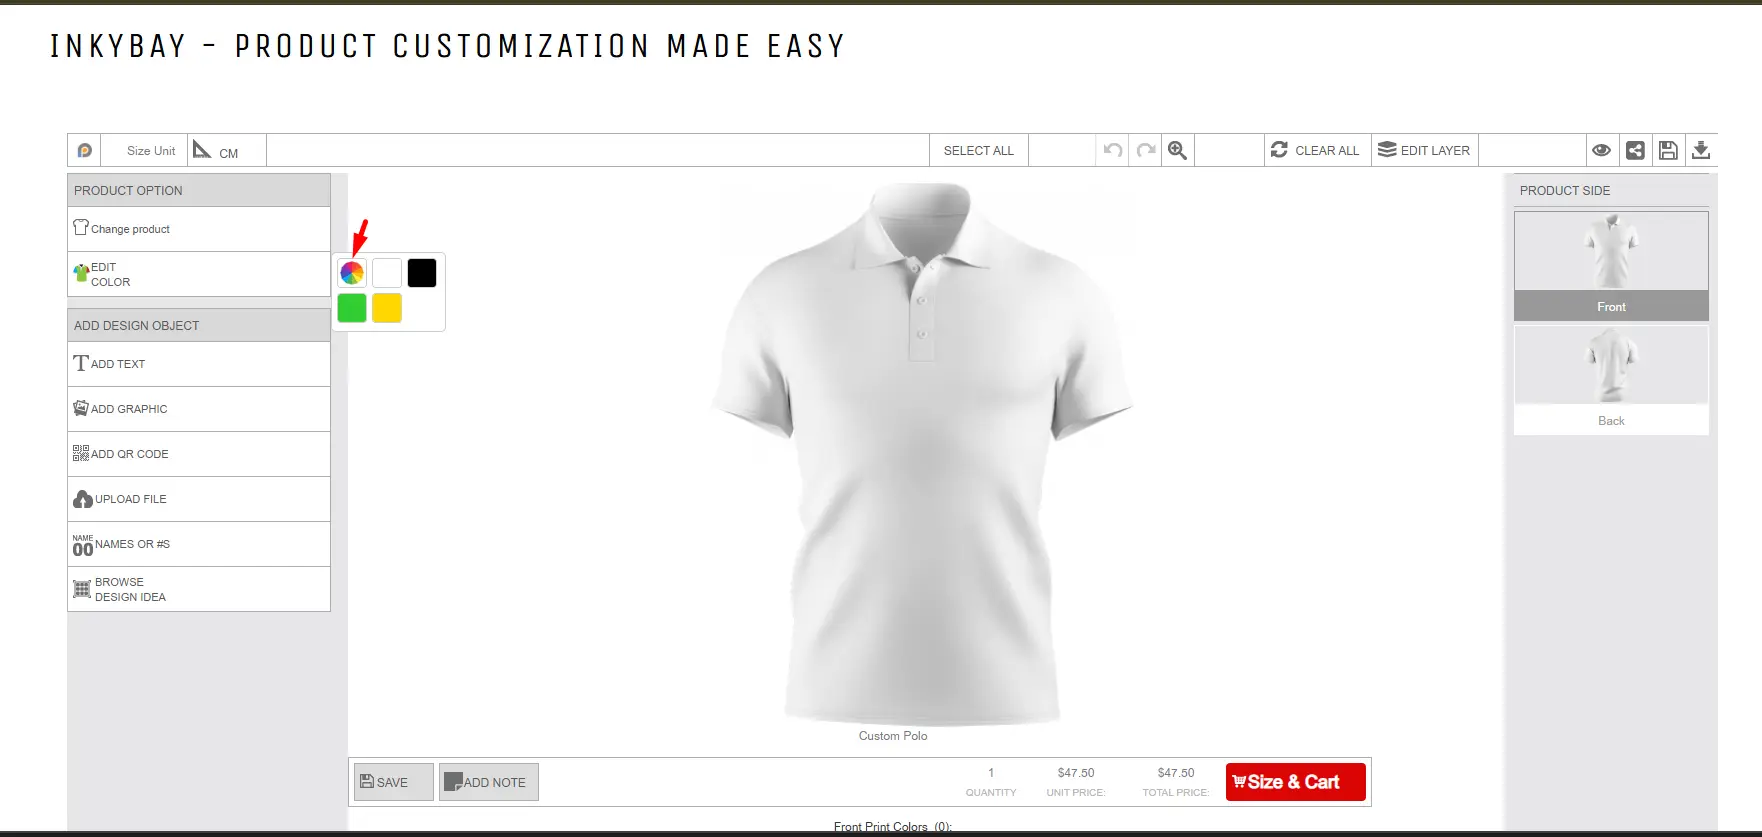
C. Full/All Colors +: Select this to show a color palette with additional preset colors. It will display a color palette and allow the customer to choose any custom colors. Additional colors will be added beside the palette. Admin can add a list of the most common colors (additional colors) to choose from. See the demo image here:
(3) Edit - Click on the Pen Icon to edit/modify the currently selected color set.
(4) + New - Click here to create a new color set. It will be automatically selected as the current color set. Check out the “create a color set for a specific product" section.
(5) Default Color - The default color (which appears as the first color in the designer window as the product color) for the selected color set is shown here. Click here to change the default color.
(6) Linked Group - Shows the side of the product linked to the selected color set.
Step 2: All changes are applied to the selected color set for the linked group.
Yay! You’re done managing product color sets and color groups. Whenever you need, you can easily assign those particular color sets or groups.
How to add an image instead of a color
If you have different color images of the particular product and want to show that in the designer (on Edit Color), select Yes for image instead of color in your color set.
You’ll have to import separate images of those colors in the product’s advanced settings, for which you have selected yes.
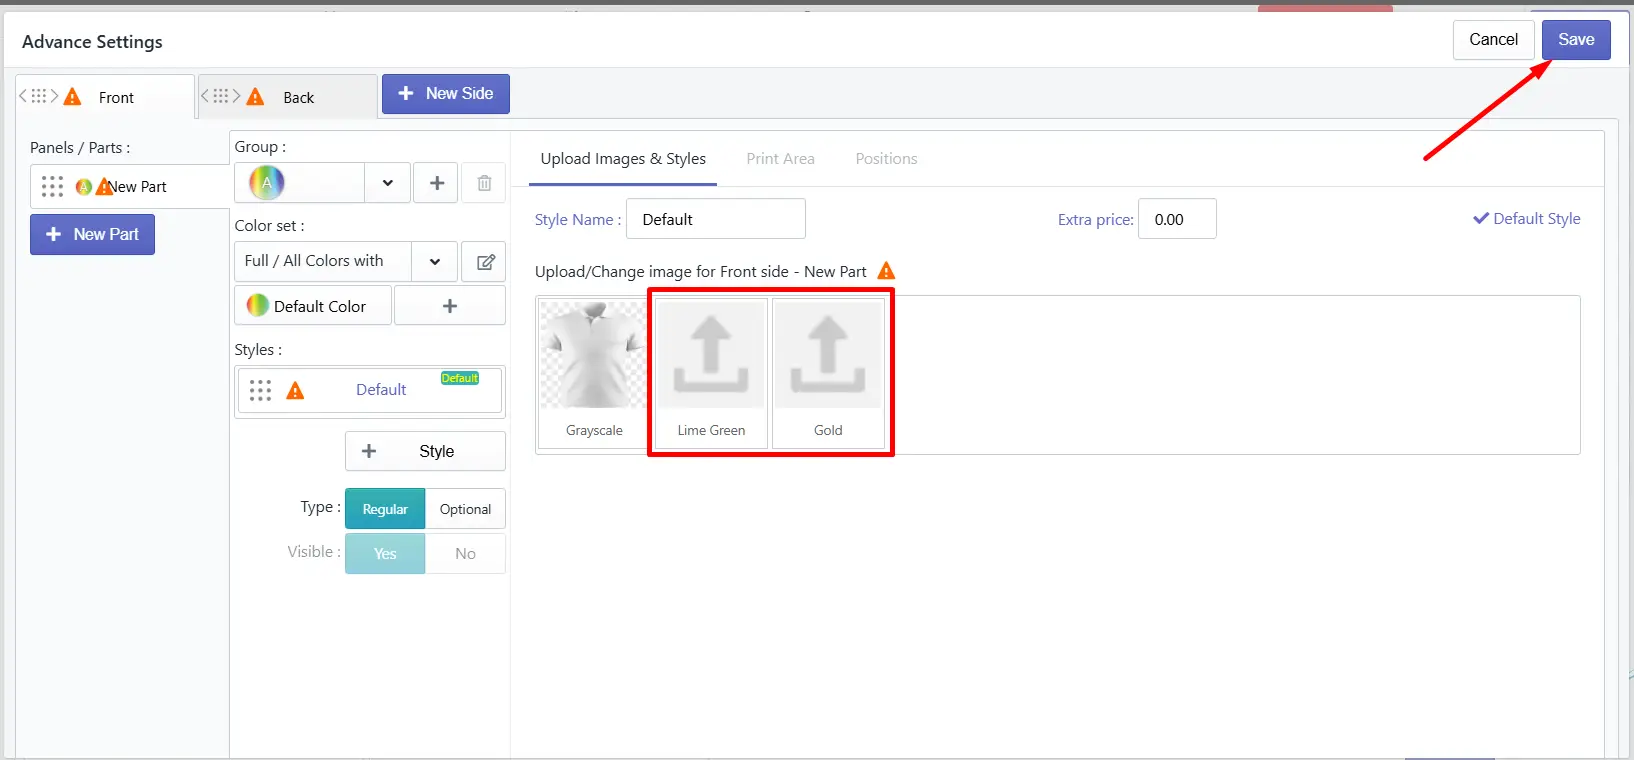
After uploading the images, click on the save button to save the changes.
Still, facing difficulties or need help? Feel free to contact us. You can also reach us:
-
InkyBay app Live chat
-
Support ticket from the InkyBay app
-
Email to support@productsdesigner.com
Did this post help you?